Ankilo WA113B&C-MA06US-HY
Ankilo Projection Alarm Clock User Manual
Model: WA113B&C-MA06US-HY
1. Ifihan
O ṣeun fun riraasing the Ankilo Projection Alarm Clock. This device is designed to provide convenient timekeeping with a unique projection feature, allowing you to view the time on your ceiling or wall. It also includes an alarm, temperature display, and USB charging capabilities. Please read this manual carefully to ensure proper use and maintenance of your new alarm clock.
2. Alaye Aabo
- Ma ṣe fi ẹrọ naa han si awọn iwọn otutu to gaju, imọlẹ orun taara, tabi ọriniinitutu giga.
- Jeki ẹrọ naa kuro ninu omi tabi awọn olomi miiran.
- Ma ṣe gbiyanju lati tunto tabi tun ẹrọ naa funrararẹ. Tọkasi gbogbo iṣẹ si oṣiṣẹ oṣiṣẹ.
- Use only the provided USB cable for power.
- The CR2032 battery is for backup only; the clock requires continuous USB power for full functionality.
3. Package Awọn akoonu

- 1 x Ankilo Projection Alarm Clock
- 1 x USB Power Cable (1.5m)
- 1 x CR2032 Memory Battery (pre-installed for backup)
- 1 x Itọsọna olumulo
The image above shows the complete contents included in your Ankilo Projection Alarm Clock package. Please verify all items are present upon unboxing.
4. Ọja Ipariview

This diagram illustrates the various buttons and ports on your Ankilo Projection Alarm Clock for easy identification and operation.
| Ẹya ara ẹrọ | Apejuwe |
|---|---|
| Bọtini SNOOZE / LIGHT | Press to snooze alarm or adjust display brightness. |
| PROJECT Button | Press to adjust projection brightness. |
| Bọtini ALARM | Press to set or activate/deactivate alarm. |
| Bọtini SET | Press to enter time/date setting mode. |
| Bọtini UP | Increase values during setting, or switch 12/24H format. |
| Bọtini isalẹ | Decrease values during setting, or switch temperature unit. |
| Iṣiro Lamp | Emits time projection onto surface. |
| Port Ibudo | Connect USB power cable here. |
| CR2032 Batiri Kompaktimenti | Houses the backup battery. |
| Agbọrọsọ | Outputs alarm sound. |
5. Eto
5.1 Agbara ẹrọ naa
The Ankilo Projection Alarm Clock is primarily powered by a USB cable. Connect the provided USB cable to the power port on the back of the clock and plug the other end into a standard USB power adapter (not included) or a USB port.
Akiyesi pataki:
- The LED screen will only remain on when the USB power supply is connected.
- The included CR2032 battery serves as a backup to retain time and alarm settings during power outages, but it does not power the display or projection.
5.2 Aago Ibẹrẹ ati Eto Ọjọ
- Tẹ mọlẹ SET button for 3 seconds to enter time setting mode. The hour digits will start flashing.
- Lo awọn UP or SILE awọn bọtini lati ṣatunṣe awọn wakati.
- Tẹ SET lẹ́ẹ̀kan síi láti jẹ́rìí wákàtí náà kí o sì gbé e sí ìṣètò ìṣẹ́jú náà. Àwọn nọ́mbà ìṣẹ́jú náà yóò máa tàn yanranyanran.
- Lo awọn UP or SILE awọn bọtini lati ṣatunṣe iseju.
- Tẹ SET again to confirm the minute and move to year setting.
- Tun ilana naa ṣe nipa lilo UP/SILE ati SET to set the year, month, and day.
- Lẹ́yìn tí o bá ti ṣètò ọjọ́ náà, tẹ SET ìgbà ìkẹyìn láti jáde kúrò ní ipò ìṣètò.
6. Awọn ilana Iṣiṣẹ
6.1 Eto Itaniji
- Tẹ mọlẹ Itaniji bọtini fun 3 aaya. Awọn nọmba wakati itaniji yoo filasi.
- Lo awọn UP or SILE awọn bọtini lati ṣeto wakati itaniji ti o fẹ.
- Tẹ Itaniji lẹẹkansi lati jẹrisi wakati naa ki o si gbe si eto iṣẹju.
- Lo awọn UP or SILE awọn bọtini lati ṣeto iṣẹju itaniji ti o fẹ.
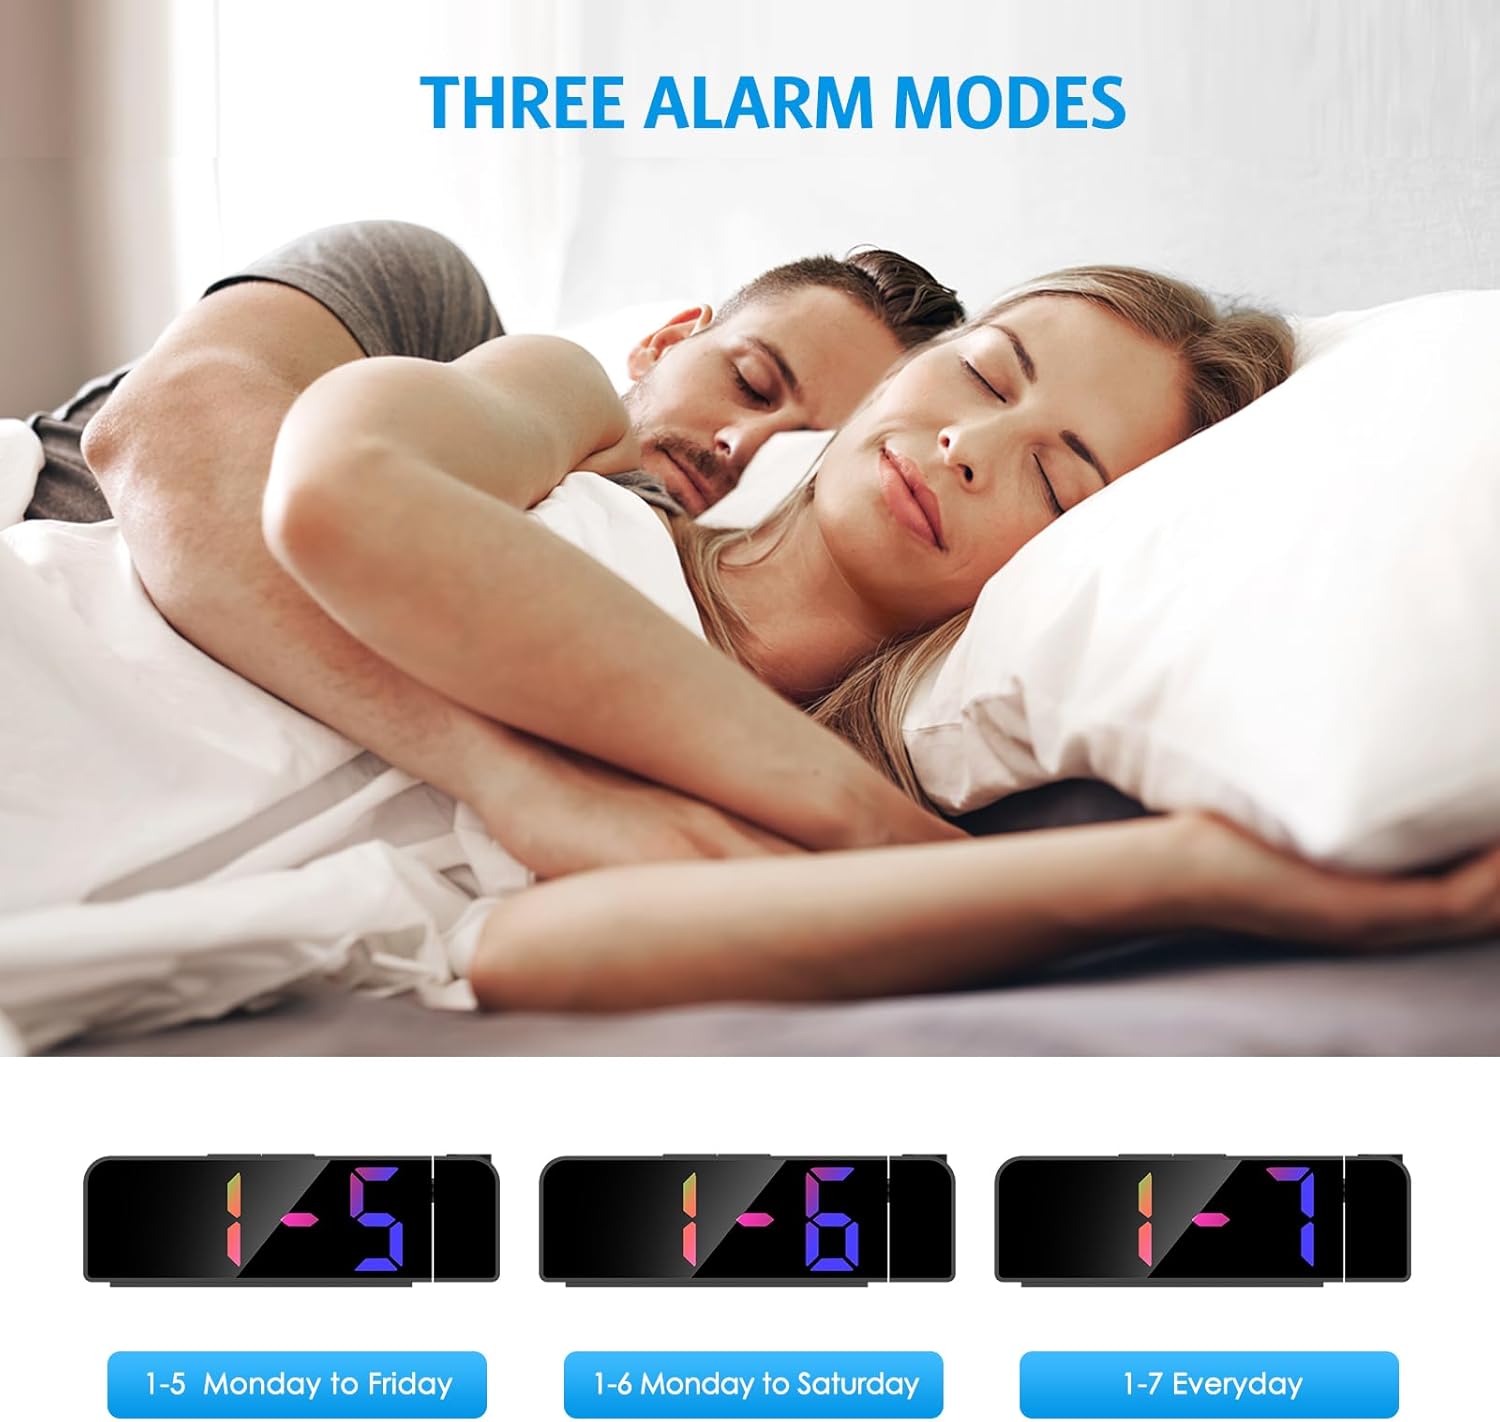
- Tẹ Itaniji again to select the alarm mode:
- 1-5: Ariwo itaniji n dun lati ọjọ Aje si ọjọ Ẹti.
- 1-6: Ariwo itaniji n dun lati ọjọ Aje si ọjọ Abamẹta.
- 1-7: Alarm sounds Everyday.
- Tẹ Itaniji one last time to confirm and exit alarm setting mode.
The image above illustrates the three available alarm modes: weekdays, weekdays plus Saturday, and every day.
6.2 Iṣiṣẹ Snooze

Nigbati itaniji ba ndun, tẹ tobi SNOOZE / LIGHT button on the top of the clock to activate the snooze function. This will provide an additional 5 minutes of sleep before the alarm sounds again. You can repeat this process as needed.
The image highlights the prominent SNOOZE/LIGHT button, easily accessible for quick snooze activation.
6.3 Siṣàtúnṣe Ifihan Imọlẹ

Tẹ awọn SNOOZE / LIGHT button (short press) to cycle through 4 levels of display brightness: Bright, Medium, Low, and Off. Select the brightness level that best suits your environment.
This image demonstrates the four distinct brightness settings for the main LED display, from bright to completely off.
6.4 Adjusting Projection Brightness and Orientation

Tẹ awọn ISESE button (short press) to cycle through 3 levels of projection brightness: Off, Dim, and Bright. The projection lamp can be rotated 180 degrees to project the time onto your ceiling or wall.
The image illustrates the projection feature, showing the clock projecting time onto a wall and the three available brightness levels for the projection.

Important Projection Orientation: The projection digits are only displayed correctly when the projection direction is towards the back of the alarm clock (away from the front display). If you project forward, the numbers will appear reversed. Ensure the projection is directed appropriately for correct readability.
This image clearly demonstrates the correct and incorrect projection orientations, emphasizing that projection should be directed backward for proper display.
6.5 Night Ipo

The alarm clock features an automatic night mode. By default, the display brightness will automatically dim between 18:00 (6 PM) and 5:59 (5:59 AM). This time range can be adjusted to suit your preferences within the settings menu (refer to the full manual for advanced settings).
The image depicts the alarm clock operating in a low-light environment, showcasing the automatic dimming feature of the night mode.
6.6 12/24 Wakati kika

Láti yípadà láàrín àwọn ọ̀nà ìgbà wákàtí méjìlá sí wákàtí mẹ́rìnlélógún, tẹ ẹ̀rọ kúkúrú náà UP button during normal time display. The display will toggle between AM/PM indication (12-hour) and military time (24-hour).
This image visually compares the appearance of the time display in both 12-hour and 24-hour formats.
7. Itọju
To maintain your Ankilo Projection Alarm Clock, gently wipe the surface with a soft, dry cloth. Avoid using abrasive cleaners or solvents, as these may damage the finish or electronic components. Keep the projection lens clean for clear time display.
8. Laasigbotitusita
| Isoro | Owun to le Fa | Ojutu |
|---|---|---|
| Ifihan naa ti pa tabi ti di dudu. | Not connected to USB power, or display brightness set to 'Off'. | Ensure USB cable is securely connected. Press SNOOZE / LIGHT lati ṣatunṣe imọlẹ. |
| Projection numbers are reversed. | Isọtẹlẹ lamp is facing forward. | Rotate the projection lamp 180 degrees so it projects towards the back of the clock. |
| Itaniji ko dun. | Alarm is not set or is deactivated. | Tẹ mọlẹ Itaniji to set the alarm time and mode. Ensure the alarm icon is visible on the display. |
| Atunse akoko/eto lẹhin agbara outage. | CR2032 backup battery is dead or missing. | Replace the CR2032 battery in the battery compartment. |
| Ìfihàn jẹ́ àbùkù. | Projection lens is dirty or surface is too far/close. | Clean the projection lens with a soft cloth. Adjust the clock's distance from the projection surface (ideal 1.6ft-16ft). |
9. Awọn pato
| Ẹya ara ẹrọ | Ẹ̀kúnrẹ́rẹ́ |
|---|---|
| Brand | Ankilo |
| Nọmba awoṣe | WA113B&C-MA06US-HY |
| Ifihan Iru | LED oni-nọmba |
| Iwọn Ifihan | 7.9 inches |
| Ọja Mefa | 1.7"W x 3.3"H |
| Orisun agbara | Corded Electric (USB cable) |
| Batiri Afẹyinti | 1 x CR2032 (pẹlu) |
| Pataki Awọn ẹya ara ẹrọ | 180° Projection, Adjustable Brightness (Display & Projection), USB Charging Port, Night Mode, Temperature Display, Snooze Function, Multiple Alarm Modes (1-5, 1-6, 1-7) |
| Ohun elo | Irin |
| Iwọn Nkan | 6.7 iwon |
10. Atilẹyin ọja ati Support

- Ilana Pada: Enjoy a 6-month return period from the date of purchase.
- Atilẹyin ọja: Your Ankilo Projection Alarm Clock is covered by a 24-month warranty against manufacturing defects.
- Atilẹyin igbesi aye: Ankilo is committed to providing lifetime technical support for this product.
The image above summarizes our commitment to customer satisfaction, including return policy, warranty, and ongoing support.
For any questions, troubleshooting assistance, or warranty claims, please contact Ankilo customer support through the platform where you purchased the product or visit our official webojula fun alaye olubasọrọ.