
1. Ifihan
This manual provides comprehensive instructions for the ACASIS 4K60fps Video Capture Card (Model VC-007PRO). This device is designed for capturing and streaming high-quality video and audio from various sources, including gaming consoles and cameras, to a computer for live broadcasting or recording. It supports 4K60fps video capture, VRR, and features ultra-low latency.
2. Package Awọn akoonu
Daju pe gbogbo awọn ohun kan wa ninu akopọ ọja rẹ:
- ACASIS 4K60fps Video Capture Card (VC-007PRO)
- Okun HDMI
- USB-C si okun USB-A
- Itọsọna fifi sori ẹrọ (iwe yii)
3. Ọja Ipariview
The ACASIS 4K60fps Video Capture Card is a compact device with multiple ports for connectivity. Understanding its layout is crucial for proper setup and operation.

Aworan: Iwaju view of the ACASIS 4K60fps Video Capture Card, showing the HDMI In and HDMI Out ports, and the USB-C port for connection to a computer.
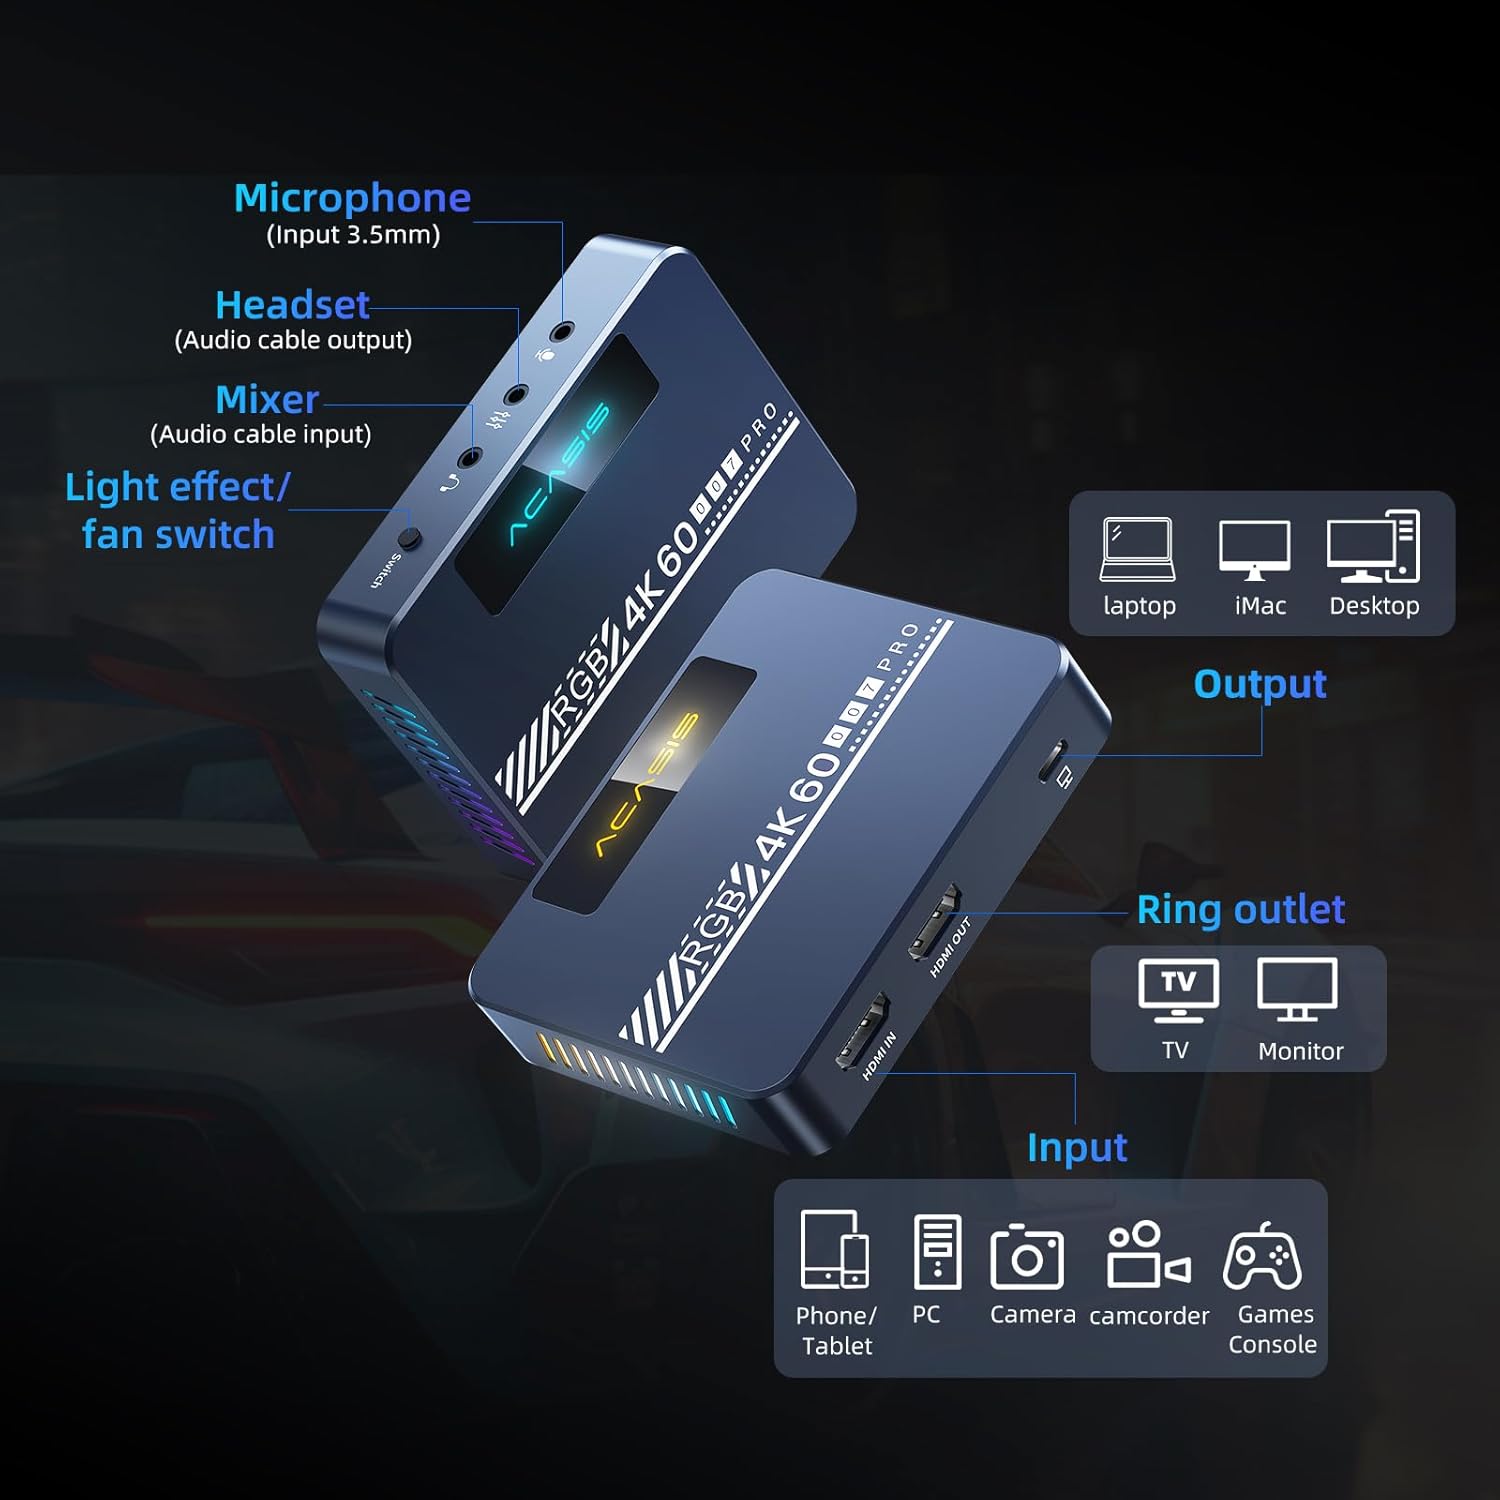
Image: Detailed diagram illustrating the various input and output ports on the capture card, including Microphone (Input 3.5mm), Headset (Audio cable output), Mixer (Audio cable input), Light effect/fan switch, HDMI IN, HDMI OUT, and USB-C output to PC/Mac.
Awọn eroja pataki:
- HDMI NI: Connects to the source device (e.g., game console, camera).
- HDMI Jade: Connects to a display (e.g., TV, monitor) for pass-through viewing.
- Ijade USB-C: Connects to your computer (PC/Mac) for data transfer and power.
- Ìbáwọlé Gbohungbohun (3.5mm): Fun sisopọ gbohungbohun ita.
- Headset Output (3.5mm): For connecting headphones or a headset for audio monitoring.
- Mixer Input (3.5mm): For connecting an audio mixer.
- Light Effect/Fan Switch: Controls the RGB lighting and cooling fan.
4. Eto Itọsọna
Follow these steps to connect your ACASIS 4K60fps Video Capture Card to your devices.
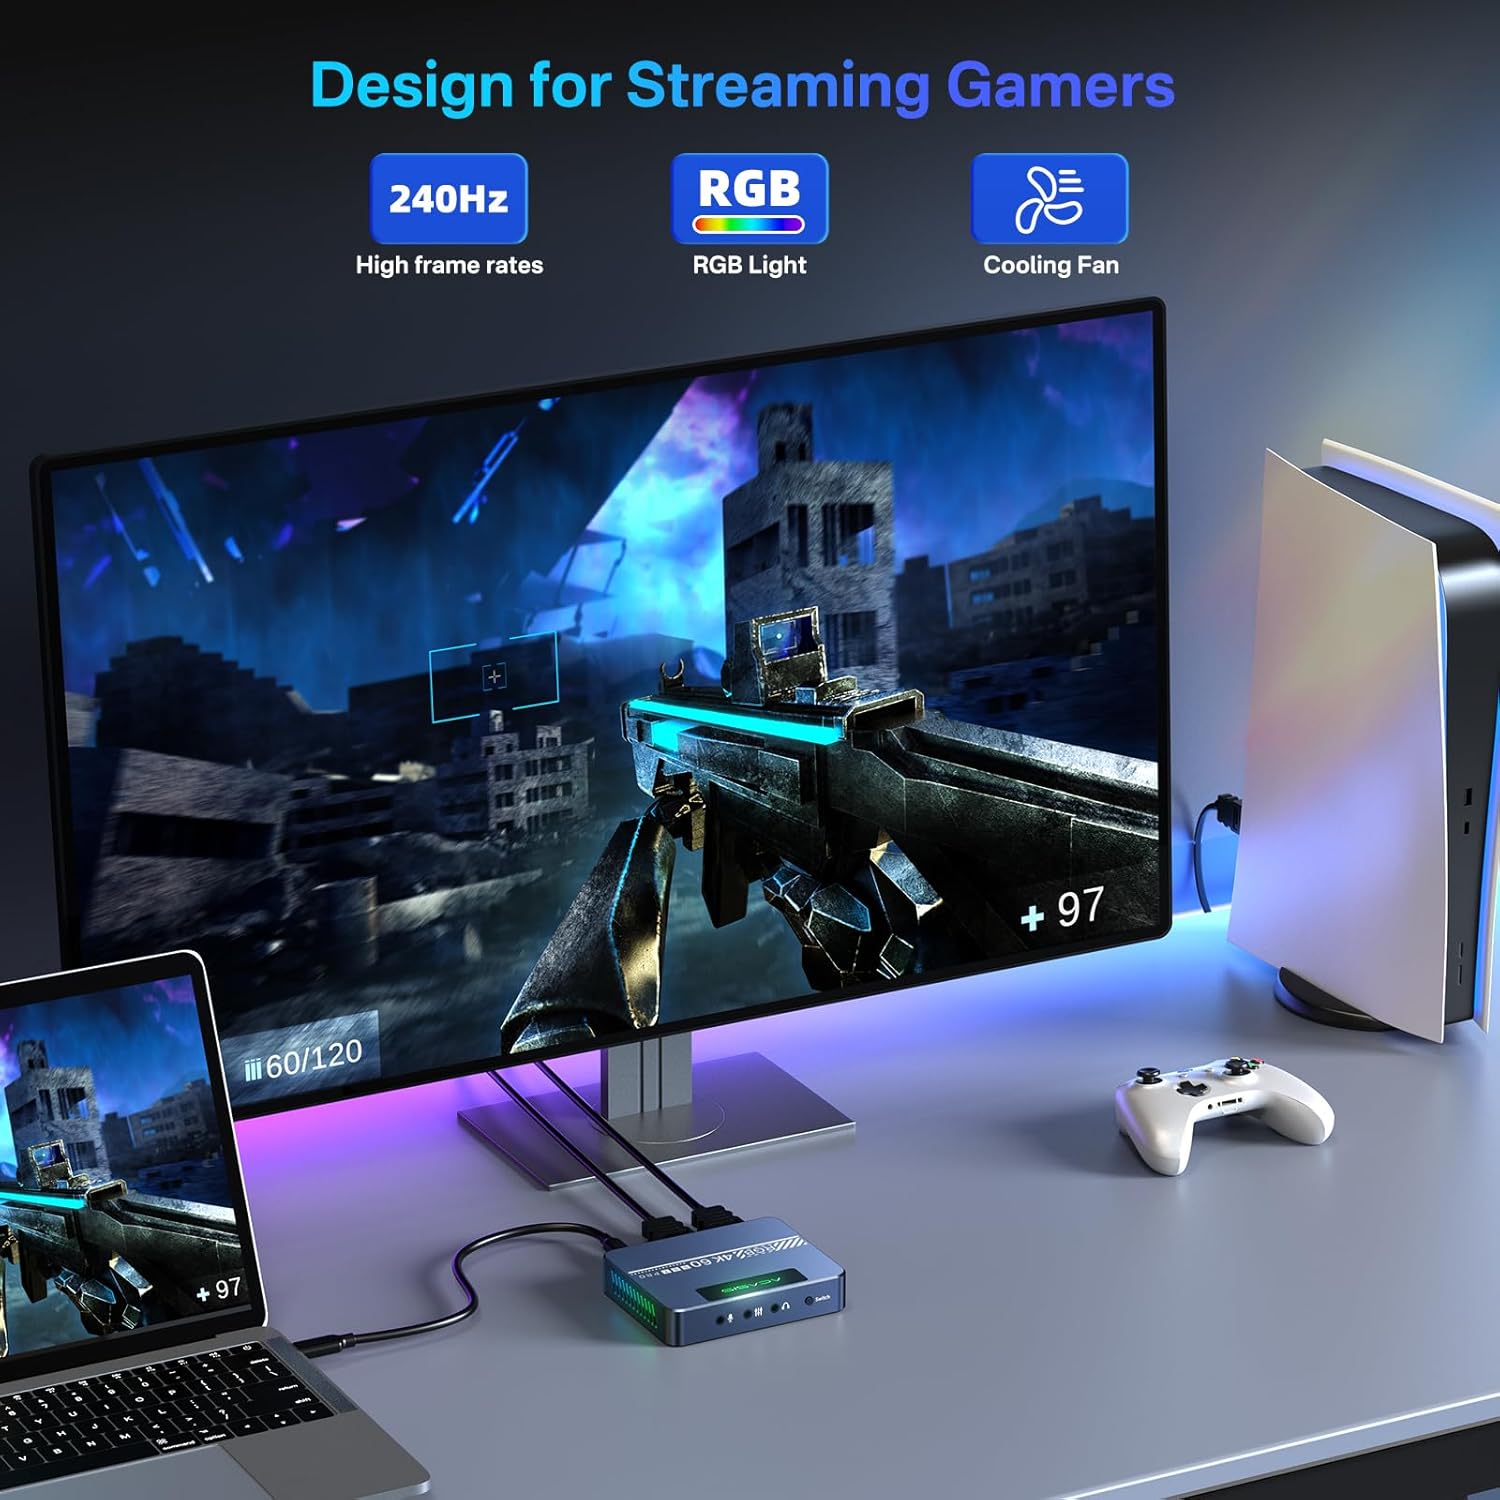
Image: A typical setup showing a game console (PS5) connected via HDMI to the capture card's HDMI IN, the capture card's HDMI OUT connected to a monitor, and the capture card's USB-C port connected to a laptop for streaming/recording.
Awọn Igbesẹ Asopọmọra:
- Sopọ Orisun Ẹrọ: Use an HDMI cable to connect your source device (e.g., Xbox Series X/S, Xbox One, PS5, PS4/Pro, PC, camera) to the HDMI-IN ibudo lori kaadi gbigba.
- Ifihan Sopọ (Aṣayan): Use another HDMI cable to connect your display (e.g., TV, monitor) to the HDMI Jade port on the capture card. This allows for pass-through viewing of your source device.
- Sopọ si Kọmputa: Connect the provided USB-C to USB-A cable (or a USB-C to USB-C cable if your computer supports it) from the capture card's USB-C o wu port to an available USB port on your computer (PC/Mac). The device is plug-and-play and typically does not require driver installation.
- So Àwọn Ẹ̀rọ Ohùn pọ̀ (Àṣàyàn):
- For microphone input, connect your 3.5mm microphone to the Gbigbe gbohungbohun ibudo.
- For audio monitoring, connect your 3.5mm headset or headphones to the Ijade Agbekọri ibudo.
- For external audio mixing, connect your audio mixer to the Mixer Input ibudo.
5. Awọn ilana Iṣiṣẹ
This section details how to use the capture card with streaming and recording software, using OBS Studio as an example.
Software Setup (OBS Studio Example):
The ACASIS capture card is compatible with various platforms and applications, including OBS, Streamlabs, Vmix, Zoom, and Microsoft Teams. For streaming and recording, OBS Studio is a commonly used application.
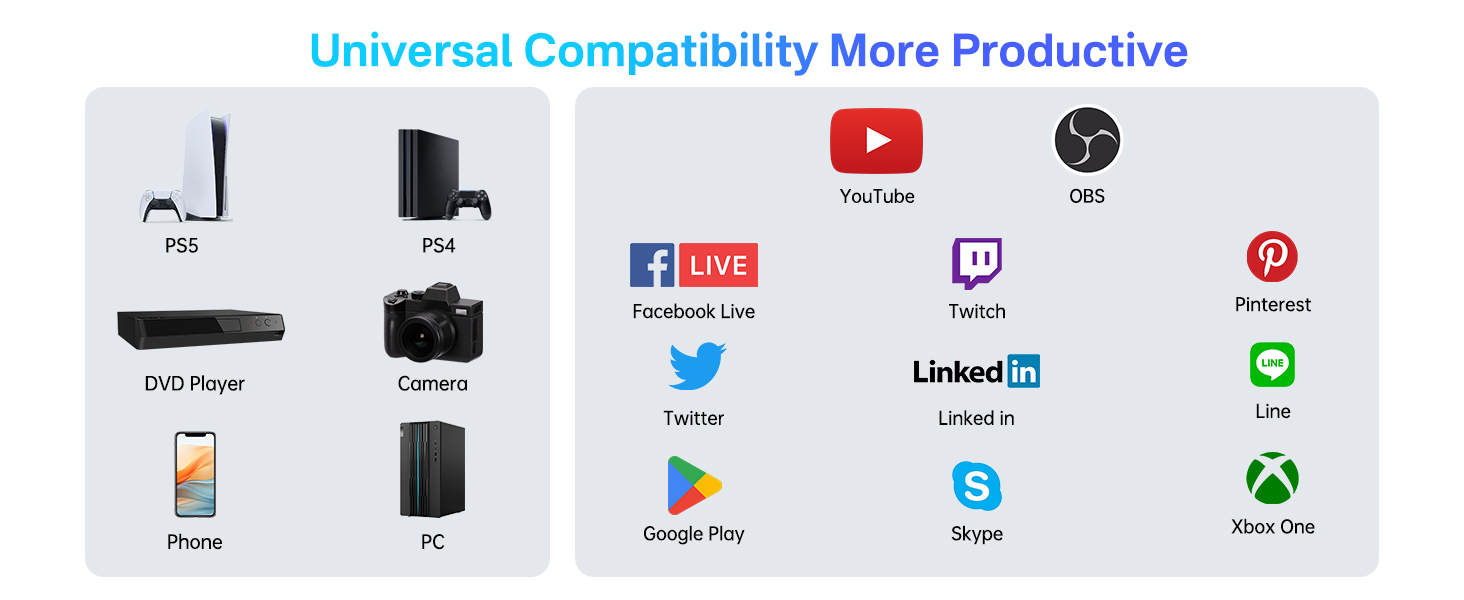
Image: A five-step guide for adding the video capture device in OBS Studio. Steps include opening OBS, clicking '+' in Sources, selecting 'Video Capture Device', creating a new source, and configuring properties.
- Open OBS Software: Launch OBS Studio on your computer.
- Add Video Source: In the 'Sources' panel, click the '+' icon.
- Select Video Capture Device: From the list, choose 'Ẹrọ Gbigba fidio'.
- Create/Select Source: You can create a new source or select an existing device name. Click 'OK'.
- Configure Properties: In the properties window for the video capture device, set the following:
- Ipinu/Iru FPS: Set to 'Aṣa'.
- Ipinnu: Yan '1920x1080' (or desired resolution up to 4K).
- FPS: Set to '60'.
- Ọna fidio: Yan 'Ọdun2'.
- Ààyè Àwọ̀: Yan 'Oṣu kejila 709'.
- Iwọn awọ: Yan 'Ni kikun'.
Recording and Streaming Settings (OBS Studio):
For optimal performance, adjust your OBS output settings. These settings are optional if you are not recording or streaming.

Image: A screenshot of OBS Studio's output settings for recording, highlighting video bitrate, encoder, audio bitrate, recording quality, and format.

Image: A screenshot of OBS Studio's output settings for streaming, showing where to enter the stream key and start streaming.
- Awọn Eto Iwọle: In OBS, go to 'Eto' (usually in the bottom right corner).
- Output Settings (Recording): Lọ sí 'Abajade' tab and then 'Gbigbasilẹ'.
- Didara Gbigbasilẹ: Set to 'Indistinguishable Quality, Large File Iwọn' for high-quality recordings.
- Fọọmu Gbigbasilẹ: 'MP4' is generally recommended for compatibility.
- Ayipada: Use 'Hardware (NVENC)' if available for better performance, otherwise 'Software (x264)'.
- Bitrate Fidio: Adjust based on desired quality and storage space (e.g., 8000 Kbps for 1080p).
- Oṣuwọn Olohun: Set to '128' or higher.
- Output Settings (Streaming): Lọ sí 'Abajade' tab and then 'Sisanwọle'.
- Bitrate Fidio: Adjust according to your internet upload speed and platform recommendations.
- Ayipada: Use 'Hardware (NVENC)' if available.
- Oṣuwọn Olohun: Set to '128' or higher.
- Eto fidio: In the 'Fidio' tab, ensure 'Base (Canvas) Resolution' and 'Ipinnu Ijade (Ti iwọn).' are set appropriately (e.g., 1920x1080). Set 'Awọn iye FPS ti o wọpọ' to '60'.
6. VRR Support
The ACASIS capture card supports Variable Refresh Rate (VRR), which helps eliminate screen tearing and stuttering for a smoother visual experience, especially in gaming. Ensure your source device and display also support VRR for this feature to function.

Image: A side-by-side comparison demonstrating the visual difference between VRR Open (smooth image) and VRR Close (image with tearing artifacts) on a gaming display.
When VRR is active, the display's refresh rate dynamically adjusts to match the frame rate output by the source device, resulting in a more fluid and responsive experience.
7. Cooling Fan and RGB Lighting
The capture card features an upgraded cooling fan to prevent overheating during extended use, ensuring stable performance. It also includes customizable RGB lighting effects.

Aworan: inu view of the capture card highlighting the integrated cooling fan, designed to dissipate heat and maintain optimal operating temperatures.
Awọn iṣakoso:
- Àwọn 'Light Effect/Fan Switch' button on the device controls both the cooling fan and the RGB lighting.
- A single press typically toggles the fan on/off.
- Double-clicking the button may cycle through RGB lighting modes or turn the lighting on/off.
8. Ibamu
The ACASIS 4K60fps Video Capture Card offers broad compatibility with various hardware and software platforms.

Image: A chart illustrating the universal compatibility of the capture card with various input devices (PS5, PS4, DVD Player, Camera, Phone, PC) and output platforms/applications (YouTube, OBS, Facebook Live, Twitch, Pinterest, Twitter, LinkedIn, Line, Google Play, Skype, Xbox One).
Hardware ti o ni atilẹyin:
- Gaming Consoles: Xbox Series X/S, Xbox One, PS5, PS4/Pro, Nintendo Switch
- Computers: PC (Windows), Mac (macOS)
- Cameras: DSLR, Camcorders, Action Cams
- Other HDMI Sources: DVD Players, Tablets, Phones (with appropriate adapters)
Supported Software/Platforms:
- OBS Studio
- Streamlabs OBS
- Vmix
- Sun-un
- Awọn ẹgbẹ Microsoft
- YouTube
- Twitch
- Awọn ere Facebook
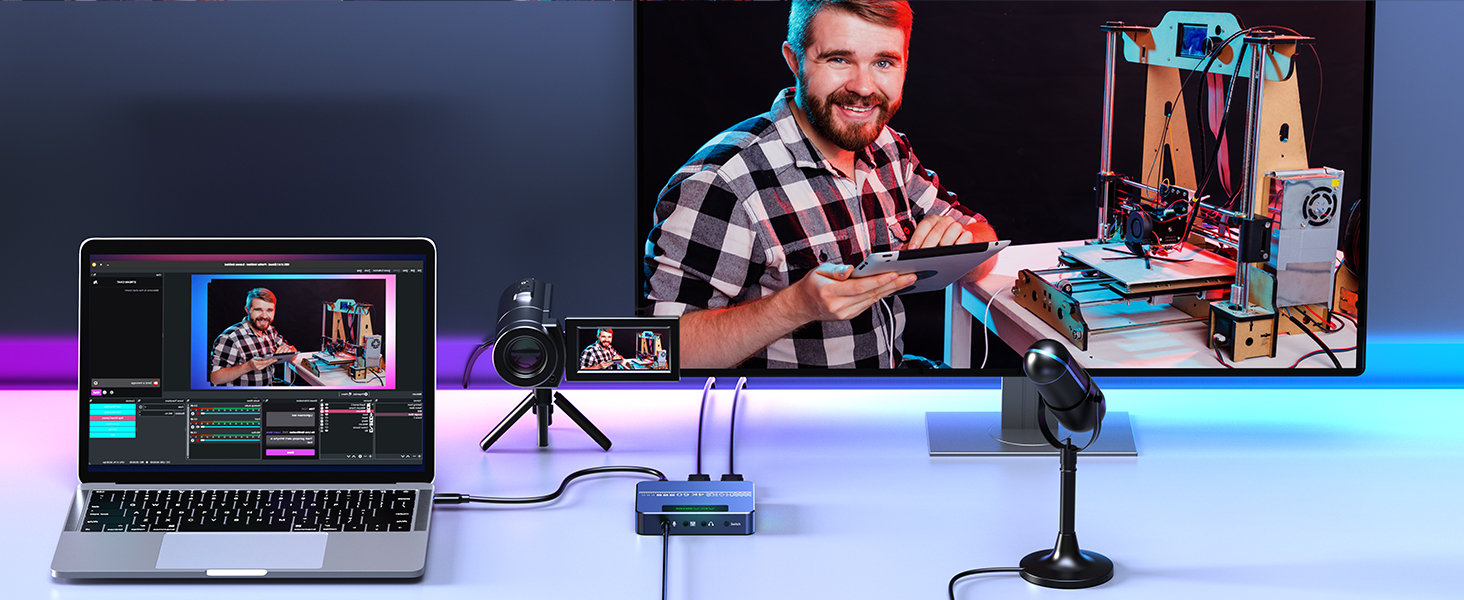
Image: A setup demonstrating the capture card's use in a video conferencing scenario, connecting a camera to a computer for enhanced video input.
9. Laasigbotitusita
Abala yii n ṣalaye awọn ọran ti o wọpọ ti o le ba pade ati pese awọn ojutu ti o pọju.
Ko si ifihan agbara / Iboju Dudu:
- Ṣayẹwo Awọn isopọ: Rii daju pe gbogbo awọn okun HDMI ati USB ti sopọ mọ ni aabo.
- Àkóónú HDCP: Ẹrọ yii DOES NOT SUPPORT HDCP. If your source device is outputting HDCP-protected content (e.g., certain streaming services, Blu-ray players), you will not get a signal. Disable HDCP on your source device if possible, or use a non-HDCP source.
- 4K Display Requirement: To achieve 4K resolution, ensure your display and source device are 4K compatible.
- Didara okun: Use high-quality HDMI cables that support 4K60fps transmission. Lower quality cables may cause signal issues or limit resolution/frame rate.
- Iṣeto ni Sọfitiwia: Verify that the capture card is correctly selected as the video source in your streaming/recording software (e.g., OBS) and that resolution/FPS settings are appropriate.
Awọn ọrọ ohun:
- Check Audio Settings: In your computer's sound settings and streaming software, ensure the correct audio input (from the capture card) and output devices are selected.
- Microphone/Headset Connections: Confirm external audio devices are properly plugged into the capture card's 3.5mm ports.
Latency/Lag:
- Ibudo USB: Ensure the capture card is connected to a USB 3.0 (or higher) port on your computer for optimal bandwidth. USB 2.0 ports may introduce higher latency.
- Iṣe Kọmputa: Ensure your computer meets the minimum system requirements for streaming/recording at your desired resolution and frame rate. Close unnecessary applications.
- Eto Software: Adjust buffer settings in your streaming software (e.g., OBS) if available.
4K Resolution Not Working:
- 4K Monitor/Device: As noted, 4K output requires a 4K compatible monitor or device.
- Ètò Ẹ̀rọ Orísun: Ensure your source device (e.g., console) is configured to output 4K resolution.
- OBS Settings: Double-check that the resolution in OBS is set to 4K (e.g., 3840x2160) if your system supports it.
10. Awọn pato
Technical specifications for the ACASIS 4K60fps Video Capture Card (Model VC-007PRO).
| Ẹya ara ẹrọ | Sipesifikesonu |
|---|---|
| Brand | ACASIS |
| Nọmba awoṣe | VC-007PRO |
| Ni wiwo Hardware | USB Iru C |
| Ipinnu Yaworan fidio | 4K 60fps (Input/Pass-through), 4K 60fps (Recording) |
| Awọn ọna System Support | Windows, macOS |
| Hardware Platform | Xbox Series X/S, Xbox One, PS5, PS4/Pro, PC/Mac |
| Iwọn Nkan | 4.2 iwon |
| Package Mefa | 6.14 x 4.57 x 2.44 inches |
| VRR Support | Bẹẹni |
| Atilẹyin HDCP | Rara |
11. Itọju
To ensure the longevity and optimal performance of your ACASIS 4K60fps Video Capture Card, follow these maintenance guidelines:
- Ninu: Lo asọ ti o tutu, ti o gbẹ lati nu ita ti ẹrọ naa. Yago fun lilo awọn olutọpa omi tabi awọn ohun elo abrasive.
- Afẹfẹ: Ensure the device's ventilation openings are not obstructed to allow proper airflow for the cooling fan.
- Ibi ipamọ: Store the capture card in a cool, dry place away from direct sunlight and extreme temperatures when not in use.
- Mimu: Handle the device with care to avoid physical damage to ports or the casing.
12. Atilẹyin ọja ati Support
For technical assistance, warranty information, or any inquiries regarding your ACASIS 4K60fps Video Capture Card, please contact ACASIS customer support.
- Imeeli Atilẹyin: support@acasis.com
- Iṣẹ Ayelujara: 7x24 hours online support is available.
Please refer to the official ACASIS webaaye tabi iwe rira rẹ fun awọn ofin ati ipo atilẹyin ọja ti o pọ julọ julọ.