
Restmo O-HT
RESTMO Sprinkler Timer User Manual
Model: O-HT
Ọrọ Iṣaaju
Thank you for choosing the RESTMO Sprinkler Timer with Brass Inlet. This programmable water timer is designed to simplify your garden watering tasks, providing automatic control for garden hoses, outdoor faucets, drip irrigation systems, and lawn watering. Please read this manual carefully before use to ensure proper installation, operation, and maintenance.
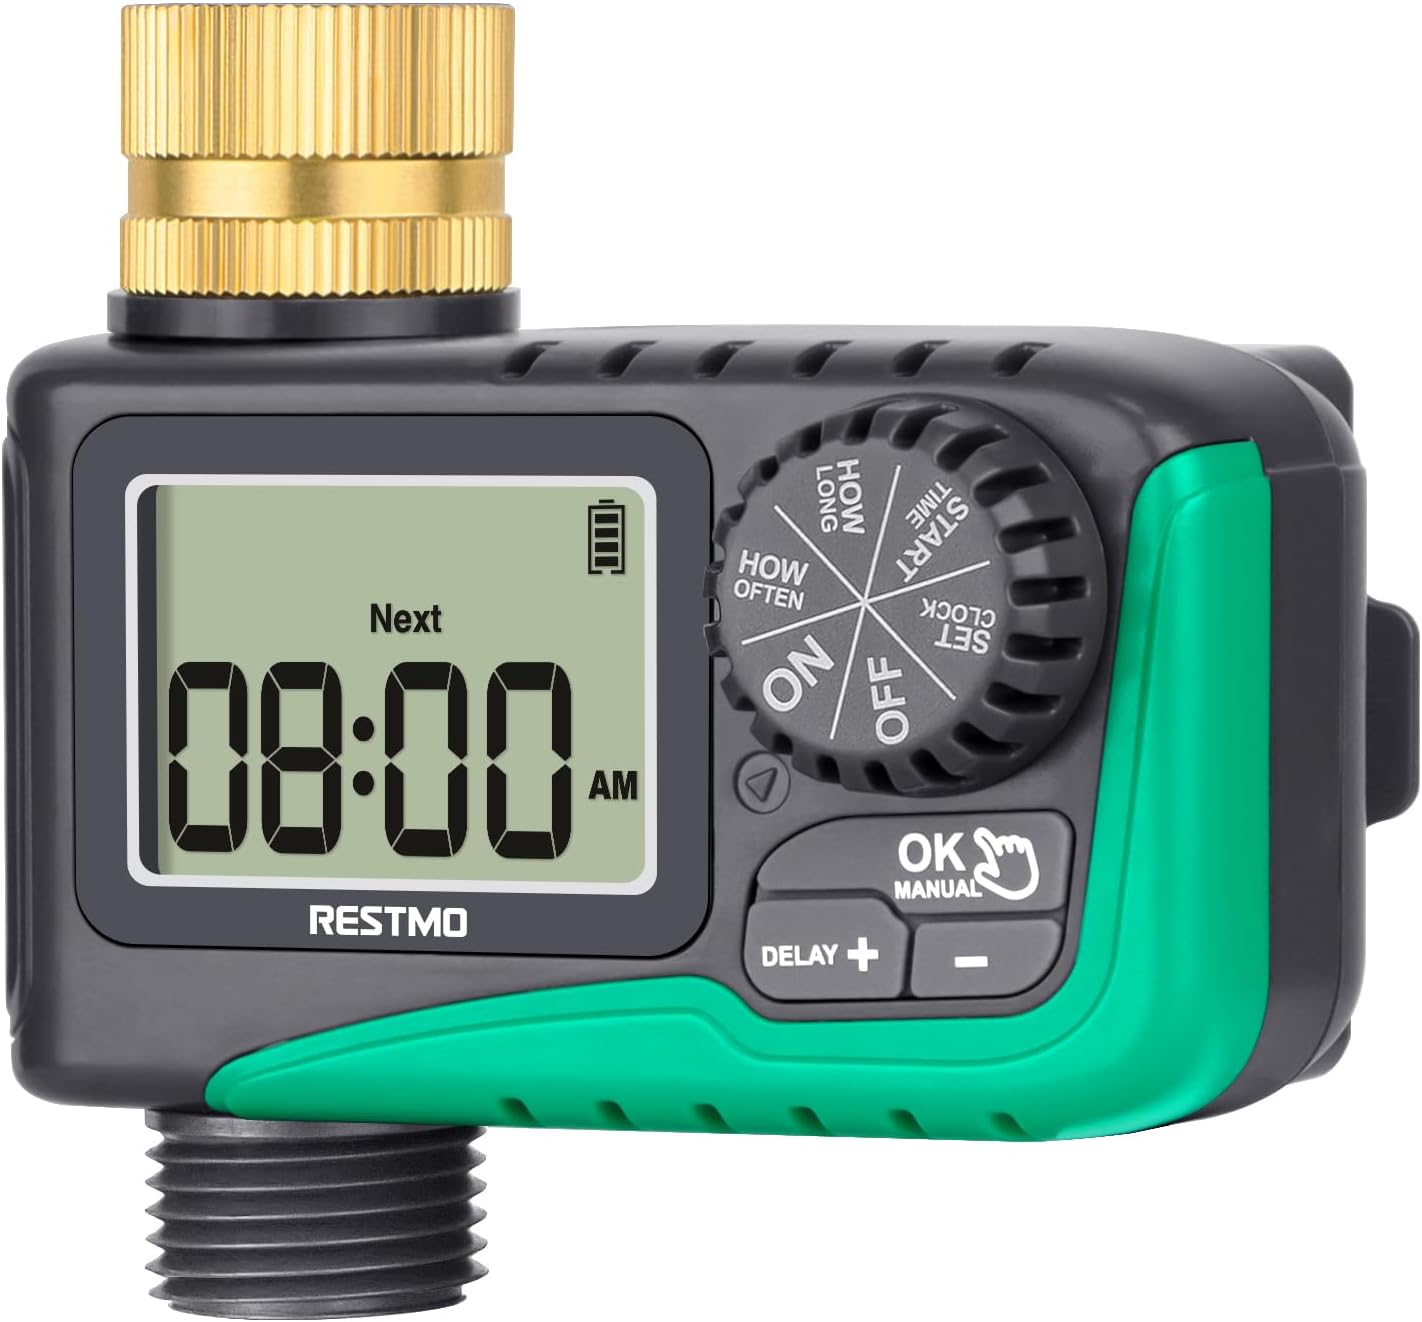
Aworan: Iwaju view of the RESTMO Sprinkler Timer, showing the digital display and control dial.
Alaye Aabo
- Do not immerse the timer in water. It is IP54 waterproof, meaning it is protected against dust and splashing water, but not full immersion.
- Use only 2 x AAA 1.5V alkaline batteries (not included). Do not mix old and new batteries or different types of batteries.
- Remove batteries if the timer will not be used for an extended period to prevent leakage.
- Protect the timer from freezing temperatures. Disconnect and store indoors during winter.
- Ensure all connections are tight to prevent leaks. Teflon tape is recommended for a secure seal.
Ọja Pariview
The RESTMO Sprinkler Timer features a user-friendly design with a large LCD screen and intuitive controls.
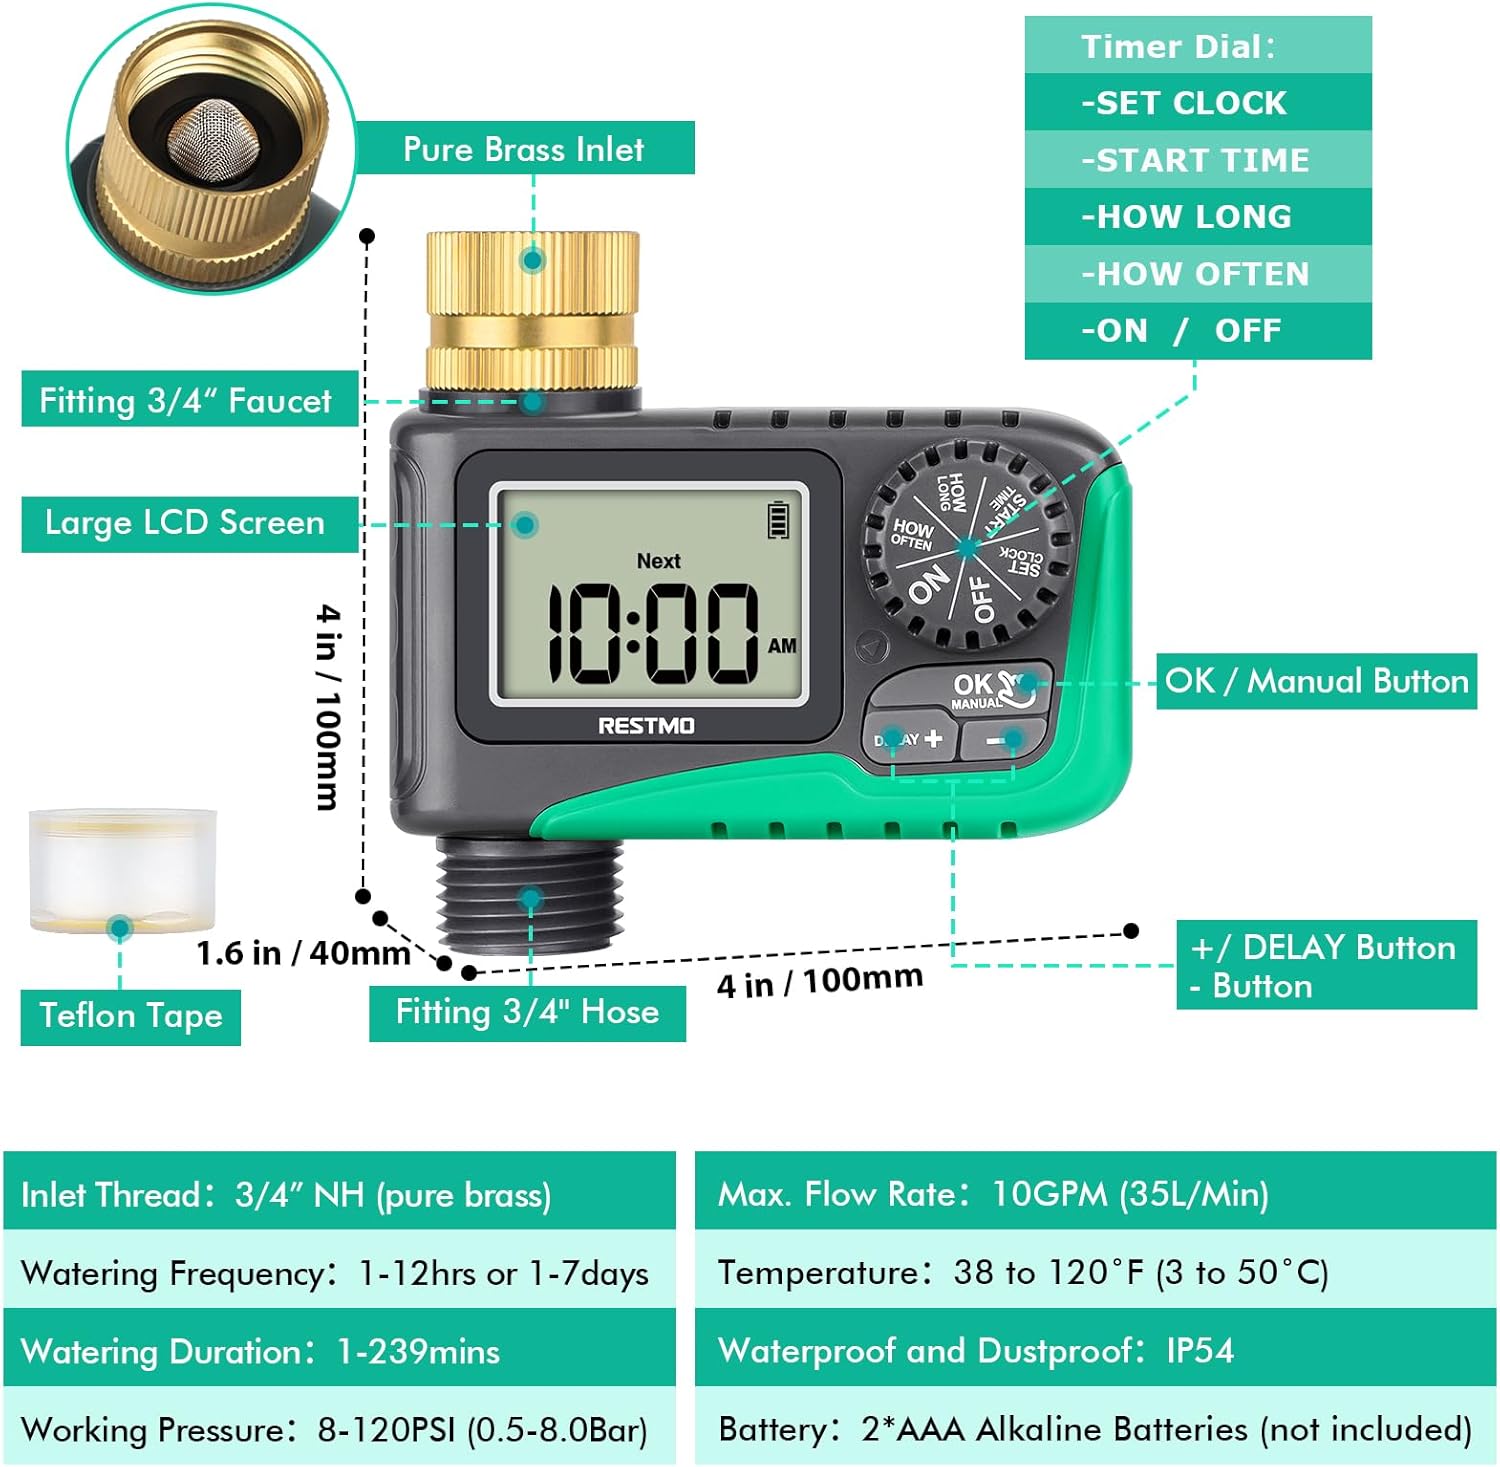
Image: Diagram illustrating the various components of the sprinkler timer, including the brass inlet, LCD screen, control dial, and buttons.
Awọn eroja pataki:
- Pure Brass Inlet Thread: 360-degree rotatable for easy installation, with a built-in metal filter washer to prevent debris.
- Iboju LCD nla: Displays current time, next watering time, and battery status.
- Ipe Aago: Used to select different settings (SET CLOCK, START TIME, HOW LONG, HOW OFTEN, ON, OFF).
- OK/Manual Button: Confirms settings and activates manual watering.
- +/- Awọn bọtini: Adjust values and activate rain delay.
- Waterproof Battery Compartment: Houses 2 x AAA batteries.

Aworan: Isunmọ view of the 360-degree swivel pure brass inlet, highlighting its design and durability.
Eto ati fifi sori
Follow these steps to install your RESTMO Sprinkler Timer:
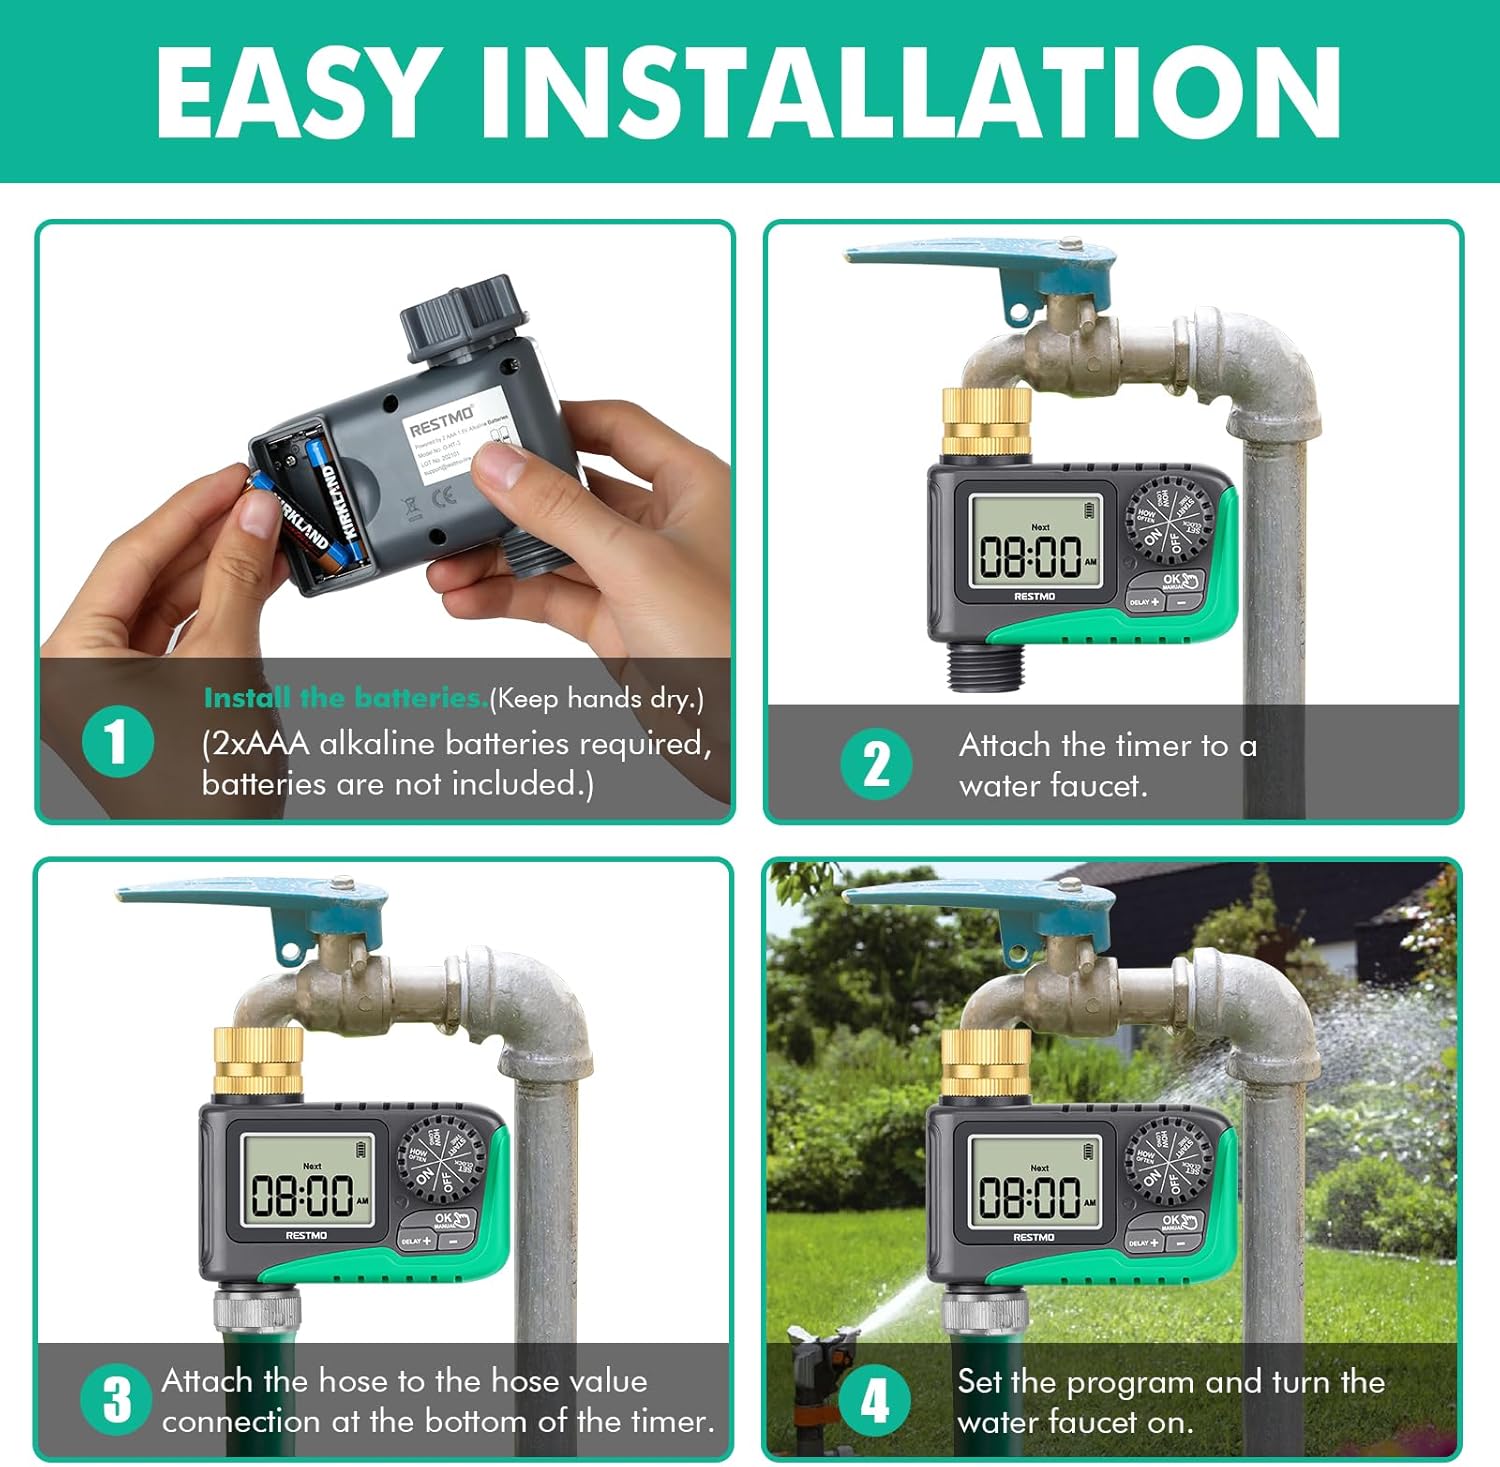
Image: Four-panel diagram showing the installation process: installing batteries, attaching to faucet, attaching hose, and setting the program.
- Fi Awọn batiri sii: Open the waterproof battery compartment. Insert 2 x AAA 1.5V alkaline batteries (not included), ensuring correct polarity. Close the compartment securely. Keep your hands dry during this process.
- So mọ Faucet: Screw the timer's brass inlet onto your 3/4" outdoor faucet. Hand-tighten firmly. For a leak-proof connection, wrap Teflon tape around the faucet threads before attaching the timer.
- So okun: Connect your garden hose to the 3/4" hose connection at the bottom of the timer. Ensure it is tightly secured.
- Turn on Faucet: Open your faucet fully. The timer is designed to operate under water pressure.
Awọn ilana Iṣiṣẹ
1. Ṣeto aago
This step sets the current time on the timer.
- Tan ipe naa si ṢEto aago.
- Tẹ awọn +/- buttons to set the current hour and minute.
- Tẹ awọn OK button to switch between hour and minute setup.
- Turn the dial to any other position to save changes.
2. Ṣètò Àkókò Ìbẹ̀rẹ̀
This sets when your automatic watering program will begin.
- Tan ipe naa si AKOKO BERE.
- Tẹ awọn +/- awọn bọtini lati ṣeto akoko ibẹrẹ ti o fẹ.
- Tẹ awọn OK button to switch between hour and minute setup.
- Turn the dial to any other position to save changes.
3. Ṣètò Àkókò Tí A Fi Mọ́ Omi (Báwo Ni Ó Ṣe Pẹ́ Tó)
This sets how long the watering will last for each cycle.
- Tan ipe naa si BAWO LO SE GUN TO.
- Tẹ awọn +/- buttons to set the watering duration from 1 minute to 239 minutes.
- Tẹ awọn OK button to switch between hour and minute setup.
- Turn the dial to any other position to save changes.
4. Ṣètò Ìwọ̀n Ìgbà Tí A Máa Ń Bọ̀ Sílẹ̀ (Báwo Ni Ìgbàkúgbà Tó)
This sets how often the watering cycles will repeat.
- Tan ipe naa si BAWO NI O ṢE N WAYE SI.
- Tẹ awọn +/- buttons to set the watering frequency: from 1 hour to 12 hours, or from 1 day to 7 days.
- Tẹ awọn OK button to switch between hour and day/hour setup.
- Turn the dial to any other position to save changes.
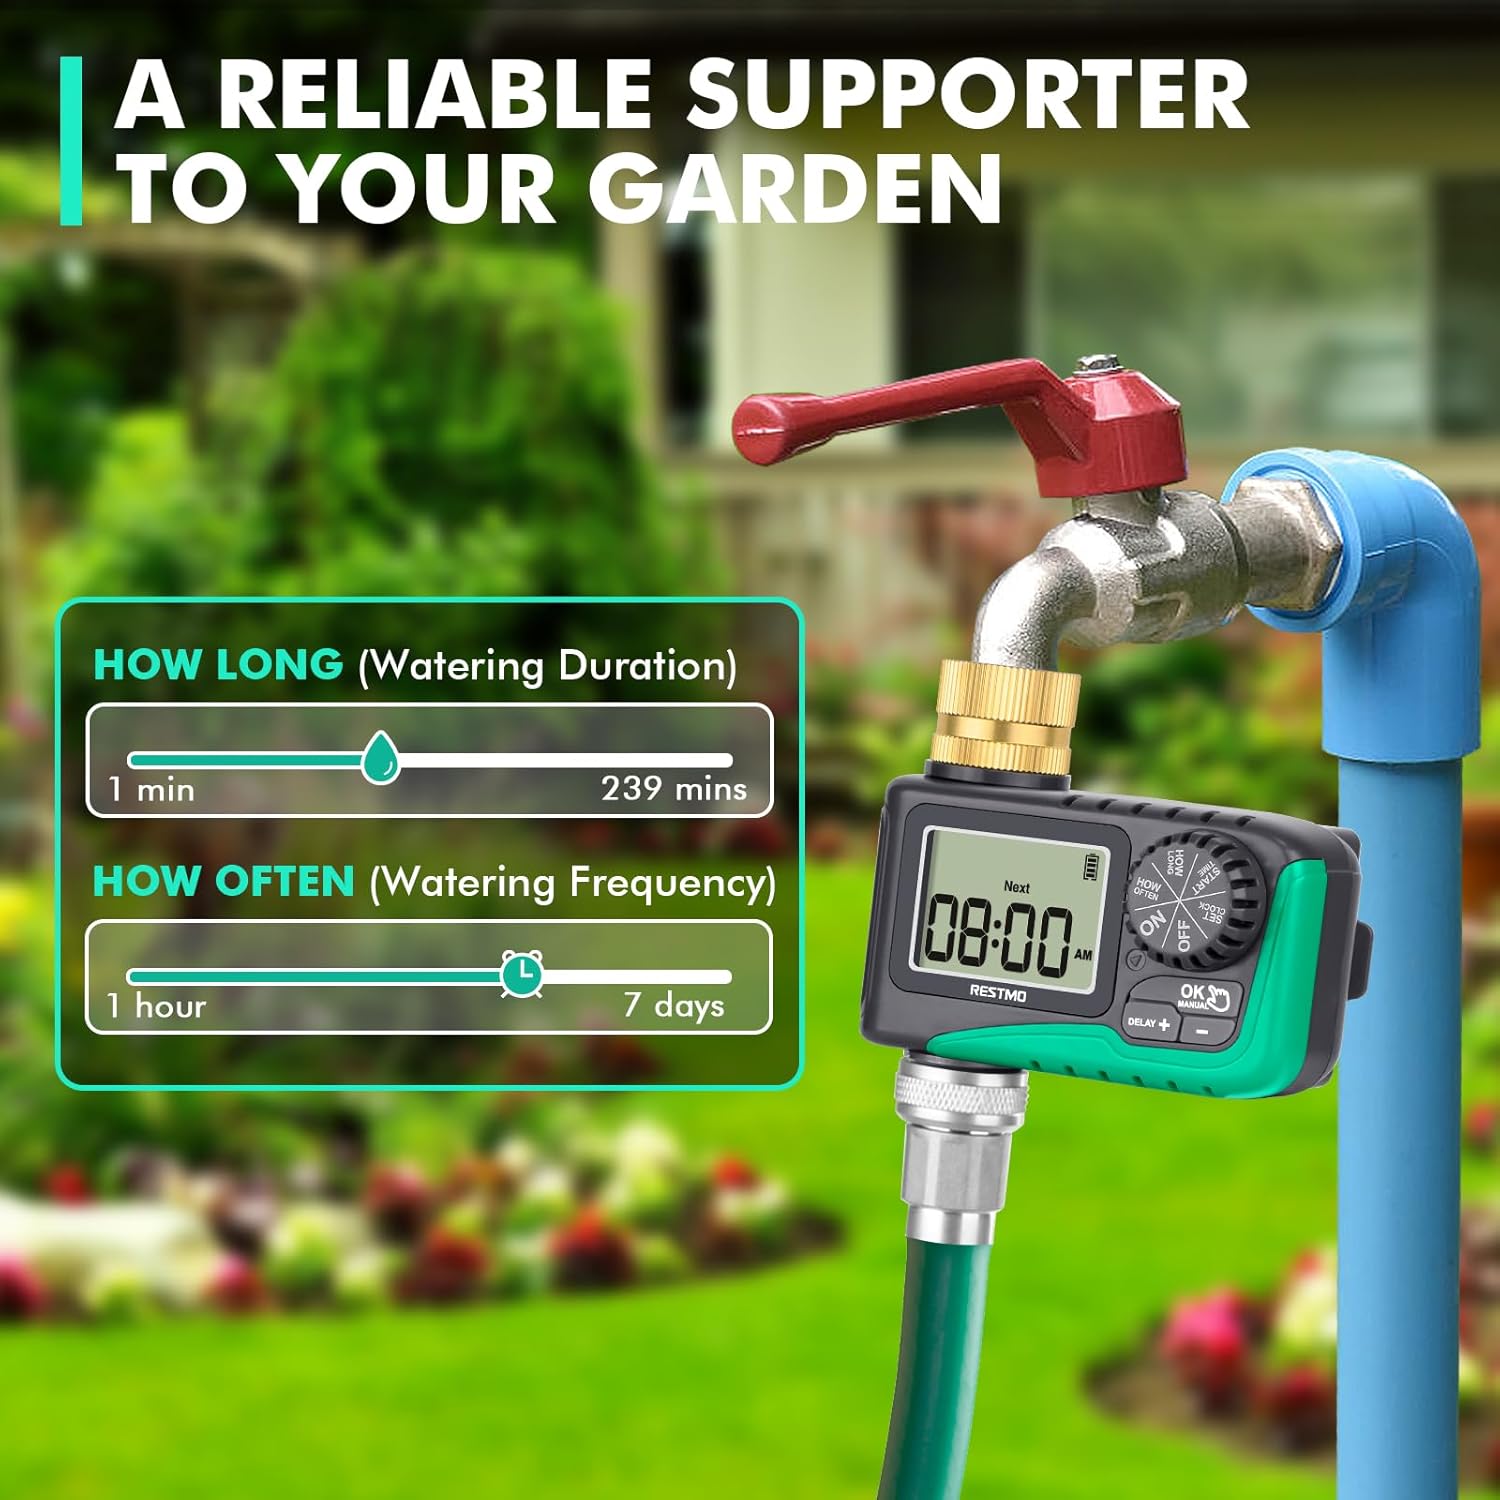
Image: Visual guide showing the range for 'How Long' (1-239 mins) and 'How Often' (1hr-7 days) settings.
5. Automatic Watering
Once programmed, turn the dial to ON to activate the automatic watering schedule. The LCD screen will display the remaining time of the current watering program when watering is active. When watering is off, the screen will flash between the next watering start time and the current time.

Image: Depicts the timer set to 'ON' for automatic watering, with a visual representation of the watering duration and frequency settings.
6. Afowoyi agbe
Láti fi ọwọ́ bomi láìsí ìpalára lórí ìṣètò rẹ:
- With the dial at ON, long press the O DARA/Afọwọṣe bọtini fun 3 aaya.
- Tẹ awọn +/- buttons to select the desired manual watering duration (1 to 239 minutes).
- Tẹ OK to switch between hour and minute. The setup flashes 3 times and manual watering will automatically start.
- To cancel manual watering, turn the dial to PAA ati lẹhinna pada si ON.

Image: Shows how to activate manual watering and adjust its duration, with a visual of water flowing from the hose.
7. Idaduro Ojo
Láti dá ìtòlẹ́sẹẹsẹ omi rẹ dúró fún ìgbà díẹ̀ nítorí òjò tàbí àwọn ìdí mìíràn:
- With the dial at ON, long press the DELAY + bọtini fun 3 aaya.
- Tẹ awọn +/- buttons to select a delay of 12, 24, 48, or 72 hours.
- Tẹ OK or wait for 3 seconds to start the rain delay.
- To cancel rain delay, turn the dial to PAA ati lẹhinna pada si ON.

Image: Illustrates the rain delay function with options for 12, 24, 48, and 72-hour delays.
8. Stop Watering
To completely stop all watering programs:
- Tan ipe naa si PAA. The timer will keep off until the dial is turned to ON lẹẹkansi.

Image: Shows the timer dial set to 'OFF', indicating that watering has stopped.
Itoju
- Ninu: Periodically check the brass inlet filter washer for debris and clean it to ensure optimal water flow.
- Rirọpo Batiri: When the battery indicator on the LCD screen shows low power, replace the batteries promptly to avoid interruption of watering schedules.
- Igba otutu: Before the first frost, disconnect the timer from the faucet and hose. Remove the batteries and store the timer indoors in a dry, protected area to prevent damage from freezing.
Laasigbotitusita
Eyi ni diẹ ninu awọn ọran ti o wọpọ ati awọn ojutu wọn:
| Isoro | Owun to le Fa | Ojutu |
|---|---|---|
| Timer not turning on/LCD blank | Awọn batiri ti o ku tabi ti ko tọ ti fi sori ẹrọ. | Replace batteries with new 2 x AAA alkaline batteries, ensuring correct polarity. |
| Water not flowing/Timer not watering | Faucet is off; low water pressure; clogged filter; incorrect program settings; valve stuck. | Ensure faucet is fully open. Check water pressure (10-120 psi required). Clean the inlet filter. Verify program settings (start time, duration, frequency). Reset the valves (see video below). |
| Omi jijo lati awọn isopọ | Loose connections; missing/damaged washer; insufficient Teflon tape. | Tighten all connections. Check for and replace any missing or damaged rubber washers. Apply more Teflon tape to faucet threads. |
| Aago akoko ko tẹle iṣeto naa | Incorrect clock setting; program not activated (dial not on ON); rain delay active. | Re-set the current time. Ensure the dial is set to ON. Check if rain delay is active and cancel if necessary. |
How to Reset the Valves:
If the timer's internal valves are not functioning correctly, you may need to reset them. This process involves cycling water through the timer manually to clear any obstructions or reset the mechanism.
Video: A step-by-step guide on how to reset the internal valves of the RESTMO Sprinkler Timer to ensure proper water flow.
Awọn pato
- Awoṣe: O-HT
- Ohun elo: Idẹ, Irin
- Inlet Thread: 3/4" NH (Pure Brass)
- Hose Fitting: 3/4"
- Iye akoko agbe: 1-239 iṣẹju
- Igbohunsafẹfẹ agbe: 1-12 hours or 1-7 days
- Àwọn Àṣàyàn Ìdádúró Òjò: 12/24/48/72 wakati
- O pọju. Oṣuwọn Sisan: 10 GPM (35 L/Min)
- Ipa Ṣiṣẹ: 10-120 PSI (0.5-8.0 Pẹpẹ)
- Iwọn otutu: 38 si 120°F (3 si 50°C)
- Idiwon ti ko ni omi: IP54
- Orisun Agbara: 2 x Awọn batiri Alkaline AAA (kii ṣe pẹlu)
- Awọn iwọn ọja: 3.94"D x 3.94"W x 1.57"H
- Ìwọ̀n Nkan: 5 iwon
Atilẹyin ọja ati Support
RESTMO products are designed for durability and performance. For warranty information or technical support, please refer to the contact details provided with your product packaging or visit the official Restmo website. Our customer service team is available to assist you with any questions or concerns.
Ask a question about this manual
Ask about setup, troubleshooting, compatibility, parts, safety, or missing instructions. Manuals+ will review the question and use this page’s manual context to help answer it.