IK Multimedia ARC Studio
IK Multimedia ARC Studio Room Correction System User Manual
Model: ARC Studio (IK000183)
1. Ifihan
The IK Multimedia ARC Studio is an advanced room correction system designed to optimize the acoustic performance of your studio or listening environment. This system includes a high-precision measurement microphone, sophisticated ARC 4 software, and a dedicated hardware processor. By analyzing your room's acoustic response, ARC Studio creates a custom correction profile to ensure accurate and balanced audio reproduction, leading to more reliable mixing and mastering decisions.
2. Alaye Aabo
Jọwọ ka gbogbo awọn ilana aabo ki o si tẹle wọn lati yago fun ibajẹ si ẹrọ naa tabi ipalara ara ẹni.
- Ma ṣe fi ẹrọ naa han si omi tabi ọrinrin pupọ.
- Yago fun gbigbe ẹrọ naa si nitosi awọn orisun ooru tabi ni imọlẹ orun taara.
- Lo oluyipada agbara nikan ti a pese pẹlu ẹyọkan.
- Má ṣe gbìyànjú láti ṣí tàbí ṣe àtúnṣe ẹ̀rọ náà fúnra rẹ. Tọ́ka gbogbo iṣẹ́ ìtọ́jú náà sí àwọn òṣìṣẹ́ tó péye.
- Rii daju pe fentilesonu to dara ni ayika ẹyọ naa lati ṣe idiwọ igbona.
- Jeki kuro ni arọwọto awọn ọmọde.
3. Package Awọn akoonu
Verify that all items are present in your ARC Studio package:
- ARC Studio Hardware Processor
- ARC Measurement Microphone
- Okun USB
- Ibi ti ina elekitiriki ti nwa
- ARC 4 Software License (downloadable)
- Quick Bẹrẹ Itọsọna
4. Ọja Ipariview
The ARC Studio system comprises three main components working in conjunction to achieve precise room correction.
4.1 ARC Studio Hardware Processor
This dedicated hardware unit processes the audio signal, applying the room correction profile in real-time. It features balanced XLR inputs and outputs for seamless integration into your studio setup. The processor operates with 24-bit/96 kHz AD/DA converters for transparent signal integrity.

Image: The ARC Studio hardware processor and measurement microphone.

Aworan: Ẹyin view of the ARC Studio processor, highlighting XLR inputs and outputs, USB port, and DC power input.
4.2 ARC Measurement Microphone
The included high-precision omnidirectional measurement microphone is crucial for accurately capturing your room's acoustic characteristics. It connects to your audio interface (not included) during the calibration process.

Image: Close-up of the ARC measurement microphone.
4.3 ARC 4 Software
The ARC 4 software guides you through the room measurement process and generates the correction profiles. It also allows for advanced customization, including target curves and monitor emulations. The software is used to load the generated profiles onto the ARC Studio hardware processor.

Image: ARC 4 software interface shown on a laptop, demonstrating frequency response analysis and correction, with the ARC Studio hardware and microphone in the foreground.
5. Eto
5.1 Software fifi sori
- Register your product on the IK Multimedia website to access the ARC 4 software download.
- Download and install the ARC 4 software on your computer (Windows or macOS).
- Follow the on-screen instructions to complete the installation and authorize the software.
5.2 Hardware Awọn isopọ
The ARC Studio processor should be placed between your audio interface's outputs and your studio monitors. The measurement microphone is connected to your audio interface during calibration.

Image: Connection diagram for the ARC Studio processor in a typical studio setup.
- Connect the ARC Studio Processor:
- Connect the outputs of your audio interface to the L ati R XLR inputs on the rear of the ARC Studio processor.
- Sopọ awọn L ati R XLR outputs of the ARC Studio processor to the inputs of your studio monitors.
- Connect the supplied USB cable from the ARC Studio processor to an available USB port on your computer.
- So ipese agbara si awọn DC IN port on the ARC Studio processor and plug it into a power outlet.
- Connect the Measurement Microphone (for calibration):
- Connect the ARC Measurement Microphone to an XLR input on your audio interface. Ensure phantom power (+48V) is enabled for the microphone input on your audio interface.

Image: A studio environment showing the ARC Studio processor integrated with a laptop, audio interface, and a microphone on a stand for calibration.
5.3 Room Calibration Process
The calibration process uses the ARC 4 software and the measurement microphone to analyze your room and create a correction profile.
- Launch the ARC 4 software on your computer.
- Select your audio interface as the input device for the measurement microphone and ensure the output is routed through the ARC Studio processor.
- Follow the on-screen instructions in the ARC 4 software to perform the room measurements. This typically involves placing the microphone at various positions around your listening area.
- The software will generate a room correction profile based on these measurements.
- Ni kete ti profile is generated, you can save it and upload it to the ARC Studio hardware processor via the USB connection.
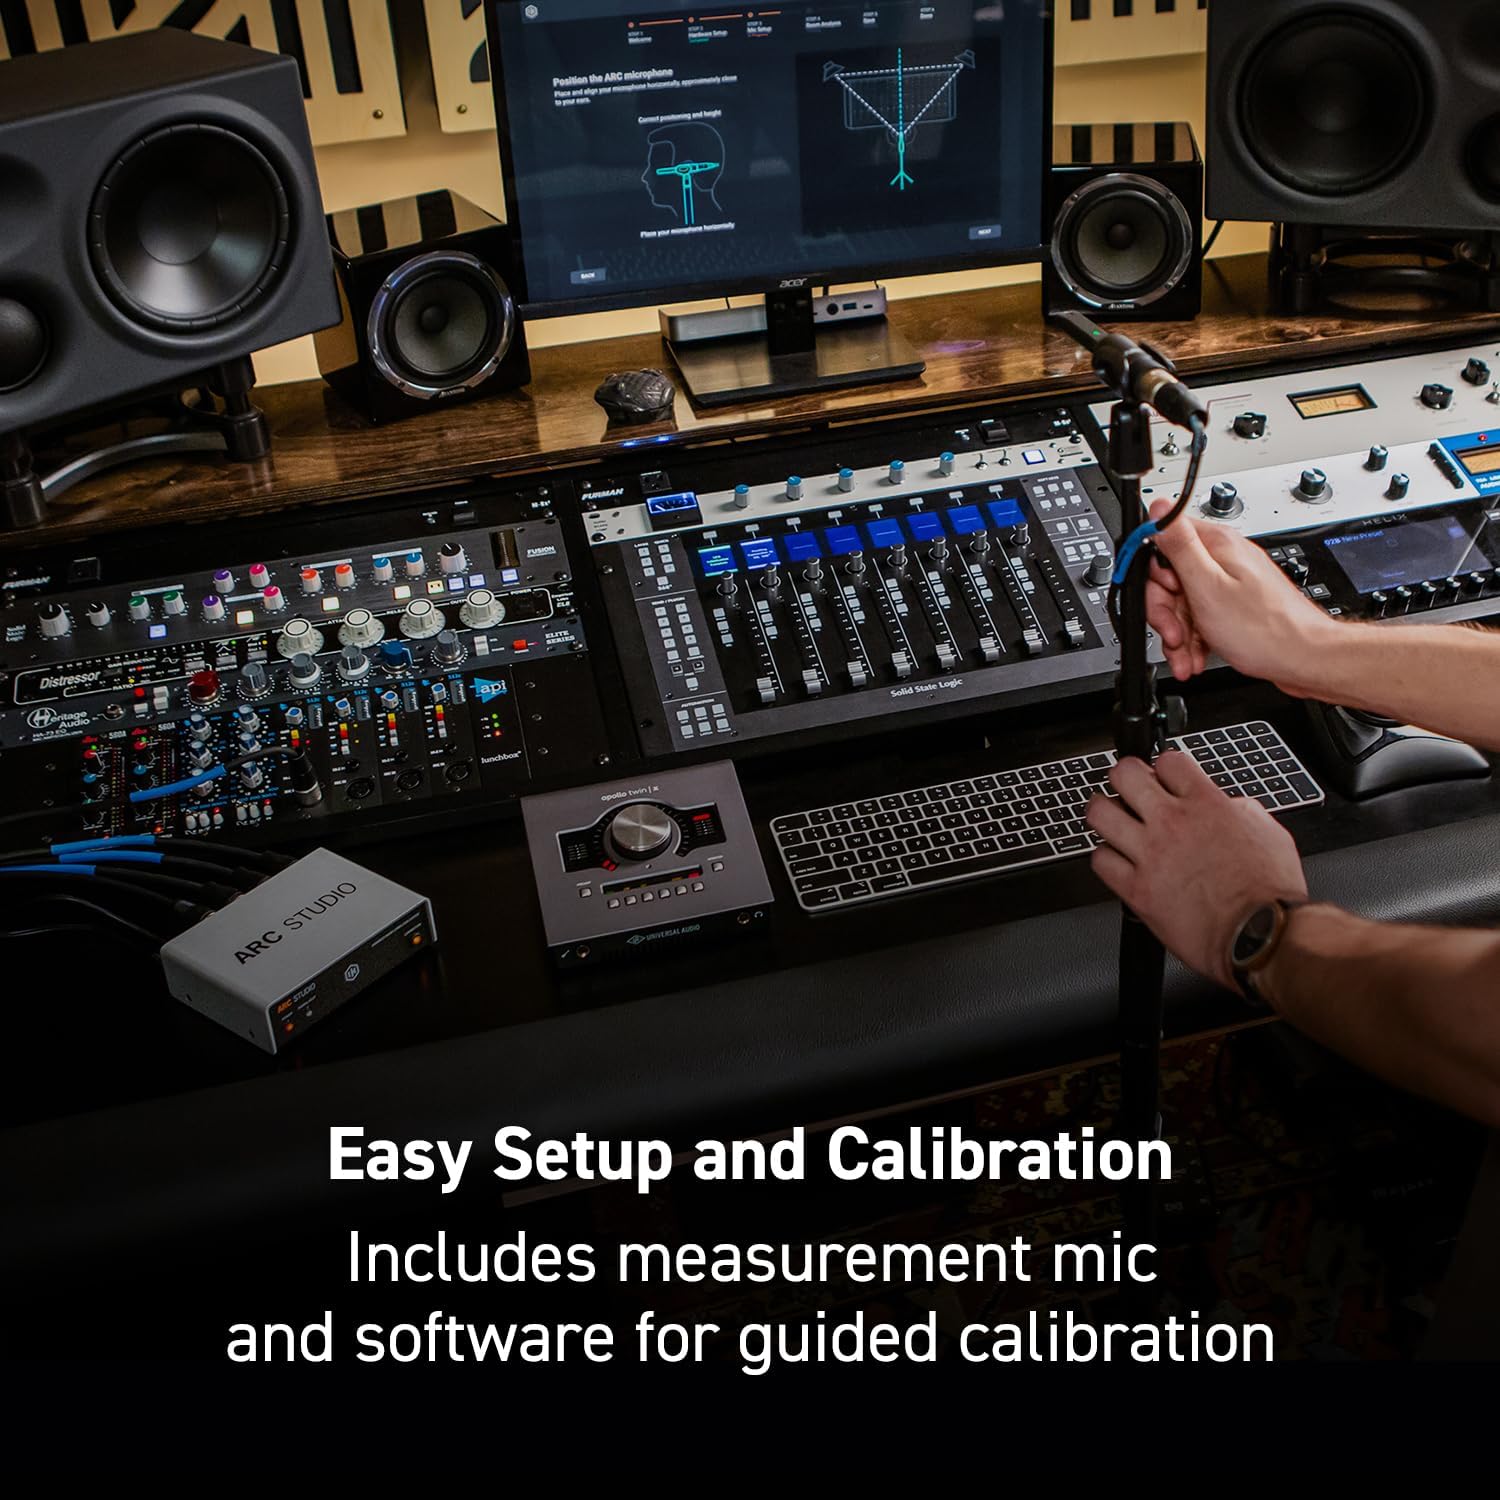
Image: A user positioning the ARC measurement microphone on a stand, preparing for room calibration with the ARC 4 software.
6. Operating the ARC Studio System
6.1 Using the ARC Studio Hardware Processor
Once a correction profile is loaded onto the ARC Studio processor, it operates independently of your computer. The processor applies the correction to all audio passing through it.
- LED agbara: Tọkasi ipo agbara ti ẹyọkan.
- Ifihan agbara / Agekuru LED: Shows audio signal presence and clipping. Adjust input levels on your audio interface to avoid clipping.
- Correction Button/LED: Toggles the room correction on or off. The LED indicates whether correction is active.

Image: Front panel of the ARC Studio processor, detailing the Power, Signal/Clip, and Correction indicators.
6.2 ARC 4 Software Features
The ARC 4 software provides advanced control and customization options for your room correction profiles.
- Custom EQ Profiles: Tailor the correction to your specific preferences or room characteristics.
- Monitor Emulations: Simulate the sound of various studio monitors and reference systems, allowing you to cross-check your mixes without needing multiple sets of speakers.
- Àwọn Irú Àtúnṣe: Choose between different correction algorithms (e.g., Natural, Linear) to suit your workflow.

Image: ARC 4 software interface displaying a frequency response graph and controls for system tuning.

Image: ARC 4 software interface with a dropdown menu illustrating various monitor emulation options.
7. Itọju
- Ninu: Use a soft, dry cloth to clean the exterior of the ARC Studio processor and microphone. Do not use liquid cleaners or solvents.
- Ibi ipamọ: Tí o kò bá lò ó fún ìgbà pípẹ́, tọ́jú ẹ̀rọ náà sí ibi tí ó tutù tí ó sì gbẹ, kúrò níbi tí oòrùn kò ti lè tàn án tàbí ibi tí ó gbóná janjan.
- Awọn imudojuiwọn sọfitiwia: Regularly check the IK Multimedia website for ARC 4 software updates to ensure optimal performance and access to new features.
8. Laasigbotitusita
| Isoro | Owun to le Fa | Ojutu |
|---|---|---|
| No sound output from monitors. | Incorrect cabling, ARC Studio not powered, correction bypassed. | Check all XLR and power connections. Ensure the ARC Studio processor is powered on and the Correction LED is illuminated (or bypassed if desired). Verify audio interface output routing. |
| Microphone not detected during calibration. | Phantom power off, incorrect input selected, faulty cable. | Ensure +48V phantom power is enabled on your audio interface input. Select the correct input in ARC 4 software. Test with a different XLR cable. |
| Audio sounds distorted or clips. | Input levels too high. | Reduce the output level from your audio interface to the ARC Studio processor. Monitor the Signal/Clip LED on the ARC Studio unit. |
| Correction profile not loading to hardware. | USB connection issue, software error. | Ensure the USB cable is securely connected. Restart ARC 4 software and the ARC Studio processor. Try a different USB port. |
9. Awọn pato
| Ẹya ara ẹrọ | Ẹ̀kúnrẹ́rẹ́ |
|---|---|
| Orukọ awoṣe | ARC Studio |
| Nọmba Awoṣe Nkan | IK000183 |
| Olupese | IK Multimedia |
| Ọja Mefa | 4.72 x 5.67 x 1.77 inches |
| Iwọn Nkan | 0.037 iwon (1.05 Giramu) |
| AD/DA Awọn oluyipada | 24-bit / 96 kHz |
| Awọn igbewọle | 2 x XLR iwontunwonsi |
| Awọn abajade | 2 x XLR iwontunwonsi |
| Asopọmọra | USB for software communication |
10. Atilẹyin ọja ati Support
IK Multimedia products are covered by a limited warranty. For detailed warranty information, product registration, and technical support, please visit the official IK Multimedia webojula:
You can also find FAQs, software downloads, and contact information for customer service on their support page.
Awọn iwe aṣẹ ti o jọmọ - ARC Studio
 |
ARC 4 Advanced Room Correction Software User Manual User manual for the ARC 4 Advanced Room Correction Software by IK Multimedia. This guide covers system overview, components, setup, analysis, plug-in usage, standalone application, FAQs, and troubleshooting. |
 |
ARC Studio Advanced Room Correction System User Manual User manual for the IK Multimedia ARC Studio, an advanced room correction system. Details features, installation, setup, specifications, and support information. |
 |
ARC Studio User Manual: Advanced Room Correction System User manual for the IK Multimedia ARC Studio, an advanced room correction system. Details features, installation, setup, specifications, and support resources. |
 |
IK Multimedia ARC Studio: Advanced Room Correction System User Manual Comprehensive user manual for the IK Multimedia ARC Studio, detailing its features, installation, setup, audio specifications, and support information for advanced room correction. |
 |
IK Multimedia ARC X Afọwọṣe olumulo: Atunse yara ati sọfitiwia Isakoso Atẹle Iwe afọwọkọ olumulo pipe fun sọfitiwia ARC X IK Multimedia, ṣe alaye atunṣe yara, iṣakoso atẹle, isọdiwọn, ati lilo plug-in fun awọn agbegbe ohun to dara julọ. Kọ ẹkọ lati ṣaṣeyọri ohun deede ni ile-iṣere eyikeyi. |
 |
Australia Iye Akojọ - Pro Audio Equipment ati Musical Instruments Atokọ idiyele pipe fun ohun elo ohun afetigbọ, awọn ohun elo orin, awọn gbohungbohun, awọn gita, amplifiers, ati awọn ẹya ẹrọ lati asiwaju burandi. Ra lori ayelujara lati AudioShop.co. |
Ask a question about this manual
Ask about setup, troubleshooting, compatibility, parts, safety, or missing instructions. Manuals+ will review the question and use this page’s manual context to help answer it.