HOCO QS2
Hoco QS2 Portable Smart Air Pump & Emergency Start-Up Power Bank User Manual
Awoṣe: QS2
1. Ifihan
Thank you for choosing the Hoco QS2 Portable Smart Air Pump & Emergency Start-Up Power Bank. This device is a multi-functional tool designed to provide reliable assistance in various situations, including jump-starting vehicles, inflating tires, and charging electronic devices. Please read this manual thoroughly before use to ensure proper operation and to maximize the lifespan of your device.
2. Awọn iṣọra aabo
Always observe the following safety guidelines to prevent injury or damage to the device and property.
- Do not expose the device to extreme temperatures, direct sunlight, or fire.
- Jeki kuro ni arọwọto awọn ọmọde.
- Má ṣe tú ẹ̀rọ náà ká, má ṣe yí i padà, tàbí gbìyànjú láti tún un ṣe fúnra rẹ. Pe àwọn òṣìṣẹ́ iṣẹ́ tó mọ̀ nípa rẹ̀.
- Ensure proper ventilation during operation, especially when using the air pump or jump start function.
- Yago fun kukuru-circuiting awọn ebute oko.
- Ma ṣe lo ibẹrẹ fo ti batiri ba clamps tabi awọn kebulu ti bajẹ.
- When jump-starting, ensure the vehicle's ignition is off and all accessories are unplugged.
- Do not over-inflate tires. Always refer to the recommended tire pressure for your vehicle.
- Tí ẹ̀rọ náà bá gbóná jù nígbà tí a bá ń lò ó, dáwọ́ iṣẹ́ dúró lẹ́sẹ̀kẹsẹ̀.
3. Package Awọn akoonu
Jọwọ ṣayẹwo apoti fun awọn nkan wọnyi:
- 1 x Hoco QS2 8000 mAh Portable Smart Air Pump Emergency Start-Up Power Bank
- 1 x Jump Start Cables (Red and Black Clamps)
- 1 x Air Hose with Valve Connector
- Various Nozzle Adapters (e.g., for bicycles, balls)
- 1 x USB Iru-C Okun Ngba agbara

Figure 1: Hoco QS2 and its complete set of accessories.
4. Ọja irinše
Familiarize yourself with the different parts of your Hoco QS2 device.
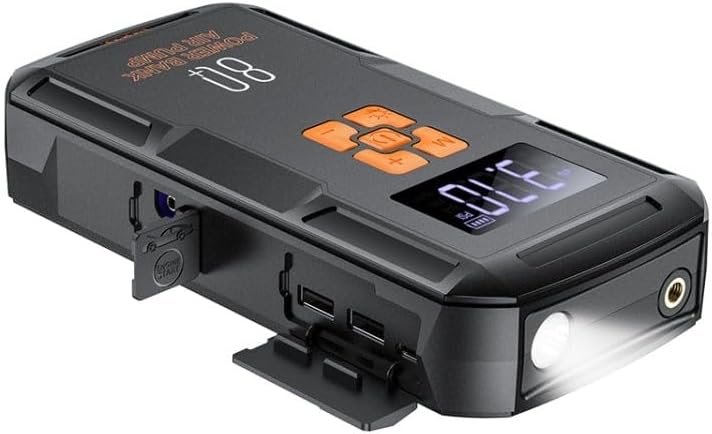
Olusin 2: Pariview of the Hoco QS2 device.
- Ifihan Digital: Shows current pressure, battery level, and selected mode.
- Awọn bọtini Iṣakoso: Power, Mode selection, Increase/Decrease pressure.
- Ibudo Hose Air: Connects the inflation hose.
- Ibudo Ibẹrẹ Fo: Connects the jump start cables.
- USB Output Ports (2x): For charging external devices (5V/2.4A).
- Ibudo Iwọle Iru-C: For charging the Hoco QS2 itself (5V/2.4A).
- Ina filaṣi LED: Pese itanna.
olusin 3: Apa view of the Hoco QS2 with ports visible.
5. Eto ati gbigba agbara
5.1 Charging the Hoco QS2
Before first use, fully charge the Hoco QS2. It is recommended to keep the device charged above 50% for optimal performance, especially for jump-starting.
- Connect the provided USB Type-C charging cable to the Type-C input port on the Hoco QS2.
- Connect the other end of the USB cable to a 5V/2.4A USB wall adapter (not included) or a compatible USB port.
- The digital display will indicate the charging status and battery level.
- Akoko gbigba agbara le yatọ da lori orisun agbara.
6. Awọn ilana Iṣiṣẹ
6.1 Jump Start Function
The Hoco QS2 can jump-start vehicles with up to 4.0L gasoline or 2.0L diesel engines.
- Ensure the Hoco QS2 is sufficiently charged (at least 75% battery recommended).
- Turn off the vehicle's ignition and all electrical accessories.
- So pupa (+) clamp of the jump start cable to the positive (+) terminal of the vehicle's battery.
- So dudu (-) clamp to the negative (-) terminal of the vehicle's battery or a solid, unpainted metal part of the engine block (ground point).
- Insert the blue connector of the jump start cable into the jump start port on the Hoco QS2.
- Once connected, the Hoco QS2 will automatically enter jump start mode.
- Start the vehicle's engine. If it doesn't start immediately, wait 30 seconds before trying again. Do not crank for more than 3 seconds per attempt.
- Once the vehicle starts, immediately disconnect the jump start cable from the Hoco QS2, then remove the black (-) clamp, lẹ́yìn náà ni pupa (+) clamp lati batiri ọkọ ayọkẹlẹ.
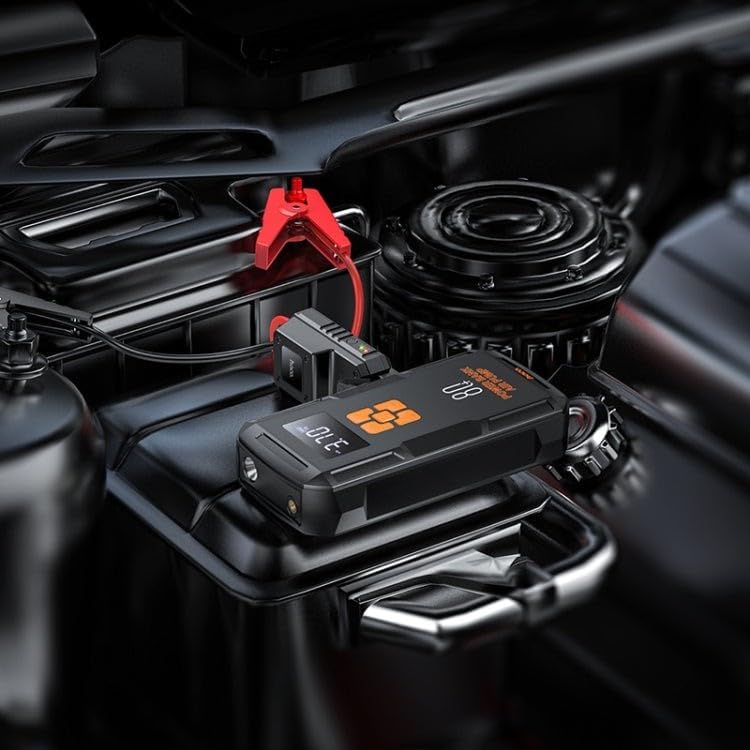
Figure 4: Using the Hoco QS2 for jump-starting a vehicle.
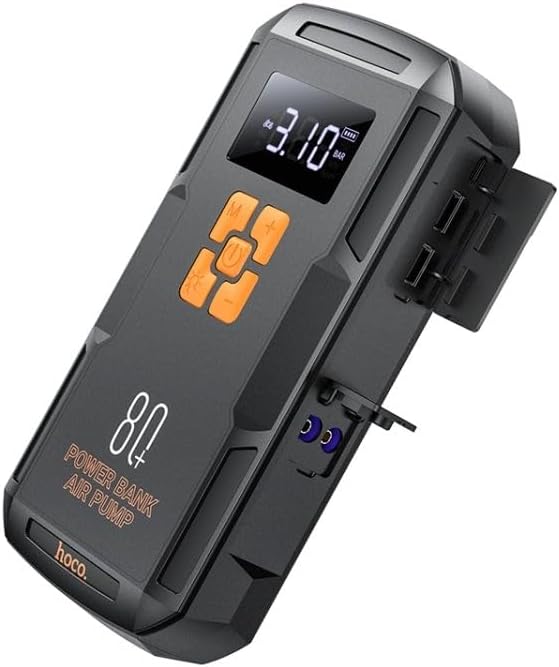
6.2 Tire Inflation Function (Air Pump)
The Hoco QS2 can inflate tires up to 10.3 bar (150 PSI) and features multiple inflation modes.
- Connect the air hose to the air hose port on the Hoco QS2.
- Attach the other end of the air hose to the tire valve. Ensure a secure connection to prevent air leakage. Use appropriate nozzle adapters for other inflatables (e.g., bicycle tires, sports balls).
- Press the Power button to turn on the device. The display will show the current tire pressure.
- Press the 'M' (Mode) button to cycle through the inflation modes: Car, Motorcycle, Bicycle, Basketball. Each mode has a default pressure setting, which can be adjusted.
- Use the '+' and '-' buttons to set your desired target pressure.
- Press the Power button again to start inflation. The pump will automatically stop once the target pressure is reached.
- Disconnect the air hose from the tire valve and the device.

Figure 5: Inflating a car tire with the Hoco QS2.
6.3 Power Bank Išė
The Hoco QS2 can charge your electronic devices via its dual USB output ports.
- Connect your device's USB charging cable to one of the USB output ports on the Hoco QS2.
- So opin keji okun waya naa mọ ẹrọ itanna rẹ (fun apẹẹrẹ, foonuiyara, tabulẹti).
- The Hoco QS2 will automatically begin charging your device.
- The digital display will show the remaining battery level of the power bank.
6.4 LED Flashlight Išė
Ìmọ́lẹ̀ LED tí a fi sínú rẹ̀ ń fúnni ní ìmọ́lẹ̀ fún onírúurú ipò.
- To turn on the flashlight, press and hold the 'Light' button (usually indicated by a light bulb icon).
- Press the 'Light' button again to cycle through different light modes (e.g., steady on, SOS signal, strobe).
- Press and hold the 'Light' button again to turn off the flashlight.
7. Itọju ati Ipamọ
- Nu ẹrọ naa pẹlu asọ ti o tutu, ti o gbẹ. Maṣe lo awọn kẹmika ti o lewu tabi awọn afọmọ abrasive.
- Store the Hoco QS2 in a cool, dry place, away from direct sunlight and moisture.
- For long-term storage, charge the device every 3-6 months to maintain battery health.
- Ensure all ports are covered when not in use to prevent dust and debris from entering.
8. Laasigbotitusita
| Isoro | Owun to le Fa | Ojutu |
|---|---|---|
| Ẹrọ ko tan. | Batiri kekere. | Gba agbara si ẹrọ ni kikun. |
| Ọkọ ko ni fo bẹrẹ. | Incorrect cable connection; Device battery too low; Vehicle battery severely discharged. | Ensure correct polarity (+ to +, - to -). Charge the Hoco QS2. Allow more time for the vehicle battery to receive a charge, or seek professional assistance if the battery is completely dead. |
| Air pump not inflating or inflating slowly. | Air hose not securely connected; Nozzle adapter not suitable; Device battery low. | Check all connections for leaks. Use the correct adapter. Charge the device. |
| Gbigba agbara USB ko ṣiṣẹ. | Device battery low; Cable faulty; Device not compatible. | Charge the Hoco QS2. Try a different USB cable. Ensure your device is compatible with 5V/2.4A charging. |
9. Imọ ni pato
| Ẹya ara ẹrọ | Sipesifikesonu |
|---|---|
| Nọmba awoṣe | GBS2 |
| Agbara Batiri | 8000 mAh (29.6 Wh) |
| Iru-C Input | 5V / 2.4A |
| USB Output 1/2 | 5V / 2.4A |
| Apapọ Ijade USB | 5V / 2.4A |
| Fo Bẹrẹ Ṣiṣejade | 12V (for vehicle emergency start) |
| Agbara afẹfẹ ti o pọju | 10.3 igi / 150 PSI |
| Awọn iwọn | Isunmọ 12 x 10 x 8 cm |
| Iwọn | Isunmọ. 800 giramu |
| Awọn iwọn otutu ti nṣiṣẹ | Refer to product packaging for specific range. |
10. Atilẹyin ọja ati Support
HOCO products are designed and manufactured to the highest quality standards. For warranty information and customer support, please refer to the warranty card included with your purchase or visit the official HOCO webojula. Tọju iwe-ẹri rira rẹ bi ẹri rira fun eyikeyi awọn ibeere atilẹyin ọja.
Ask a question about this manual
Ask about setup, troubleshooting, compatibility, parts, safety, or missing instructions. Manuals+ will review the question and use this page’s manual context to help answer it.