
1. Ifihan
This manual provides detailed instructions for the Odokee Digital Alarm Clock, Model U2-SV-001. Please read this manual thoroughly before using the product to ensure correct operation and to maximize its features. Keep this manual for future reference.
2. Ọja Ipariview
The Odokee Digital Alarm Clock is designed for ease of use and clear visibility, featuring a large display, adjustable brightness, multiple alarm sounds, and a multi-color night light. It also includes a convenient USB charging port.
Awọn ẹya pataki:
- Large, bold 2-inch numbers for easy readability.
- 5-level adjustable brightness dimmer for the time display.
- Extra loud alarm with 5 selectable wake-up sounds and adjustable volume (30-110dB).
- Battery backup for time and alarm settings during power outages (display off).
- Integrated USB charging port for external devices.
- 8-color night light with adjustable brightness.
- Front-facing buttons for effortless setup and operation.
Awọn eroja:
Refer to the image below for a visual representation of the clock's front panel and buttons.

olusin 2.1: Iwaju view of the Odokee Digital Alarm Clock showing the display and control buttons.
The back of the clock features the power input, USB charging port, and battery compartment.

olusin 2.2: Ẹyìn view of the alarm clock with power input and USB charging port.
3. Eto
3.1 Asopọ agbara
- Connect the provided AC adapter to the DC 5V input port on the back of the alarm clock.
- Plug the AC adapter into a standard electrical outlet. The display will illuminate.

Figure 3.1: Connecting the alarm clock to power using the included AC adapter.
3.2 Batiri Afẹyinti fifi sori
The clock requires 2 AAA alkaline batteries (not included) for backup. These batteries maintain time and alarm settings during a power outage, but the display will not light up when running on battery power alone.
- Ṣí ideri yàrá ìpamọ́ batiri náà ní ẹ̀yìn aago náà.
- Fi awọn batiri ipilẹ AAA 2 sii, ni idaniloju polarity to pe (+/-).
- Pa ideri iyẹwu batiri naa.

Nọmba 3.2: Iyẹwu batiri fun awọn batiri AAA.
4. Awọn ilana Iṣiṣẹ
4.1 Ṣiṣeto Aago naa
- Tẹ mọlẹ Akoko SET bọ́tìnì fún ìṣẹ́jú-àáyá mẹ́ta láti tẹ ipò ìṣètò àkókò wọlé. Àwọn nọ́mbà wákàtí náà yóò máa tàn yanranyanran.
- Tẹ awọn HOUR 12/24H bọtini lati ṣatunṣe wakati naa.
- Tẹ awọn MIN AL ON/OFF bọtini lati ṣatunṣe iṣẹju.
- Tẹ Akoko SET lẹẹkansi lati jẹrisi ati ipo eto akoko jade.

Figure 4.1: Time setting button layout.
4.2 12/24 Wakati kika
Láti yípadà láàrín àwọn ọ̀nà ìgbà wákàtí méjìlá sí wákàtí mẹ́rìnlélógún:
- Ni ipo ifihan akoko deede, tẹ bọtini naa HOUR 12/24H Bọtini lati yi laarin awọn wakati 12 (pẹlu itọkasi AM/PM) ati awọn ọna kika wakati 24.

Figure 4.2: Toggling between 12-hour and 24-hour display.
4.3 Display Brightness Dimmer
The clock display has 5 brightness levels and can be turned off completely.
- Tẹ awọn LIGHT DIM button (also the Snooze button) repeatedly to cycle through the 5 brightness levels and the 'off' state.

Figure 4.3: Adjusting the display brightness.
4.4 Eto Itaniji
- Tẹ mọlẹ ALAGBARA SET bọtini fun 2 aaya. Awọn nọmba wakati itaniji yoo filasi.
- Tẹ awọn HOUR 12/24H bọtini lati ṣatunṣe wakati itaniji.
- Tẹ awọn MIN AL ON/OFF bọtini lati ṣatunṣe iṣẹju itaniji.
- Tẹ ALAGBARA SET lẹẹkansi lati jẹrisi akoko itaniji.
- After setting the alarm time, the alarm will be automatically activated. A bell icon will appear on the display.
4.5 Alarm Sound Selection
The clock offers 5 different alarm sounds.
- While the alarm is not sounding, press the ALARM OHUN button repeatedly to cycle through the 5 available sounds: Birds Chirping, Beep, Soft Music, Ode to Joy, Siren.

Àwòrán 4.4: Àwọn ohùn ìkìlọ̀ tó wà.
4.6 Ṣíṣe àtúnṣe iwọn didun itaniji
The alarm volume can be adjusted from 30dB to 110dB.
- While the alarm is not sounding, press the ALARM VOL button repeatedly to cycle through the available volume levels.
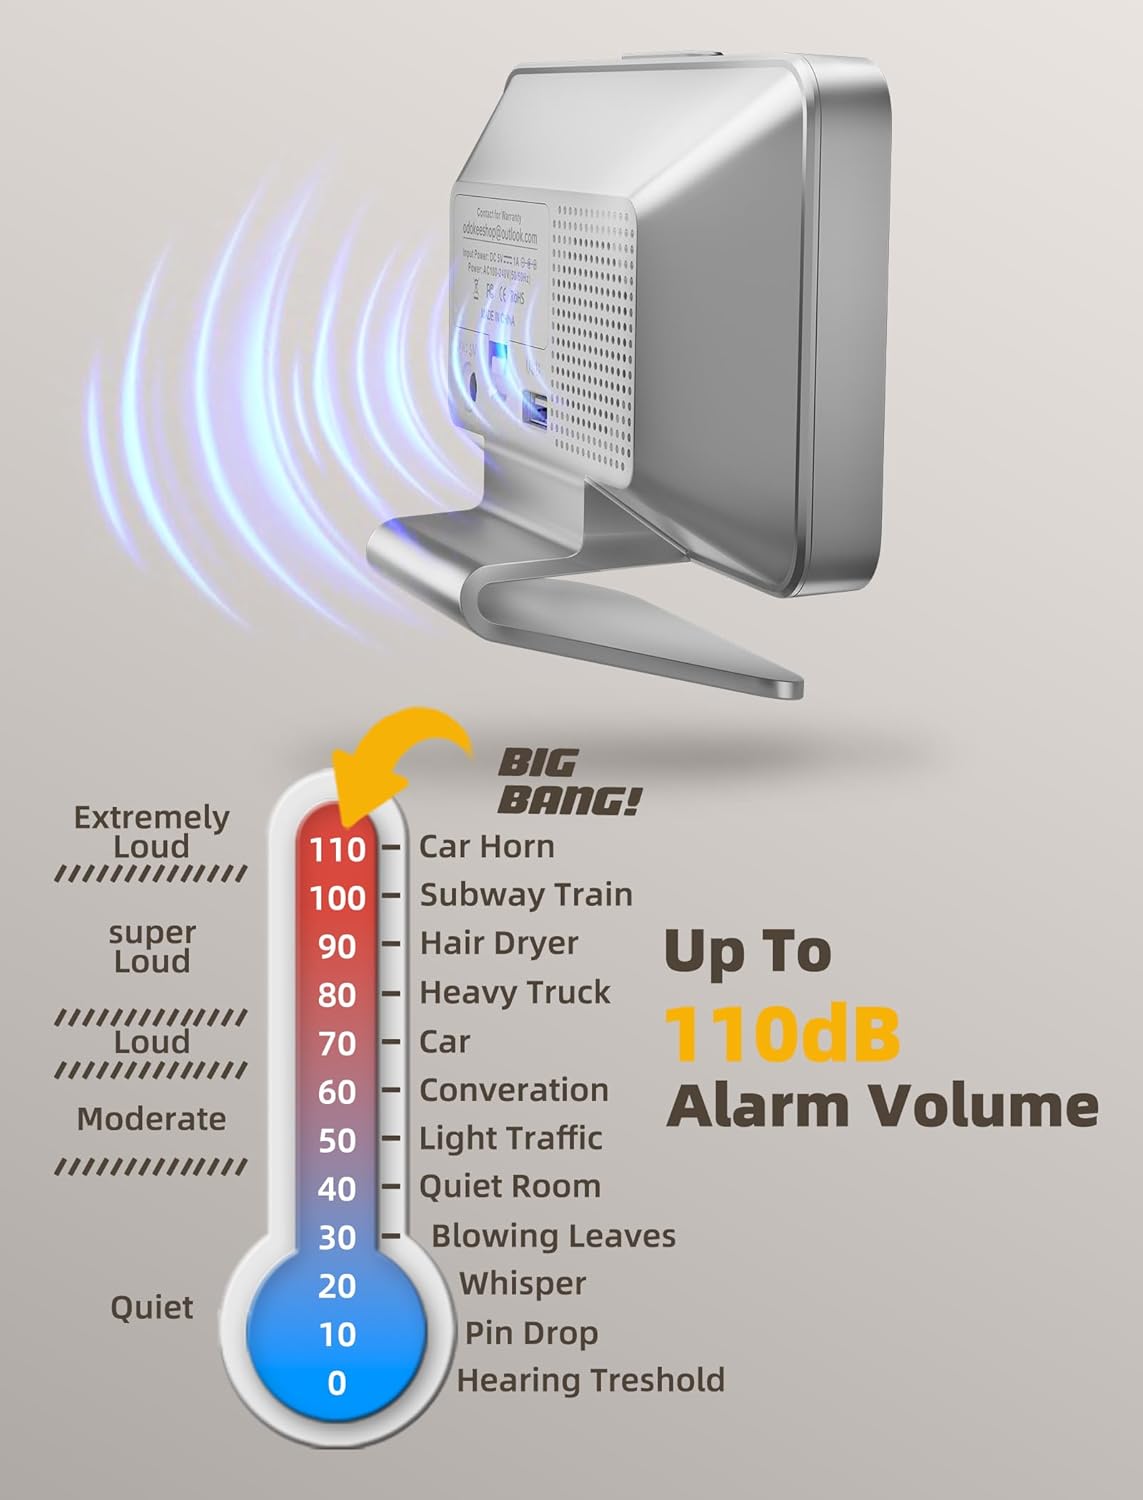
Figure 4.5: Alarm volume adjustment range.
4.7 Iṣiṣẹ Snooze
Nigbati itaniji ba dun:
- Tẹ awọn ti o tobi LIGHT DIM button (Snooze button) on top of the clock to activate snooze. The alarm will pause for 9 minutes and then sound again.
- To turn off the alarm completely, press any other button on the front panel.

Figure 4.6: Location of the Snooze/Dimmer button.
Iṣẹ́ 4.8 Ìmọ́lẹ̀ Alẹ́
The clock features an 8-color night light with adjustable brightness.
- Tẹ awọn Imọlẹ button (sun icon) to turn on the night light.
- Tẹ awọn Imọlẹ button repeatedly to cycle through the 8 colors and adjust their brightness levels.
- To turn off the night light, continue pressing the Imọlẹ bọtini titi ti o yipada si pa.

Figure 4.7: The 8-color night light feature.
4.9 Okun gbigba agbara USB
A USB charging port is located on the back of the clock.
- Connect your smartphone or other USB-powered device to this port using a compatible USB cable (not included) to charge it.

Figure 4.8: Using the integrated USB charging port.
5. Itọju
5.1 Ninu
- Fi aṣọ rírọ̀ tí ó gbẹ nu aago náà.
- Ma ṣe lo abrasive ose tabi epo, bi awọn wọnyi le ba awọn dada.
5.2 Batiri Rirọpo
- Tí aago bá ń ní ìrírí agbára nígbà gbogbo outages or if the backup function is unreliable, replace the 2 AAA batteries in the battery compartment.
- Ensure proper polarity when inserting new batteries.
6. Laasigbotitusita
| Isoro | Owun to le Fa | Ojutu |
|---|---|---|
| Ifihan ti wa ni pipa. | Clock is not plugged in, or brightness is set to 'off'. | Ensure AC adapter is securely plugged in. Press the LIGHT DIM bọtini lati ṣatunṣe imọlẹ. |
| Display is off during power outage. | This is normal. Battery backup only maintains settings, not display. | No action needed. Display will return when power is restored. |
| Itaniji ko dun. | A kò ṣètò ìró ìró tàbí a ti pa á. Ìró ìró náà kéré jù. | Ensure alarm is set and the bell icon is visible. Adjust alarm volume using ALARM VOL bọtini. |
| Akoko ti ko tọ lẹhin agbara utage. | Awọn batiri afẹyinti ti ku tabi ko fi sii. | Install or replace 2 AAA batteries. Reset the time if necessary. |
| Ibudo gbigba agbara USB ko ṣiṣẹ. | Clock is not powered, or device cable is faulty. | Ensure clock is plugged into an outlet. Try a different USB cable or device. |
7. Awọn pato
- Awoṣe: U2-SV-001
- Brand: Odokee
- Iru ifihan: Oni-nọmba
- Orisun Agbara: Corded Electric (AC adapter included)
- Batiri Afẹyinti: Awọn batiri 2 x AAA (kii ṣe pẹlu)
- Awọn iwọn ọja: 5.5"W x 4"H
- Ohun elo: Ṣiṣu
- Awọn ẹya pataki: Adjustable Brightness, Adjustable Volume, USB Charging Port, Large Display, Mood Light (8 colors)
- Ìwọ̀n Nkan: 6 iwon (171 Giramu)
8. Atilẹyin ọja ati Support
8.1 atilẹyin ọja Alaye
This Odokee Digital Alarm Clock (Model U2-SV-001) comes with an 18-month warranty from the date of purchase. This warranty covers manufacturing defects and ensures the product functions as described under normal use.
8.2 Onibara Support
For any questions, technical assistance, or warranty claims, please contact Odokee customer support:
- Imeeli: odokeeshop@outlook.com
Please provide your model number (U2-SV-001) and purchase details when contacting support to facilitate a quicker resolution.