
1. Ifihan
This user manual provides comprehensive instructions for the installation, configuration, and operation of your KuWFi CPE120 and CPE130 2.4G Wireless WiFi Bridge and Outdoor Access Point. Please read this manual carefully before using the device to ensure proper setup and optimal performance. Keep this manual for future reference.
2. Ọja Ipariview
The KuWFi CPE120 and CPE130 are 300Mbps outdoor wireless devices designed to extend Wi-Fi coverage over long distances, up to 1KM. They support Point-to-Point (PTP) and Point-to-Multi-Point (PTMP) connections, functioning as both a wireless bridge and an access point. These devices are built for outdoor use, featuring waterproof, dustproof, and lightning protection.
2.1. CPE120 Features
- 300Mbps Outdoor Wireless WiFi Bridge.
- Supports 1KM Long Range WiFi Extender functionality.
- LED display for configuring PTP/PTMP connections.
- Supports AP and Bridge operation modes.
- Waterproof, dustproof, and lightning protection.
- Operating Temperature: -30℃ to 55℃.
2.2. CPE130 Features
- Economic 300Mbps outdoor CPE.
- LED display support for 1KM Long Range.
- Improved wireless networking for extended coverage.
- Seamless wireless connectivity for homes and secondary buildings.
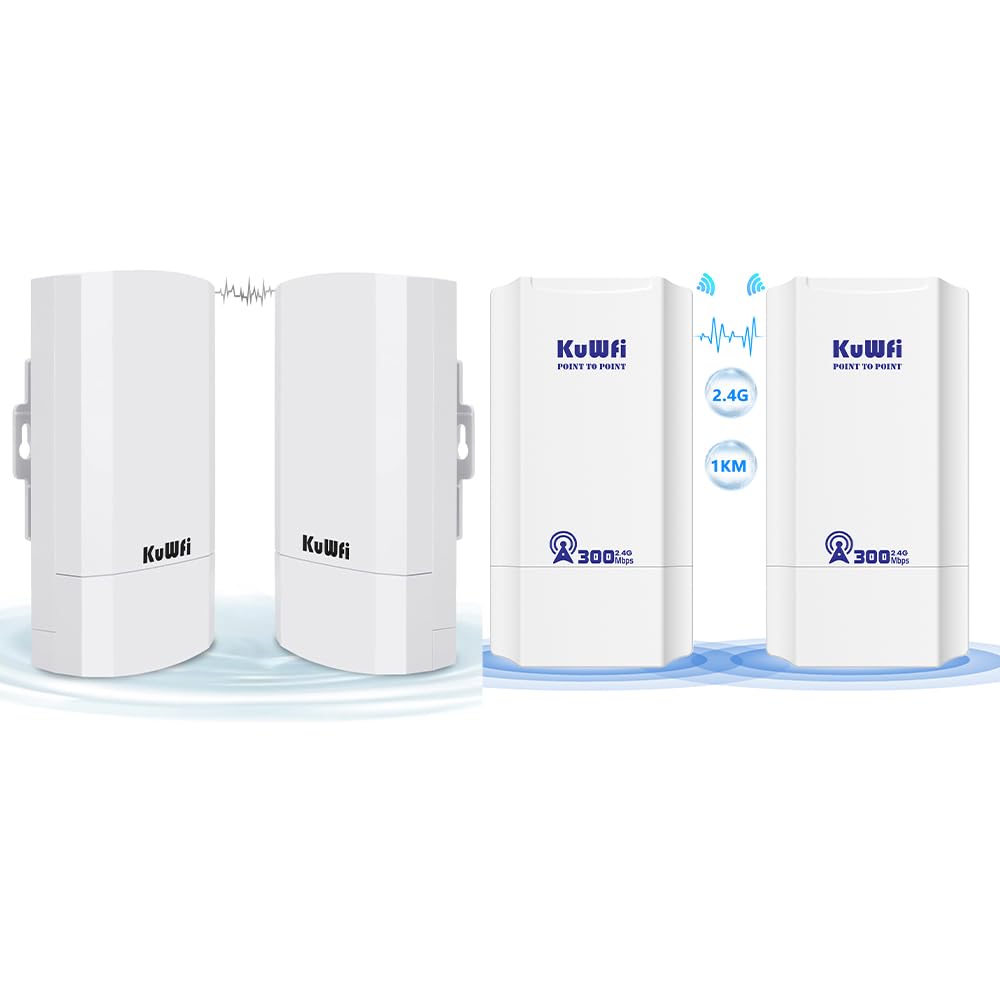
Figure 2.1: KuWFi CPE120/CPE130 Wireless Bridge Devices.

Figure 2.2: KuWFi CPE device highlighting 1KM long-range capability.
3. Package Awọn akoonu
Nigbati o ba ṣii package, jọwọ rii daju pe gbogbo awọn nkan ti o wa ni isalẹ wa ati ni ipo to dara:
- KuWFi CPE120/CPE130 Wireless Bridge Device(s)
- PoE (Power over Ethernet) Injector(s)
- Okun Ethernet
- Mounting Accessories (e.g., zip ties)
- Afowoyi Olumulo (iwe-ipamọ yii)

Figure 3.1: Included accessories and device dimensions.
4. Hardware Loriview
Familiarize yourself with the physical components of the CPE device.
4.1. Awọn ibudo ati awọn Atọka
Each CPE device features the following ports and LED indicators on its underside:
- Ibudo WAN: Used for connecting to the network (e.g., router, NVR) and for Power over Ethernet (PoE) input.
- Ibudo LAN: Used for connecting to client devices (e.g., IP camera, PC).
- Bọtini Tuntun: Used to reset the device to factory defaults. Press and hold for approximately 5-10 seconds while the device is powered on.
- Ifihan LED: A digital display showing configuration status (e.g., '8.8.8.8' for Master, '8.8.8.9' for Slave, or other status codes).
- Awọn imọlẹ Atọka:
- LED agbara: Ṣe afihan ipo agbara.
- WAN LED: Indicates WAN port activity.
- LED LAN: Ntọka si iṣẹ ibudo LAN.
- Awọn LED Agbara ifihan agbara: Multiple LEDs indicating wireless signal strength.

Figure 4.1: CPE Device Ports and Indicators (Master and Slave examples).

Nọmba 4.2: Alaye view of CPE device ports and controls.
5. Eto ati fifi sori
The KuWFi CPE devices can be configured for Point-to-Point (PTP) or Point-to-Multi-Point (PTMP) connections. One device will act as the Oga, and the other(s) as Ẹrú (awọn).
5.1. Basic Connection Diagram (PTP)
For a basic Point-to-Point setup, you will need two CPE devices. One acts as the Master, connected to your network source (e.g., router), and the other as the Slave, connected to your client device (e.g., IP camera, PC).
- Master Device Setup:
- Connect an Ethernet cable from your router/NVR to the WAN port of the Master CPE device.
- Power the Master CPE device using the provided PoE injector.
- Ensure the LED display on the Master device shows the correct configuration (e.g., '8.8.8.8').
- Slave Device Setup:
- Connect an Ethernet cable from the LAN port of the Slave CPE device to your client device (e.g., IP camera, PC).
- Power the Slave CPE device using the provided PoE injector.
- Ensure the LED display on the Slave device shows the correct configuration (e.g., '8.8.8.9').
- Iṣagbesori: Mount the devices outdoors in a clear line of sight for optimal signal transmission. Use the provided mounting accessories.

Figure 5.1: Point-to-Point Extended Network Diagram.

Figure 5.2: Point-to-Point and Point-to-Multi-Point Extended Camera Monitoring Range.
Figure 5.3: Wireless Bridge Master and Slave Connection Examples.
5.2. Configuring Master/Slave Roles
The CPE devices typically use an LED display for initial configuration. Refer to the device's quick start guide or the manufacturer's website for specific steps on how to set one device as Master and the other(s) as Slave(s) using the LED display or a web ni wiwo.
- Oga: Connects to the main network source (e.g., router).
- Ẹrú: Connects to the remote client device(s).
6. Awọn ọna ṣiṣe
The KuWFi CPE devices support two primary operating modes:
- Ipo AP (Ibi Iwọle): In this mode, the device acts as a wireless access point, broadcasting a Wi-Fi signal for other devices to connect to. This is typically used when the CPE is connected to a wired network and needs to provide wireless access.
- Ipo Afara: In this mode, the device creates a wireless link between two wired networks or extends a wired network wirelessly. This is the primary mode for PTP/PTMP connections, where one CPE bridges the network to another CPE.
7. Itọju
To ensure the longevity and optimal performance of your KuWFi CPE devices, follow these maintenance guidelines:
- Ninu: Periodically clean the exterior of the devices with a soft, dry cloth. Do not use liquid cleaners or aerosols.
- Awọn imudojuiwọn famuwia: Check the KuWFi official webAaye (www.kuwfi.com) for the latest firmware updates. Keeping the firmware updated can improve performance, add new features, and fix bugs.
- Idaabobo Ayika: Ensure the devices are securely mounted and protected from extreme weather conditions beyond their specified operating range.
8. Laasigbotitusita
If you encounter issues with your KuWFi CPE devices, refer to the following common troubleshooting steps:
- Ko si Agbara:
- Ensure the PoE injector is properly connected and receiving power.
- Ṣayẹwo gbogbo awọn asopọ okun.
- Ko si Isopọ Nẹtiwọọki:
- Verify that the Master and Slave devices are correctly configured (e.g., LED display shows correct codes).
- Check the WAN/LAN LED indicators for activity.
- Ensure there is a clear line of sight between the Master and Slave devices.
- Try resetting both devices to factory defaults and reconfiguring them.
- Confirm that the connected router/NVR is functioning correctly.
- Weak Signal/Slow Speed:
- Adjust the alignment of the devices to ensure optimal signal strength.
- Check for obstructions between the devices.
- Ensure the distance between devices does not exceed the recommended range (1KM).
- Dín ìdènà láti ọ̀dọ̀ àwọn ẹ̀rọ alailowaya 2.4GHz mìíràn kù.
- Ko le Wiwọle Web Interface (if applicable):
- Ensure your computer is connected to the CPE's LAN port or a network segment that can reach the CPE's IP address.
- Verify the CPE's default IP address (refer to the quick start guide or device label).
- Temporarily disable your computer's firewall.
For further assistance, please visit the KuWFi support webojula tabi olubasọrọ onibara iṣẹ.
9. Awọn pato
| Ẹya ara ẹrọ | Apejuwe |
|---|---|
| Brand | KuWFi |
| Orukọ awoṣe | CPE120, CPE130 |
| Pataki Ẹya | Wiwọle Point Ipo, WPS |
| Igbohunsafẹfẹ Band Class | Ẹgbẹ-ẹyọkan (2.4GHz) |
| Alailowaya Ibaraẹnisọrọ Alailowaya | 802.11n |
| Awọn ẹrọ ibaramu | Kọǹpútà alágbèéká, Kọmputa Ti ara ẹni, Foonuiyara, Tabulẹti |
| Asopọmọra Technology | Wi-Fi |
| Eriali Iru | Ti o wa titi |
| Aabo Ilana | WPS (Eto Idaabobo Wi-Fi) |
| Ọna Iṣakoso | Touch (referring to LED display interaction) |
| LAN Port bandiwidi | 1000 Mbps |
| Oṣuwọn Gbigbe Data ti o pọ julọ | 300 Megabits fun keji |
| Is Modem Compatible | Rara |
| Ibora | 1KM Long Range |
| Awọn iwọn otutu ti nṣiṣẹ | -30 ℃ si 55 ℃ |
| Ibi ipamọ otutu | -40 ℃ si 70 ℃ |
| mabomire / eruku | Bẹẹni |
| Monomono Idaabobo | Bẹẹni |
10. Alaye Aabo
Jọwọ ṣe akiyesi awọn iṣọra ailewu wọnyi:
- Ma ṣe ṣi ẹrọ naa casing. Tọkasi gbogbo iṣẹ si oṣiṣẹ oṣiṣẹ.
- Ensure proper grounding for lightning protection.
- Use only the power adapter and PoE injector provided by the manufacturer.
- Avoid placing the device near heat sources or in direct sunlight for prolonged periods.
- Keep the device away from water or excessive humidity.
11. Atilẹyin ọja ati Support
Specific warranty information is not provided within this manual. For details regarding warranty coverage, technical support, or customer service, please refer to the product packaging, the official KuWFi webAaye (www.kuwfi.com), or contact your retailer.