1. Ifihan
This manual provides comprehensive instructions for the installation, operation, and maintenance of your Juno 2-Inch Flat Trim Canless Wafer LED Downlight. This innovative lighting solution is designed for quick and easy installation in various ceiling spaces, eliminating the need for traditional recessed housings. It features an all-in-one design with switchable white color temperature and adjustable lumen output, offering versatile lighting for accent, task, or general illumination.

Figure 1: Juno 2-Inch Flat Trim Canless Wafer LED Downlight with its remote driver box.
2. Alaye Aabo
Please read all instructions carefully before installation and retain this manual for future reference. Failure to follow these instructions may result in electric shock, fire, or other hazards.
- Máa pa agbára ní ẹ̀rọ ìfọ́mọ́ra kí o tó bẹ̀rẹ̀ sí í fi sori ẹ̀rọ tàbí kí o ṣe àtúnṣe èyíkéyìí.
- All electrical connections must be in accordance with local and National Electrical Code (NEC) standards. If you are unfamiliar with proper electrical wiring connections, consult a qualified electrician.
- Ma ṣe yipada tabi paarọ ọja ni eyikeyi ọna.
- Rii daju pe ipese voltage ni ibamu pẹlu imuduro (120 Volts).
- This product is suitable for wet locations and is IC Rated for direct contact with insulation.
- Do not install damaged products. Inspect the product upon receipt.
3. Package Awọn akoonu
Rí i dájú pé gbogbo àwọn èròjà wà níbẹ̀ tí wọn kò sì bàjẹ́ kí o tó tẹ̀síwájú pẹ̀lú fífi sori ẹrọ:
- LED Lens (Integrated with Downlight Fixture)
- Mounting Hardware (Spring clips, remote driver box)
Note: The downlight fixture and remote driver box are typically pre-assembled or connected.
4. Awọn ẹya ara ẹrọ
The Juno 2-Inch Flat Trim Canless Wafer LED Downlight offers advanced features for optimal lighting performance and ease of use:
- Canless Design: No housing required, allowing installation directly into ceiling drywall.
- Switchable White Color Temperature (SWW5): Easily select from five color temperature options:
- 2700K Asọ White
- 3000K Gbona White
- 3500K didoju White
- 4000K Cool White
- 5000K Ojumomo
- Adjustable Lumen Output (ALO25): Choose from three brightness levels (Low, Medium, High) to suit your needs.
- Ti o le ṣe dimmable: Compatible with most standard TRIAC dimmers, dimming down to 10 percent.
- Agbara Lilo: Long-life LEDs and a high-efficiency driver ensure superior illumination and extended service life.
- Ti won won IC: Approved for direct contact with insulation, simplifying installation in insulated ceilings.
- Wet Location Certified: Suitable for use in bathrooms, showers, and outdoor covered areas.

Figure 2: Switches on the remote driver box allow selection of color temperature and lumen output.

Figure 3: Visual guide to the different color temperatures available.
5. Eto ati fifi sori
The canless design simplifies installation. Follow these steps for a secure and proper setup:
- Pa Agbara: Before starting, ensure the power to the installation area is turned off at the circuit breaker.
- Mura Ṣii silẹ: Cut a 2-inch diameter hole in the ceiling drywall at the desired location. Ensure there are no obstructions (joists, pipes, wires) within the ceiling space.
- Asopọmọra Waya:
- Open the remote driver box.
- Connect the building's supply wires (hot, neutral, ground) to the corresponding wires in the driver box using appropriate wire connectors.
- Rii daju pe gbogbo awọn asopọ wa ni aabo ati idabobo daradara.
- Close the driver box cover.
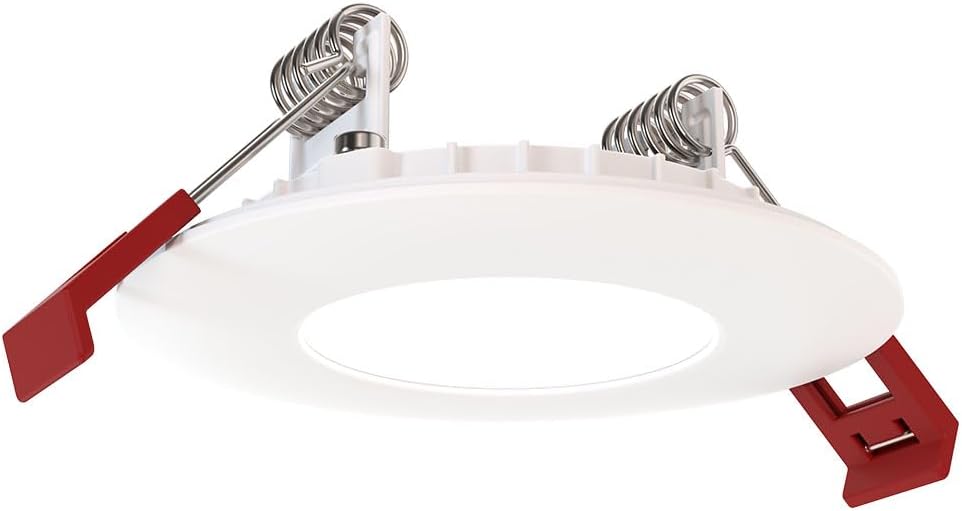
Figure 4: The remote driver box houses the electrical connections and adjustment switches.
- Select Settings (Pre-Installation): Before inserting the downlight into the ceiling, use the switches on the remote driver box to select your desired color temperature (2700K-5000K) and lumen output (Low, Medium, High). These settings can be adjusted later if needed, but it's easier before final installation.
- Insert Driver Box: Place the remote driver box into the ceiling opening. Its slim design allows it to fit into tight spaces.
- Fi sori ẹrọ Downlight:
- Gently push the spring-loaded clips on the sides of the downlight upwards.
- Insert the downlight into the ceiling opening.
- Once the downlight is fully inserted, release the clips. The clips will spring back down and firmly secure the fixture against the ceiling.

Figure 5: Dimensions of the downlight and driver box for installation planning.
- Pada Agbara pada: Turn the power back on at the circuit breaker. Test the downlight's functionality.
6. Awọn ilana Iṣiṣẹ
Your Juno LED Downlight is designed for simple operation once installed.
- Titan/Apapa: Ṣakoso ina nipa lilo iyipada odi boṣewa ti a so mọ Circuit naa.
- Dimming: If connected to a compatible TRIAC dimmer switch, adjust the brightness by manipulating the dimmer control. The light can be dimmed down to 10% of its maximum output.
- Adjusting Color Temperature and Lumen Output:
The color temperature and lumen output are set via switches located on the remote driver box (refer to Figure 2). To change these settings after installation, you will need to access the driver box, which may require temporarily removing the fixture from the ceiling or accessing the box through an attic/access panel if it was placed there. It is recommended to set these preferences during installation.
- Yipada Iwọn otutu Awọ: Select from 2700K, 3000K, 3500K, 4000K, or 5000K.
- Lumen Output Switch: Choose Low, Medium, or High brightness.
7. Itọju
The Juno LED Downlight requires minimal maintenance due to its durable design and long-life LEDs.
- Ninu: Rii daju pe agbara wa ni pipa ṣaaju ṣiṣe mimọ. Mu imuduro rẹ nu pẹlu rirọ, gbẹ, tabi die-die damp asọ. Ma ṣe lo abrasive ose tabi olomi, bi wọn le ba ipari tabi itanna irinše.
- Igbesi aye LED: The integrated LEDs are designed for extended operation and do not require replacement under normal use.
8. Laasigbotitusita
Tí o bá ní ìṣòro pẹ̀lú ìmọ́lẹ̀ rẹ, wo àwọn ìṣòro àti ìdáhùn tí ó wọ́pọ̀ wọ̀nyí:
| Isoro | Owun to le Fa | Ojutu |
|---|---|---|
| Imọlẹ ko tan. | Ko si agbara si ohun elo. Loose onirin asopọ. Àyípadà tí ó ní àbùkù tàbí ẹ̀rọ ìfọ́wọ́sí. | Ṣayẹwo Circuit fifọ ati odi yipada. Turn off power, check all wire connections in the driver box. Test switch or breaker; replace if necessary. |
| Ina flickers tabi dims aibojumu. | Iyipada dimmer ti ko ni ibamu. Alailowaya onirin. Apọju Circuit. | Ensure dimmer is TRIAC compatible and designed for LED lighting. Pa agbara, ṣayẹwo gbogbo awọn asopọ waya. Dín ẹrù kù lórí ẹ̀rọ náà tàbí kí o kan sí onímọ̀ ẹ̀rọ iná mànàmáná. |
| Iwọn otutu tabi imọlẹ awọ ti ko tọ. | Switches on driver box set incorrectly. | Access the remote driver box and adjust the color temperature and lumen output switches to desired settings. |
Tí ìṣòro náà bá ń bá a lọ lẹ́yìn tí a ti gbìyànjú àwọn ìdáhùn wọ̀nyí, kan si ìrànlọ́wọ́ oníbàárà.
9. Awọn pato
| Iwa | Ẹ̀kúnrẹ́rẹ́ |
|---|---|
| Brand | Juno |
| Orukọ awoṣe | WF2 RD ALO25 SWW5 90CRI 120 MW M6 (Round LED) |
| Iwọn | 2-Inch Flat Trim |
| Àwọ̀ | Matte White |
| Ohun elo | Aluminiomu, Polycarbonate |
| Imọlẹ Orisun Orisun | LED |
| Voltage | 120 Volts |
| Wattage | 9.2 watt |
| Pataki Awọn ẹya ara ẹrọ | Adjustable Color Temperature (2700K-5000K), Dimmable (Triac), Energy Efficient, Waterproof |
| Iru fifi sori ẹrọ | Flush Mount (Canless) |
| inu ile / ita gbangba Lilo | Indoor, Outdoor (Wet Location Certified) |
| Ọja Mefa | 3.2"L x 3.2"W x 1.3"H (Fixture) |
| Iwọn Nkan | 13.2 iwon |
| Awọn iwe-ẹri | CSA certified, Title 24, Energy Star, IC Rated |
10. Atilẹyin ọja ati Support
Atilẹyin ọja: This product comes with a Limited Warranty. Please refer to the product packaging or the manufacturer's official website for specific terms and conditions of the warranty.
Atilẹyin Onibara: For technical assistance, troubleshooting beyond this manual, or warranty claims, please contact Juno customer support. Contact information can typically be found on the product packaging or the official Juno webojula.
Awọn orisun Ayelujara: For additional information, product updates, or FAQs, visit the official Juno webojula: www.acuitybrands.com/brands/juno