Ọrọ Iṣaaju
This manual provides essential information for the installation, operation, and maintenance of your KICKER CXA400.1 Mono Class D Car Amplifier and CXARC Remote Bass Control. Please read this manual thoroughly to ensure proper use and to achieve optimal performance from your audio system.

Aworan: Oke view of the KICKER CXA400.1 Mono Class D Car Amplifier.
The KICKER CXA400.1 amplifier is designed for efficient power delivery to subwoofers, featuring a Class-D power plant and a compact design. The KICKER CXARC remote control allows for convenient adjustment of bass levels.
Alaye Aabo
Nigbagbogbo ṣe akiyesi awọn iṣọra ailewu atẹle nigba fifi sori ẹrọ ati ṣiṣẹ rẹ ampolutọpa:
- Disconnect the vehicle's battery negative terminal before making any electrical connections.
- Rii daju pe gbogbo awọn onirin ti wa ni ipalọlọ daradara ati ni aabo lati yago fun ibajẹ tabi awọn iyika kukuru.
- Lo agbara iwọn ti o yẹ ati awọn onirin ilẹ bi pato ninu apakan fifi sori ẹrọ.
- Yago fun iṣagbesori awọn amplifier in locations exposed to excessive heat, moisture, or vibration.
- Ma ṣe ṣiṣẹ awọn amplifier if it is damaged or malfunctioning. Refer to the troubleshooting section or contact KICKER support.
- Fífi ara hàn fún ìwọ̀n ìfúnpọ̀ ohùn gíga fún ìgbà pípẹ́ lè fa àìgbọ́ran títí láé. Ṣọ́ra nígbà tí o bá ń ṣe àtúnṣe ìwọ̀n ìfúnpọ̀ ohùn.
Package Awọn akoonu
Daju pe gbogbo awọn nkan wa ninu apo rẹ:
- KICKER CXA400.1 Mono Class D Car Ampitanna
- KICKER CXARC Remote Bass Control
- Mounting Hardware (screws, vertical mounting brackets)
- Iwe afọwọkọ eni (iwe yii)
Eto ati fifi sori
Proper installation is crucial for optimal performance and safety. If you are unsure about any part of the installation process, consult a professional installer.
Iṣagbesori awọn Ampitanna
The CXA400.1 amplifier features a compact design and includes vertical mounting hardware for flexible installation options. Choose a location that is dry, well-ventilated, and protected from direct sunlight or excessive heat. Ensure there is sufficient space around the amplifier fun air san.
Awọn isopọ onirin
All wiring should be done with the vehicle's battery disconnected. Use high-quality power, ground, and speaker wires of appropriate gauge.

Aworan: View of the KICKER CXA400.1 amplifier showing RCA input/output and control panel.
- Asopọ agbara: Connect the main power wire from the battery (with an inline fuse) to the amplifier's +12V terminal.
- Isopọ ilẹ: Connect a short, heavy-gauge ground wire from the amplifier's GND terminal to a clean, bare metal point on the vehicle's chassis.
- Titan-latọna jijin: Sopọ awọn amplifier's REM terminal to the remote turn-on output of your head unit.
- Ibuwọlu Input: The CXA400.1 accepts both low-level (RCA) and high-level (speaker wire) input signals. It can accept up to 40 volts of speaker-level input, eliminating the need for line-out converters in many cases. Connect your head unit's RCA outputs to the amplifier's INPUT terminals for low-level input, or use the high-level input if your head unit does not have RCA outputs.
- Agbejade Agbọrọsọ: So subwoofer (s) rẹ pọ si ampÀwọn ìpele ìjáde agbọ́hùnsọ̀ tí ó wà ní lifier. Rí i dájú pé ó péye.

Aworan: Apa view of the KICKER CXA400.1 amplifier showing power, ground, remote, and speaker terminals.
Awọn Eto Ibẹrẹ
After all connections are made, reconnect the vehicle's battery. Before playing audio, set the amplifier's gain control to its minimum position. Adjust other settings like crossover and bass boost as needed for your specific audio setup.
Ṣiṣẹ awọn Amplifier and Bass Knob
The KICKER CXA400.1 amplifier offers several adjustable features to fine-tune your audio experience. The CXARC remote bass control provides convenient real-time adjustments.
Gba Iṣakoso
Awọn ere Iṣakoso ibaamu awọn amplifier's input sensitivity to the output level of your head unit. Start with the gain at minimum and slowly increase it until you hear distortion, then back off slightly. This ensures maximum clean signal from your head unit.
adakoja Eto
Awọn amplifier features a variable 12dB low-pass crossover (50Hz–200Hz). This filter allows only frequencies below the set point to pass to the subwoofer, preventing higher frequencies from reaching it and improving overall sound clarity. Adjust this to blend smoothly with your main speakers.
Subsonic Ajọ
A 24dB/octave subsonic filter set at 25Hz helps protect your subwoofer by removing extremely low, inaudible frequencies that can cause excessive cone excursion and potential damage. It also improves efficiency by preventing the amplifier from wasting power on these frequencies.
KickEQ Bass didn
The KickEQ offers a variable 0-6dB bass boost centered at 40Hz. Use this feature to enhance low-frequency response. Adjust carefully to avoid distortion and speaker damage.
CXARC Remote Bass Control
The CXARC remote bass control connects to your CXA400.1 amplifier and allows you to adjust the bass level conveniently from the driver's seat. This provides on-the-fly control over your subwoofer's output without needing to access the amplifier taara.
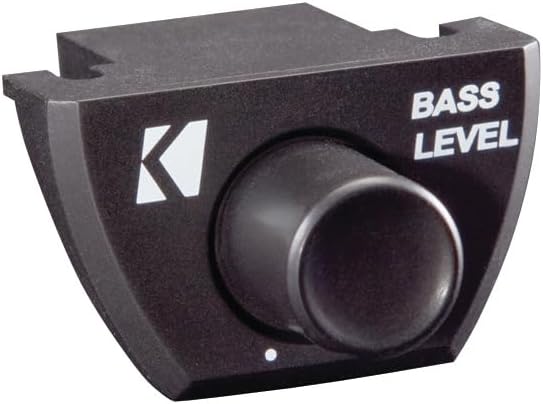
Image: The KICKER CXARC Remote Bass Control knob.
Itoju
Your KICKER amplifier and bass knob require minimal maintenance to ensure long-lasting performance.
- Ninu: Lorekore nu awọn amplifier and remote with a soft, dry cloth to remove dust and dirt. Do not use harsh chemicals or abrasive cleaners.
- Awọn isopọ: Nígbà míì, máa ṣàyẹ̀wò gbogbo àwọn ìsopọ̀ wáyà láti rí i dájú pé wọ́n wà ní ààbò àti pé wọn kò ní ìbàjẹ́. Àwọn ìsopọ̀ tí kò ní ìfọ́ lè fa àìṣiṣẹ́ tàbí ìbàjẹ́.
- Afẹfẹ: Rii daju pe awọn ampÀwọn ìyẹ́ ìtútù lifier kò ní dí wọn lọ́wọ́ láti jẹ́ kí ooru wọn máa tú jáde dáadáa.
Laasigbotitusita
If you experience issues with your KICKER amplifier, tọka si awọn iṣoro ti o wọpọ ati awọn ojutu wọnyi:
- Ko si Agbara: Check the inline fuse on the power wire, ensure the ground connection is solid, and verify the remote turn-on wire is receiving 12V when the head unit is on.
- Ko si Ohun: Check all input and output connections. Ensure the gain is not set to minimum. Verify the head unit is sending an audio signal. Check speaker wires for shorts or open circuits.
- Ohun Yiyi: Reduce the gain setting. Check for proper crossover and bass boost settings. Ensure the input signal is not overdriven.
- Amplifárì Gbígbóná jù: Rii daju deedee fentilesonu ni ayika amplifier. Check the impedance of your speakers; ensure it matches the amplifier ká agbara.
- Remote Bass Knob Not Working: Check the connection cable between the CXARC and the amplifier. Rii daju pe amplifier ni agbara lori.
If problems persist after checking these points, contact KICKER customer support.
Awọn pato
| Ẹya ara ẹrọ | Sipesifikesonu |
|---|---|
| Igbara agbara (RMS) | 150x1 watts/ch at 4 Ohms, 300x1 watts/ch at 2 Ohms, 400x1 watts/ch at 1 Ohm |
| Idahun Igbohunsafẹfẹ | 25-200Hz |
| Input Sensitivity | 250mV-10V (Low Level), 1V-40V (High Level) |
| Ifihan Ibuwọlu-si-Noise | > 95dB |
| Adakoja ti nṣiṣe lọwọ | Ayípadà Lo-pass 50Hz–200Hz, 12dB/octave |
| Subsonic Ajọ | 25Hz @24dB/octave |
| KickEQ Boost | Variable 0-6dB @40Hz |
| Awọn iwọn | 8-1/8" x 5.9" x 17" (20.6cm x 15cm x 43cm) |
| Iwọn Nkan | 5.3 iwon |
| Nọmba awoṣe | KickerBDL240611-01 (Bundle) |
Atilẹyin ọja
The KICKER CXA400.1 Amplifier and CXARC Bass Knob are covered by a 1-Odun olupese atilẹyin ọja. This warranty covers defects in materials and workmanship under normal use. Please retain your proof of purchase for warranty claims. For specific warranty terms and conditions, refer to the documentation included with your product or visit the official KICKER webojula.
Atilẹyin
For technical assistance, troubleshooting, or warranty inquiries, please contact KICKER customer support. You can find contact information and additional resources on the official KICKER website. When contacting support, please have your product model number (CXA400.1, CXARC) and proof of purchase readily available.
Ṣabẹwo si KICKER Store on Amazon fun diẹ ẹ sii awọn ọja ati alaye.