1. Ifihan
This manual provides detailed instructions for the installation, operation, and maintenance of your Vikye KYZ-20A Intelligent PWM Solar Charge Controller. This device is designed to manage the power flow from your solar panels to your battery bank, ensuring efficient charging and protecting your batteries from overcharge and over-discharge. It features a 3-stage PWM charge management system, an industrial microcontroller, and a clear LCD display with a backlight for easy monitoring and adjustment of parameters.
2. Awọn Ilana Aabo pataki
- Ensure your battery has sufficient voltage fun oludari lati da iru batiri mọ ṣaaju fifi sori akọkọ.
- Okun batiri yẹ ki o kuru bi o ti ṣee ṣe lati dinku pipadanu agbara.
- The charge controller is designed for regulating solar modules only. Do not connect any other charging source to the controller.
- The controller will generate heat during operation. Ensure adequate ventilation around the unit.
- Nigbagbogbo so batiri pọ ni akọkọ, lẹhinna nronu oorun, ati nikẹhin fifuye naa. Ge asopọ ni ọna yiyipada.
- Avoid short circuits on the battery, solar panel, and load terminals.
- This device is for indoor use only. Protect it from water, moisture, and direct sunlight.
- Kan si onimọ-ẹrọ ina ti o mọye ti o ba ni idaniloju nipa apakan eyikeyi ti fifi sori ẹrọ naa.
3. Ọja Ipariview
The Vikye KYZ-20A Solar Charge Controller features a robust design with an intuitive LCD display and multiple protection functions. It supports both 12V and 24V battery systems and offers a 2A USB output for charging small devices.
3.1 Key Awọn ẹya ara ẹrọ
- Industrial microcontroller for adjustable charge and discharge parameters.
- Full 3-stage PWM isakoso idiyele.
- Comprehensive protection functions: over-current, short circuit, open circuit, reverse connection.
- Large LCD display with backlight for clear visibility, especially at night.
- Switchable charging function for lithium and lead-acid batteries.
- Integrated 5V/2A USB output.
3.2 Idanimọ paati

olusin 1: Iwaju view of the KYZ-20A Solar Charge Controller. This image displays the front of the controller, highlighting the LCD screen, control buttons, and the six terminal connections at the bottom.

olusin 2: Apa view of the KYZ-20A Solar Charge Controller terminals. This image shows the six screw terminals for connecting the battery, solar panel, and DC load, along with the DC output port.
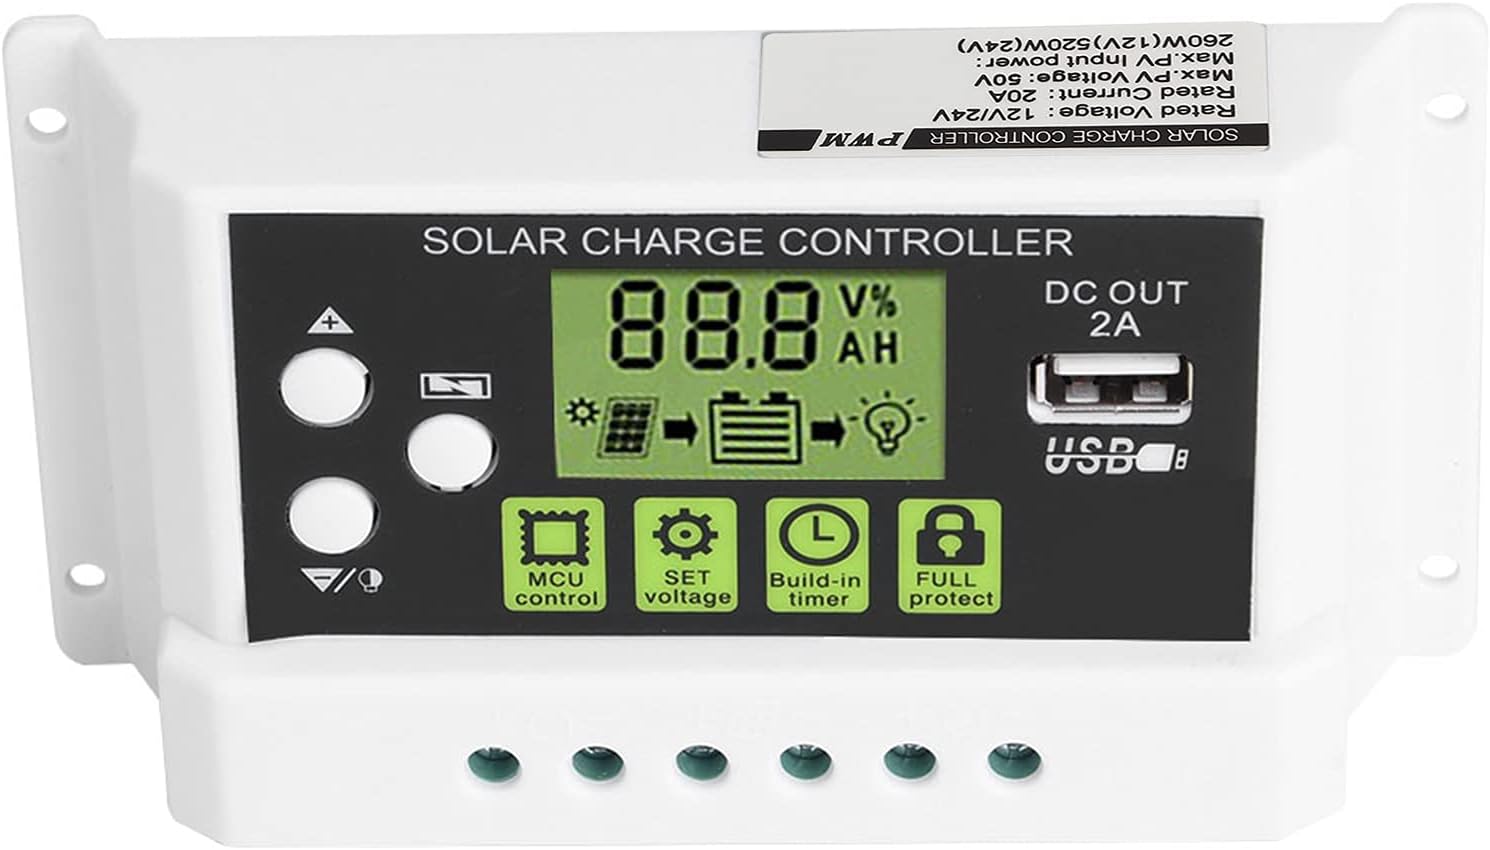
Figure 3: Close-up of the LCD display and control buttons. Aworan yii pese alaye kan view of the LCD screen, showing battery voltage, charge/discharge status, and icons for MCU control, SET voltage, Build-in timer, and Full protect functions. The USB output port is also visible.

Figure 4: LCD display with backlight function. This image illustrates the controller's screen with its backlight active, enhancing visibility in low-light conditions.
4. fifi sori
Follow these steps carefully to install your solar charge controller. Incorrect installation can damage the device or other components.
- Mura Aaye fifi sori ẹrọ: Choose a dry, well-ventilated indoor location away from direct sunlight, high temperatures, and moisture. Ensure there is enough space around the controller for heat dissipation.
- So batiri pọ: Connect the battery to the charge controller first. Ensure the battery has sufficient voltage (at least 10V for 12V systems, 20V for 24V systems) for the controller to recognize the battery type. Connect the positive (+) and negative (-) terminals correctly. The battery cable should be as short as possible to minimize voltage ju.
- Solar Panel: Connect the solar panel to the charge controller. Ensure correct polarity (+ to + and - to -). The controller is designed for solar modules only; do not connect other power sources.
- Connect the DC Load (Optional): If you have a DC load, connect it to the load terminals of the controller. Ensure correct polarity.
- Jẹrisi Awọn isopọ: Double-check all connections for correct polarity and secure fastening.
Akiyesi pataki: Disconnect components in the reverse order: first the load, then the solar panel, and finally the battery.
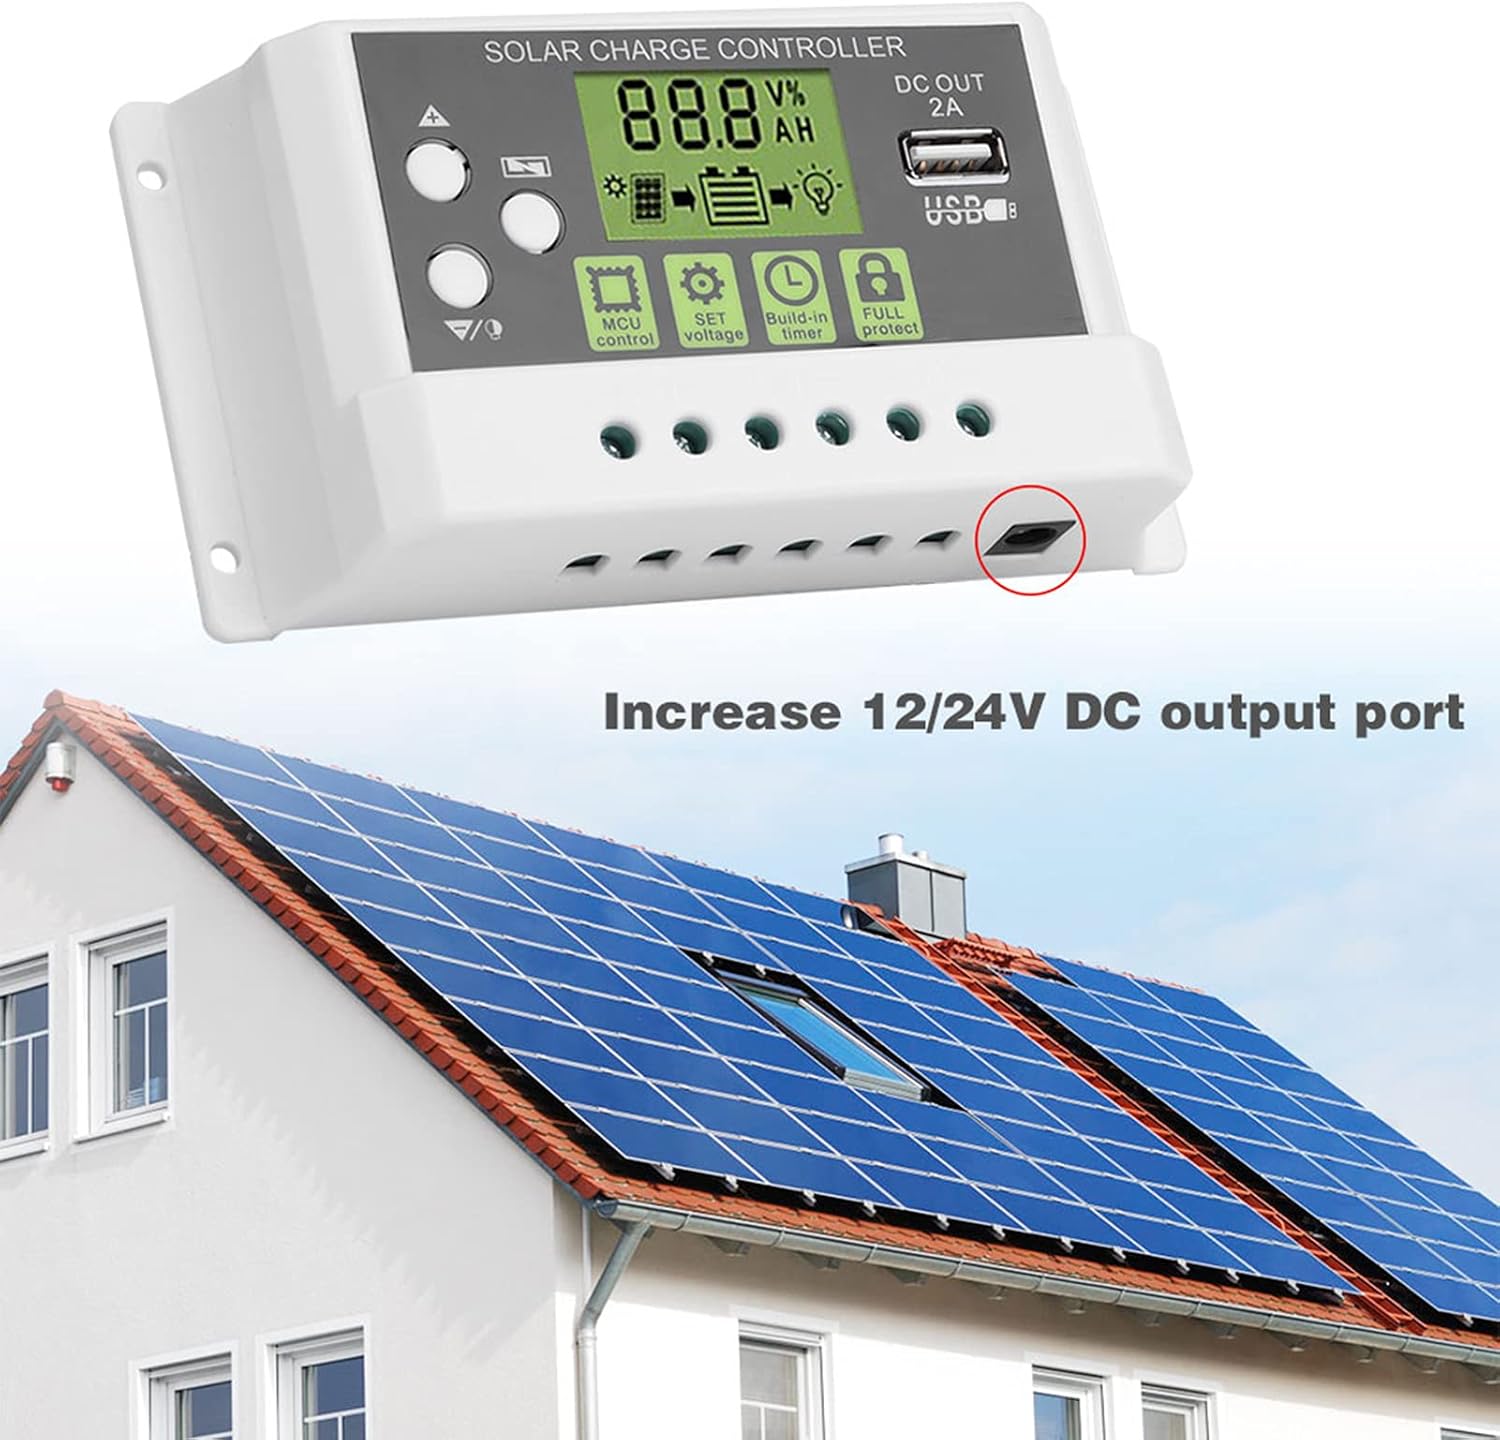
Olusin 5: Example installation diagram. This image illustrates the general setup of the solar charge controller within a solar power system, connecting to solar panels and a battery bank, and highlighting the DC output port.
5. Isẹ
The controller's LCD display provides real-time system information, and the buttons allow for parameter adjustments.
Ifihan ati Awọn bọtini LCD 5.1
The LCD screen displays various parameters such as battery voltage, charging current, discharging current, and battery state of charge. The backlight function improves visibility in dark environments.
- Awọn bọtini oke/isalẹ: Used to navigate through display menus and adjust parameter values.
- Ṣeto Bọtini: A lo lati tẹ ipo eto paramita sii ati jẹrisi awọn yiyan.
- MCU Control: Indicates the microcontroller is actively managing the system.
- SET Voltage: Allows adjustment of various voltage parameters (e.g., float voltage, iwọn kekeretage disconnect).
- Build-in Timer: Configures load control based on time settings.
- Full Protect: Indicates active protection features (e.g., overcharge, short circuit).
5.2 Eto Eto
To enter parameter setting mode, press and hold the SET button for a few seconds. Use the Up/Down buttons to navigate through parameters and adjust values. Press SET again to confirm and save changes. Refer to the specifications section for default voltagawọn iye.
- Aṣayan Iru Batiri: The controller supports both lithium and lead-acid batteries. Ensure the correct battery type is selected in the settings for optimal charging.
- Iṣakoso fifuye: The controller can manage the DC load output. This can be set to always on, always off, or controlled by a timer (e.g., dusk to dawn).
5.3 Ijade USB
The integrated 5V/2A USB output port can be used to charge small electronic devices. This output is active when the battery has sufficient charge.
6. Itọju
Itọju deede ṣe idaniloju igbesi aye gigun ati iṣẹ ti o dara julọ ti oludari idiyele oorun rẹ.
- Ninu: Periodically clean the controller's exterior with a dry cloth to remove dust and dirt. Do not use liquid cleaners.
- Ṣayẹwo Asopọmọra: Annually inspect all wiring connections to ensure they are tight and free from corrosion. Loose connections can lead to power loss or overheating.
- Afẹfẹ: Rí i dájú pé àwọn ihò afẹ́fẹ́ kò dí láti jẹ́ kí ooru má baà tú jáde dáadáa.
- Awọn ipo Ayika: Verify that the controller remains in a dry, well-ventilated environment within its specified operating temperature range.
7. Laasigbotitusita
If you encounter issues with your solar charge controller, refer to the following common problems and solutions:
- Ko si Ifihan/Ko si Agbara:
- Check battery connections and ensure correct polarity.
- Daju batiri voltage is above the minimum operating threshold (e.g., 10V for 12V systems).
- Inspect battery fuse (if applicable).
- Batiri Ko Ngba agbara:
- Ṣayẹwo awọn asopọ panẹli oorun ati polarity.
- Ensure solar panels are receiving adequate sunlight.
- Daju oorun nronu voltage is within the controller's input range.
- Ṣayẹwo fun eyikeyi shading lori oorun paneli.
- Fifuye ko ṣiṣẹ:
- Check load connections and polarity.
- Verify load settings in the controller (e.g., timer, always on).
- Rii daju pe batiri voltage jẹ loke awọn kekere voltage disconnect (LVD) threshold.
- Check for overcurrent or short circuit on the load.
- Controller Overheating:
- Rii daju pe fentilesonu to peye ni ayika oludari.
- Dín ẹrù kù tí ó bá ṣeé ṣe.
- Verify that the ambient temperature is within the operating range.
Ti iṣoro naa ba wa lẹhin ṣiṣe ayẹwo awọn aaye wọnyi, jọwọ kan si atilẹyin alabara.
8. Awọn pato
Technical specifications for the Vikye KYZ-20A Solar Charge Controller:
| Paramita | Value (KYZ-20A) |
|---|---|
| Batiri Voltage | 12V/24V (self-adaptive) |
| Gbigba agbara lọwọlọwọ | 20A |
| Sisọ lọwọlọwọ | 10A |
| Iwọle Solar Max | <41V |
| Equality Charge (Lithium) | 12.8V |
| Equality Charge (Lead-acid) | 14.4V |
| Floating Charge (Lithium) | 12.0V (default, adjustable 11.5-12.8V) |
| Floating Charge (Lead-acid) | 13.7V (default, adjustable 13-15V) |
| Undervoltage Protection (Lithium) | 10.7V (default, adjustable 9.0-11.0V) |
| Undervoltage Protection (Lead-acid) | 10.7V (default, adjustable 9.0-11.5V) |
| Discharge Reconnect (Lithium) | 11.6V (default, adjustable 11.0-11.7V) |
| Discharge Reconnect (Lead-acid) | 12.6V (default, adjustable 11.5-13V) |
| Imurasilẹ Lọwọlọwọ | <10mA |
| Ijade USB | 5V/2A ti o pọju |
| Awọn iwọn otutu ti nṣiṣẹ | -35 ~ 60 ℃ |
| Awọn iwọn | 133 x 70 x 35mm (5.2 x 2.7 x 1.3 inch) |
| Iwọn | Isunmọ 205g (7.2oz) |
Note: All red voltage values are for 12V systems; double them for 24V systems.


