Veout 16-Inch Portable Monitor User Manual
Model: V1-Blue
Brand: Veout
1. Ifihan
This manual provides comprehensive instructions for the setup, operation, and maintenance of your Veout 16-inch Portable Monitor. Please read this manual thoroughly before using the product to ensure proper functionality and to maximize your user experience. Keep this manual for future reference.
2. Ọja Ipariview
2.1 Key Awọn ẹya ara ẹrọ
- Ifihan: 16-inch IPS panel with 1920x1200P FHD resolution, 16:10 aspect ratio, 100% sRGB color gamut, 1200:1 contrast ratio, and 300 cd/m² brightness.
- Awọn ilọsiwaju wiwo: 178 ° jakejado viewing angle, FreeSync technology for smooth motion, HDR support for enhanced dynamic range, and low-blue-light/flicker-free layers for reduced eye strain.
- Apẹrẹ: Ultra-slim (0.36 inches) and lightweight (1.58 pounds) aluminum alloy construction with an integrated adjustable stand (0 to 75 degrees). Available in multiple colors.
- Asopọmọra: Two USB Type-C ports and one Mini-HDMI port for versatile device compatibility.
- Ohun: Built-in dual speakers and a 3.5mm audio jack.
- Awọn iṣakoso: Intuitive menu control wheel for easy adjustments.
2.2 Kini ni Apoti
Jẹrisi pe gbogbo awọn ohun kan wa ninu package:

Image: Contents of the product packaging, including the portable monitor, various connection cables, and the user manual.
- Veout 16-Inch Portable Monitor (V1-Blue)
- HDMI to Mini HDMI Cable
- USB-C si okun USB-A
- USB-C si okun USB-C
- Itọsọna olumulo
3. Eto Itọsọna
3.1 Initial Placement and Stand Adjustment
Place the monitor on a stable, flat surface. The integrated stand allows for adjustable viewing angles from 0 to 75 degrees. Gently extend the stand from the back of the monitor and position it to your desired angle for stable support.

Image: The portable monitor's thin profile and its adjustable stand, demonstrating a customizable viewigun igun.
3.2 Nsopọ si Awọn ẹrọ
The monitor supports both single-cable USB-C connections and two-cable HDMI connections.
3.2.1 USB-C Single-Cable Connection
For devices with full-featured USB-C ports (supporting video output and power delivery), connect one end of the provided USB-C to USB-C cable to the monitor's USB-C port and the other end to your device's USB-C port. This connection provides both video signal and power.

Image: A laptop connected to the portable monitor using a single USB-C cable, demonstrating a simplified setup.
3.2.2 HDMI and USB-A Power Connection
If your device does not have a full-featured USB-C port, or if you prefer to use HDMI, connect the Mini-HDMI end of the provided HDMI to Mini HDMI cable to the monitor's Mini-HDMI port and the standard HDMI end to your device's HDMI port. For power, connect the USB-C end of the USB-C to USB-A cable to the monitor's USB-C port and the USB-A end to a power source (e.g., a USB wall adapter or your laptop's USB-A port).

Image: A portable monitor connected to a laptop using both an HDMI cable for video and a USB-A cable for power, illustrating a two-cable setup.
3.3 Agbara Lori
Once connected, the monitor should automatically power on. If not, press the power button located on the side of the monitor.
4. Awọn ilana Iṣiṣẹ
4.1 Ipilẹ Awọn iṣẹ
- Titan/Apapa: Tẹ mọlẹ bọtini agbara fun iṣẹju diẹ.
- Wiwọle Akojọ aṣayan: Use the control wheel on the side of the monitor to access the On-Screen Display (OSD) menu.
- Brightness/Volume: Rotate the control wheel to adjust brightness or volume directly, or navigate to these settings within the OSD menu.

Aworan: A alaye view of the monitor's side, indicating the locations of the USB-C ports, Mini HDMI port, 3.5mm audio jack, dual speakers, and the control wheel for menu navigation and adjustments.
4.2 Landscape and Portrait Modes
The monitor can be used in both landscape and portrait orientations. The built-in stand supports stable positioning in either mode. Your connected device may automatically detect the orientation, or you may need to adjust it manually in your device's display settings.

Image: Two portable monitors displaying content, one in horizontal orientation and the other in vertical orientation, connected to a main computer.
5. Asopọmọra
The Veout portable monitor offers broad compatibility with various devices:
- Laptops/PCs: Connect via USB-C (single cable for video and power) or Mini-HDMI (for video) + USB-A (for power).
- Foonuiyara: Compatible with many USB-C enabled smartphones that support video output. Use a USB-C to USB-C cable.
- Awọn console ere: Connect Nintendo Switch (docked mode), Xbox, PS5, PS4 via Mini-HDMI. An external power source for the monitor may be required.
- Awọn ẹrọ miiran: Compatible with Mini PCs, cameras, and other devices with HDMI or full-featured USB-C output.

Image: A visual representation of various applications and operating systems running simultaneously across multiple screens, highlighting the monitor's multitasking potential.
6. Ifihan Eto
Access the On-Screen Display (OSD) menu using the control wheel to adjust various display settings:
- Imọlẹ/Itọtọ: Adjust the luminance and difference between light and dark areas.
- Eto awọ: Modify color temperature, hue, and saturation. The monitor supports 100% sRGB for accurate color reproduction.
- Ipo HDR: Enable or disable High Dynamic Range for enhanced contrast and color depth.
- FreeSync: Activate FreeSync to synchronize the monitor's refresh rate with your graphics card's frame rate, reducing screen tearing and stuttering. (Note: Requires an AMD Radeon graphics card for optimal performance.)
- Imọlẹ Buluu Kekere: Reduce blue light emission to minimize eye strain during prolonged use.

Image: A comparison demonstrating the visual improvement with HDR enabled, showing enhanced clarity and contrast.

Image: A visual comparison illustrating the effect of FreeSync technology, showing a smooth image when FreeSync is on versus a torn image when it is off.
7. Itọju
7.1 Ninu Atẹle
Lati nu iboju naa, rọra nu rẹ pẹlu asọ ti ko ni lint. Fun awọn ami alagidi, dampen the cloth slightly with water or a screen-cleaning solution. Avoid using harsh chemicals, abrasive cleaners, or direct spraying of liquids onto the screen.
7.2 Ibi ipamọ
When not in use, store the monitor in a cool, dry place, away from direct sunlight and extreme temperatures. It is recommended to use the original packaging or a protective sleeve to prevent scratches and damage during storage or transport.
8. Laasigbotitusita
If you encounter issues with your Veout portable monitor, refer to the following common problems and solutions:
- Ko si ifihan agbara:
- Ensure all cables (USB-C or HDMI/USB-A) are securely connected to both the monitor and your device.
- Verify that your device's display output is enabled and configured correctly (e.g., extended display, duplicate display).
- If using HDMI, ensure the monitor is receiving sufficient power via the USB-A connection.
- Ko si Agbara:
- Check the power connection. If using USB-C, ensure your device's USB-C port supports power delivery. If using USB-A for power, ensure the power source is active.
- Gbiyanju okun USB-C ti o yatọ tabi ohun ti nmu badọgba agbara.
- Image Issues (Flickering, Distorted Colors):
- Ṣàyẹ̀wò àwọn ìsopọ̀ okùn fún ìfọ́ tàbí ìbàjẹ́.
- Adjust display settings in the OSD menu (e.g., refresh rate, color mode).
- Update graphics drivers on your connected device.
- Ibamu MacBook: The monitor is engineered for MacBook Air/Pro, offering USB-C single-cable connection.
- Gaming Console Compatibility (Switch/PS5): The monitor works with Nintendo Switch (docked mode), PS5, and Xbox via USB-C or HDMI.
- Laptop/Mini PC/Phone Compatibility: The monitor offers plug-and-play USB-C connectivity for compatible devices, requiring no additional drivers.
9. Awọn pato
| Ẹya ara ẹrọ | Sipesifikesonu |
|---|---|
| Iwon iboju | 16 inches |
| Ipinnu | Awọn piksẹli 1920 x 1200 (FHD) |
| Apakan Ipin | 16:10 |
| Panel Iru | IPS |
| Awọ Gamut | 100% sRGB |
| Ipin Itansan | 1200:1 |
| Imọlẹ Aworan | Káńdélà 300 (cd/m²) |
| Viewigun igun | 178° |
| Ọja Mefa | 9.4 x 13.9 x 0.3 inches |
| Iwọn Nkan | 1.58 iwon (810g) |
| Asopọmọra | 2x USB Type-C, 1x Mini-HDMI |
| Awọn Agbọrọsọ ti a ṣe sinu | Bẹẹni |
| Iboju Iboju | Matte |
10. Atilẹyin ọja ati Support
Veout products are designed for reliability and performance. Your Veout 16-inch Portable Monitor comes with the following:


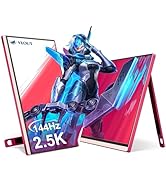
Image: Badges indicating 12-month warranty, 24-hour customer service, and 30-day money-back guarantee.
- Atilẹyin fun oṣu 12: Your monitor is covered by a 12-month warranty from the date of purchase against manufacturing defects.
- Ẹri Owo Pada 30-ọjọ: Tí o kò bá ní ìtẹ́lọ́rùn pẹ̀lú ohun tí o rà, o lè yẹ fún àtúnpadà láàrín ọjọ́ 30.
- Atilẹyin Onibara: For technical assistance or warranty claims, please contact Veout customer service. Support is available 24 hours.