
1. Ifihan
This manual provides essential instructions for the installation, operation, and maintenance of your new wangpeng Gray US Backlit Keyboard. Please read this manual thoroughly before proceeding with installation to ensure proper function and to prevent damage to your device.
2. Ibamu
This keyboard is specifically designed for the following HP laptop models:
- HP 17-CN Series
- HP 17CP Series
- HP 17S-CU Series
- HP 470 G8 Series
- HP TPN-I140 Series
- HP TPN-I139 Series
Important: Please verify your laptop model and compare the physical appearance of your original keyboard with the product images before installation.
3. Package Awọn akoonu
package rẹ yẹ ki o ni nkan wọnyi ninu:
- 1 x wangpeng Gray US Backlit Keyboard
4. Alaye Aabo
Ṣe akiyesi awọn iṣọra ailewu atẹle lakoko fifi sori:
- Always power off your laptop and disconnect it from the power adapter before beginning any installation or removal process.
- Remove the laptop battery if it is user-removable.
- Use appropriate tools to avoid damaging your laptop's casing tabi ti abẹnu irinše.
- Handle the keyboard and internal connectors with care to prevent electrostatic discharge (ESD) damage. Consider using an anti-static wrist strap.
- Tí o bá ní iyèméjì nípa ìgbésẹ̀ èyíkéyìí, wá ìrànlọ́wọ́ ọ̀jọ̀gbọ́n.
5. Eto / fifi sori
Installing a laptop keyboard typically involves disassembling parts of the laptop. The exact steps may vary by model. The following is a general guide. For detailed, model-specific instructions, refer to your laptop's official service manual or a reputable online guide for your specific HP model.
Awọn igbesẹ fifi sori ẹrọ gbogbogbo:
- Mura aaye iṣẹ rẹ: Ensure a clean, well-lit, and static-free environment. Gather necessary tools (e.g., small Phillips head screwdriver, plastic pry tool).
- Paa ati Ge asopọ: Shut down your laptop completely. Disconnect the AC adapter and remove the battery (if external). Press and hold the power button for 15 seconds to discharge any residual power.
- Access the Keyboard: Depending on your HP model, the keyboard may be accessible from the top (by prying it out) or from the bottom (requiring removal of the bottom case, motherboard, or other components). Carefully follow your laptop's specific disassembly guide.
- Disconnect Old Keyboard: Once the old keyboard is accessible, carefully disconnect its ribbon cables from the motherboard. There are usually two cables: one for the keys and one for the backlight. Gently lift the small retaining clips on the connectors before pulling the cables out.
- Yọ keyboard atijo kuro: Remove any screws or clips securing the old keyboard. Carefully lift it out.
- Fi Kííbọọ̀dù Tuntun Sílẹ̀: Position the new wangpeng keyboard into place. Ensure it sits flush.
- So Kííbọọ̀dù Tuntun pọ̀: Carefully insert the ribbon cables of the new keyboard into their respective connectors on the motherboard. Ensure they are fully seated and then gently push down the retaining clips to secure them.
- Kọǹpútà alágbèéká Tuntun: Reassemble your laptop by reversing the disassembly steps. Ensure all screws are tightened appropriately and no cables are pinched.
- Idanwo Ibẹrẹ: Reconnect the battery and AC adapter. Power on the laptop. Test all keys, including function keys and the backlight function, before fully securing all panels.
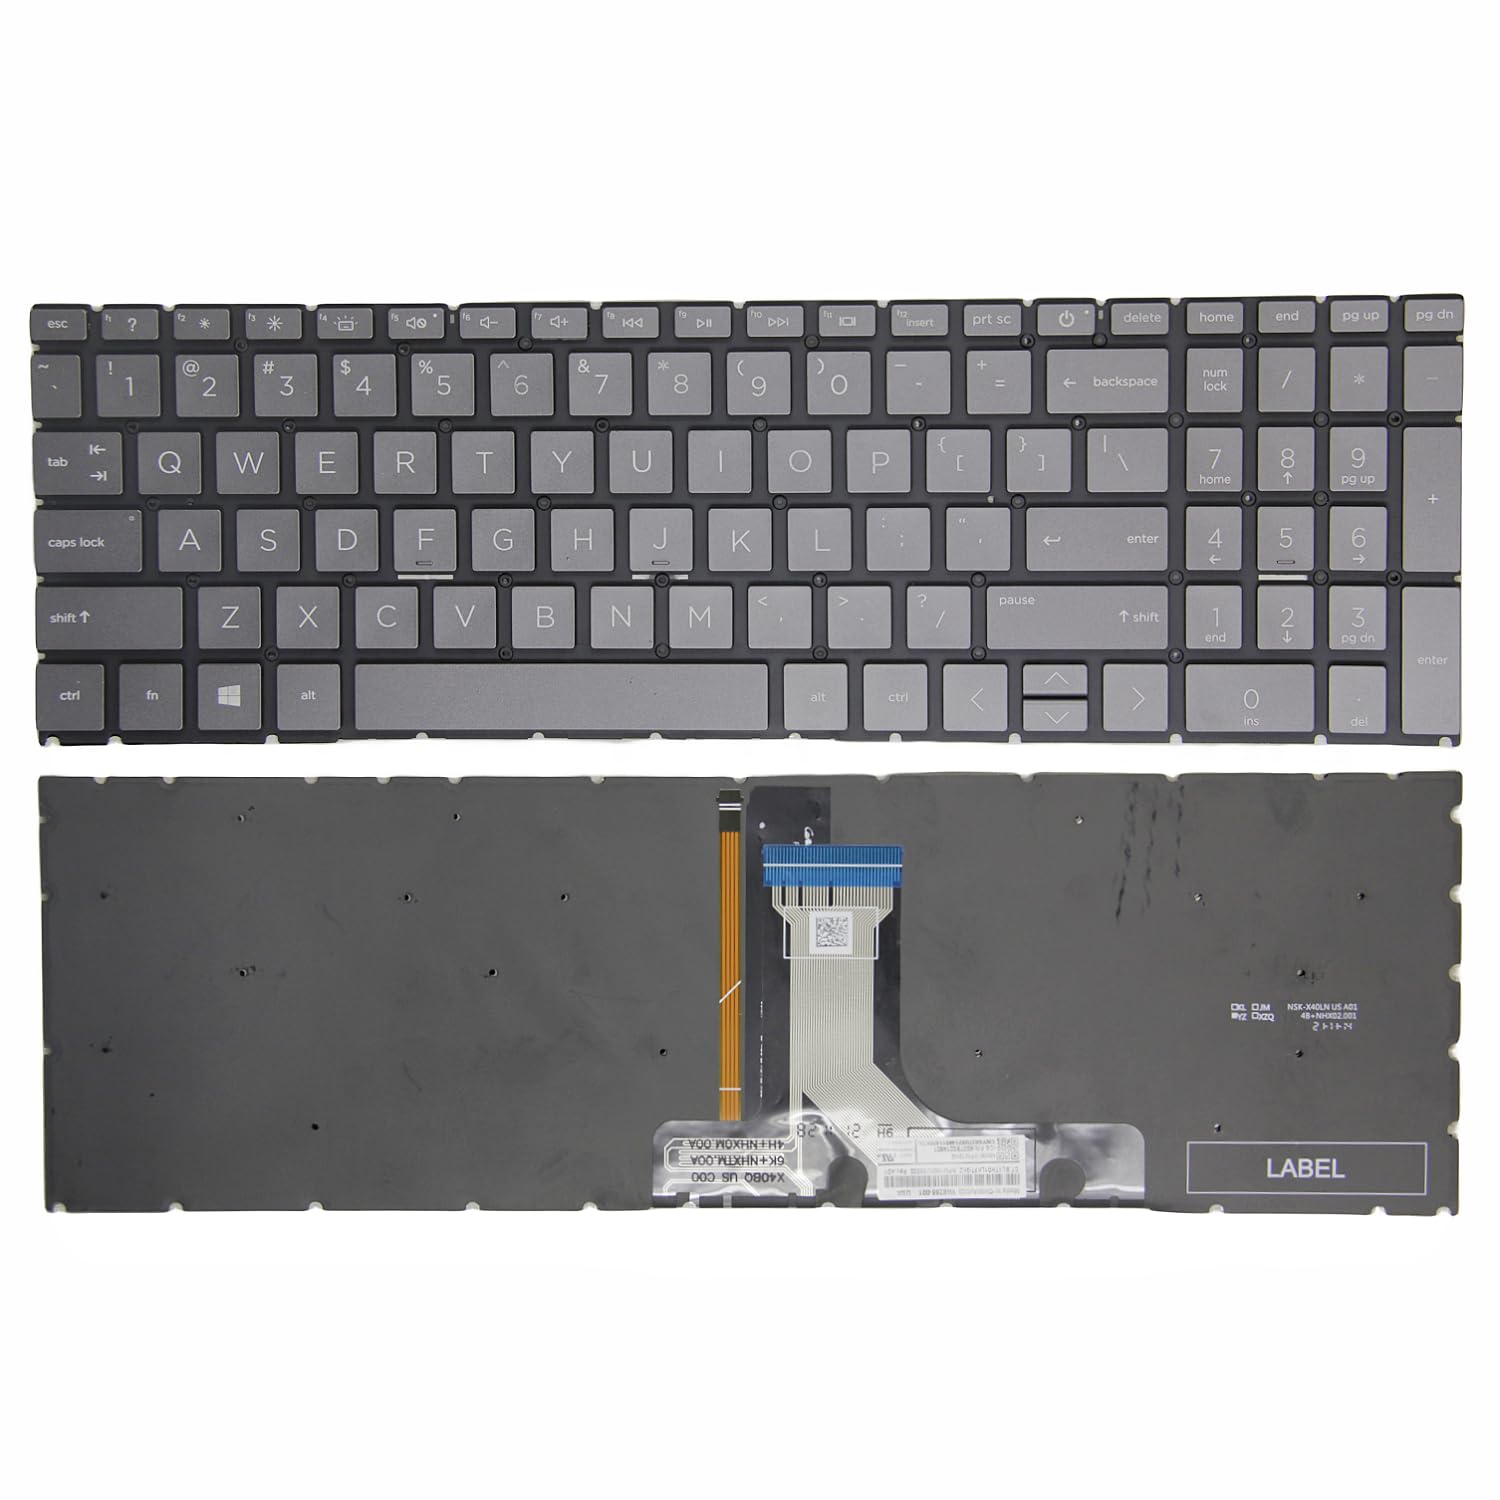
An image showing the new gray US backlit keyboard, highlighting its layout and keycaps. This represents the product you are installing.
6. Awọn ilana Iṣiṣẹ
This keyboard features a backlight for improved visibility in low-light conditions.
- Mimu ṣiṣẹ/Muṣiṣẹkuro ina Backlight: The backlight is typically controlled by a function key combination. Look for a key with a keyboard or light icon (often on F5, F9, F10, or F11). Press the Fn key simultaneously with the corresponding function key to toggle the backlight on/off or adjust its brightness levels.
- Atunse Imọlẹ: Some models may offer multiple brightness levels or an automatic adjustment feature. Refer to your laptop's operating system settings or HP documentation for advanced backlight control options.
7. Itọju
Láti rí i dájú pé keyboard rẹ pẹ́ títí àti pé ó ń ṣiṣẹ́ dáadáa:
- Ninu: Lo asọ asọ, ti ko ni lint die-die dampened with water or a mild electronics cleaner to wipe the keycaps. Avoid spraying liquids directly onto the keyboard. Use compressed air to remove dust and debris from between the keys.
- Yago fun Idasonu: Keep liquids away from your laptop to prevent damage to the keyboard and internal components.
- Lilo pẹlẹbẹ: Yẹra fún agbára tó pọ̀ jù nígbà tí o bá ń tẹ̀ ẹ́.
8. Laasigbotitusita
If you encounter issues with your new keyboard, consider the following troubleshooting steps:
- Keyboard Ko Dahun:
- Ensure the ribbon cables are securely connected to the motherboard. Re-seat them if necessary.
- Tun kọǹpútà alágbèéká rẹ bẹrẹ.
- Check Device Manager (Windows) for any keyboard-related errors or outdated drivers.
- Imọlẹ ẹhin Ko Ṣiṣẹ:
- Ensure the backlight ribbon cable is properly connected.
- Try the Fn + Function key combination to activate the backlight.
- Check your laptop's BIOS/UEFI settings for any keyboard backlight options.
- Àwọn Kọ́kọ́rọ́ Pàtàkì Tí Kò Ṣiṣẹ́:
- This could indicate a faulty keyboard. Verify connections again.
If issues persist after troubleshooting, contact customer support or consult a professional technician.
9. Awọn pato
| Brand | wangpeng |
| Ibamu awoṣe | HP 17-CN, 17CP, 17S-CU, 470 G8, TPN-I140, TPN-I139 Series |
| Ìfilélẹ | US Ìfilélẹ |
| Àwọ̀ | Grẹy |
| Imọlẹ ẹhin | Bẹẹni |
| Ipo | Tuntun |
10. Atilẹyin ọja ati Support
This wangpeng keyboard comes with a 3-osu atilẹyin ọja from the date of purchase. This warranty covers manufacturing defects. It does not cover damage caused by improper installation, misuse, accidents, or unauthorized modifications.
For warranty claims, technical support, or further assistance, please contact your retailer or the wangpeng customer service department with your purchase details.