
1. Ifihan
This manual provides detailed instructions for the installation, operation, and maintenance of your darkFlash DS900 ATX Mid-Tower PC Case. Please read this manual thoroughly before beginning assembly to ensure proper setup and optimal performance of your computer system.
2. Key Awọn ẹya ara ẹrọ
- Ti ko ni idiwọ View: Features a 270° panoramic tempered glass panel for an expansive view of internal components and RGB lighting. The tempered glass offers clarity and durability.
- Upgraded High-Speed I/O Panel: Equipped with USB 3.0 ports and a Type-C interface for fast data transfer and broad device compatibility.
- Eto itutu agbaiye to munadoko: Includes one non-LED PWM ARGB fan. The case supports up to 10 fans and a 360mm radiator for effective airflow and heat dissipation, crucial for maintaining component temperatures during intensive use.
- Apẹrẹ ironu: Incorporates magnetic dust filters on the top and panel dust filters to minimize dust accumulation, protecting internal components. An anti-slip bottom structure enhances stability.
- Fifi sori Rọrun: Designed for user-friendly assembly, featuring hassle-free cable management options and quick access to components for upgrades and maintenance.

Àwòrán: Iwájú-òsì view of the darkFlash DS900 ATX Mid-Tower PC Case in white, showcasing the tempered glass panels and interior layout.

Aworan: Exploded view diagram of the darkFlash DS900 PC case, illustrating its modular design with removable tempered glass panels and top mesh filter.
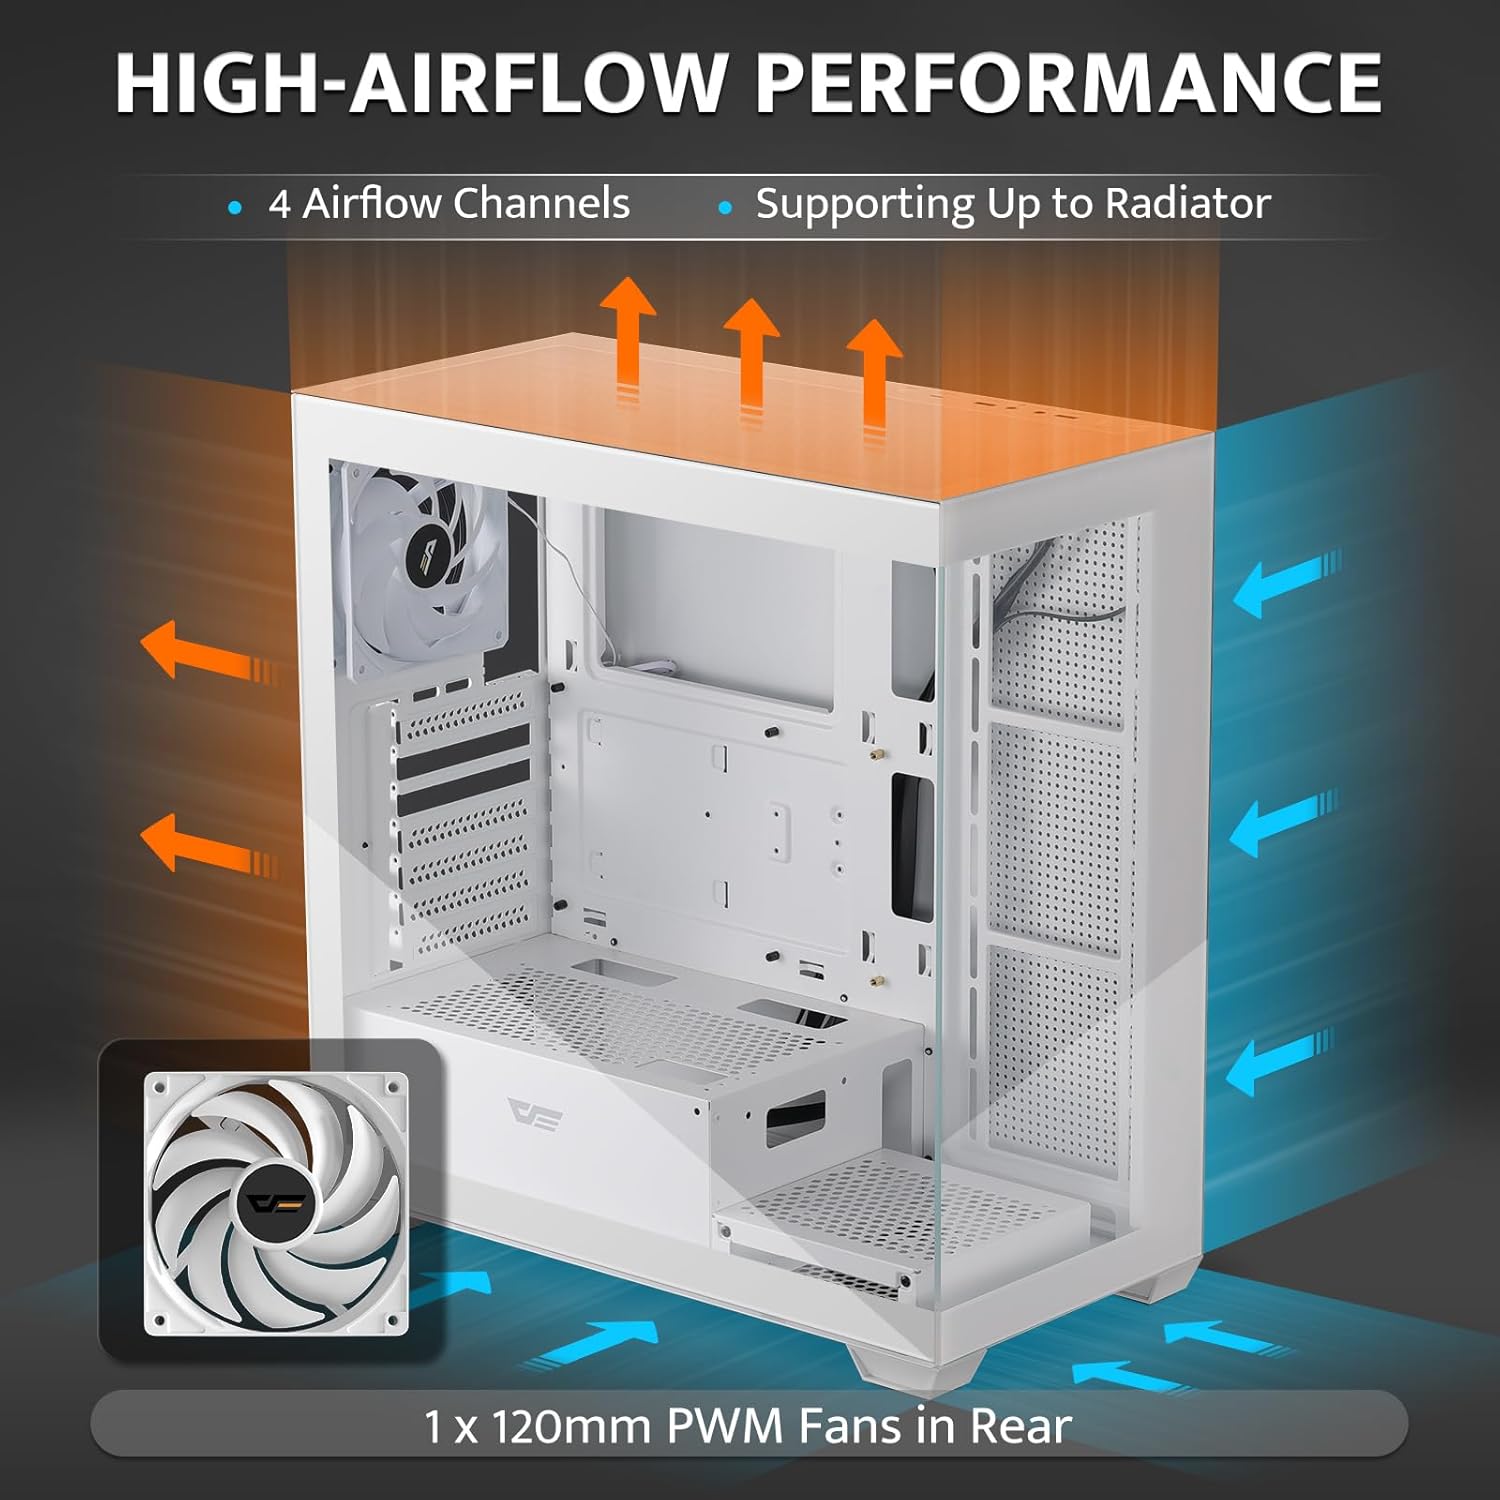
Image: Diagram showing the high-airflow performance of the darkFlash DS900 PC case, with arrows indicating air intake and exhaust paths, and a single 120mm PWM fan in the rear.

Image: Close-up of the darkFlash DS900 PC case's top I/O panel, highlighting the LED indicator, Type-C port, USB 2.0 ports, HD audio jacks, USB 3.0 ports, and reset button.
3. Awọn pato
| Ẹya ara ẹrọ | Ẹ̀kúnrẹ́rẹ́ |
|---|---|
| Brand | darkFlash |
| Orukọ awoṣe | DS900 |
| Iru Irú | Ile-iṣọ Mid |
| Modaboudu Ibamu | Micro ATX, ATX |
| Ohun elo | Irin, Gilasi Onígboná |
| Àwọ̀ | Funfun |
| Awọn iwọn Ọja (LxWxH) | 8.6 x 17.8 x 17 inches (218 x 452 x 432 mm) |
| Iwọn Nkan | 15 poun (6.8 kg) |
| Nọmba ti USB 3.0 Ports | 2 |
| Nọmba ti USB 2.0 Ports | 2 |
| Ọna Itutu | Afẹfẹ, omi |
| Agbara Ipese Iṣagbesori Iru | Isalẹ Oke |

Image: Internal layout diagram of the darkFlash DS900 PC case, indicating component clearances and mounting points.
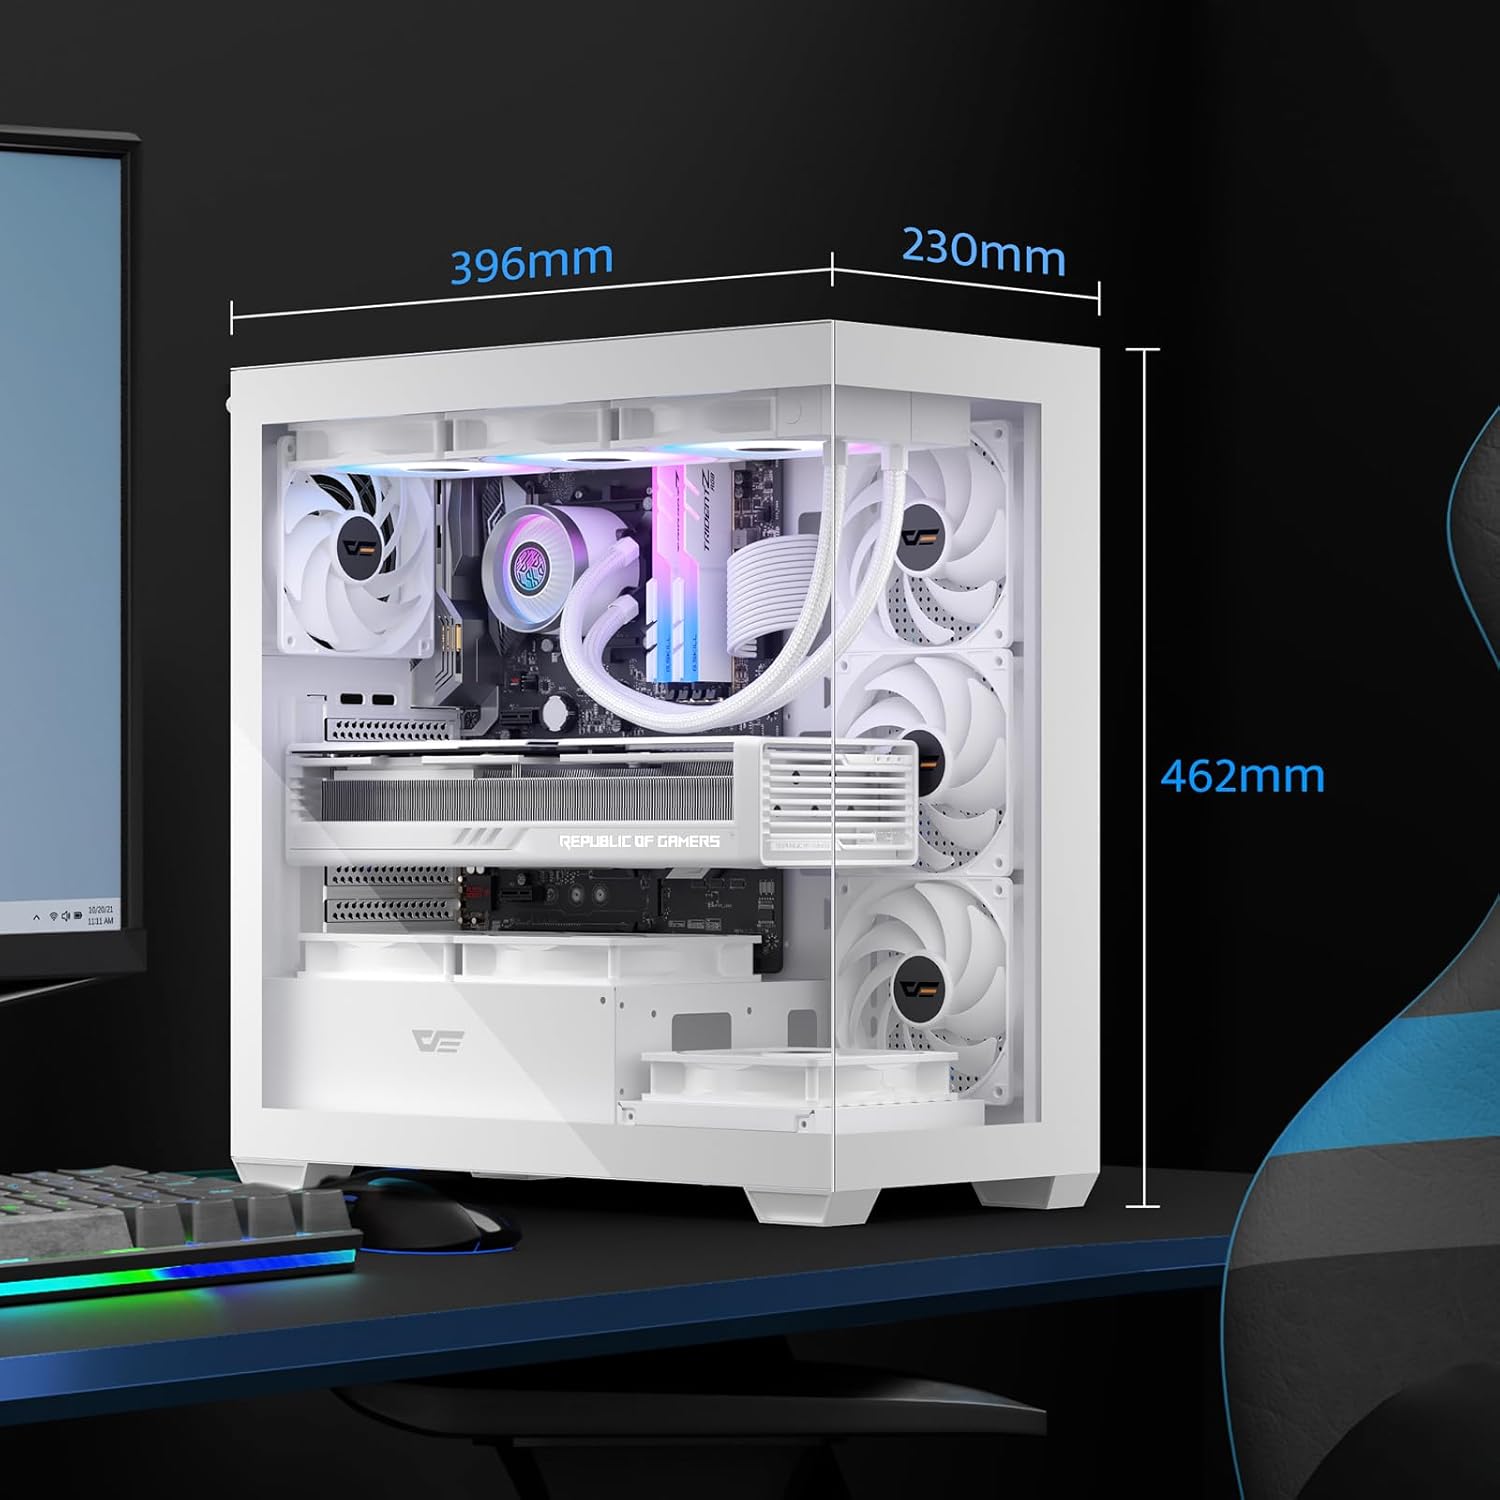
Image: Dimensions diagram of the darkFlash DS900 PC case.
4. Eto ati fifi sori
4.1. Unpacking ati Igbaradi
- Fi ìṣọ́ra yọ àpótí PC náà kúrò nínú àpótí rẹ̀.
- Inspect the case for any signs of damage during transit.
- Remove all tempered glass panels and the top mesh filter by unscrewing the thumb screws or releasing the latches. Set them aside on a soft, flat surface to prevent scratches.
- Familiarize yourself with the internal layout and included accessories (screws, cable ties, etc.).
4.2. Fi sori ẹrọ paati
Follow these general steps for installing your PC components. Refer to your individual component manuals for specific instructions.
- Modaboudu: Install the necessary standoffs for your motherboard form factor (ATX, Micro ATX). Carefully place the motherboard into the case and secure it with screws.
- Ẹka Ipese Agbara (PSU): Mount the PSU in the designated bottom compartment. Secure it with screws from the rear of the case.
- Awọn awakọ ipamọ: Install 2.5" SSDs and 3.5" HDDs into their respective drive bays or mounting points.
- Graphics Card (GPU) and Expansion Cards: Remove the necessary PCIe slot covers. Insert your graphics card and other expansion cards into the motherboard's PCIe slots and secure them.
- Fans and Radiators: Install additional cooling fans or liquid cooling radiators as desired. The case supports up to a 360mm radiator. Ensure proper airflow direction (intake/exhaust).
- Olutọju Sipiyu: Install your CPU cooler according to its manufacturer's instructions. Ensure it fits within the case's maximum CPU cooler height (170mm).
4.3. Iṣakoso USB
Utilize the cable routing cutouts and tie-down points behind the motherboard tray to organize cables. This improves airflow and aesthetics. Connect all necessary power and data cables to your components and the front I/O panel.
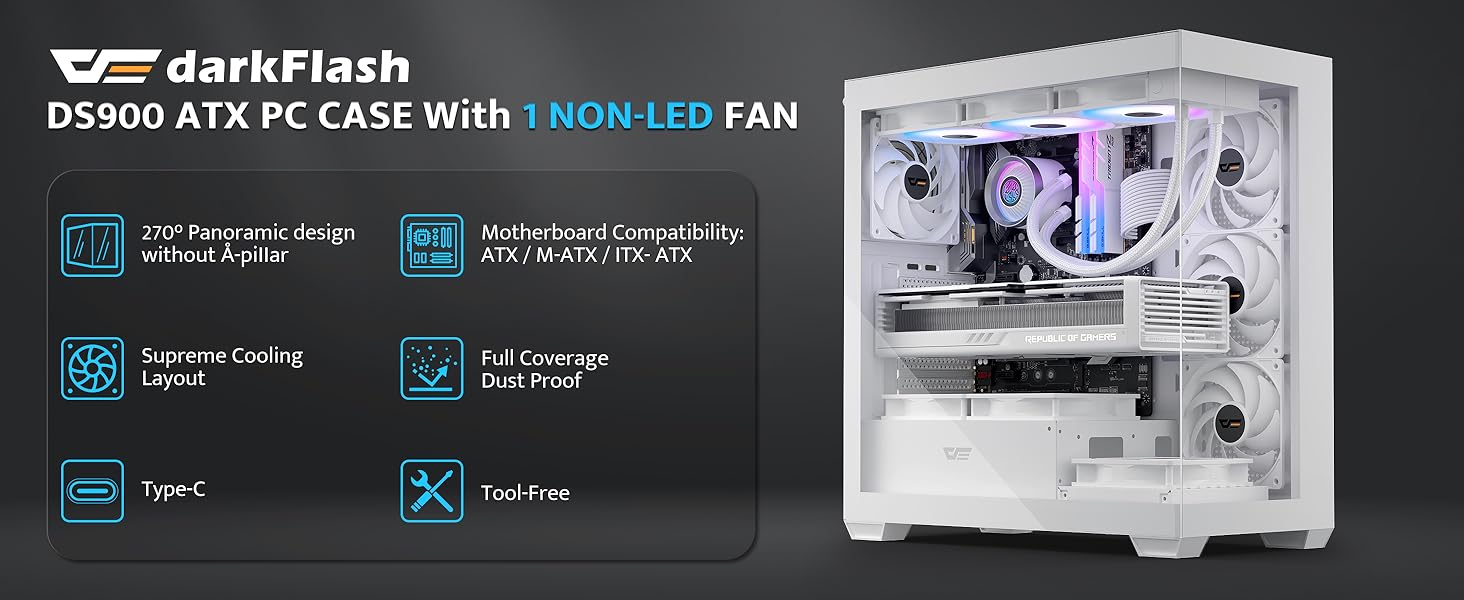
Aworan: Ti abẹnu view of the darkFlash DS900 PC case, illustrating space for component installation and cable routing.
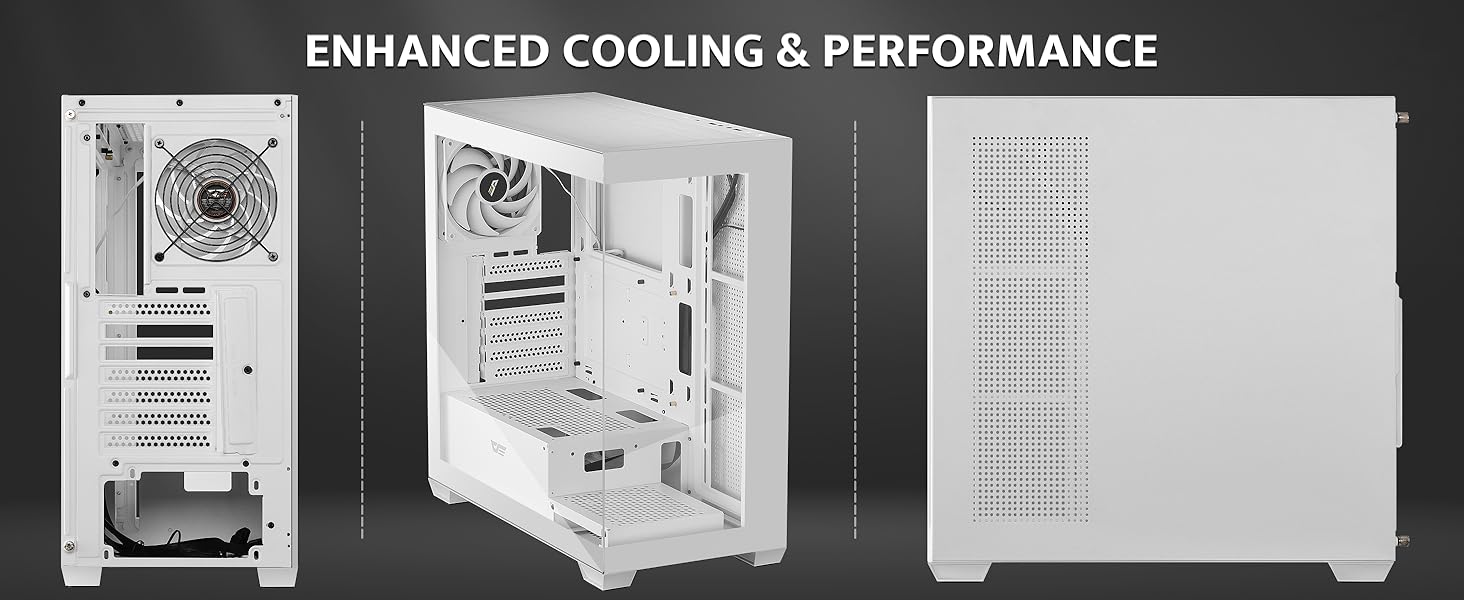
Image: Another internal perspective of the darkFlash DS900 PC case, highlighting the open layout.
5. Isẹ
5.1. Agbara Lori
Once all components are securely installed and cables are connected, replace the tempered glass panels and top mesh filter. Connect your monitor, keyboard, mouse, and power cable. Press the power button on the top I/O panel to start your system.
5.2. Airflow Optimization
The darkFlash DS900 is designed for high airflow. Ensure that fans are configured to create an optimal balance of intake and exhaust. Typically, front and bottom fans are set to intake, while rear and top fans are set to exhaust, creating positive pressure to reduce dust ingress.
6. Itọju
6.1. Fífọ Àwọn Àlẹ̀mọ́ Eruku
Regularly clean the magnetic dust filters located on the top and other panel filters. These can be easily removed, cleaned with water and mild soap, dried thoroughly, and reinstalled. This prevents dust buildup inside the case, which can hinder cooling performance and component longevity.
6.2. Gbogbogbo Cleaning
Use a soft, dry cloth to wipe down the exterior of the case, including the tempered glass panels. For stubborn smudges on glass, a glass cleaner can be used sparingly on the cloth, not directly on the glass. Avoid abrasive cleaners or solvents.
7. Laasigbotitusita
Tí o bá ní ìṣòro pẹ̀lú ìkọ́lé PC rẹ, ronú nípa àwọn ìgbésẹ̀ tí ó wọ́pọ̀ láti yanjú ìṣòro wọ̀nyí:
- Ko si Agbara: Rí i dájú pé gbogbo àwọn okùn agbára (PSU sí ògiri, PSU sí motherboard, CPU, GPU) ni a so pọ̀ dáadáa. Ṣàyẹ̀wò switch agbára lórí PSU.
- Igbóná púpọ̀: Verify that all fans are spinning correctly and are oriented for optimal airflow. Ensure CPU cooler and GPU fans are functioning. Check for dust buildup on components and filters.
- Ariwo Fan Excessive fan noise can indicate a fan issue or improper mounting. Check if fans are securely mounted and free from obstructions. Consider adjusting fan curves in your motherboard's BIOS/UEFI or software.
- I/O Iwaju Ko Ṣiṣẹ: Double-check that all front panel connectors (USB, audio, power/reset switches, LED indicators) are correctly plugged into the motherboard headers.
- Awọn ọran Ibamu Ẹka: If a component does not fit, refer to the specifications section for maximum clearances (e.g., GPU length, CPU cooler height, radiator size).
For more complex issues, consult the manuals for your individual PC components or seek assistance from a qualified technician.
8. Atilẹyin ọja ati Support
For warranty information and technical support, please refer to the official darkFlash webojula tabi kan si wọn onibara iṣẹ taara. Jeki ẹri rira rẹ fun awọn iṣeduro atilẹyin ọja.