1. Ifihan
Thank you for choosing the HITRENDS Magic Light Wand and Wireless Remote Control Outlet. This product provides a convenient and fun way to control your Christmas tree lights and other home decorations wirelessly. Please read this manual carefully before use to ensure proper operation and safety.
2. Alaye Aabo
- Má ṣe fi ọjà náà sí omi tàbí ọrinrin tó pọ̀ jù.
- Ensure the receiver is plugged into a standard 120V AC outlet.
- Do not overload the receiver. Refer to specifications for maximum wattage.
- Keep the Magic Light Wand away from small children to prevent choking hazards from small parts.
- Replace batteries in the wand only with the specified type (2 AA batteries).
- Unplug the receiver from the wall outlet when not in use for extended periods.
3. Package Awọn akoonu
Package pẹlu awọn nkan wọnyi:
- 1 x Magic Light Wand (requires 2 AA batteries, not included)
- 1 x Wireless Remote Control Outlet Receiver (3-prong)
4. Ọja Ipariview
The HITRENDS Magic Light Wand system consists of two main components: the Magic Light Wand and the Wireless Remote Control Outlet Receiver.
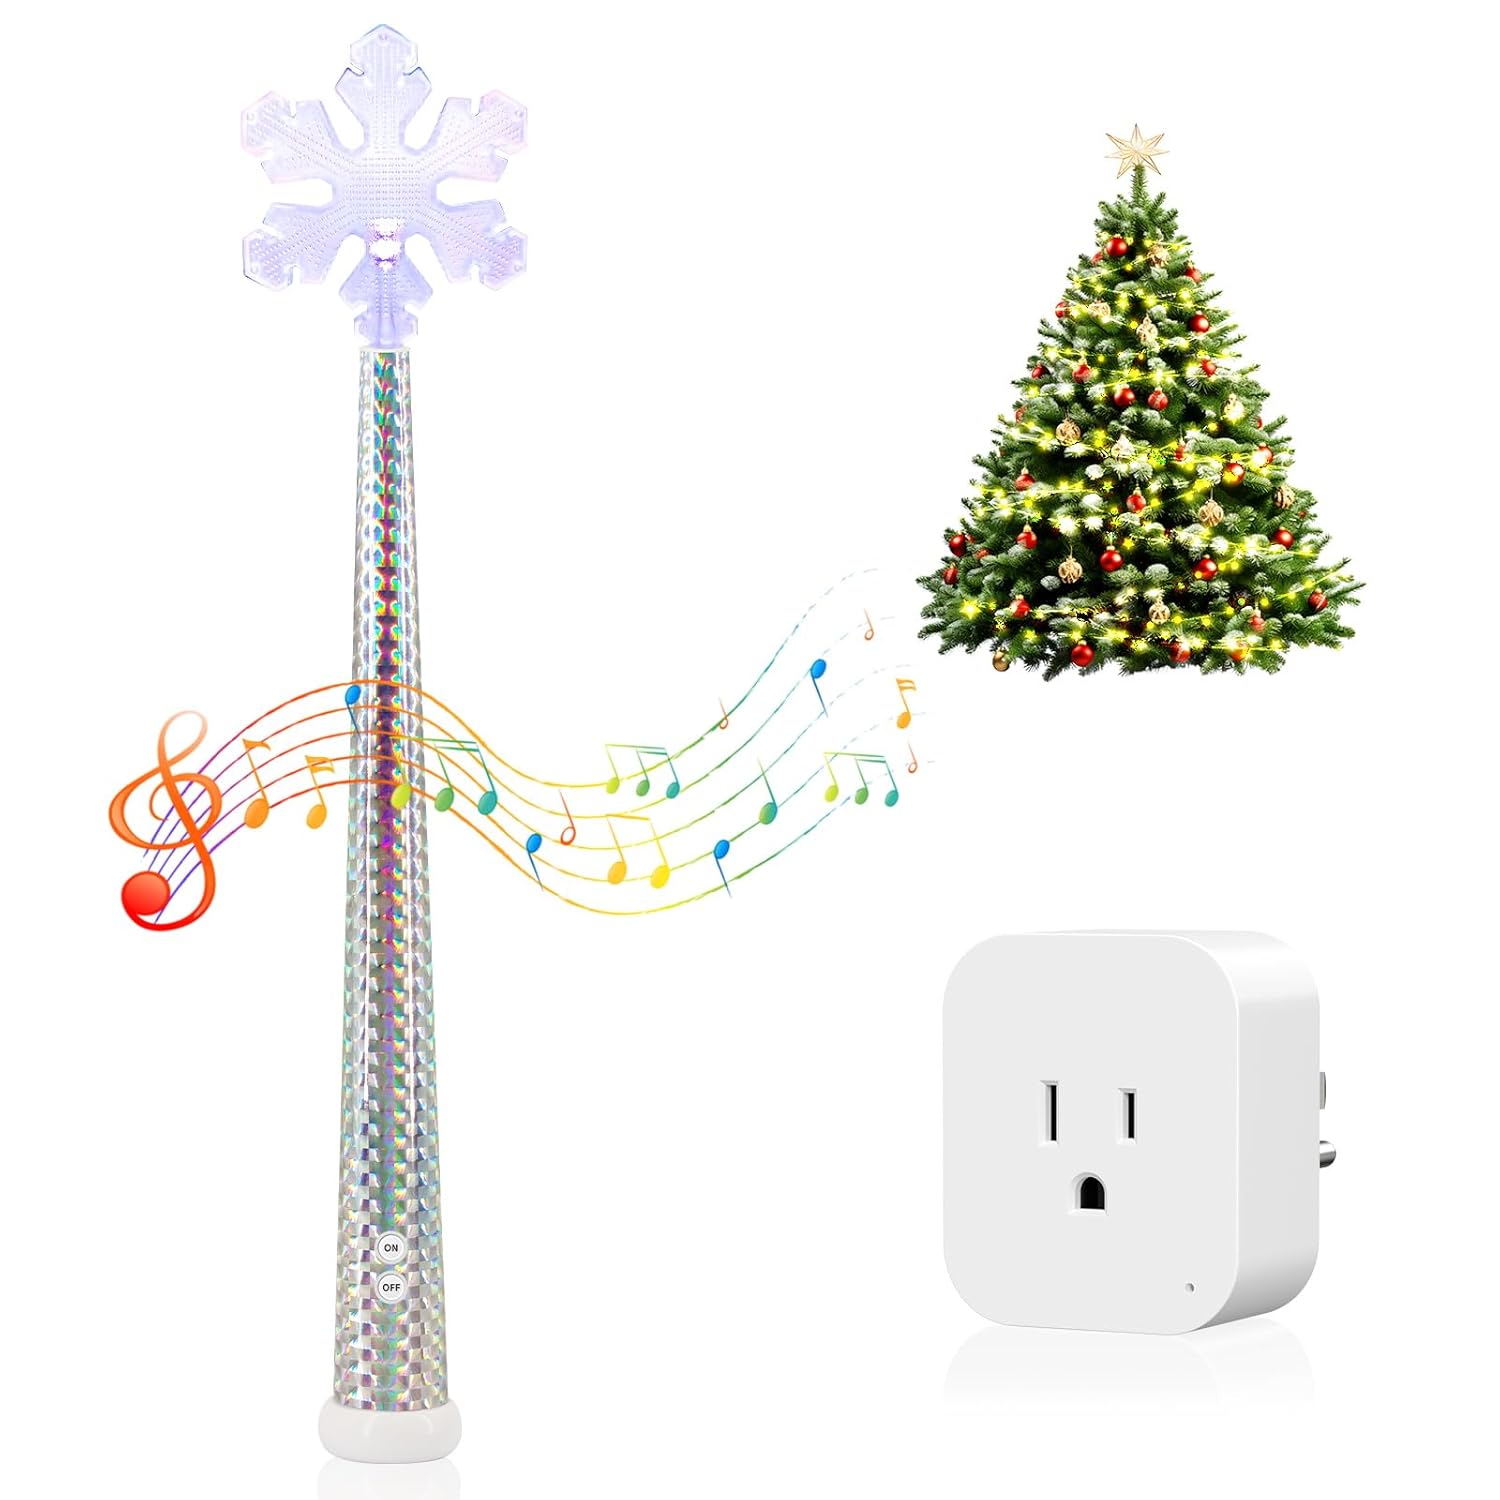
Image 4.1: The Magic Light Wand and its accompanying Wireless Remote Control Outlet Receiver.

Aworan 4.2: alaye view of the Magic Light Wand, highlighting its RGB LED light, battery compartment (for 2 AA batteries, not included), high-quality speaker for music, and ON/OFF buttons.
The Magic Light Wand features an RGB LED light, a speaker for music, and ON/OFF buttons. The Wireless Remote Control Outlet Receiver is a compact 3-prong device designed to plug into a standard wall outlet.
5. Awọn ilana iṣeto
Follow these steps to set up your Magic Light Wand and Wireless Remote Control Outlet:
- Insert Batteries into the Wand: Open the battery compartment on the Magic Light Wand and insert 2 AA batteries (not included), ensuring correct polarity.
- So Olugba sii: Insert the Wireless Remote Control Outlet Receiver into any standard 3-prong wall outlet.
- Connect Your Lights: Plug the string lights or other decoration lights you wish to control into the 3-prong outlet on the receiver.

Image 5.1: Visual guide for connecting the receiver to a wall socket and plugging in the string lights.
6. Awọn ilana Iṣiṣẹ
Once set up, you can control your lights using the Magic Light Wand.
6.1 Ipilẹ Tan / Pa Iṣakoso
- To turn the connected lights ON, press the 'ON' button on the Magic Light Wand.
- To turn the connected lights PAA, press the 'OFF' button on the Magic Light Wand.

Image 6.1: A person using the Magic Light Wand to control Christmas tree lights, demonstrating the wireless remote control functionality with a range of up to 100 feet.
6.2 Shaking Mode and Music Effects
The Magic Light Wand also features an interactive shaking mode with music:
- Press and hold the button on the wand for approximately 5 seconds to activate the shaking mode.
- Once in shaking mode, gently shake the wand to control the lights and activate musical surprises.

Image 6.2: A child demonstrating the shaking mode of the Magic Light Wand to control lights, accompanied by musical effects.
6.3 Alailowaya Range
The wireless remote control operates effectively up to 100 feet (approximately 30 meters) away from the receiver, allowing flexible placement and control.
6.4 Wapọ Lo
This system is suitable for controlling various types of decorative lights and small appliances, including LED lights, floor lampàwọn ohun ọ̀ṣọ́, àti àwọn ohun ọ̀ṣọ́ ọjọ́ ìsinmi.

Aworan 6.3: Examples of various indoor and outdoor decoration lights that can be controlled using the HITRENDS Magic Light Wand system.
7. Itọju
- Ninu: Wipe the Magic Light Wand and receiver with a dry, soft cloth. Do not use abrasive cleaners or immerse in water.
- Rirọpo Batiri: When the wand's lights dim or the music becomes faint, replace the 2 AA batteries. Ensure proper polarity during replacement.
- Ibi ipamọ: Store the product in a cool, dry place when not in use. Remove batteries from the wand if storing for extended periods to prevent leakage.
8. Laasigbotitusita
- Lights not turning on/off:
- Check if the receiver is securely plugged into a live wall outlet.
- Ensure the lights are properly plugged into the receiver.
- Verify that the Magic Light Wand has fresh batteries and they are inserted correctly.
- Ensure the wand is within the 100-foot operating range of the receiver.
- Wand not lighting up or playing music:
- Replace the AA batteries in the wand.
- Ensure the ON/OFF buttons on the wand are pressed firmly.
- Ìjánu: If experiencing intermittent control, try moving the receiver or wand to a different location to avoid potential interference from other electronic devices.
9. Awọn pato
- Brand: HITRENDS
- Awoṣe: Magic Light Wand and Wireless Remote Control Outlet
- Power Input (Receiver): 120V AC
- Wand Battery: 2 x AA batiri (ko si)
- Iwọn Alailowaya: Titi di 100 ẹsẹ (isunmọ 30 mita)
- Receiver Plug Type: 3-prong
- Awọn iwe-ẹri: UL tested & certified (Receiver)
- Awọn iwọn idii: 15.2 x 3.27 x 2.83 inches
- Ìwúwo Apo: 8.15 iwon

Image 9.1: Detailed dimensions of the Magic Light Wand and the Wireless Remote Control Outlet Receiver.
10. Atilẹyin ọja ati Support
HITRENDS products are designed for reliability and performance. For any questions, technical support, or warranty inquiries, please contact HITRENDS customer service through the retailer's platform or the official HITRENDS website. Please have your product model and purchase date available when contacting support.