1. Ifihan
This user manual provides comprehensive instructions for the setup, operation, maintenance, and troubleshooting of your Thomson 27-inch QHD Gaming Monitor (Model: M27QG5Y14). This monitor is designed to deliver a superior visual experience with its QHD resolution, 180Hz refresh rate, and IPS panel technology, making it ideal for gaming and multimedia applications.

Aworan 1.1: Iwaju view of the Thomson 27-inch QHD Gaming Monitor, showcasing its sleek design and display area.
2. Alaye Aabo
Please read all safety instructions carefully before using the monitor. Keep this manual for future reference.
- Orisun Agbara: Lo adapter agbara ti a pese pẹlu iboju naa nikan. Rii daju pe ibudo agbara naa wa ni ilẹ daradara.
- Afẹfẹ: Má ṣe dí àwọn ihò afẹ́fẹ́. Jẹ́ kí àyè tó wà ní àyíká àtẹ ìṣàn náà kí afẹ́fẹ́ tó ń lọ dáadáa má baà gbóná jù.
- Omi ati Ọrinrin: Jẹ́ kí àwòjìji náà jìnnà sí omi, òjò tàbí ọ̀rinrin tó pọ̀ jù. Má ṣe gbé àwọn nǹkan tí omi kún sí orí àwòjìji náà.
- Ninu: Disconnect the power cable before cleaning. Use a soft, dry cloth. Do not use liquid cleaners or aerosol cleaners.
- Ibi: Place the monitor on a stable, flat surface. Avoid placing it in direct sunlight or near heat sources.
- Mimu: Fi ọwọ́ mú monitor náà dáadáa. Má ṣe jẹ́ kí ó jábọ́ tàbí kí ó fa ìkọlù líle.
- Ṣiṣẹ: Maṣe gbiyanju lati ṣe iṣẹ atẹle naa funrararẹ. Tọkasi gbogbo iṣẹ si awọn oṣiṣẹ iṣẹ ti o peye.
3. Package Awọn akoonu
Daju pe gbogbo awọn nkan wa ninu package. Ti awọn ohun kan ba nsọnu tabi bajẹ, kan si alagbata rẹ.
- Thomson 27-inch QHD Gaming Monitor
- Iduro Iduro (Ipilẹ ati Ọrun)
- Power Adapter ati Power Cable
- Okun HDMI
- DisplayPort (DP) Cable (may vary by region)
- USB-B si okun USB-A (fun iṣẹ ibudo USB)
- Afowoyi Olumulo (iwe-ipamọ yii)
- Skru fun imurasilẹ ijọ
4. Eto
4.1. Nto Iduro Atẹle
- Fi pẹ̀lẹ́pẹ̀lẹ́ yọ àwo mótíìnì náà kúrò nínú àpótí rẹ̀ kí o sì gbé e sí orí ilẹ̀ rírọ̀ tí ó mọ́ kí ó má baà jẹ́ kí ó fọ́.
- So ọrun imurasilẹ si nronu atẹle nipa lilo awọn skru ti a pese.
- Attach the stand base to the stand neck and secure it with the designated screw.
- Once assembled, carefully lift the monitor and place it on a stable desk or table.

Image 4.1: Monitor dimensions and stand assembly overview. The monitor measures approximately 61 cm wide, 54 cm high (with stand), and 24 cm deep (with stand).
4.2. Nsopọ Atẹle
So awọn okun waya ti o yẹ mọ awọn ibudo titẹ sii ti atẹle naa. Wo aworan ni isalẹ fun awọn ipo ibudo.
- Asopọ agbara: Connect the power adapter to the "DC IN" port on the monitor, then plug the power cable into a power outlet.
- Input fidio:
- Connect an HDMI cable from your computer's graphics card to an "HDMI 2.1" port on the monitor.
- Alternatively, connect a DisplayPort (DP) cable from your computer's graphics card to a "DP 1.2" port on the monitor.
- Ibudo USB: To enable the monitor's USB 3.0 ports, connect a USB-B cable from the "USB 3.0 B" port on the monitor to a USB-A port on your computer.
- Ijade ohun: Connect headphones or external speakers to the "Earphone Plug" (3.5mm audio jack) for audio output.

Image 4.2: Rear panel of the monitor displaying the various input and output ports for connectivity.
4.3. Awọn atunṣe Ergonomic
Iduro atẹle ngbanilaaye fun ọpọlọpọ awọn atunṣe lati mu ilọsiwaju rẹ pọ si viewitunu:
- Tẹ: Adjust the screen's vertical angle (up or down).
- Swivel: Rotate the screen horizontally (left or right).
- Pivot: Yi iboju 90 iwọn fun ipo aworan viewing.
- Atunse Giga: Gbé àtẹ ìṣàfihàn náà sókè tàbí kí o sọ ọ́ kalẹ̀ sí ibi tí ojú rẹ bá fẹ́.
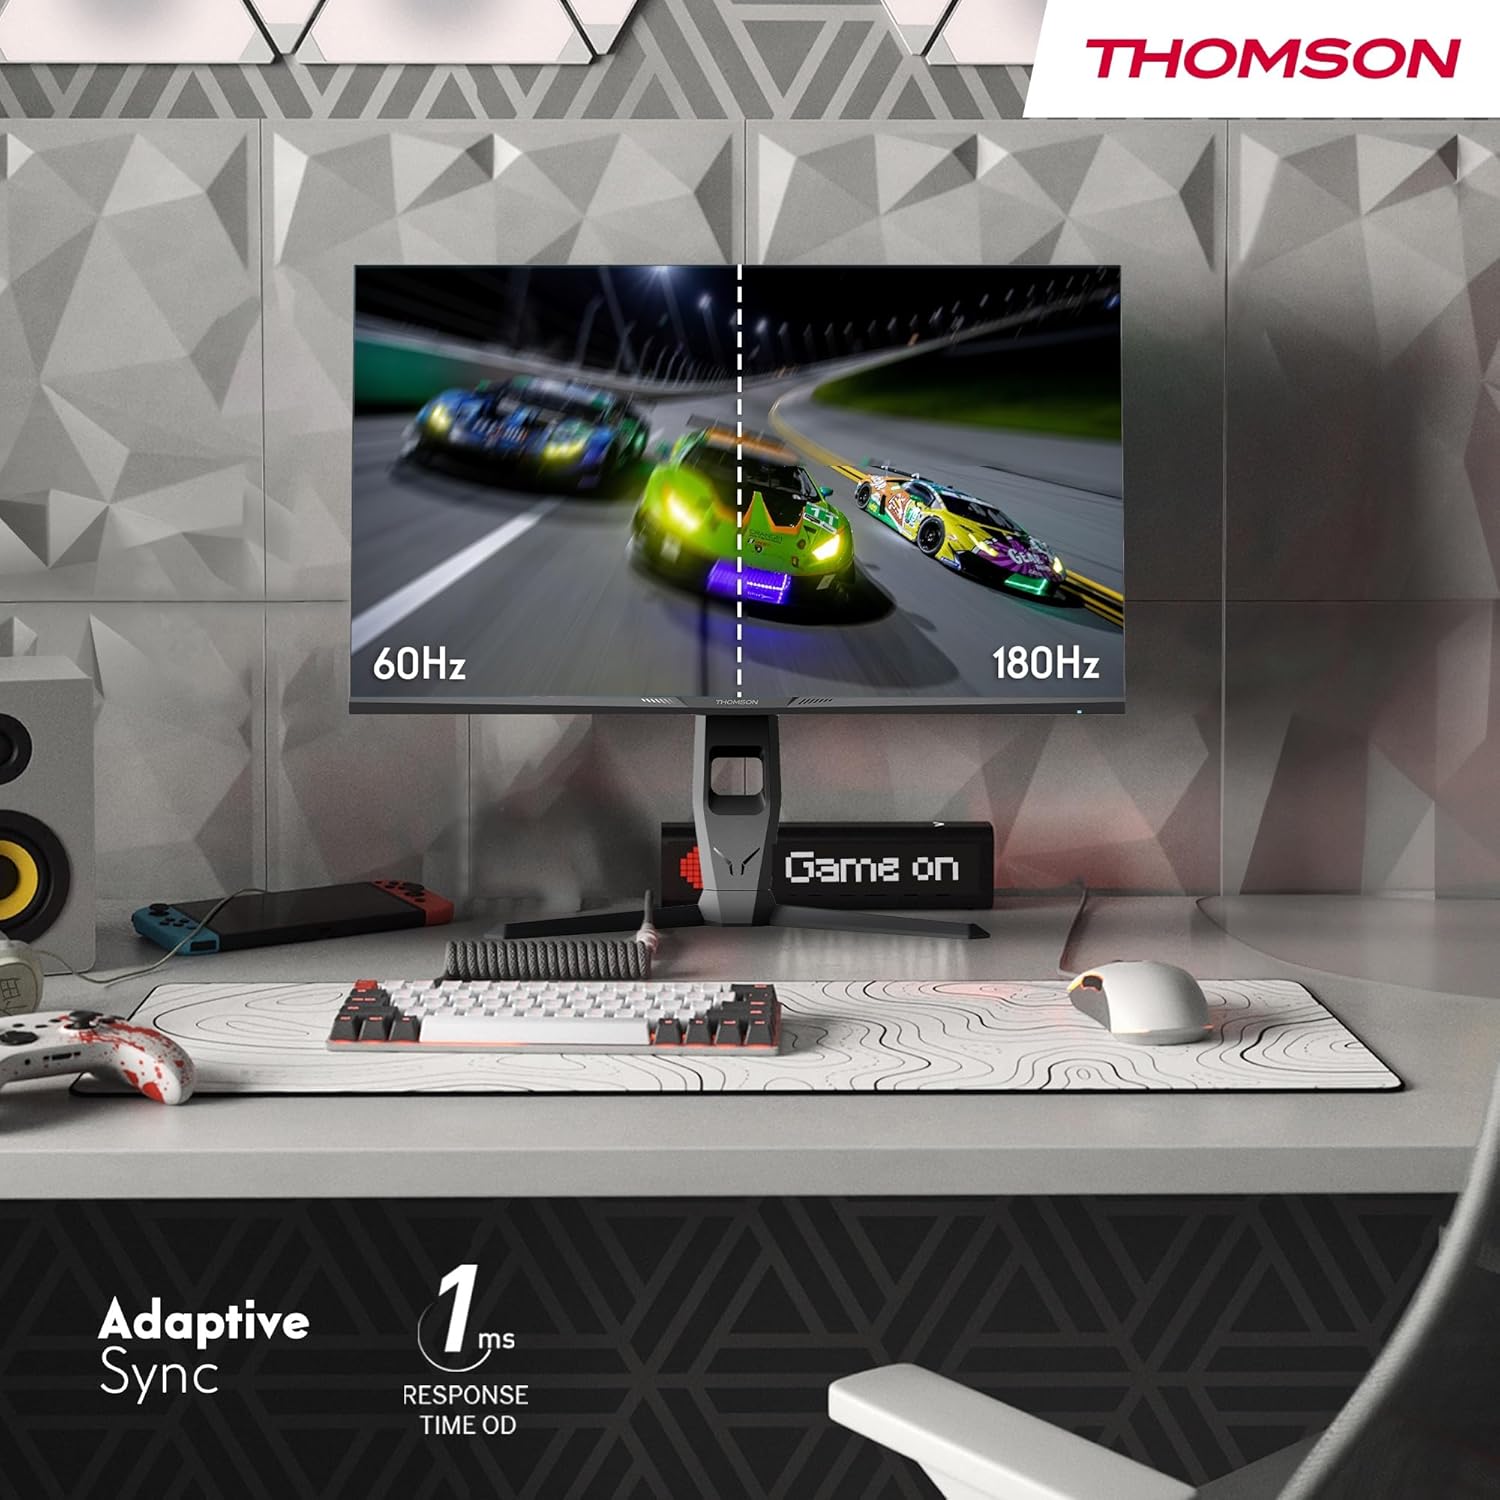
Image 4.3: Demonstrations of the monitor's ergonomic capabilities, including tilt, swivel, and pivot for optimal viewing awọn igun.
4.4. Ṣíṣe VESA
The monitor is compatible with VESA 100x100mm mounting standards. To mount the monitor on a wall or an alternative stand, remove the original stand and attach the VESA-compatible mount (sold separately) using appropriate screws.
5. Awọn ilana Iṣiṣẹ
5.1. Agbara Tan / Paa
Tẹ bọtini agbara, ti o maa n wa ni ẹhin tabi isalẹ ti iboju naa, lati tan tabi pa a. Ina ifihan agbara yoo tan nigbati iboju naa ba wa ni titan.
5.2. On-iboju Ifihan (OSD) Akojọ aṣyn
The OSD menu allows you to adjust various monitor settings. Use the joystick or buttons (location may vary) on the monitor to navigate the menu.
- Eto aworan: Ṣàtúnṣe ìmọ́lẹ̀, ìyàtọ̀, mímú, ìgbóná àwọ̀, àti gamma.
- Eto awọ: Fine-tune RGB levels, saturation, and hue.
- Aṣayan titẹ sii: Fi ọwọ́ yípadà láàárín àwọn ìtẹ̀wọlé HDMI àti DisplayPort.
- Ohun: Ṣàtúnṣe iwọn didun fún àwọn agbọ́hùnsọ tàbí àgbékalẹ̀ agbekọri.
- Awọn Eto OSD: Yí èdè OSD padà, kí ó hàn gbangba, àti àkókò ìparẹ́.
- Ètò Àwọn Ere: Access features like Adaptive Sync, response time (OD), and crosshair overlays.
5.3. ayo Awọn ẹya ara ẹrọ
- Oṣuwọn Isọdọtun 180Hz: Provides smoother motion and reduced input lag, especially beneficial for fast-paced games. Ensure your graphics card and cable support this refresh rate.
- 1ms Response Time (OD): Minimizes motion blur and ghosting for clear, crisp images during rapid movements.
- Amuṣiṣẹpọ Amuṣiṣẹpọ: Synchronizes the monitor's refresh rate with your graphics card's frame rate, eliminating screen tearing and stuttering. Enable this feature in the OSD menu and your graphics card control panel.

Image 5.1: Visual comparison illustrating the difference between 60Hz and 180Hz refresh rates, highlighting the smoother motion provided by the higher refresh rate, alongside the Adaptive Sync feature.
5.4. Àwọn Ẹ̀yà Ìtọ́jú Ojú
- Imọ-ẹrọ Anti-Flicker: Reduces screen flickering, which can cause eye strain during prolonged use.
- Ipo Imọlẹ Buluu Kekere: Filters out harmful blue light emissions to protect your eyes and reduce fatigue. This mode can be activated through the OSD menu.
- Iboju Idaabobo-Glare: The matte screen surface minimizes reflections from ambient light, providing clear visuals without distraction.

Image 5.2: Depiction of the monitor's eye comfort features, including an anti-glare screen and technologies like Anti-Flicker and Low Blue Light for reduced eye strain.
5.5. Ìmọ́lẹ̀ Ayíká RGB
The monitor features integrated RGB ambient lighting on the rear. This lighting can be customized via the OSD menu to enhance your gaming environment or match your setup's aesthetics.
6. Itọju
6.1. Ninu Atẹle
- Iboju: Rọra nu iboju naa pẹlu asọ ti ko ni lint. Fun awọn ami alagidi, fẹẹrẹ dampen the cloth with water or a specialized screen cleaner (ensure it's safe for LCD/IPS panels) and wipe gently. Never spray liquid directly onto the screen.
- Casing: Lo asọ ti o rọ, ti o gbẹ lati nu atẹle naa casing. Yago fun lilo abrasive ose tabi epo.
- Nigbagbogbo ge asopọ okun agbara ṣaaju ṣiṣe mimọ.
6.2. Ibi ipamọ
Tí o bá ń fi monitor pamọ́ fún ìgbà pípẹ́, yọ gbogbo okùn náà kúrò, kó o sínú àpótí ìpamọ́ rẹ̀ (tí ó bá wà), kí o sì tọ́jú rẹ̀ sí ibi tí ó tutù tí ó sì gbẹ, tí kò sí ìmọ́lẹ̀ oòrùn tààrà tàbí ooru tó le koko.
7. Laasigbotitusita
Apá yìí ń sọ̀rọ̀ nípa àwọn ìṣòro tó wọ́pọ̀ tí o lè bá pàdé. Tí ìṣòro náà bá ń bá a lọ, kan sí ìrànlọ́wọ́ àwọn oníbàárà.
| Isoro | Owun to le Fa | Ojutu |
|---|---|---|
| Ko si agbara | Okùn agbára kò sopọ̀ mọ́; ibi tí agbára bá ti bàjẹ́; Atẹle ti pa. | Ensure power cable is securely connected. Test the power outlet. Press the monitor's power button. |
| Ko si ifihan agbara / Iboju òfo | Video cable not connected; Incorrect input selected; Computer not outputting signal. | Check HDMI/DP cable connections. Select the correct input source via OSD. Ensure computer is on and outputting video. |
| Distorted image / Flickering | Incorrect resolution/refresh rate; Faulty cable; Graphics driver issue. | Set display resolution to 2560x1440 and refresh rate to 180Hz. Try a different video cable. Update graphics drivers. |
| Ko si ohun lati inu awọn agbọrọsọ/agbekọri | Volume too low; Audio cable not connected; Incorrect audio output selected on PC. | Increase monitor volume via OSD. Ensure headphones/speakers are connected. Select monitor as audio output device in PC settings. |
8. Awọn pato
Detailed technical specifications for the Thomson M27QG5Y14 monitor.
| Ẹya ara ẹrọ | Sipesifikesonu |
|---|---|
| Brand | Thomson |
| Awoṣe | M27QG5Y14 |
| Iwon iboju | 27 inches |
| Panel Iru | IPS |
| Ipinnu | 2560 x 1440 (QHD) |
| Oṣuwọn sọtun | 180 Hz |
| Akoko Idahun | 1 Millisecond (OD) / 5 Milliseconds (GtG) |
| Imọlẹ | 350 Awọn owo |
| Ipin Itansan | 1200:1 |
| Viewigun igun | 178 Degrees (Horizontal/Vertical) |
| Awọ Gamut | 120% sRGB |
| HDR atilẹyin | HDR10 (10-bit) |
| Amuṣiṣẹpọ Adaptive | Bẹẹni |
| Asopọmọra | 2x HDMI 2.1, 1x DisplayPort 1.2, 1x USB 3.0 Type-B (upstream), 3x USB 3.0 Type-A (downstream), 1x Earphone Plug (3.5mm) |
| Awọn Agbọrọsọ ti a ṣe sinu | Bẹ́ẹ̀ni (2x2W) |
| VESA Oke ibamu | 100x100mm |
| Awọn iwọn ọja (pẹlu iduro) | 61 x 54 x 24 cm (W x H x D) |
| Iwọn (pẹlu iduro) | 7.3 kg |
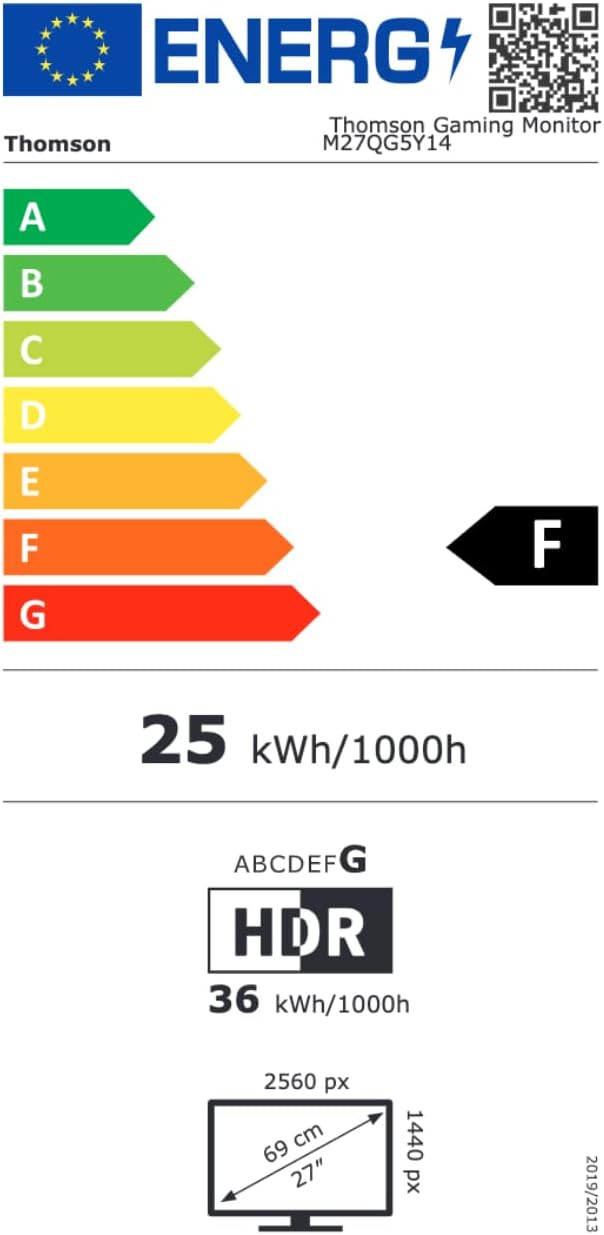
Image 8.1: EU Energy Label for the Thomson M27QG5Y14 monitor. For more details, visit the Database database EPREL.
9. Atilẹyin ọja ati Support
Thomson products are designed for reliability and performance. This monitor typically comes with a 3-odun atilẹyin ọja lati ọjọ rira, ibora awọn abawọn iṣelọpọ. Jọwọ ṣe idaduro ẹri rira rẹ fun awọn iṣeduro atilẹyin ọja.
For technical assistance, troubleshooting beyond this manual, or warranty inquiries, please contact Thomson customer support or your local retailer. Refer to the official Thomson website or your product packaging for specific contact details.
You can also visit the official Thomson store on Amazon for more information: Thomson Store.