
Displays2go DF043TLB2
Displays2go Advertising Multimedia Kiosk (DF043TLB2) User Manual
Model: DF043TLB2 | Brand: Displays2go
1. Ifihan
This manual provides comprehensive instructions for the setup, operation, and maintenance of your Displays2go Advertising Multimedia Kiosk, model DF043TLB2. This 43-inch multi-touch kiosk is designed for displaying interactive digital content in various public and commercial environments. Please read this manual thoroughly before use to ensure proper functionality and safety.
2. Alaye Aabo
- Ensure the kiosk is placed on a stable, level surface to prevent tipping.
- Do not expose the unit to moisture, rain, or extreme temperatures.
- Lo oluyipada agbara ti a pese nikan.
- Jeki awọn šiši fentilesonu ko o lati ṣe idiwọ igbona.
- Ma ṣe gbiyanju lati ṣii tabi tun ẹrọ naa funrararẹ. Tọkasi gbogbo iṣẹ si oṣiṣẹ oṣiṣẹ.
- Ge agbara kuro ṣaaju ki o to nu tabi gbe ẹrọ naa.
3. Package Awọn akoonu
Jẹrisi pe gbogbo awọn ohun kan wa ninu package:
- Displays2go Advertising Multimedia Kiosk (DF043TLB2)
- Okun agbara
- Four Locking Casters (pre-installed or to be installed)
- Afowoyi Olumulo (iwe-ipamọ yii)
4. Awọn ilana iṣeto
4.1. Unpacking ati Placement
Carefully remove the kiosk from its packaging. Place the unit on a flat, stable surface. Ensure adequate space around the kiosk for ventilation and access.

olusin 1: Iwaju view of the Displays2go Advertising Multimedia Kiosk.

olusin 2: Apa view of the kiosk displaying content.

olusin 3: Ẹyìn view of the kiosk, showing ventilation and access panel.
Fidio 1: A 360-degree view of the 43-inch Floor Standing Poster, showcasing its physical design and features from all angles.
4.2. Caster Installation (if not pre-installed)
If the four locking casters are not pre-installed, carefully tilt the kiosk and attach each caster to the designated mounting points on the base. Ensure they are securely fastened. Lock the casters once the kiosk is in its final position to prevent unintended movement.
4.3. Asopọ agbara
- Locate the power input port on the back of the kiosk.
- Connect the provided power cable to the kiosk and then to a standard electrical outlet.
- Flip the power switch to the "ON" position. The kiosk will begin to boot up.

Nọmba 4: Alaye view of the kiosk's connectivity ports and power switch.
5. Awọn ilana Iṣiṣẹ
5.1. Initial Boot-Up and Android 11 OS
Upon powering on, the kiosk will boot into the Android 11 operating system. The initial setup may require you to configure basic settings such as language, Wi-Fi connection, and time zone. Follow the on-screen prompts.
Video 2: Product Showcase of the Displays2go Digital Poster, highlighting various features and applications. This video provides a general overview of the kiosk's capabilities, including its touch functionality and design.
5.2. Using the Multi-Touch Screen
The kiosk features a 10-point IR touchscreen, allowing for interactive gestures such as tapping, swiping, and multi-finger operations. Navigate the Android interface and interactive applications by touching the screen directly.
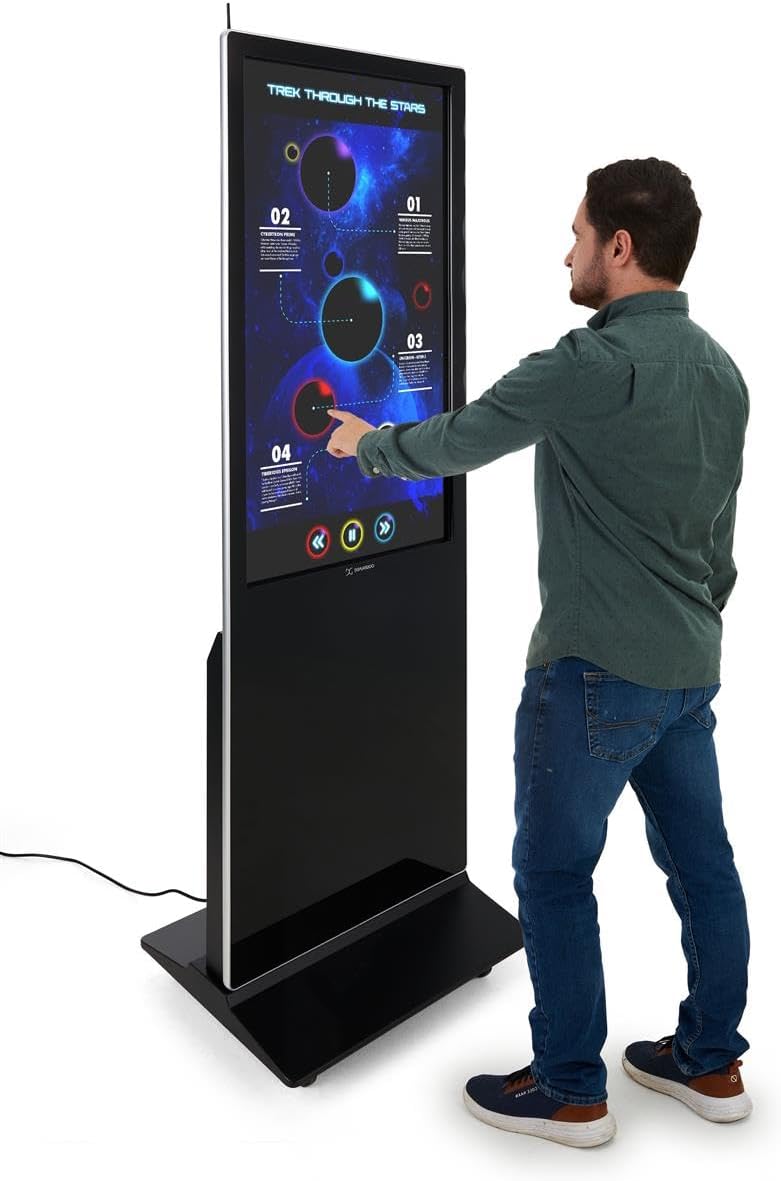
Figure 5: A user interacting with the multi-touch screen of the kiosk.
5.3. Content Upload and Management
There are several methods to upload and manage content on your kiosk:
- Plug-and-Play USB: Connect a USB drive to one of the three available USB ports. The kiosk will detect the drive, allowing you to transfer media files (images, videos, documents) directly to the internal storage.
- Cloud Storage/CMS: Connect the kiosk to your network via Wi-Fi or Ethernet (LAN port). You can then access your personal cloud storage accounts or integrate with a connected content management system (CMS) for remote content updates.
5.4. Using the DiViEX Slideshow App
The kiosk comes with the DiViEX slideshow app pre-installed. This application allows you to create and manage captivating slideshows with various borders, aspect ratios, and theme sharing capabilities. Refer to the in-app help or the DiViEX documentation for detailed usage instructions.
Video 3: Demonstration of the DiViEX Slideshow App. This video illustrates how to use the pre-installed application to create and customize digital content for display on the kiosk.
5.5. Ijade ohun
The kiosk is equipped with dual 8W speakers for audio output. Adjust the volume through the Android operating system settings or within the media playback application.
6. Itọju
6.1. Cleaning the Screen and Casing
- Nigbagbogbo ge asopọ okun agbara ṣaaju ṣiṣe mimọ.
- Lo asọ asọ, ti ko ni lint die-die dampened with water or a non-abrasive screen cleaner to wipe the screen.
- Fun awọn casing, use a soft, dry cloth. Avoid harsh chemicals or abrasive materials.
6.2. Software imudojuiwọn
Periodically check for system updates through the Android settings menu to ensure optimal performance and security. Ensure the kiosk is connected to the internet during updates.
7. Laasigbotitusita
| Isoro | Owun to le Fa | Ojutu |
|---|---|---|
| Kiosk does not power on. | Power cable disconnected; power switch off; no power from outlet. | Check power cable connection; ensure power switch is ON; test outlet with another device. |
| Iboju ifọwọkan ko dahun. | Software glitch; screen dirty; external interference. | Restart the kiosk; clean the screen; ensure no objects are blocking the IR sensors. |
| No content displayed. | No media loaded; incorrect app selected; network issue for streaming content. | Ṣe idaniloju media files are present; ensure the correct application (e.g., DiViEX) is running; check network connection. |
| Ko si ohun afetigbọ. | Volume too low; audio muted; application audio settings. | Increase volume in Android settings; unmute audio; check audio settings within the playing application. |
8. Awọn pato
| Ẹya ara ẹrọ | Ẹ̀kúnrẹ́rẹ́ |
|---|---|
| Awoṣe | DF043TLB2 |
| Iwon iboju | 43 inches |
| Ipinnu | 1920 x 1080 (1080p HD) |
| Fọwọkan Imọ-ẹrọ | 10pt IR Touchscreen |
| Eto isesise | Android 11 |
| Ibi ipamọ inu | 32 GB |
| Àgbo | 4 GB |
| Awọn ibudo USB | 3 |
| Awọn agbọrọsọ | Meji 8W |
| Apakan Ipin | 1.78:1 |
| Eto Itansan Aworan | 1200:1 |
| Awọn Iwọn Ọja (W x H x D) | 24.4 x 56 x 9 inches |
| Olupese | Awọn ifihan 2go |
9. Atilẹyin ọja ati Support
For warranty information and technical support, please refer to the Displays2go official webojula tabi kan si wọn onibara iṣẹ. Tọju iwe-ẹri rira rẹ fun awọn ẹtọ atilẹyin ọja.
Displays2go Contact Information:
- Webojula: www.displays2go.com
- Foonu: 1-844-221-3393
Ask a question about this manual
Ask about setup, troubleshooting, compatibility, parts, safety, or missing instructions. Manuals+ will review the question and use this page’s manual context to help answer it.