1. Ọja Ipariview
The NOKLEAD Mini Thermometer Humidity Meter is a compact and accurate device designed to monitor indoor temperature and humidity levels. It features a clear display with a comfort indicator, making it easy to understand your environment at a glance. Its portable design allows for versatile placement in various settings.
Kini o wa ninu apoti:
- 2 x NOKLEAD Thermometer Humidity Meters
- 1 x Itọsọna olumulo
- 2 x CR2032 Button Batteries (pre-installed or included)
- 2 x Double-sided Adhesive Stickers

Figure 1.1: Two NOKLEAD Mini Thermometer Humidity Meters.
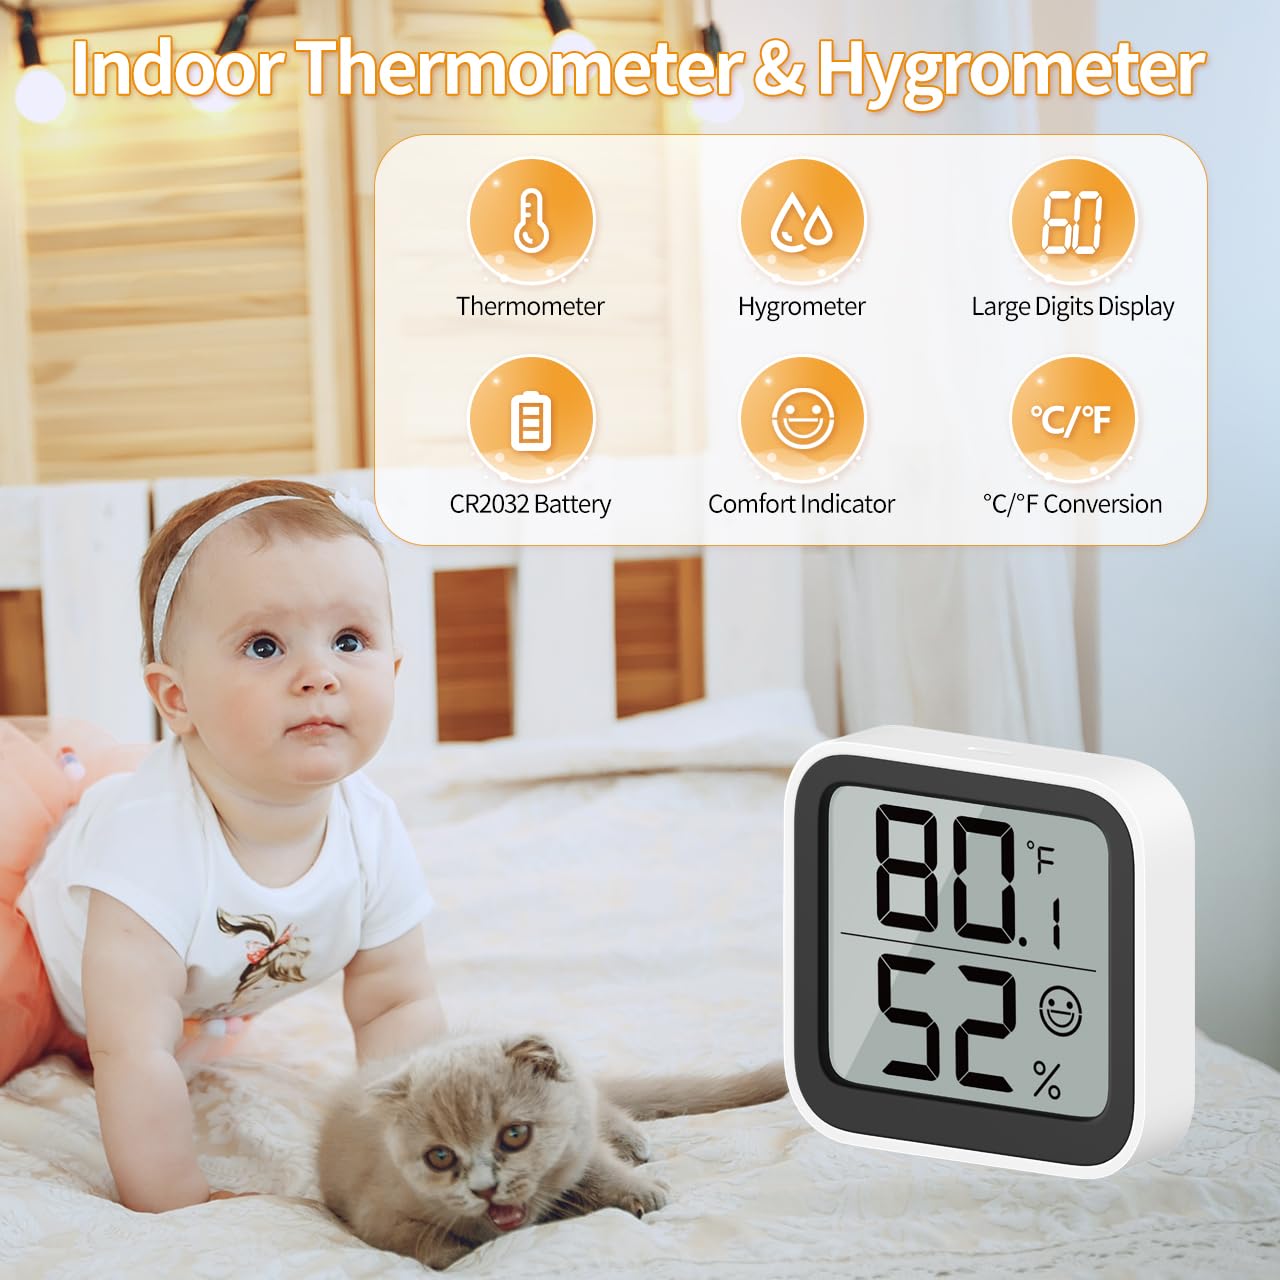
Figure 1.2: Product features overview, including thermometer, hygrometer, large digits display, CR2032 battery, comfort indicator, and C/F conversion.
2. Eto
2.1 Fifi sori batiri
The device comes with a pre-installed CR2032 button battery. If the battery needs replacement or is not installed, locate the battery compartment on the back of the device. Use a small screwdriver to unscrew the safety screw on the battery cover, then remove the cover. Insert the CR2032 battery with the positive (+) side facing up. Replace the cover and secure it with the screw.

Nọmba 2.1: Iwaju ati sẹhin view of the device, highlighting the battery safety screwgate.
2.2 Ibi
The NOKLEAD Thermometer Humidity Meter offers flexible placement options:
- Ibi Tabili: The device has a built-in stand allowing it to be placed upright on any flat surface such as a desk, shelf, or nightstand.
- Iṣagbede ogiri: Use the included double-sided adhesive tape to attach the device securely to a wall or other vertical surface. Ensure the surface is clean and dry before applying the adhesive.
For accurate readings, place the device away from direct sunlight, heat sources (like radiators or vents), and areas with high airflow (like open windows or air conditioning units).

Figure 2.2: Device dimensions and placement options (tabletop stand and wall mount).
3. Awọn ilana Iṣiṣẹ
3.1 Ifihan Loriview
The large LCD screen displays the current temperature (top number) and humidity (bottom number) in real-time. A comfort indicator face icon is also shown to provide a quick visual assessment of the environment.
3.2 Temperature Unit Switch (℃/℉)
To switch between Celsius (℃) and Fahrenheit (℉), locate the button on the back of the device labeled "℃/℉". Press this button once to toggle the temperature unit.
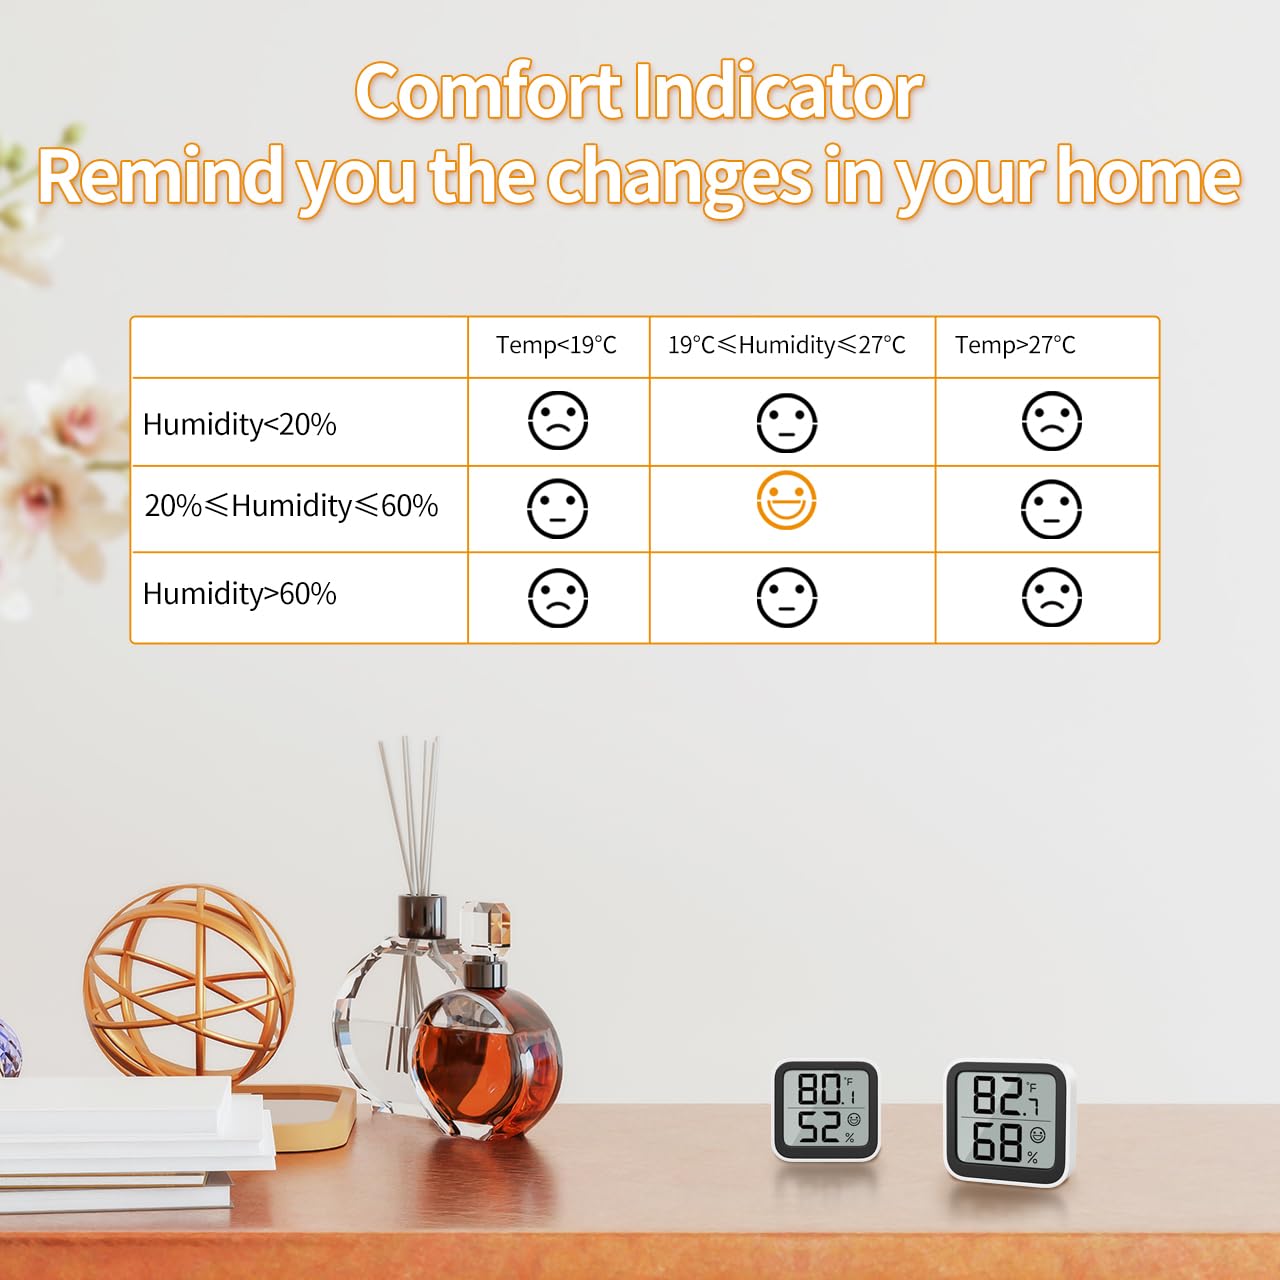
Figure 3.1: Location of the ℃/℉ switch button on the back of the device.
3.3 Comfort Indicator
The face icon on the display provides a visual indication of the comfort level based on the current temperature and humidity. This helps you quickly determine if the environment is too dry, comfortable, or too wet, prompting you to adjust humidifiers or dehumidifiers as needed.

Figure 3.2: Comfort Indicator Chart.
| Ipo | Ibiti ọriniinitutu | Iwọn otutu | Oju Aami |
|---|---|---|---|
| Gbẹ | <20% RH | Any Temperature | Oju Ibanujẹ |
| Itunu | 20% RH - 60% RH | 19℃ - 27℃ (66.2℉ - 80.6℉) | Smiling Face |
| tutu | > 60% RH | Any Temperature | Oju Ibanujẹ |
The device updates data measurements in real-time to provide the latest environmental conditions.

Olusin 3.3: Examples of suitable environments for the thermometer hygrometer.
4. Itọju
4.1 Batiri Rirọpo
The device uses a CR2032 button battery, which has low energy consumption and a long service life (typically 8-12 months). When the display becomes dim or stops working, it's time to replace the battery. Follow the instructions in Section 2.1 Battery Installation to replace the battery.

Figure 4.1: Battery compartment and typical battery life.
4.2 Ninu
To clean the device, gently wipe the surface with a soft, dry cloth. Do not use abrasive cleaners, solvents, or immerse the device in water. Keep the air inlets on the device clear of dust and debris to ensure accurate readings.
5. Laasigbotitusita
- Ko si Ifihan / Iboju òfo:
Check if the CR2032 battery is correctly installed with the positive (+) side facing up. Replace the battery if it is depleted. - Awọn kika ti ko pe:
Ensure the device is placed in a stable environment, away from direct sunlight, heat sources (e.g., radiators, ovens), or strong drafts (e.g., open windows, air conditioning vents). Allow the device to stabilize for at least 30 minutes after initial setup or relocation for accurate readings. - Display is Dim:
The battery level may be low. Replace the CR2032 battery.
6. Awọn pato
| Ẹya ara ẹrọ | Sipesifikesonu |
|---|---|
| Nọmba awoṣe | 6223P2 |
| Iwọn Iwọn Iwọn otutu | -9.9℃ si 60℃ (14.18℉ si 140℉) |
| Yiye iwọn otutu | ± 1.0 ℃ |
| Iwọn otutu Ipinnu | 0.1 ℃ |
| Iwọn Iwọn Ọriniinitutu | 10% RH si 95% RH |
| Yiye Ọriniinitutu | ± 3-5% RH |
| Iduro ọriniinitutu | 1% RH |
| Ọja Mefa | 46mm x 50mm x 12mm (0.67"W x 4.8"H) |
| Iwọn | 26g (0.92 iwon) |
| Batiri Iru | CR2032 Bọtini Batiri |
| Iṣagbesori Iru | Tabletop, Odi Oke |
7. Atilẹyin ọja ati Support
For any questions, technical support, or warranty inquiries regarding your NOKLEAD Thermometer Humidity Meter, please contact NOKLEAD customer service through the retailer's platform or the official NOKLEAD website. Please retain your purchase receipt for warranty purposes.