
1. Ifihan
This manual provides detailed instructions for the setup, operation, maintenance, and troubleshooting of your ACASIS DS-0202 14-in-1 USB C Docking Station. Please read this manual thoroughly before using the product to ensure optimal performance and longevity.

Image 1.1: The ACASIS DS-0202 14-in-1 USB C Docking Station, showcasing its compact design and multiple connectivity options including USB-C, USB-A, HDMI, DisplayPort, Ethernet, and card readers.
2. Key Awọn ẹya ara ẹrọ
- 14-ni-1 Asopọmọra: Expands a single USB-C/Thunderbolt 3/4 port into 14 ports, including 2 HDMI, 1 DisplayPort, 3 USB-C 3.1 (10Gbps), 2 USB-A 3.1 (10Gbps), 1 USB 2.0, SD/TF card reader, 1Gbps Ethernet, 3.5mm audio, and 100W Power Delivery.
- Atilẹyin Ifihan Mẹta: Supports single 4K@60Hz display and triple 4K@30Hz displays (under DP1.4). Windows systems support both MST (Multi-Stream Transport) and SST (Single-Stream Transport) for mirror and extend modes. macOS systems do not support MST.
- Gbigbe Data Iyara Giga: Features 3 USB-C 3.1 and 2 USB-A 3.1 ports, all offering 10Gbps data transfer speeds for rapid file awọn gbigbe.
- Ifijiṣẹ Agbara 100W: Provides up to 100W Power Delivery through the dedicated USB-C port to charge compatible laptops, tablets, and phones.
- Gigabit-Eternet: Integrated 1000Mbps Ethernet port ensures stable and fast wired network connectivity.
- Asopọmọra ohun: Includes a 3.5mm audio and microphone port for headset connection.
- Àwọn Olùka Káàdì SD/TF: Built-in SD and TF card slots for convenient data access.
3. Ìṣètò Ibudo
Familiarize yourself with the various ports on the ACASIS DS-0202 docking station:

Aworan 3.1: alaye view of the docking station's ports, including RJ45 (Ethernet), DisplayPort, HDMI 1, HDMI 2, USB 2.0, USB-A 3.1, PD 3.0 (Max 100W), 3.5mm Audio, and three USB-C 3.1, two USB-A 3.1, SD/TF 3.0 ports.
- Àwọn Ibudo Iwaju/Ẹgbẹ́:
- 3 x USB-C 3.1 (10Gbps)
- 2 x USB-A 3.1 (10Gbps)
- 1 x SD Card Reader (SD 3.0)
- 1 x TF Card Reader (TF 3.0)
- Awọn ibudo ẹhin:
- 1 x RJ45 Gigabit Ethernet (1000Mbps)
- 1 x DisplayPort (4K@60Hz)
- 2 x HDMI 2.0 (4K@60Hz)
- 1 x USB 2.0 (480Mbps)
- 1 x USB-A 3.1 (10Gbps)
- 1 x USB-C PD 3.0 (Max 100W input)
- 1 x 3.5mm Audio & Mic In
4. Awọn ilana iṣeto
Before connecting the docking station, ensure your laptop's USB-C port supports Power Delivery, DisplayPort Alt Mode, and Data Transfer. Refer to your laptop's specifications or manufacturer for details.

Image 4.1: USB-C port compatibility check. Ensure your laptop's USB-C port supports Thunderbolt 3/4 or USB-C with Power Delivery, DisplayPort Alt Mode, and Data Transfer for full functionality.
- Sopọ Adapter Agbara (Aṣayan ṣugbọn a ṣeduro): If you wish to charge your laptop via the docking station, connect your laptop's USB-C power adapter (up to 100W) to the "PD 100W" USB-C port on the docking station.
- Sopọ si Kọǹpútà alágbèéká: Connect the integrated USB-C cable from the docking station to a compatible USB-C/Thunderbolt 3/4 port on your laptop.
- So Àwọn Ìfihàn Ìta pọ̀:
- For single or dual monitors: Connect your monitors using HDMI cables to the HDMI 1 and HDMI 2 ports, or a DisplayPort cable to the DP port.
- For triple monitors: Connect your monitors to the HDMI 1, HDMI 2, and DP ports.
Note: Ensure your display cables are securely connected.
- Awọn Agbeegbe Sopọ: Connect your USB devices (keyboard, mouse, external drives, etc.) to the available USB-A and USB-C data ports.
- Sopọ Ethernet (Aṣayan): For a wired network connection, connect an Ethernet cable from your router/modem to the RJ45 port on the docking station.
- So Àwọn Ẹ̀rọ Ohùn pọ̀ (Àṣàyàn): Pulọọgi agbekọri rẹ tabi awọn agbohunsoke sinu jaketi ohun afetigbọ 3.5mm.
The docking station is plug-and-play and should be automatically recognized by your operating system. You may need to configure display settings manually.
5. Awọn ilana Iṣiṣẹ
5.1 Display Configuration (Windows)
Windows operating systems support both Mirror Mode (SST) and Extend Mode (MST) for multiple displays. You can configure these settings via your display settings.

Image 5.1: Triple display setup examples for Windows, illustrating Mirror Mode (A-BBB) and Extend Mode (A-BCD, A-BC, A-BD) with various monitor arrangements and resolutions.
- Mirror Mode (SST): All connected displays show the same content as your laptop screen.
- Extend Mode (MST): Each connected display can show different content, extending your desktop across multiple screens.
- Ipinnu: Supports up to 4K@60Hz for a single display and 4K@30Hz for triple displays (under DP1.4).
To adjust display settings in Windows:
- Tẹ-ọtun lori tabili tabili rẹ ki o yan "Awọn eto ifihan".
- Identify and arrange your displays.
- Select the desired display mode (Extend these displays, Duplicate these displays).
- Adjust resolution and orientation as needed.
5.2 Ṣíṣeto Ìfihàn (macOS)
macOS systems do not support Multi-Stream Transport (MST). Therefore, when multiple external monitors are connected, they will either mirror each other or extend the laptop display, but cannot extend independently to three unique displays.

Image 5.2: Triple display setup examples for macOS, illustrating Mirror Mode (A-AAA) where all displays show the same content, and Extend Mode (A-BBB) where external displays mirror each other while extending the laptop screen.
- Ipo digi: All connected displays show the same content as your MacBook screen.
- Fa Ipo: The external displays will mirror each other, extending your desktop from the MacBook screen. You cannot have three independent extended displays.
- Ipinnu: Supports up to 4K@30Hz for triple displays.
To adjust display settings in macOS:
- Go to "System Settings" (or "System Preferences" on older macOS versions).
- Select "Displays".
- Arrange your displays and select the desired mode (Mirror Displays or Use as separate display).
5.3 Data Gbigbe
The docking station features 3 USB-C 3.1 and 2 USB-A 3.1 ports, all capable of 10Gbps data transfer. Connect your high-speed storage devices to these ports for optimal performance.

Image 5.3: The docking station's 10Gbps USB-C and USB-A ports enable ultra-fast data transfer for large files and high-bandwidth peripherals.
5.4 Ifijiṣẹ agbara
The dedicated USB-C PD port supports up to 100W power input. Connect your laptop's power adapter to this port to charge your laptop while using the docking station.

Image 5.4: The 100W Power Delivery port allows for fast charging of your laptop while connected to the docking station, with an example showing 100W input and 85W output to the laptop.
5.5 Gigabit àjọlò
The RJ45 port provides a stable and fast 1000Mbps (1 Gigabit) Ethernet connection. This is ideal for reliable internet access and large file transfers over a local network.

Image 5.5: The Gigabit Ethernet port provides a fast and stable wired network connection, supporting speeds up to 1000Mbps.
Àwọn Olùka Káàdì SD/TF 5.6
Insert your SD or TF (Micro SD) cards into the respective slots for quick access to photos and other data. Both slots can be used simultaneously.
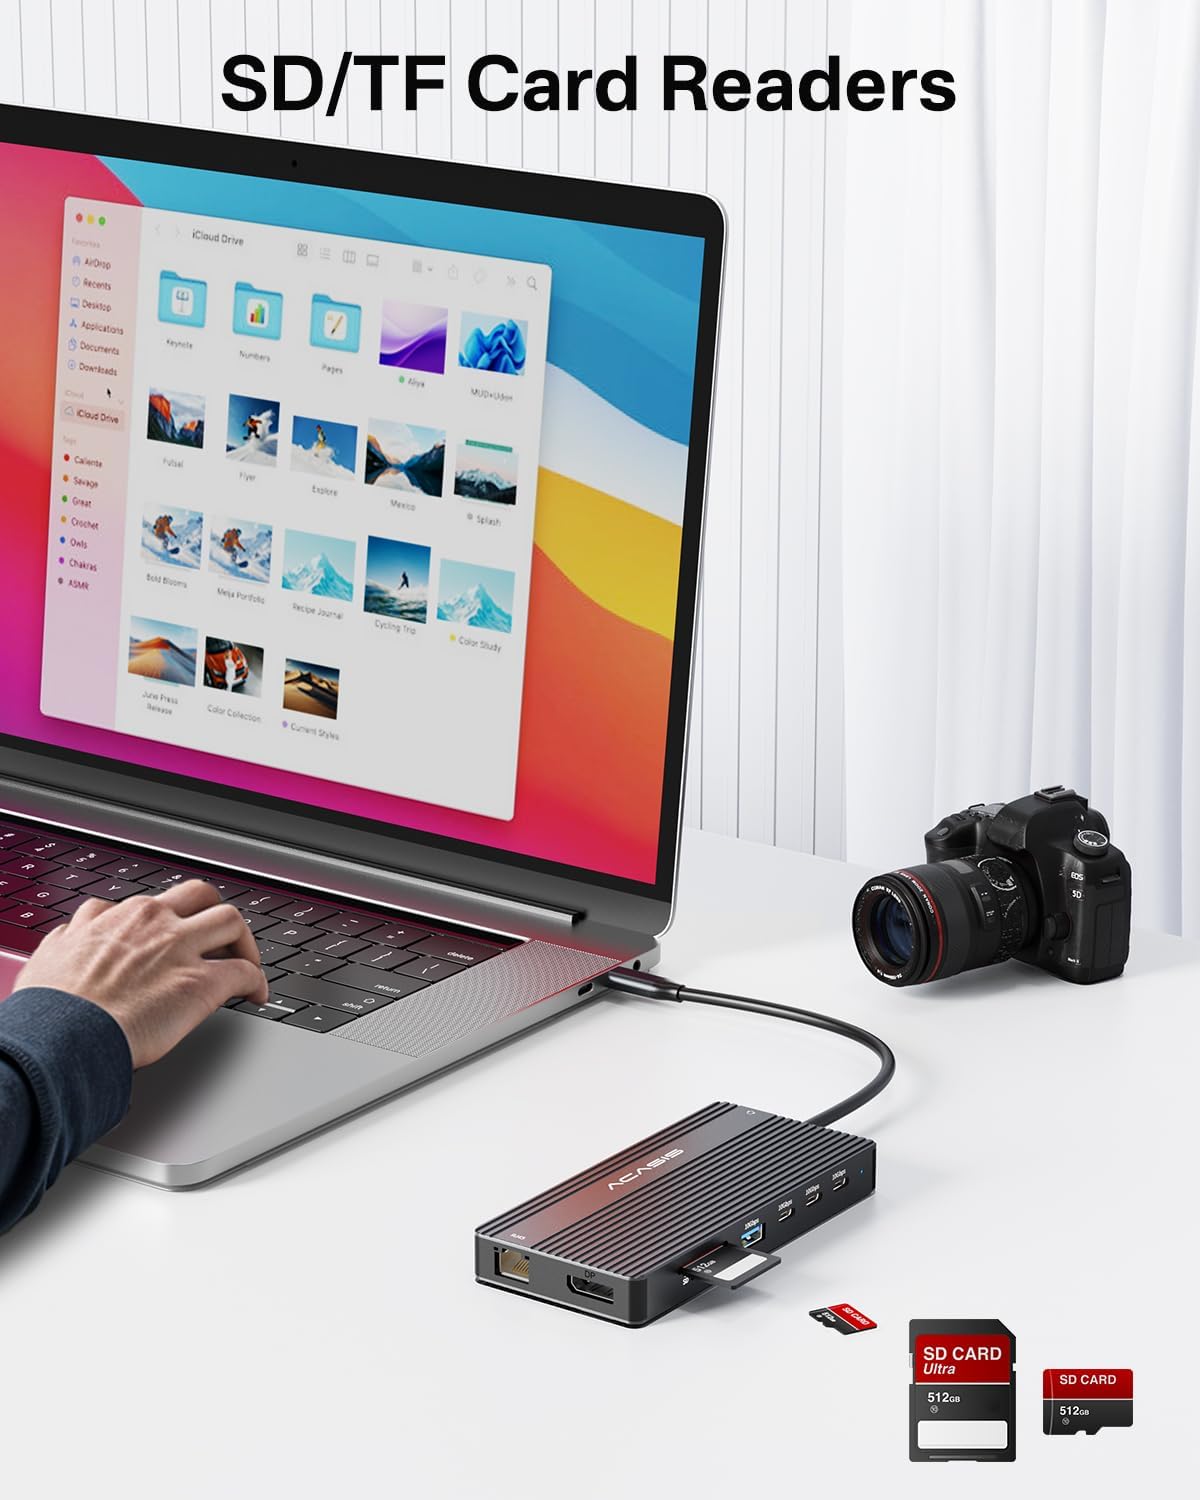
Image 5.6: The integrated SD and TF card readers allow for convenient and fast access to memory card data, useful for photographers and content creators.
6. Itọju
- Ninu: Lo aṣọ rírọrùn tí ó gbẹ láti nu ojú ibi ìtọ́jú ọkọ̀ ojú omi. Yẹra fún àwọn ohun èlò ìfọmọ́ omi tàbí àwọn ohun èlò ìpara.
- Ibi ipamọ: Tọju ibudo docking ni itura, aye gbigbẹ kuro lati orun taara ati awọn iwọn otutu to gaju.
- Mimu: Avoid dropping or subjecting the device to strong impacts. Do not bend the integrated USB-C cable excessively.
- Afẹfẹ: Rí i dájú pé ibùdó ìdúró ọkọ̀ náà ní afẹ́fẹ́ tó péye láti dènà ìgbóná jù, pàápàá jùlọ nígbà lílo fún ìgbà pípẹ́ pẹ̀lú àwọn ẹ̀rọ tí a so pọ̀.
7. Laasigbotitusita
| Isoro | Owun to le Fa | Ojutu |
|---|---|---|
| No display output / Flickering screen |
|
|
| Kọǹpútà alágbèéká kò gba agbara |
|
|
| USB devices not recognized / Slow data transfer |
|
|
| Ethernet connection unstable or not working |
|
|
8. Awọn pato
| Ẹya ara ẹrọ | Ẹ̀kúnrẹ́rẹ́ |
|---|---|
| Nọmba awoṣe | DS-0202 |
| Brand | ACASIS |
| Asopọmọra | USB-C (Host connection) |
| Ijade fidio | 2 x HDMI 2.0 (4K@60Hz), 1 x DisplayPort (4K@60Hz) |
| Awọn ibudo data USB | 3 x USB-C 3.1 (10Gbps), 2 x USB-A 3.1 (10Gbps), 1 x USB 2.0 (480Mbps) |
| Àjọlò | 1 x RJ45 Gigabit Ethernet (1000Mbps) |
| Oluka kaadi | SD 3.0, TF 3.0 (simultaneous use) |
| Ohun | 1 x 3.5mm Audio & Mic In |
| Ifijiṣẹ Agbara | USB-C PD 3.0, up to 100W input |
| Awọn ẹrọ ibaramu | Laptops with full-featured USB-C/Thunderbolt 3/4 ports (Dell, HP, Lenovo, ThinkPad, Surface, MacBook, etc.) |
| Awọn ọna ṣiṣe | Windows, macOS, Linux, iPadOS |
| Ọja Mefa | 1 x 1 x 1 inches (isunmọ) |
| Iwọn Nkan | 5 iwon (isunmọ) |
| Àwọ̀ | Dudu |
9. atilẹyin ọja Information
ACASIS products typically come with a standard manufacturer's warranty. For specific warranty terms and conditions, please refer to the warranty card included with your product or visit the official ACASIS webojula. Tọju iwe-ẹri rira rẹ bi ẹri rira fun awọn iṣeduro atilẹyin ọja.
Awọn ero aabo tun wa fun rira lọtọ:
- 3-odun Idaabobo Eto
- 4-odun Idaabobo Eto
- Idaabobo pipe (ètò oṣooṣu)
These plans offer extended coverage beyond the standard manufacturer's warranty.
10. Onibara Support
If you encounter any issues or have questions regarding your ACASIS DS-0202 14-in-1 USB C Docking Station, please contact ACASIS customer support through the following channels:
- Osise Webojula: Ṣabẹwo si ACASIS Store on Amazon fun alaye ọja ati awọn orisun atilẹyin.
- Imeeli Atilẹyin: Refer to your product packaging or the ACASIS webojula fun awọn julọ lọwọlọwọ support adirẹsi imeeli.
- Fọọmu Olubasọrọ Ayelujara: Many manufacturers provide a contact form on their webojula fun imọ iranlowo.
When contacting support, please have your product model number (DS-0202) and purchase details ready.