
1. Ifihan
The Sharkoon AK2 Black is an ATX PC case designed for a wide range of computer builds, including gaming, work, and multimedia stations. It offers a discreet aesthetic combined with extensive compatibility for modern hardware and efficient cooling solutions. This manual provides essential information for the proper setup, operation, and maintenance of your AK2 PC case.
Awọn ẹya pataki pẹlu:
- Support for Mini-ITX, Micro-ATX, ATX, and BTF motherboards.
- Spacious interior for large graphics cards (up to 41 cm).
- CPU cooler height clearance up to 17 cm.
- Power supply unit (PSU) length up to 23.5 cm.
- Pre-installed 120mm fans (one front, one rear), with support for up to eleven fans total.
- Compatibility with up to two 360mm radiators for liquid cooling.
- Front panel with modern TRRS and USB-C ports.
- Storage options for up to two 3.5" HDDs or four 2.5" SSDs.
2. Alaye Aabo
Please read and understand the following safety guidelines before installing components into your PC case:
- Always disconnect the power supply from the wall outlet before opening the PC case or installing/removing components.
- Fi ọwọ́ ṣọ́ gbogbo àwọn ẹ̀yà ara pẹ̀lú ìṣọ́ra láti yẹra fún ìbàjẹ́. Iná mànàmáná tí kò dúró lè ba àwọn ẹ̀yà ara ẹ̀rọ itanna tí ó ṣe pàtàkì jẹ́. Ẹ ronú nípa lílo okùn ọwọ́ tí kò dúró.
- Rii daju pe fentilesonu to dara ni ayika ọran PC lati ṣe idiwọ igbona.
- Pa awọn ẹya kekere ati awọn irinṣẹ kuro lọdọ awọn ọmọde.
- Do not attempt to modify the case structure, as this may compromise its integrity and void your warranty.
- Refer to the manuals of your individual components (motherboard, GPU, PSU, etc.) for specific installation instructions.
3. Eto ati Fi sori ẹrọ paati
This section outlines the general steps for installing your computer components into the Sharkoon AK2 Black PC case.
3.1. Ngbaradi Ọran naa
Carefully remove the side panels of the case. The AK2 features a spacious interior designed for ease of access during component installation.

olusin 1: Ti abẹnu view of the main compartment, ready for component installation.
3.2. Modaboudu fifi sori
The AK2 supports Mini-ITX, Micro-ATX, ATX, and BTF motherboards. Install the necessary standoffs for your motherboard form factor. Carefully place your motherboard onto the standoffs and secure it with screws.

Figure 2: Motherboard tray cutout for easy CPU cooler installation/removal.
3.3. Agbara Ipese Unit (PSU) fifi sori
Install your PSU into the dedicated compartment at the bottom of the case. The AK2 accommodates PSUs up to 23.5 cm in length. Secure the PSU with screws from the rear of the case.
3.4. Fifi sori ẹrọ Awakọ Ibi ipamọ
The case provides bays for up to two 3.5" HDDs or four 2.5" SSDs. Locate the drive cages and mounting points, typically behind the motherboard tray or within the PSU shroud area. Secure your drives using the provided screws or tool-less mechanisms.

olusin 3: Ru ti abẹnu view showing cable management space and drive mounting options.
3.5. Fifi Kaadi Aworan (GPU) ati Kaadi Imugboroosi sori ẹrọ
Install your graphics card into the appropriate PCIe slot on your motherboard. The AK2 supports large graphics cards up to 41 cm in length. Remove the necessary expansion slot covers from the rear of the case and secure your card.
3.6. Cooling System Installation (Fans and Radiators)
The AK2 comes with two pre-installed 120mm fans (one in the front, one in the rear). The case supports up to eleven fans in total for optimal airflow. For liquid cooling, it can accommodate up to two 360mm radiators. Install additional fans or radiators in the designated mounting positions (front, top, rear) as needed.

olusin 4: Ti abẹnu view showing fan and radiator mounting locations.
3.7. Connecting Front Panel I/O
Connect the front panel cables (USB-C, TRRS audio, power button, reset button, LED indicators) to the corresponding headers on your motherboard. Refer to your motherboard manual for exact header locations.

olusin 5: Iwaju view of the AK2 case, featuring the front panel I/O.
4. Ṣiṣẹ́ Àpò PC rẹ
Once all components are installed and connected, replace the side panels. Connect your peripherals, monitor, and power cable. Press the power button on the front panel to start your computer.
The AK2's design prioritizes airflow to ensure efficient cooling for your components. Ensure that the pre-installed fans are spinning and consider adding more fans if your system generates significant heat, especially during demanding tasks like gaming.
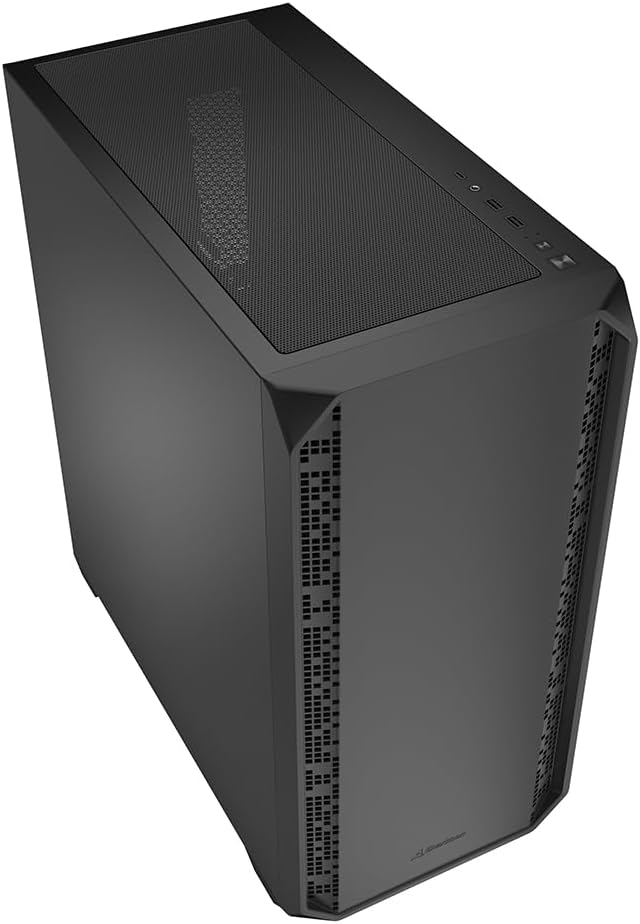
olusin 6: Angled view of the AK2 case, showcasing awọn oniwe-ìwò oniru.
5. Itọju
Itọju deedee n ṣe iranlọwọ lati rii daju pe iṣẹ ṣiṣe to dara julọ ati igba pipẹ ti awọn paati PC rẹ.
- Awọn Ajọ Eruku: The AK2 likely includes removable dust filters (e.g., on the top, front, and/or bottom). Regularly clean these filters by gently brushing or washing them to prevent dust buildup inside the case, which can impede airflow and cause overheating.
- Ninu inu: Periodically open the case (after disconnecting power) and use compressed air to remove dust from fans, heatsinks, and other components.
- Iṣakoso USB: Ensure cables are neatly routed to avoid obstructing airflow. The AK2 offers ample space behind the motherboard tray for effective cable management.
6. Laasigbotitusita
If you encounter issues during or after building your PC, consider the following common troubleshooting steps:
- Ko si Agbara: Double-check all power connections, including the 24-pin ATX, 8-pin CPU, and PCIe power cables. Ensure the PSU switch is in the 'ON' position.
- Ko si Ifihan: Verify that your monitor is connected to the graphics card (not the motherboard's integrated graphics, unless you are using it) and that the monitor is powered on and set to the correct input. Reseat your graphics card and RAM modules.
- Igbóná púpọ̀: Ensure all case fans and CPU cooler fans are spinning correctly. Check for dust buildup on heatsinks and dust filters. Verify proper thermal paste application on the CPU.
- Àwọn Ìṣòro Ìṣíṣẹ́/Ìdíwọ́ fún Páńẹ́lì Ìwájú: Confirm that all front panel headers (USB, audio, power/reset switches) are correctly connected to the motherboard.
For more complex issues, consult the manuals for your individual components or seek assistance from a qualified technician.
7. Awọn pato
Below are the technical specifications for the Sharkoon AK2 Black ATX PC Case:
| Brand | Sharkoon |
| Orukọ awoṣe | AK2 dudu |
| Iru Irú | Ile-iṣọ |
| Àwọ̀ | Dudu |
| Ohun elo | Alloy Irin |
| Iwọn Nkan | 6.46 kilo |
| Awọn iwọn Ọja (D x W x H) | 46D x 22.5W x 48.5H sẹntimita |
| Total Internal Bays | 6 (for 3.5" HDDs or 2.5" SSDs) |
| Modaboudu Support | Mini-ITX, Micro-ATX, ATX, BTF |
| Max. GPU Length | 41 cm |
| O pọju. Sipiyu kula Giga | 17 cm |
| O pọju. PSU Ipari | 23.5 cm |
| Fan Support | Up to 11 (2 x 120mm pre-installed) |
| Radiator Support | Up to two 360mm radiators |
| Iwaju I/O | TRRS, USB-C |

Figure 7: Product dimensions of the AK2 Black PC case.
8. Atilẹyin ọja ati Support
For warranty information and technical support, please refer to the official Sharkoon webojula tabi kan si wọn onibara iṣẹ taara. Jeki ẹri rira rẹ fun awọn iṣeduro atilẹyin ọja.
Fun iranlọwọ siwaju sii, o le ṣabẹwo si Sharkoon official webojula.