
Montech HS02 PRO Glass Black with Fans
MONTECH HS02 PRO ATX Mid-Tower PC Case User Manual
Model: HS02 PRO Glass Black with Fans (HS02PB)
Brand: Montech
1. Alaye Aabo
Please read and understand all safety instructions before installing or using the MONTECH HS02 PRO PC Case. Failure to follow these instructions may result in damage to the product, personal injury, or voiding of the warranty.
- Aabo Itanna: Ensure all power components are properly grounded and connected. Disconnect power before performing any installation or maintenance.
- Mimu: The case contains tempered glass panels. Handle with care to prevent breakage. Avoid dropping or subjecting the case to strong impacts.
- Afẹfẹ: Ensure adequate airflow around the case to prevent overheating. Do not block ventilation openings.
- Ayika: Operate the case in a dry, stable environment. Avoid extreme temperatures, humidity, and direct sunlight.
- Awọn ọmọde ati awọn ohun ọsin: Keep the product and its components out of reach of children and pets. Small parts can be a choking hazard.
2. Package Awọn akoonu
Verify that all items listed below are present in your package. If any items are missing or damaged, please contact Montech customer support.
- MONTECH HS02 PRO ATX Mid-Tower PC Case
- Apoti ẹya ẹrọ (awọn skru, awọn asopọ zip, awọn iduro, ati bẹbẹ lọ)
- Afowoyi Olumulo (iwe-ipamọ yii)
- Pre-installed GF120 V2 ARGB Fans (5x)
3. Ọja Ipariview
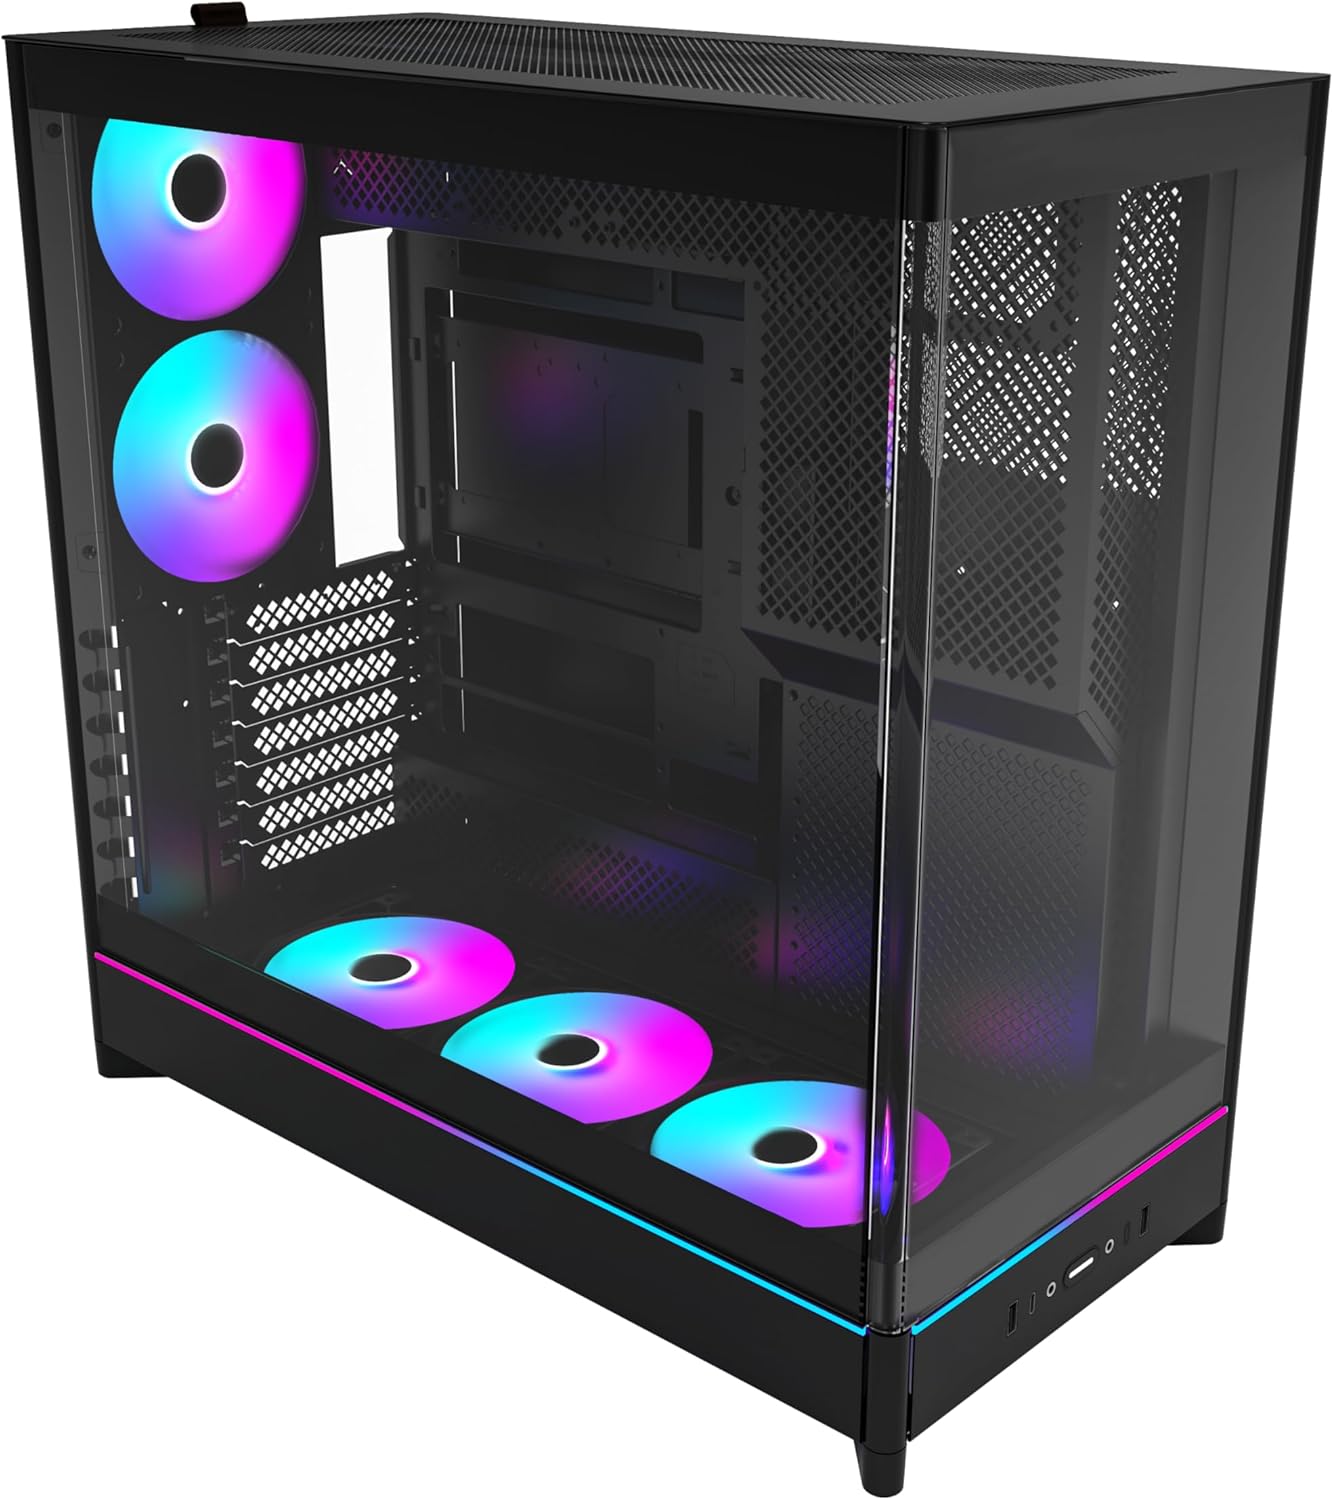
The MONTECH HS02 PRO is a high-airflow ATX mid-tower PC case designed for optimal thermal performance and aesthetic appeal. It features a unique reversible layout and a sturdy curved tempered glass front panel.
Awọn ẹya pataki:
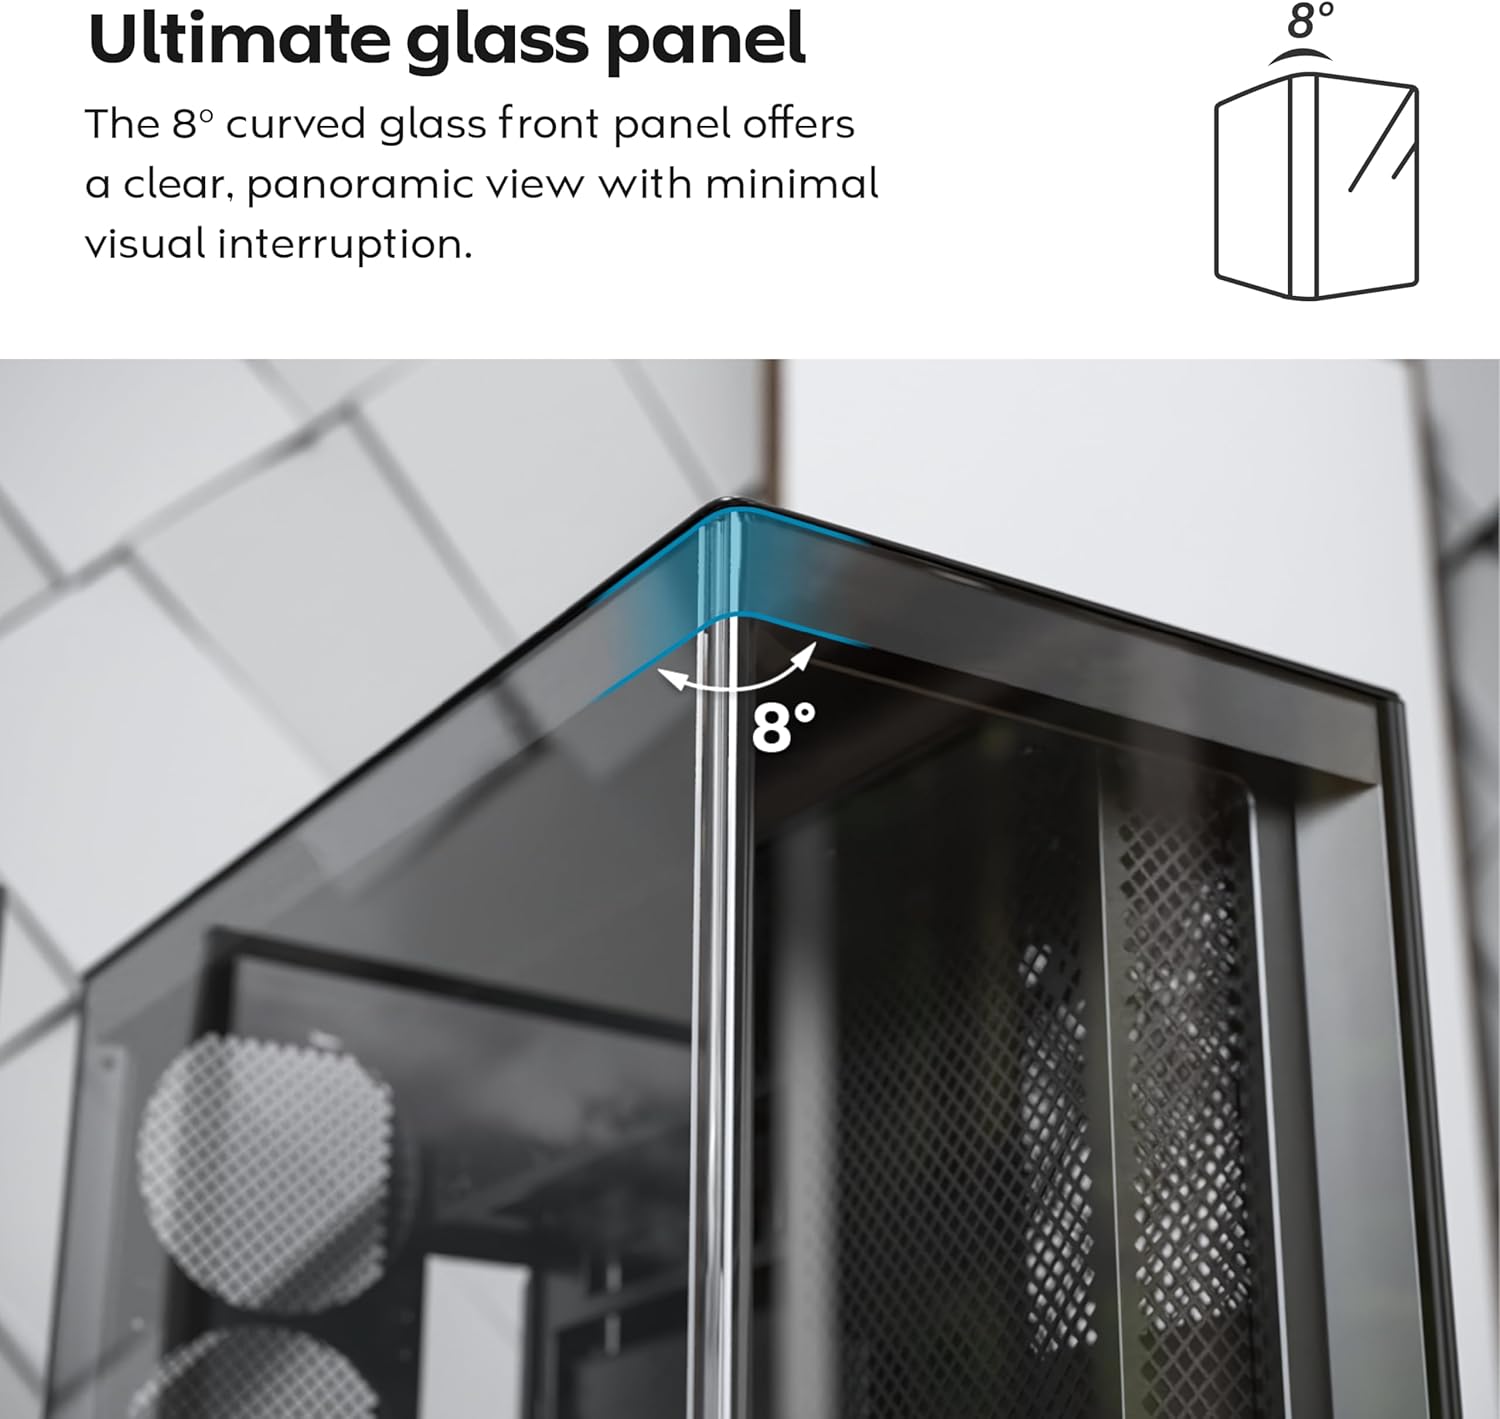
- 8-Degree Curved Glass Panel: The front tempered glass panel features a subtle 8-degree curved edge, offering a distinctive and refined view of the interior with minimal visual distortion.
- Apẹrẹ Yipada: A top-down reversible layout allows the entire setup to be positioned on either the left or right side, showcasing your build from your preferred angle.
- Vertical Ventilation: Bottom air intake and top exhaust create a natural chimney effect for efficient heat dissipation.
- Vertical GPU Ready: Rotatable PCIe slots enable an instant vertical GPU setup without requiring an extra holder or stand.
- Sink-In Design: A recessed bottom fan and motherboard layout maintain a clean, unobstructed side view.
- Pre-installed ARGB PWM Fans: Comes with 5 pre-installed GF120 V2 ARGB fans, fully syncable with motherboard lighting control.
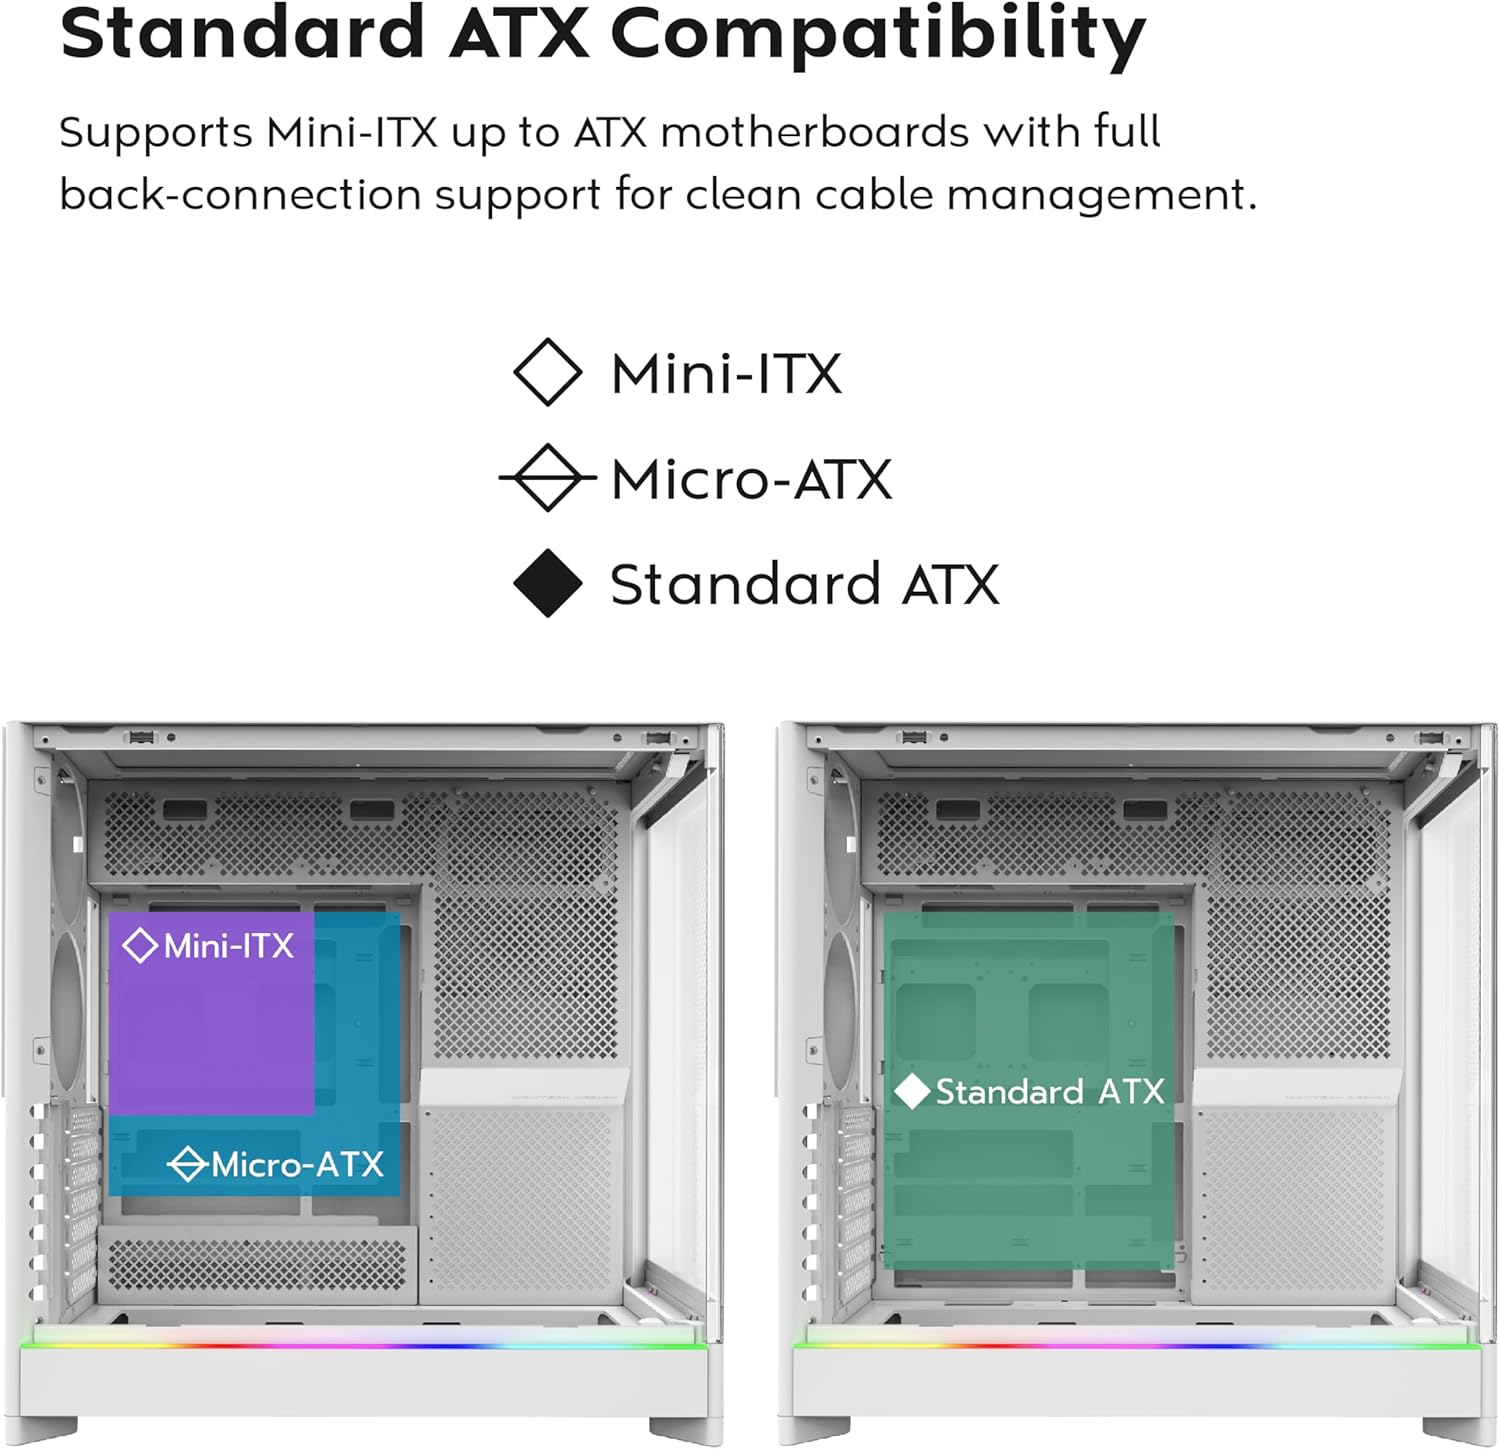
- Back-Connect Motherboard Ready: Supports standard and back-connect motherboards, including MSI Project Zero, ASUS BTF, and more.
- AmpAgbara Ibi ipamọ: Supports multiple storage drives (HDD/SSD) for flexible and expandable storage options.
Idanimọ eroja:





4. Eto ati fifi sori
This section provides general guidelines for setting up your MONTECH HS02 PRO PC case. For detailed component-specific instructions, refer to your motherboard, GPU, and PSU manuals.
4.1 Ngbaradi Ọran naa
- Ṣii silẹ: Fi ìṣọ́ra yọ àpò náà kúrò nínú àpò rẹ̀. Ṣe àyẹ̀wò bóyá ó ti bàjẹ́ tí a bá fi ọkọ̀ gbé e.
- Yiyọ igbimọ: Gently remove the tempered glass side panel and the rear metal side panel. The tempered glass panel is secured with toolless latches.
- Apoti Ẹya: Locate the accessory box inside the case, which contains all necessary screws and mounting hardware.
4.2 Fifi sori modaboudu
- Àwọn ìforígbárí: Ensure the correct standoffs are installed for your motherboard form factor (Mini-ITX, Micro-ATX, or ATX). Adjust if necessary.
- Ààbò I/O: Fi ààbò I/O ti motherboard rẹ sinu ẹnu-ọna ẹhin apoti naa.
- Iṣagbesori: Carefully align your motherboard with the standoffs and gently lower it into place. Secure it with the provided screws.
- Back-Connect Motherboards: If using a back-connect motherboard, ensure proper alignment with the designated cutouts for cable routing.
4.3 Power Ipese Unit (PSU) fifi sori
- Iṣagbesori: The PSU mounts at the bottom of the case. Slide the PSU into its designated bay from the rear.
- Nfi aabo: Ṣe aabo PSU pẹlu awọn skru lati ẹhin ọran naa.
- Cabling: Route necessary power cables through the cable management cutouts to the motherboard and other components.
4.4 Storage Drive Installation (HDD/SSD)
- Awọn Okun Wakọ: Utilize the designated drive bays for 3.5" HDDs and 2.5" SSDs.
- Iṣagbesori: Secure drives using the provided screws or toolless mechanisms where applicable.
4.5 Graphics Card (GPU) fifi sori
- PCIe Iho: Yọ awọn ideri iho PCIe pataki kuro.
- Petele sori: Insert the GPU into the primary PCIe slot on your motherboard and secure it with screws.
- Vertical Installation (Optional): The rotatable PCIe slots allow for vertical GPU mounting. Rotate the bracket and install your GPU vertically. A PCIe riser cable (not included) is required for vertical mounting.
4.6 Fifi sori ẹrọ Eto Itutu (Awọn Afẹfẹ/Awọn Radiator)
- Awọn onijakidijagan ti a ti fi sii tẹlẹ: The case comes with 5 pre-installed ARGB PWM fans. Connect their power and ARGB cables to your motherboard or a fan controller.
- Additional Fans/Radiators: The case supports additional fans and radiators at the top, rear, and bottom. Refer to the specifications for supported sizes.
- AIO Cooler: Install your All-in-One (AIO) liquid cooler radiator and fans according to the cooler's instructions, utilizing the available mounting points.
4.7 USB Management
Lo awọn ample space behind the motherboard tray and the cable management cutouts to route and secure cables. This improves airflow and aesthetics.
5. Awọn ilana Iṣiṣẹ
Once all components are installed and secured, you can power on your system.
5.1 Agbara Lori
- Awọn Agbeegbe Sopọ: Connect your monitor, keyboard, mouse, and other peripherals to your system.
- Cable Agbara: Connect the PSU power cable to a wall outlet and flip the PSU's power switch to the 'ON' position.
- Bọtini agbara: Tẹ bọtini agbara ni iwaju panẹli I/O ti apoti naa.
5.2 Front I/O Panel Functions
- Awọn ibudo USB 3.0: Fún sísopọ̀ àwọn ẹ̀rọ tó bá USB 3.0 mu.
- Ibudo Iru-C USB: For connecting USB Type-C compatible devices.
- Jack Audio: Fun olokun tabi agbohunsoke.
- Gbohungbohun Jack: Fun sisopọ gbohungbohun kan.
- Bọtini agbara: To turn the system on or off.
- Bọtini LED: To cycle through the 29 ARGB lighting modes for the pre-installed fans and integrated light strip.
6. Itọju
Itọju deedee n ṣe iranlọwọ lati rii daju pe iṣẹ ṣiṣe to dara julọ ati igba pipẹ ti awọn paati PC rẹ.
- Pipa eruku: Periodically clean dust filters (top, bottom, front) to maintain optimal airflow. Use compressed air to remove dust from internal components.
- Glass Panel Cleaning: Use a soft, lint-free cloth and a non-abrasive glass cleaner to clean the tempered glass panels. Avoid harsh chemicals.
- Iṣakoso USB: Máa ṣàyẹ̀wò ọ̀nà tí o ń gbà lo okùn láti rí i dájú pé kò sí okùn tó ń dí afẹ́fẹ́ tàbí abẹ́ afẹ́fẹ́ lọ́wọ́ lẹ́ẹ̀kọ̀ọ̀kan.
- Ayewo Olufẹ: Ensure all fans are spinning freely and quietly. Clean fan blades if dust buildup is significant.
7. Laasigbotitusita
This section addresses common issues you might encounter. For more complex problems, consult Montech customer support or a qualified technician.
Awọn oran ti o wọpọ ati Awọn ojutu:
| Isoro | Owun to le Fa | Ojutu |
|---|---|---|
| System ko ni agbara lori. | PSU switch off, power cables loose, faulty PSU/motherboard. | Ensure PSU switch is ON. Check all power connections (24-pin, CPU, GPU). Test PSU if possible. |
| Fans are not spinning or RGB is not working. | Fan cables disconnected, ARGB cables disconnected, faulty fan/controller. | Verify fan power and ARGB headers are securely connected to motherboard/controller. Use the LED button to cycle modes. |
| Afẹ́fẹ́ afẹ́fẹ́ tí kò dára tàbí iwọn otutu gíga. | Dust buildup, obstructed vents, incorrect fan orientation. | Clean dust filters and internal components. Ensure fans are oriented correctly for intake/exhaust. Check for cable obstructions. |
| Awọn ebute oko I/O iwaju ko ṣiṣẹ. | Front panel connectors loose or incorrectly connected to motherboard. | Refer to your motherboard manual to ensure all front panel headers (USB, audio) are correctly connected. |
8. Awọn pato
Detailed technical specifications for the MONTECH HS02 PRO ATX Mid-Tower PC Case.
| Ẹya ara ẹrọ | Sipesifikesonu |
|---|---|
| Orukọ awoṣe | HS02 PRO Glass Black with Fans |
| Nọmba awoṣe | HS02PB |
| Iru Irú | Ile-iṣọ Mid |
| Modaboudu Ibamu | ATX, Micro-ATX, Mini-ITX (with back-connect support) |
| Awọn iwọn (LxWxH) | 32 x 52.4 x 58.8 inches (iwọn 81.3 x 133.1 x 149.4 cm) |
| Iwọn Nkan | 24.2 poun (isunmọ 10.98 kg) |
| Iwaju Panel | Curved Tempered Glass (8-degree) |
| Awọn onijakidijagan ti a ti fi sii tẹlẹ | 5x GF120 V2 ARGB PWM Fans |
| Ọna Itutu | Air (Vertical Ventilation / Chimney Effect) |
| Agbara Ipese Iṣagbesori Iru | Isalẹ Oke |
| Iwaju Awọn Ibudo I / O | 2x USB 3.0, 1x USB Type-C, Audio, Mic, Power Button, LED Button |
| GPU Kiliaransi | Up to 420mm (supports vertical GPU with rotatable PCIe slots) |
| Ibi ipamọ Bays | Multiple HDD/SSD support |
| Àwọ̀ | Dudu |
9. Atilẹyin ọja ati Support
For warranty information and technical support, please refer to the official Montech webojula tabi kan si wọn onibara iṣẹ taara. Jeki ẹri rira rẹ fun awọn iṣeduro atilẹyin ọja.
- Montech Official Webojula: www.montechpc.com
- Iṣẹ onibara: Tọkasi awọn website for contact details, including email and phone support.
Ask a question about this manual
Ask about setup, troubleshooting, compatibility, parts, safety, or missing instructions. Manuals+ will review the question and use this page’s manual context to help answer it.