Ọrọ Iṣaaju
The MITSUKO AmbiMotion 2.0 TV Sync LED Backlight Kit enhances your viewing experience by dynamically synchronizing LED lighting with the colors displayed on your TV screen. This system includes an HDMI 2.0 Sync Box and an RGBIC+W LED strip, supporting 4K 60Hz content for movies, gaming, and music. This manual provides essential information for the proper setup, operation, maintenance, and troubleshooting of your AmbiMotion 2.0 system.
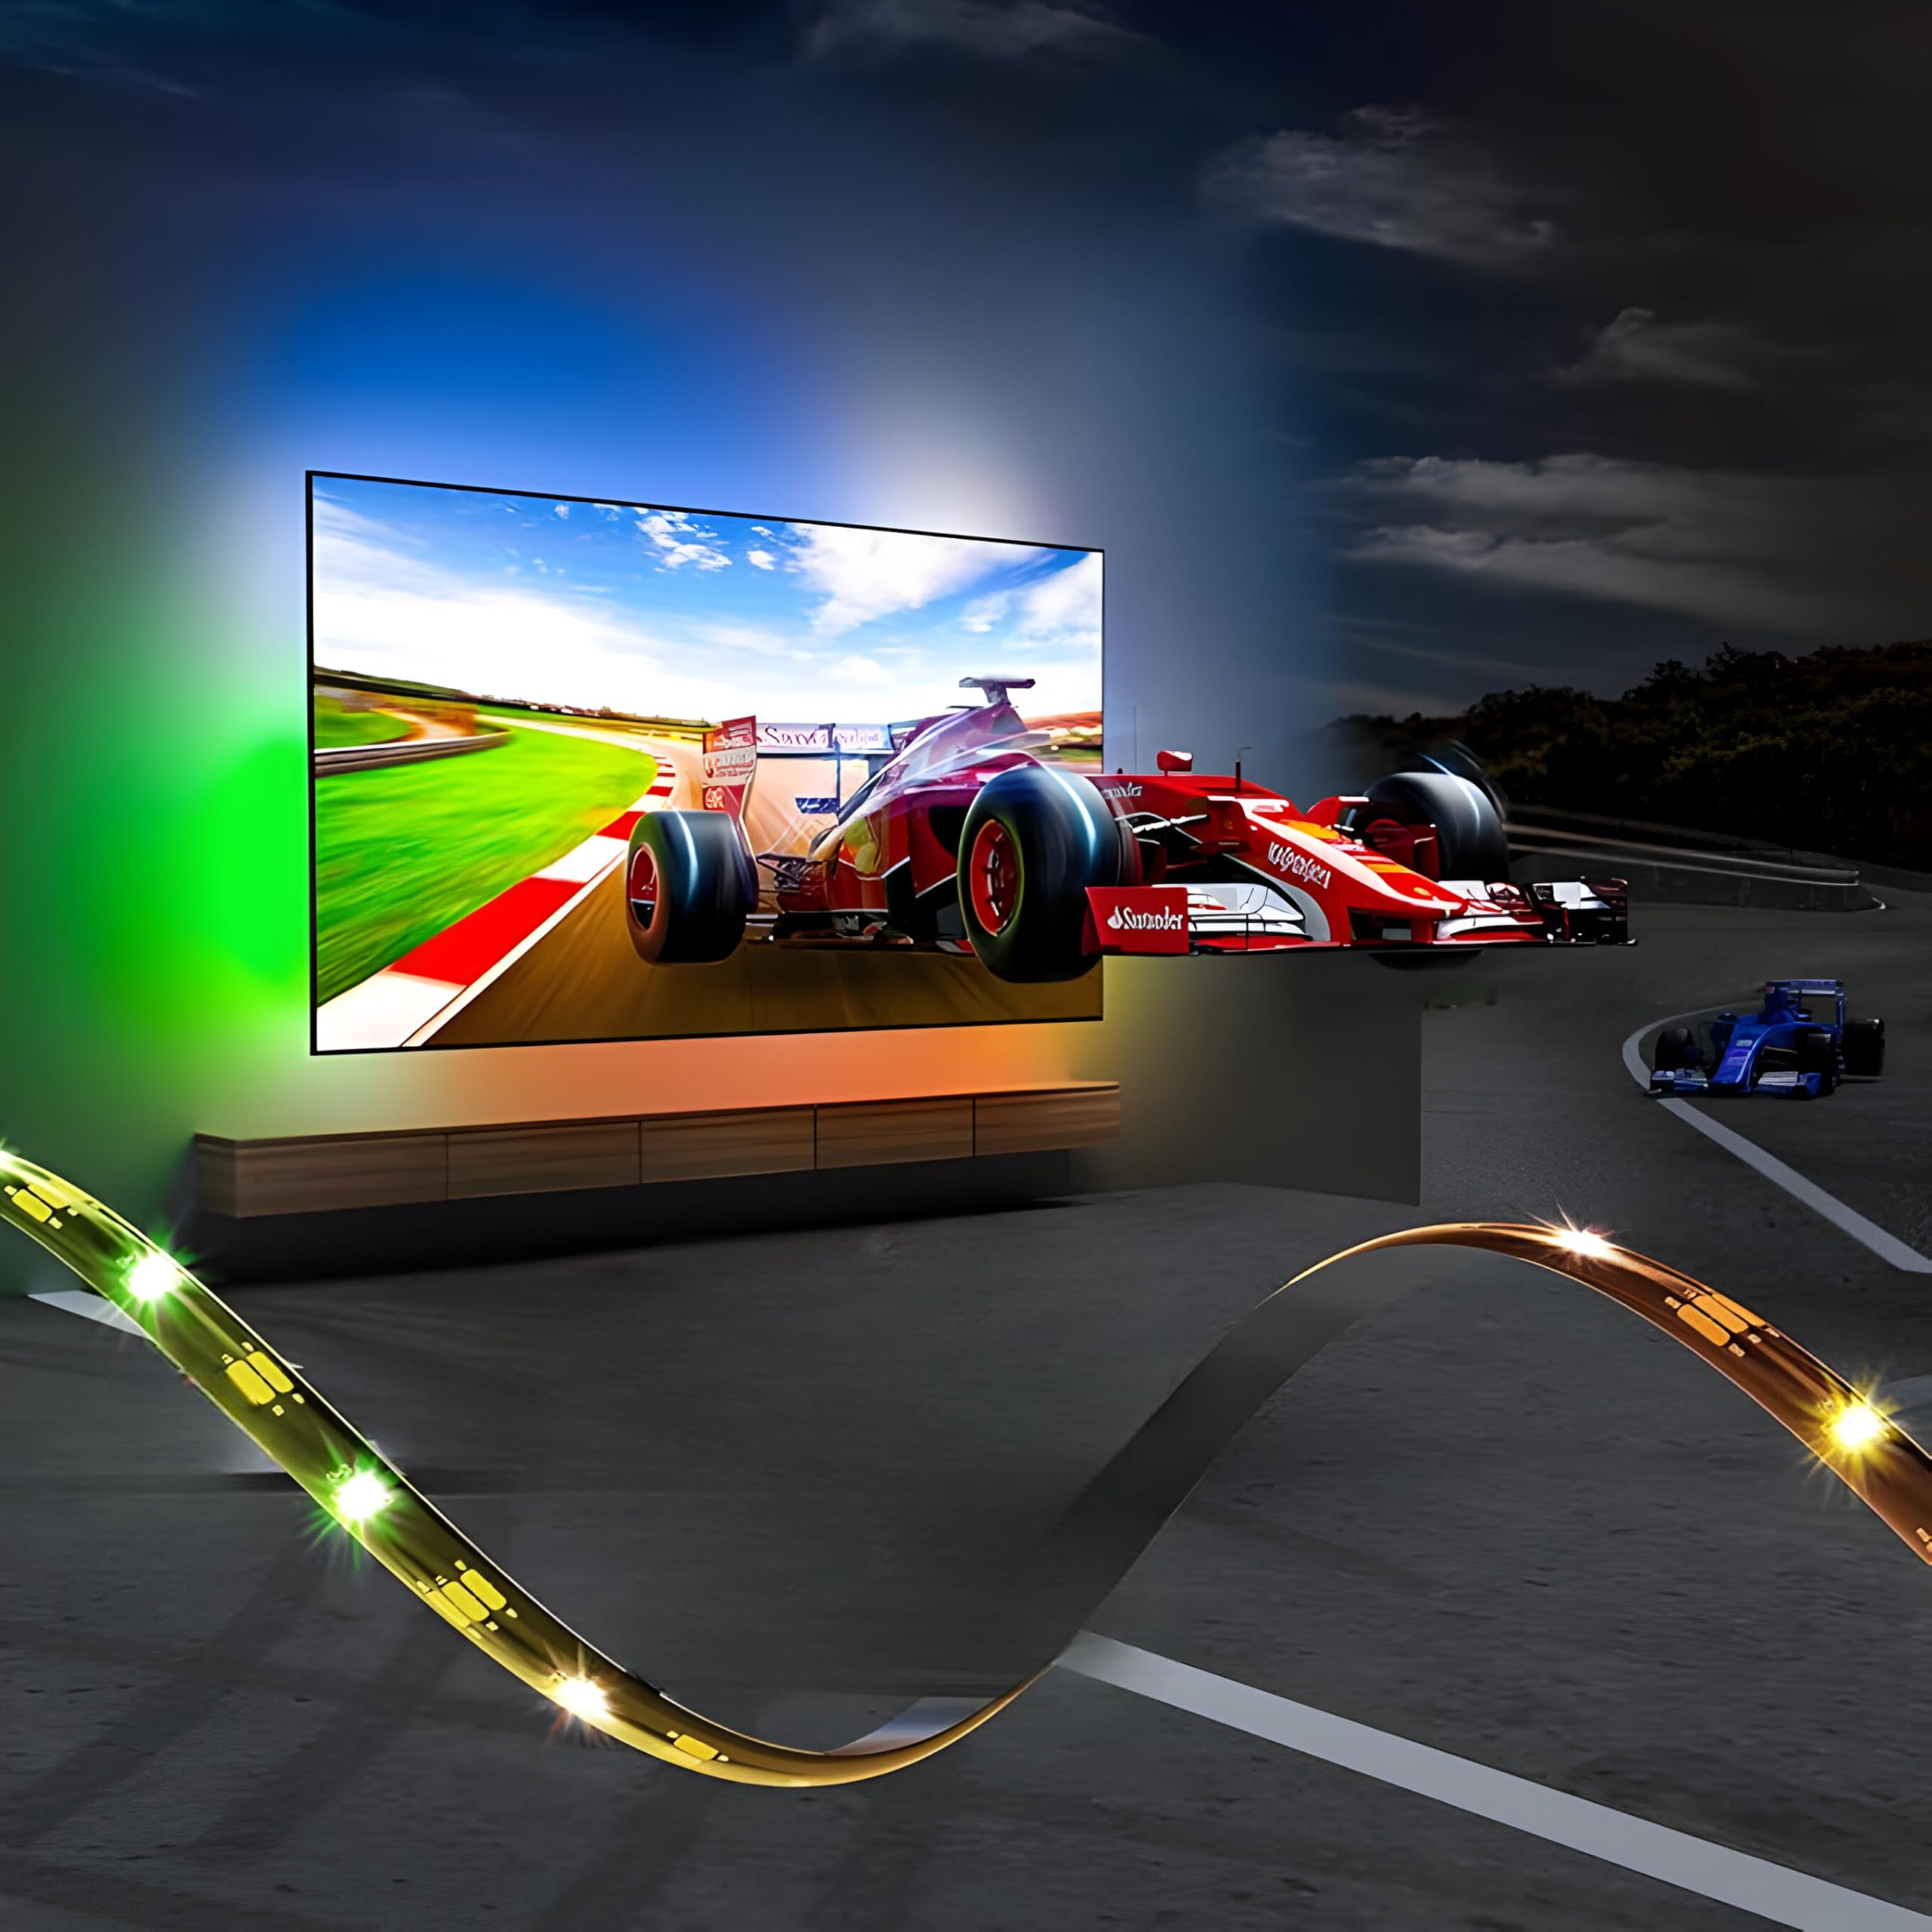
Image: The AmbiMotion 2.0 LED backlight kit creating an immersive viewing environment behind a television.
Ohun ti o wa ninu Apoti
Jọwọ rii daju pe gbogbo awọn paati wa ninu package:
- HDMI 2.0 Sync Box x1
- Strip Lights x1 (RGBIC+W, 30 LEDs/meter)
- Adapter agbara x1
- HDMI 2.0 Okun x1
Alaye Aabo pataki
- Rí i dájú pé ohun tí a fi ń so agbára pọ̀ mọ́ ibi tí agbára bá wà.
- Do not expose the sync box or LED strips to water or excessive moisture, unless specified for outdoor use (this product is for indoor use).
- Avoid bending the LED strip at sharp angles to prevent damage to the circuit.
- Jeki kuro ni arọwọto awọn ọmọde.
- Ge asopọ agbara ṣaaju ṣiṣe mimọ tabi itọju.
Awọn ilana iṣeto
The AmbiMotion 2.0 system requires an external HDMI device for light synchronization. It does not sync with applications running directly on a Smart TV.
1. LED Strip Installation
- Clean the back surface of your TV thoroughly to ensure proper adhesion of the LED strip.
- Carefully peel off the adhesive backing from the LED strip.
- Attach the LED strip to the back of your TV, ensuring it is positioned evenly around the edges. The strip is designed for TVs up to 65 inches.
- Connect the LED strip to the designated port on the HDMI Sync Box.
2. HDMI Sync Box Connection
- Connect your HDMI source device (e.g., Firestick, set-top box, gaming console, Apple TV, Chromecast) to the Input HDMI port on the AmbiMotion 2.0 Sync Box using the provided HDMI 2.0 cable.
- Sopọ awọn HDMI Ijade port of the Sync Box to an HDMI input port on your TV using another HDMI 2.0 cable.
- Connect the power adapter to the Sync Box and plug it into a power outlet.

Image: Correct and incorrect setup diagrams for the AmbiMotion 2.0 system, emphasizing the need for an external HDMI source.
Akiyesi pataki: Lights sync only with content from apps on your HDMI device (like Fire TV or game console), not with apps on your Smart/Android TV directly. Ensure your HDMI device is connected through the sync box.

Image: Connection diagram showing the required HDMI device connection and a reminder about Smart TV app limitations.
Awọn ilana Iṣiṣẹ
Once the AmbiMotion 2.0 system is set up, you can control it via the dedicated mobile application or physical buttons on the sync box.
1. Agbara Tan / Paa
Press the power button on the Sync Box or use the app to turn the lights on or off.
2. Sync Modes
The AmbiMotion 2.0 offers various synchronization modes for an immersive experience:
- Ipo Fiimu: Optimizes lighting effects for cinematic content.
- Ipo Ere: Provides dynamic lighting for an enhanced gaming experience.
- Ipo Orin: Synchronizes lights with audio rhythms.
Select your desired mode via the mobile application. The system ensures no transition delay and high accuracy in color matching.

Image: A home theater setup with AmbiMotion 2.0 lights, highlighting ease of setup and compatibility with various HDMI devices.
3. Fantasia Technology
The AmbiMotion 2.0 features Fantasia Technology, allowing you to link multiple color-changing MITSUKO lights to your Sync Box. This enables simultaneous synchronization of all connected lights with your on-screen content, creating a unified ambient lighting experience.

Image: An immersive gaming setup with the AmbiMotion 2.0 lights responding to on-screen action.
Itoju
To ensure the longevity and optimal performance of your AmbiMotion 2.0 system, follow these maintenance guidelines:
- Ninu: Gently wipe the LED strips and sync box with a dry, soft cloth. Do not use abrasive cleaners or solvents.
- Adhesion: If the LED strip begins to peel, re-secure it with appropriate adhesive tape designed for electronics.
- Iṣakoso USB: Rii daju pe gbogbo awọn kebulu ti ṣeto daradara ati kii ṣe labẹ ẹdọfu lati yago fun ibajẹ.
Laasigbotitusita
If you encounter issues with your AmbiMotion 2.0 system, refer to the following common problems and solutions:
- Lights are not syncing with TV content:
- Ensure an external HDMI device (e.g., streaming stick, game console) is connected to the Sync Box's HDMI Input, and the Sync Box's HDMI Output is connected to your TV. The system does not sync with Smart TV's built-in apps.
- Verify all HDMI cables are securely connected. - No sound output from soundbar/audio system:
- If your audio system is connected to your TV, ensure the TV's audio output settings are correctly configured to pass through audio from the HDMI input connected to the Sync Box. Some TVs or sound systems may require specific settings for HDMI ARC/eARC.
- Try connecting your audio system directly to the HDMI source device if possible, or use an audio extractor before the Sync Box if your setup requires it. - Awọn imọlẹ ko wa ni titan:
- Check if the power adapter is securely connected to the Sync Box and a working power outlet.
- Ensure the LED strip is properly connected to the Sync Box. - Inaccurate color matching:
- Ensure the LED strip is correctly installed around the TV edges.
- Check for any obstructions between the TV screen and the LED strip that might affect color detection.
Awọn pato
| Ẹya ara ẹrọ | Ẹ̀kúnrẹ́rẹ́ |
|---|---|
| Nọmba awoṣe | Ambimotion 2.0 Mini |
| Àwọ̀ | Multicolor (RGBIC+W) |
| Awọn LED fun Mita kan | 30 |
| HDMI Ẹya | 2.0 |
| Àtìlẹ́yìn Ìpinnu Tó Pọ̀ Jùlọ | 4K@60Hz, 1080p@240Hz, 2K@144Hz |
| HDR atilẹyin | HDR10+, Dolby Vision |
| Atilẹyin ohun | Dolby Atmos |
| Ọna Iṣakoso | App Control, Button Control |
| Asopọmọra | HDMI, Bluetooth |
| Omi Resistance Ipele | Water Resistant (IP65 for strip) |
| inu ile / ita gbangba Lilo | Ninu ile |
| Iwọn Nkan | 800 giramu |

Image: Detail of the RGB+W LED strip, highlighting its segmented lighting effects and specifications.
Alaye atilẹyin ọja
MITSUKO provides a 1-odun atilẹyin ọja on all MITSUKO products, including the AmbiMotion 2.0 TV Sync LED Backlight Kit. This warranty covers manufacturing defects and ensures product reliability. Please retain your proof of purchase for warranty claims.

Image: Warranty and customer support information.
Onibara Support
For any questions, technical assistance, or warranty claims regarding your MITSUKO AmbiMotion 2.0 TV Sync LED Backlight Kit, please contact our customer support team:
- Imeeli: support@mitsukoindia.com
- Foonu: 9354913946
Our team is available to provide satisfactory solutions as quickly as possible.