
Ọrọ Iṣaaju
This manual provides essential information for the safe and effective use of your PRITECH Body Hair Trimmer, Model US-PR-3233. Please read these instructions thoroughly before first use and retain for future reference. This device is designed for body hair trimming and features ceramic blades, a waterproof design, and USB-C charging for convenience.

Image: The PRITECH Body Hair Trimmer, its charging base, and product packaging, illustrating the complete product set.
Package Awọn akoonu
Jẹrisi pe gbogbo awọn ohun kan wa ninu package:
- PRITECH Body Hair Trimmer Unit
- Gbigba agbara Mimọ
- USB-C Ngba agbara Cable
- Comb Attachment (1.5mm)
- Comb Attachment (3mm/6mm)
- Comb Attachment (9mm/12mm)
- Fifọ Fẹlẹ

Image: The PRITECH Body Hair Trimmer displayed with its charging base, USB-C cable, cleaning brush, and three comb attachments.
Ṣeto
1. Ngba agbara Trimmer
Before initial use, fully charge the trimmer. The device features an LED display that indicates the battery level.
- So okùn gbigba agbara USB-C pọ mọ ipilẹ gbigba agbara.
- So opin keji okun USB-C sinu adapter agbara USB ti o baamu (ko si ninu rẹ).
- Place the trimmer onto the charging base. Ensure the trimmer is seated correctly.
- The LED display will show the charging status, with the number increasing from 0 to 100. A full charge typically takes approximately 2 hours.
The standing charging base helps keep the blades dry and clean, preventing odors.

Image: The PRITECH Body Hair Trimmer connected to its charging base via a USB-C cable, illustrating the charging process.
2. Attaching and Removing Comb Attachments
The trimmer comes with three adjustable comb attachments to achieve different hair lengths.
- 1.5mm: For very short trimming.
- 3mm/6mm: Adjustable for medium lengths.
- 9mm/12mm: Adjustable for longer lengths.
- To attach a comb: Align the comb attachment with the trimmer head and push it firmly until it clicks into place.
- To adjust length (for 3/6mm and 9/12mm combs): Slide the comb attachment up or down to select the desired length setting.
- To remove a comb: Gently push the comb attachment upwards from the trimmer head until it detaches.

Image: The PRITECH Body Hair Trimmer with various comb attachments, showing the available trimming lengths (1.5mm, 3.0mm/6.0mm, 9.0mm/12.0mm).
Awọn ilana Iṣiṣẹ
1. Power On/Off and Speed Modes
The trimmer features multiple speed modes for different hair types and sensitive areas.
- To power on: Press the power button once. The trimmer will start in the default speed mode.
- To switch speed modes: Tap the power button repeatedly to cycle through the available speed settings. The LED display may indicate the current speed.
- To power off: Press and hold the power button for a few seconds until the trimmer stops.
- Low Speed (5200 RPM): Recommended for sensitive areas.
- Medium Speed (5600 RPM): Suitable for quick touch-ups.
- High Speed (6000 RPM): Ideal for coarse hair.
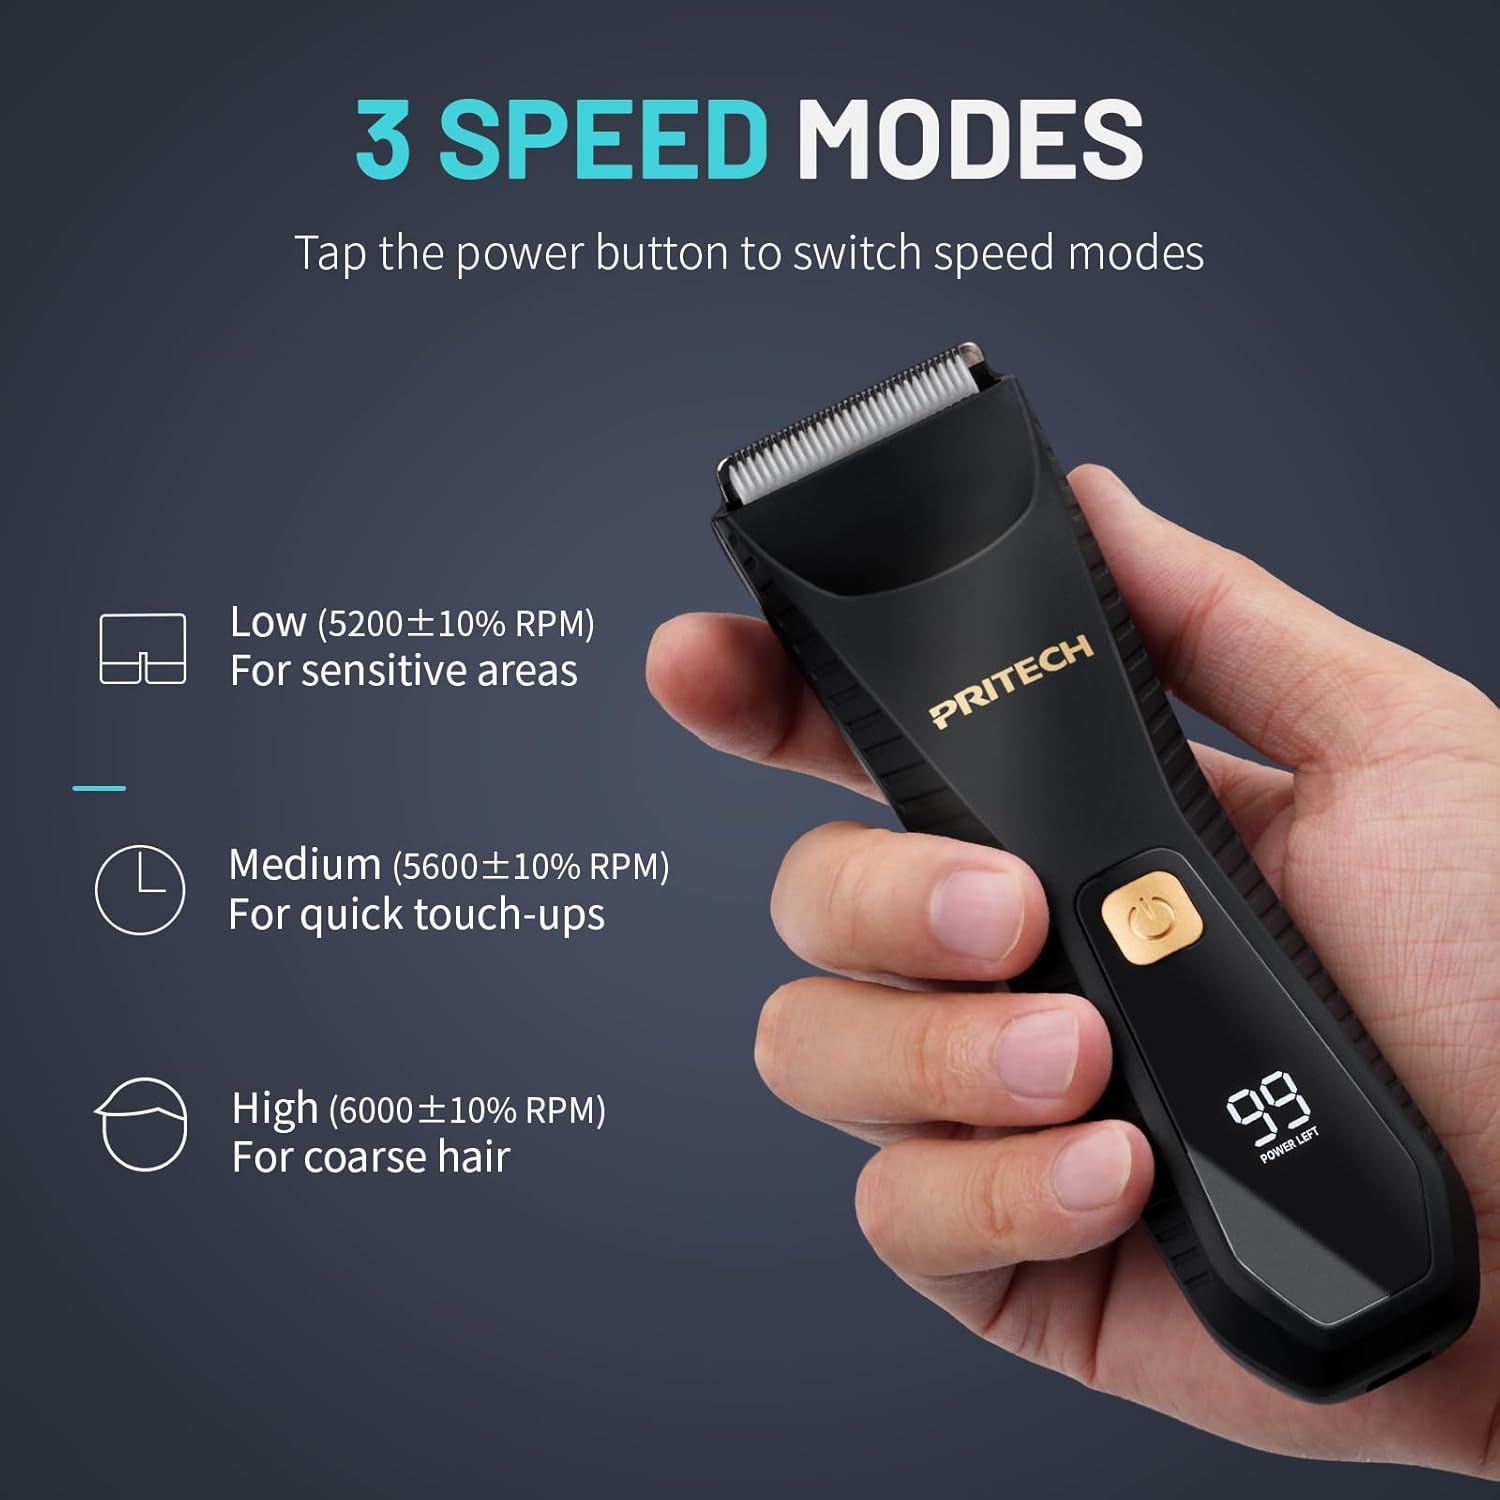
Image: A hand holding the PRITECH Body Hair Trimmer, with an overlay illustrating the three distinct speed modes and their recommended uses.
2. Àwọn Ọ̀nà Ìtọ́jú Gígé
The trimmer is designed for both wet and dry use, offering flexibility in your grooming routine. The ceramic blades feature a chamfered and rounded corner design to minimize nicks and irritation.
- Gige gige: For general hair removal, ensure skin is clean and dry.
- Wet Trimming: The trimmer is IPX7 waterproof, allowing use in the shower. This can help soften hair and reduce friction.
- Awọn agbegbe ti o ni imọlara: Use the 1.5mm comb attachment or trim without a guard for the closest shave, exercising caution. Always pull the skin taut to create a flat surface for trimming.
- Imọlẹ LED ti a ṣe sinu: The integrated LED light illuminates the trimming area, improving visibility.

Image: A composite image showing the PRITECH Body Hair Trimmer being used for hair removal on legs, groin, and chest areas.

Aworan: A alaye view of the PRITECH Body Hair Trimmer's ceramic blade, highlighting its chamfered and rounded corner design for safe and effective trimming.
3. Travel Lock Function
The travel lock prevents accidental activation and battery drain during transport.
- To engage travel lock: Press and hold the power button for 5 seconds. The LED display will indicate that the device is locked.
- To disengage travel lock: Press and hold the power button for 5 seconds again. The device will unlock and be ready for use.

Image: The PRITECH Body Hair Trimmer's LED display showing the travel lock icon, with instructions on how to engage and disengage the feature.
Itoju
1. Nu Trimmer naa mọ
Ṣiṣe mimọ nigbagbogbo ṣe idaniloju iṣẹ ti o dara julọ ati mimọ.
- Ensure the trimmer is powered off and disconnected from the charging base before cleaning.
- Yọ eyikeyi awọn asomọ comb.
- Use the provided cleaning brush to remove loose hairs from the blades and trimmer head.
- Since the trimmer is IPX7 waterproof, you can rinse the blade head directly under running water. Do not immerse the entire charging base in water.
- Allow the trimmer head to air dry completely before reattaching combs or storing.

Image: A hand holding the PRITECH Body Hair Trimmer under a running faucet, demonstrating its IPX7 waterproof capability for easy cleaning.
2. Abojuto abẹfẹlẹ
While the ceramic blades are designed for durability, proper care extends their lifespan.
- Avoid dropping the trimmer, as this can damage the ceramic blades.
- Periodically, a small drop of clipper oil (not included) can be applied to the blades to maintain smooth operation.
3. Ibi ipamọ
Store the trimmer in a cool, dry place, away from direct sunlight and out of reach of children.
Laasigbotitusita
| Isoro | Owun to le Fa | Ojutu |
|---|---|---|
| Trimmer ko ni tan. | Battery is depleted. Travel lock is engaged. | Charge the trimmer fully. Disengage the travel lock by pressing and holding the power button for 5 seconds. |
| Trimmer fa irun tabi ge ni ibi. | Blades are dirty or dull. Hair buildup. | Clean the blades thoroughly. Ensure blades are free of hair and debris. Consider applying clipper oil. |
| Trimmer not charging. | Charging cable or adapter faulty. Trimmer not properly seated on base. | Check cable and adapter connections. Ensure trimmer is correctly placed on the charging base. Try a different USB-C cable or power adapter. |
| Ifihan LED ko ṣiṣẹ. | Battery completely depleted. Device malfunction. | Charge the trimmer. If the issue persists after charging, contact customer support. |
Awọn pato ọja
- Nọmba awoṣe: US-PR-3233
- Brand: PRITECH
- Agbara: 5W
- Iṣawọle: DC 5V/1A
- Batiri: 1 x 9V (pẹlu)
- Akoko gbigba agbara: O fẹrẹ to awọn wakati 2
- Awọn eroja to wa: Trimmer, Charging Base, USB-C Cable, 3 Comb Attachments, Cleaning Brush
- Idiwon ti ko ni omi: IPX7 (can be immersed in freshwater at a depth of one meter for up to 30 minutes)
- Ohun elo abẹfẹlẹ: Seramiki
- Awọn iwọn: 6.26 x 4.8 x 2.72 inches
- Ìwúwo: 10.86 iwon
- Olupese: WENZHOU PRITECH INDUSTRIAL CO.,LTD.
Atilẹyin ọja ati Support
For warranty information or technical support, please contact PRITECH customer service. Keep your purchase receipt as proof of purchase.
Olupese: WENZHOU PRITECH INDUSTRIAL CO.,LTD.
For further assistance, please visit the official PRITECH webaaye tabi kan si awọn ikanni atilẹyin alabara wọn.