1. Alaye Aabo
Please read and understand all safety warnings and instructions before operating the AWithZ P20B Spot Welder. Failure to follow these instructions may result in electric shock, fire, or serious injury.
- Idaabobo Oju: Always wear appropriate eye protection (e.g., welding goggles or a welding helmet) to shield your eyes from sparks and intense light during welding operations.
- Afẹfẹ: Ensure adequate ventilation in your workspace to disperse fumes and gases produced during welding.
- Aabo Itanna: Do not operate the welder in wet conditions. Ensure the power supply is correctly grounded. Avoid touching live electrical parts.
- Mimu Batiri: Exercise caution when working with batteries. Lithium batteries can be volatile if mishandled. Do not short-circuit batteries.
- Awọn ohun elo ina: Jeki awọn ohun elo ina kuro ni agbegbe alurinmorin.
- Awọn ọmọde ati awọn ohun ọsin: Keep the device and all accessories out of reach of children and pets.
2. Ọja Ipariview
The AWithZ P20B is a 14.5KW SuperCapacitor Spot Welder designed for efficient and precise welding of various battery types and metal sheets. It features both automatic and foot pedal operating modes, along with a wide range of adjustable settings.
Awọn eroja to wa:
- P20B Spot Welding Machine
- 15A Ṣaja
- Foot Pedal (2m long)
- 3 Pairs of Replacement Welding Pins
- 5-meter Nickel Plated Sheet (0.15mm thickness)
- 18650 Batiri dimu
- File
- Ilana itọnisọna
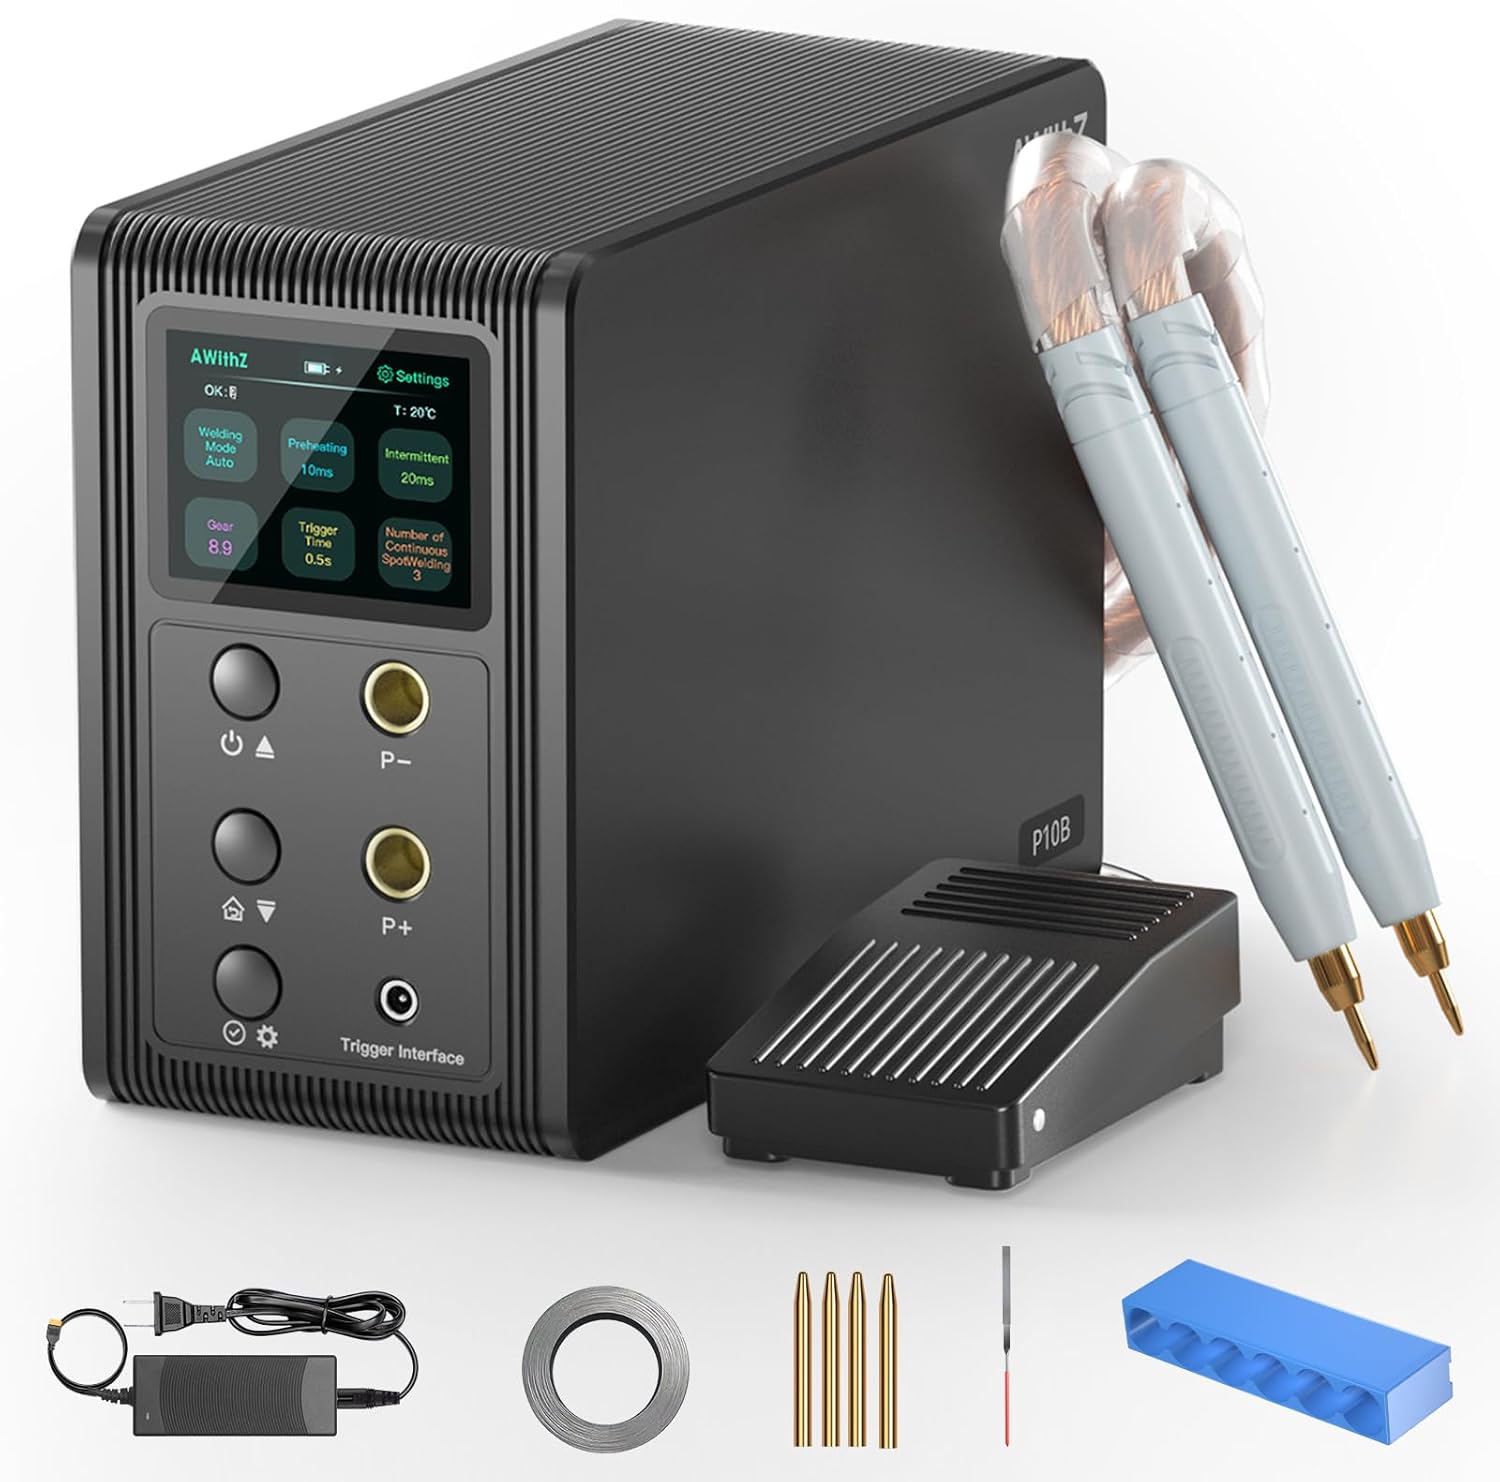
The main unit features a clear display and intuitive controls for adjusting welding parameters. The flexible welding pens allow for precise application, and the foot pedal provides enhanced control for intricate tasks.

3. Awọn ilana iṣeto
Follow these steps to set up your AWithZ P20B Spot Welder for first use:
- Unboxing: Ni ifarabalẹ yọ gbogbo awọn paati kuro ninu apoti. Ṣayẹwo fun eyikeyi bibajẹ.
- Sopọ Awọn ikọwe Alurinmorin: Insert the welding pens into the designated ports on the front panel of the spot welder. Ensure a secure connection.
- So Efatelese Ẹsẹ (Aṣayan): If using the foot pedal mode, connect the foot pedal cable to the 'Trigger Interface' port.
- Initial Activation/Charging: Connect the spot welder to a 100-240V AC power supply using the provided 15A charger. The device requires approximately 5 minutes of charging to reach an 'OK' state for spot welding, indicated on the display screen.
- Prepare Welding Tips: Ensure the welding pins are clean and sharp. Use the provided file to sharpen them if necessary.

4. Awọn ilana Iṣiṣẹ
The AWithZ P20B offers flexible operation modes and precise control over welding parameters.
4.1. Yíyan Ipò Alurinmorin
The device supports two primary welding modes:
- Ipo Aifọwọyi: Once the appropriate gear is selected, the device will automatically trigger a weld when the welding pens make contact with the material.
- Ipo Ẹsẹ ẹsẹ: Provides manual control over the welding trigger. Step on the foot pedal to initiate a weld. This mode is ideal for precise positioning.

4.2. Adjusting Welding Parameters
The P20B features 999 adjustable gears, allowing fine-tuning for various materials and thicknesses. Parameters such as preheating time, interval, and continuous spot welding count can also be adjusted via the control panel.
- Atunse jia: Use the 'P-' and 'P+' buttons on the control panel to increase or decrease the welding power (gear).
- Ibamu Ohun elo: The welder is suitable for materials such as 0.6mm nickel plated sheet, 0.6mm stainless steel sheet, 0.6mm iron sheet, 0.3mm pure nickel sheet, and 0.2mm copper sheet. Adjust the gear setting according to the material and thickness.

4.3. Alurinmorin ilana
Place the material to be welded on a stable, non-conductive surface. Position the welding pens firmly on the contact points. Initiate the weld using either the automatic trigger or the foot pedal, depending on your selected mode. Observe the weld quality and adjust settings as needed.
4.4. Ipo Batiri
The device features a battery indicator on its display. It is recommended to keep the internal supercapacitors charged for optimal performance. The unit is powered by built-in super energy storage capacitors, not user-replaceable batteries for power.

5. Itọju
Regular maintenance ensures the longevity and optimal performance of your spot welder.
- Welding Pin Replacement: The welding pens are designed with replaceable pins. If the pins become worn or damaged, gently pull them out and insert new ones. Three pairs of replacement pins are included.
- Pin Sharpening: Lo ohun ti a pese file to sharpen the tips of the welding pins when they become dull. This maintains welding precision.
- Ninu: Keep the device and welding pens clean and free from debris. Use a dry cloth for cleaning.
6. Laasigbotitusita
If you encounter issues with your AWithZ P20B Spot Welder, refer to the following common troubleshooting tips:
- Ko si Agbara: Ensure the charger is properly connected to both the device and a working power outlet. Check the power switch.
- No Weld Output: Verify that the welding pens are securely connected. Check the selected welding mode and gear settings. Ensure the device has completed its initial activation (displaying 'OK').
- Didara Weld ti ko dara: Adjust the gear setting to match the material and thickness. Ensure welding pins are clean and sharp. Apply consistent pressure during welding.
- Igbóná púpọ̀: While designed for stable operation, continuous high-gear use may cause the welding pen leads to warm up. Allow the device to cool down if excessive heat is observed.
7. Awọn pato
| Ẹya ara ẹrọ | Sipesifikesonu |
|---|---|
| Nọmba awoṣe | P20B |
| Olupese | AWithZ |
| Max Polusi Welding Power | 14.6KW |
| Iṣagbewọle Voltage | 100-240V AC |
| Awọn jia adijositabulu | 999 |
| Awọn ọna alurinmorin | Automatic, Foot Pedal |
| Awọn ohun elo ibaramu | Nickel plated sheet (up to 0.6mm), Stainless steel sheet (up to 0.6mm), Iron sheet (up to 0.6mm), Pure nickel sheet (up to 0.3mm), Copper sheet (up to 0.2mm) |
| Welding Pen Lead Length | 60 cm |
| Iwọn Nkan | 2.53 kg |
| Parcel Mefa | 24 x 21.9 x 14.6 cm |

8. Official ọja Video
For a visual guide on the product's features and operation, please watch the official video below:
9. Atilẹyin ọja ati Support
For warranty information, technical support, or service inquiries, please refer to the contact details provided with your purchase documentation or visit the official AWithZ webojula. Tọju iwe-ẹri rira rẹ bi ẹri rira fun awọn iṣeduro atilẹyin ọja.