
1. Ifihan
This manual provides instructions for the assembly, operation, and maintenance of the MONTECH X5M Micro ATX Gaming PC Case. The X5M is designed for high airflow and features pre-installed ARGB fans, a glass side panel, and an integrated GPU holder.
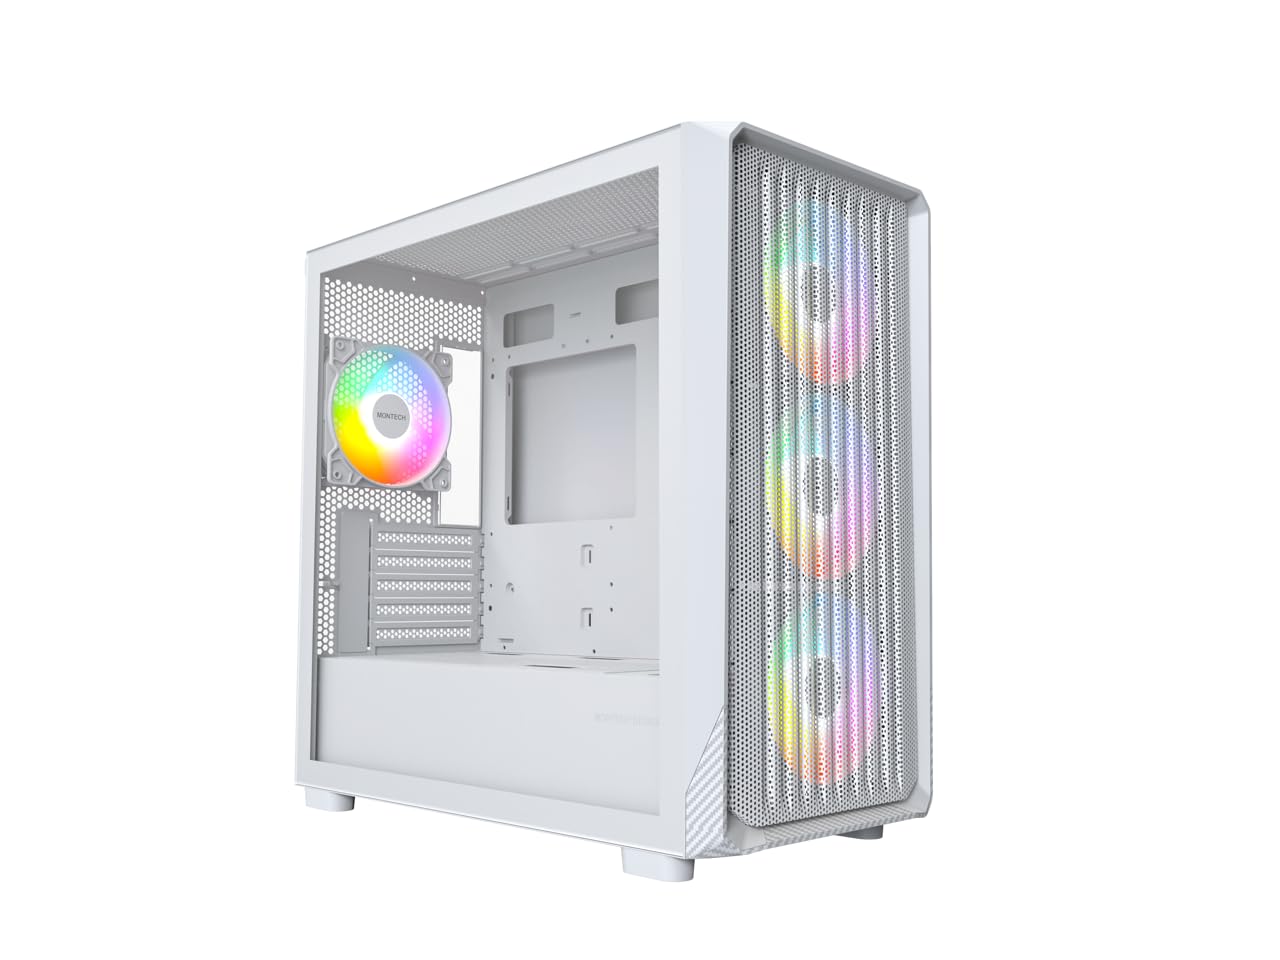
Figure 1: MONTECH X5M Micro ATX Gaming PC Case (White variant).
2. Key Awọn ẹya ara ẹrọ
- Integrated GPU Holder: An adjustable GPU support stand is included to provide physical support for graphics cards.
- Apẹrẹ Afẹfẹ Giga: Optimized structure for efficient cooling.
- Pre-installed ARGB Fans: Four 120mm ARGB fans are pre-installed for immediate cooling and customizable lighting.
- Panel Ẹgbẹ Gilasi ti o ni ibinu: Pese kan ko o view ti abẹnu irinše.
- Carbon Fiber Print Accents: Aesthetic detailing on the front panel.
- Asopọmọra Wapọ: Front I/O panel includes USB 2.0, USB 3.0, USB Type-C, and audio ports.

Olusin 2: Pariview of the MONTECH X5M case highlighting internal layout and ARGB fans.
3. Awọn pato
| Brand | Montech |
| Orukọ awoṣe | X5M |
| Iru Irú | Micro ATX Mid-iṣọ |
| Modaboudu Ibamu | Micro ATX |
| Awọn onijakidijagan ti a ti fi sii tẹlẹ | 4 x 120mm ARGB egeb |
| Àtìlẹ́yìn Gígùn GPU | Ti o de 405mm |
| Atilẹyin Giga Itutu Sipiyu | Ti o de 165mm |
| PSU Length Support | Ti o de 230mm |
| Ibi ipamọ Bays | Up to 2 HDDs & 4 SSDs |
| Iwaju Awọn Ibudo I / O | 1x USB 2.0, 1x USB 3.0, 1x USB Type-C, Mic & Audio, LED Button, Power Button |
| Ọna Itutu | Afẹfẹ |
| AIO Radiator Support | Top: Up to 360mm; Front: Up to 360mm |
| Ohun elo | Plastic with Carbon Fiber Accents, Tempered Glass |
| Iwọn Nkan | 14.3 iwon (6.49 kg) |

Figure 3: Close-up of the carbon fiber print detailing on the front panel of the X5M case.
4. Eto ati fifi sori
Follow these steps for installing components into your MONTECH X5M PC case. Ensure your system is powered off and unplugged before beginning any installation.
4.1. Ngbaradi Ọran naa
- Carefully remove the tempered glass side panel by unscrewing the thumb screws and sliding it off.
- Yọ ẹgbẹ ẹhin kuro lati wọle si agbegbe iṣakoso okun.
4.2. Modaboudu fifi sori
- Fi sori ẹrọ I / O shield (ti ko ba ti so mọ modaboudu rẹ tẹlẹ) sinu ṣiṣi ẹhin ti ọran naa.
- Align your Micro ATX motherboard with the standoffs inside the case.
- Ṣe aabo modaboudu nipa lilo awọn skru ti a pese.
4.3. Agbara Ipese Unit (PSU) fifi sori
- Place the PSU into the dedicated compartment at the bottom rear of the case.
- Ṣe aabo PSU pẹlu awọn skru lati ẹhin ọran naa.
4.4. Storage Device Installation (HDDs/SSDs)
The X5M supports up to 2 HDDs and 4 SSDs.
- 2.5" SSDs: Mount SSDs onto the designated brackets behind the motherboard tray or on the PSU shroud.
- Awọn HDD 3.5": Install HDDs into the drive cage located under the PSU shroud.
4.5. Kaadi eya aworan (GPU) fifi sori
- Yọ awọn ideri PCIe pataki ti o yẹ lati ẹhin ọran naa.
- Insert the GPU into the appropriate PCIe slot on your motherboard.
- Fi awọn skru so GPU mọ.
- Adjust the integrated GPU support stand to provide stability for your graphics card.
4.6. Fifi sori ẹrọ afẹ́fẹ́ ati radiator
The X5M comes with four 120mm ARGB fans pre-installed. Additional fans or AIO radiators can be installed as follows:
- Oke: Supports 3x 120mm or 2x 140mm fans, or AIO radiators up to 360mm.
- Iwaju: Supports 3x 120mm or 2x 140mm fans, or AIO radiators up to 360mm.
- Ẹyìn: Ṣe atilẹyin fun 1x 120mm àìpẹ.
- PSU Shroud: Ṣe atilẹyin fun awọn onijakidijagan 2x 120mm.

Figure 4: Illustration of airflow within the MONTECH X5M case and the pre-installed ARGB fans.

Figure 5: Diagram detailing fan and radiator support locations and sizes within the X5M case.
4.7. Iṣakoso USB
Lo àwọn ohun tí a gé síta àti àwọn ibi tí a ti so mọ́ ara wọn lẹ́yìn àwo módàbù láti ṣètò àwọn wáyà. Èyí mú kí afẹ́fẹ́ àti ẹwà wọn sunwọ̀n síi.
4.8. Iwaju I/O Panel Awọn isopọ
Connect the front panel cables (USB 2.0, USB 3.0, USB Type-C, HD Audio, Power Switch, Reset Switch, LED) to the corresponding headers on your motherboard. Refer to your motherboard manual for specific header locations.

Figure 6: Front I/O panel of the MONTECH X5M, showing USB 2.0, USB 3.0, USB Type-C, Mic & Audio jacks, LED button, and Power button.
5. Isẹ
5.1. Agbara Lori
After all components are installed and cables connected, replace the side panels. Connect your monitor, keyboard, mouse, and power cable. Press the Power Button on the front I/O panel to start your system.
5.2. ARGB Fan Control
A le ṣakoso awọn onijakidijagan ARGB ti a ti fi sii tẹlẹ ni awọn ọna meji:
- Dedicated LED Button: Use the LED button on the front I/O panel to cycle through 25 built-in lighting modes.
- Modaboudu Amuṣiṣẹpọ: Connect the ARGB cables to a compatible 5V 3-pin ARGB header on your motherboard. Use your motherboard's RGB software (e.g., ASUS Aura Sync, MSI Mystic Light Sync, GIGABYTE RGB Fusion, ASRock Polychrome Sync) to synchronize and customize lighting effects.
6. Itọju
Itọju deedee n ṣe iranlọwọ lati rii daju pe iṣẹ ṣiṣe to dara julọ ati igba pipẹ ti awọn paati PC rẹ.
- Isọdi eruku: Periodically remove and clean the dust filters (located on the top, front, and bottom) to maintain optimal airflow. Use compressed air or a soft brush.
- Ode Ninu: Mu ese ita gbangba pẹlu asọ, damp asọ. Yago fun abrasive ose.
- Ninu inu: With the system powered off and unplugged, use compressed air to remove dust from internal components and fans.
7. Laasigbotitusita
- Eto Ko Ni Agbara:
- Ensure the power cable is securely connected to the PSU and the wall outlet.
- Check that the PSU switch is in the "ON" position.
- Verify all front panel connectors (especially the Power Switch) are correctly attached to the motherboard.
- Confirm the 24-pin ATX and 8-pin CPU power cables are securely connected to the motherboard.
- Awọn onijakidijagan Ko Yiyi / RGB Ko Imọlẹ:
- Check that all fan power cables are securely connected to the fan hub or motherboard headers.
- Ensure ARGB cables are properly connected to the fan hub or a compatible 5V 3-pin ARGB header on the motherboard.
- If using motherboard synchronization, verify that the RGB software is installed and configured correctly.
- Try cycling through modes using the dedicated LED button on the front panel.
- Ko si Abajade Ifihan:
- Ensure your monitor cable is connected to the graphics card (GPU) and not the motherboard's integrated graphics port (unless you are using integrated graphics).
- Tun awọn eya kaadi ninu awọn oniwe-PCIe Iho.
- Check that the GPU power cables are securely connected.
8. Atilẹyin ọja ati Support
8.1. atilẹyin ọja Information
The MONTECH X5M PC Case comes with a 1 Odun olupese atilẹyin ọja. This warranty covers defects in materials and workmanship under normal use. For specific terms and conditions, please refer to the official Montech webojula tabi kan si atilẹyin alabara.
8.2. Onibara Support
For further assistance, technical support, or warranty claims, please visit the official Montech website or contact their customer service department. You can find contact information on the Montech webojula: www.montechpc.com