
Ọrọ Iṣaaju
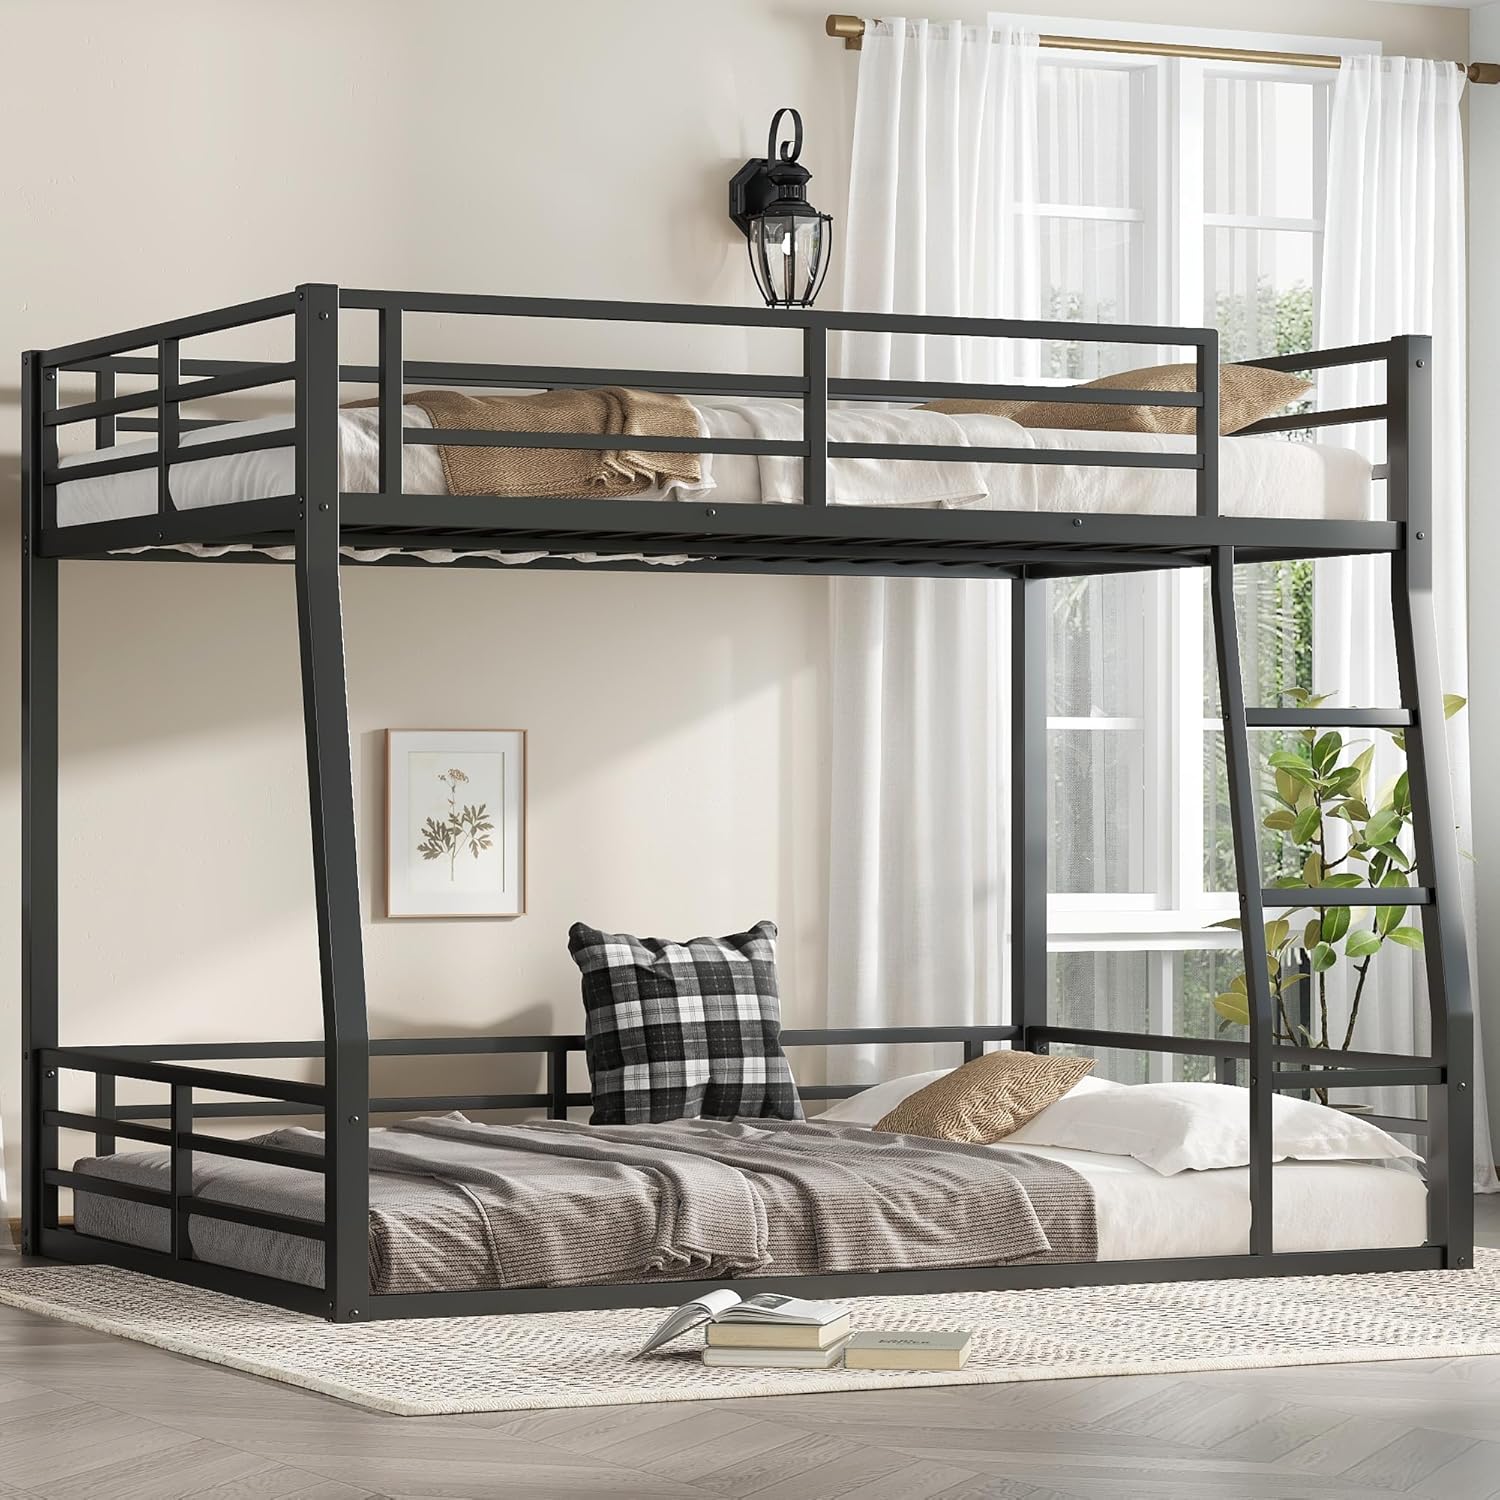
Thank you for choosing the Polibi Full XL Over Queen Metal Bunk Bed. This manual provides essential information for the safe assembly, operation, and maintenance of your new bunk bed. Please read all instructions carefully before beginning assembly and retain this manual for future reference.
Alaye Aabo pataki
- Agbara iwuwo: The upper bunk is designed to support a maximum weight of 400 lbs. The lower bunk is designed to support a maximum weight of 600 lbs. Do not exceed these limits.
- Awọn oju opopona: Always use the guardrails on the upper bunk. Ensure they are properly installed and secured before use.
- Aabo Akaba: Use the integrated ladder for access to the upper bunk. Do not jump on or off the bunk bed.
- Iwon akete: Use only mattresses that comply with the recommended dimensions for each bunk to ensure proper fit and safety.
- Afẹfẹ: Ensure adequate ventilation around the bunk bed.
- Apejọ: Assembly must be performed by adults. Ensure all hardware is securely tightened before use. Periodically check and re-tighten hardware as needed.
- Ko si Fo: Do not allow children to jump on the bunk bed.
- Awọn nkan eewọ: Do not attach or hang items on any part of the bunk bed that are not designed for use with the bed, such as hooks, belts, or ropes, as they may pose a strangulation hazard.
Awọn pato ọja
| Ẹya ara ẹrọ | Ẹ̀kúnrẹ́rẹ́ |
|---|---|
| Awoṣe | Full XL Over Queen Metal Bunk Bed |
| Brand | Polibi |
| Ohun elo | Eru-ojuse Irin |
| Àwọ̀ | Dudu |
| Apapọ Awọn iwọn (L x W x H) | 82.7" x 63" x 63.7" |
| Upper Bunk Weight Capacity | 400 lbs |
| Lower Bunk Weight Capacity | 600 lbs |
| Pataki Ẹya | Noise-Reduced Design, Safety Guardrail |

Package Awọn akoonu
Before assembly, please ensure all components are present and undamaged. If any parts are missing or damaged, do not proceed with assembly and contact customer support.
- Upper Bunk Frame Components
- Lower Bunk Frame Components
- Integrated Ladder Components
- Awọn ọna opopona
- Metal Slats (for both bunks)
- Ohun elo Apejọ (awọn skru, awọn boluti, fifọ, Wrench Allen)
- Ilana itọnisọna
Awọn ilana Apejọ
It is recommended that two adults assemble this bunk bed. Clear a spacious area for assembly and keep all hardware within reach.
- Yọọ ati Ṣe idanimọ Awọn apakan: Carefully unpack all components and lay them out. Compare them with the parts list (if provided in the physical manual) to ensure everything is present.
- Assemble Lower Bunk Frame: Begin by connecting the side rails and end frames for the lower bunk. Secure all connections with the provided hardware, but do not fully tighten until the frame is complete.
- Install Lower Bunk Slats: Once the lower bunk frame is assembled, place and secure the metal slats onto the designated supports. Ensure all slats are evenly spaced and firmly attached.
- Assemble Upper Bunk Frame: Repeat the process for the upper bunk frame, connecting the side rails and end frames.
- Install Upper Bunk Slats: Secure the metal slats for the upper bunk.
- Attach Upper Bunk to Lower Bunk: Carefully lift the assembled upper bunk frame and align it with the designated connection points on the lower bunk frame. Secure with the appropriate hardware. This step may require two people.
- Fi Awọn Idaabobo sori ẹrọ: Attach the full-length guardrails to the upper bunk, ensuring they are securely fastened to prevent accidental falls.
- Attach Integrated Ladder: Connect the integrated ladder to the bunk bed frame. Ensure it is stable and securely attached for safe climbing.
- Imuduro ipari: Nígbà tí gbogbo àwọn ohun èlò bá ti kó jọ tán, padà sẹ́yìn kí o sì mú gbogbo àwọn skru àti bulọ́ọ̀tì náà di mọ́lẹ̀ pátápátá. Má ṣe fún un ní agbára jù.
- Ṣayẹwo: Perform a final inspection to ensure all parts are correctly assembled, stable, and secure before placing mattresses on the bunks.


Awọn Itọsọna Lilo
- Ensure mattresses are properly seated within the frame and do not extend beyond the guardrails on the upper bunk.
- Only one person should occupy the upper bunk at a time.
- Do not use the bunk bed if any part is broken or missing.
- Regularly check all connections and hardware for tightness.
Itoju ati Itọju
- Ninu: Mu fireemu irin naa nu pẹlu asọ, damp asọ. Yẹra fun lilo awọn kẹmika lile tabi awọn afọmọ abrasive, eyiti o le ba ipari jẹ.
- Ayewo: Periodically inspect all structural components, including the frame, slats, ladder, and guardrails, for any signs of wear, damage, or loose connections.
- Hardware: Re-tighten all bolts and screws every 3-6 months to ensure the bed remains stable and secure.
- Ayika: Keep the bunk bed in a dry environment to prevent rust or corrosion.

Laasigbotitusita
| Isoro | Owun to le Fa | Ojutu |
|---|---|---|
| Ibùsùn náà ń mì tìtì tàbí ó ń mì tìtì | Àwọn ìsopọ̀ ohun èlò tí kò ní ìfọ́. | Check and tighten all bolts and screws. Ensure all parts are correctly aligned. |
| Awọn ariwo ariwo | Awọn isopọ alaimuṣinṣin tabi ija laarin awọn ẹya irin. | Tighten all hardware. Apply a small amount of lubricant (e.g., silicone spray) to connection points if noise persists. |
| Ladder feels insecure | Ladder not properly attached or hardware is loose. | Verify the ladder is correctly installed and all attachment hardware is securely tightened. |
| Awọn ẹya ti o padanu lakoko apejọ | Àṣìṣe ìfipamọ́ tàbí apá tí ó sọnù. | Do not proceed with assembly. Contact Polibi customer support immediately for replacement parts. |
Atilẹyin ọja ati Onibara Support
Polibi products are manufactured with quality and durability in mind. For specific warranty details, please refer to the warranty card included with your purchase or visit the official Polibi website. If you have any questions, require assistance with assembly, or need replacement parts, please contact Polibi customer support through the retailer where the product was purchased or via the contact information provided on the Polibi brand store.
Fun afikun alaye, o le ṣàbẹwò awọn Ile itaja Polibi lori Amazon.