
1. Ifihan
Thank you for choosing the STRICH 37-Key Kids Mini Digital Piano Keyboard. This manual provides essential information for the safe and effective use of your new musical instrument. Please read it thoroughly before operation and retain it for future reference.

Figure 1.1: STRICH 37-Key Kids Mini Digital Piano Keyboard (Pink)
2. Alaye Aabo
- Ṣe abojuto awọn ọmọde nigbagbogbo lakoko lilo.
- Keep the piano away from water and moisture.
- Ma ṣe ṣipaya si awọn iwọn otutu to gaju tabi oorun taara.
- Lo adapter agbara ti a pese tabi awọn batiri ti a ṣeduro nikan.
- Avoid dropping the instrument or subjecting it to strong impacts.
- Rii daju pe fentilesonu to dara ni ayika ẹyọ naa.
3. Package Awọn akoonu
Jẹrisi pe gbogbo awọn ohun kan wa ninu package:
- STRICH 37-Key Mini Digital Piano Keyboard
- Adapter Agbara (DC 6V)
- Kid's Piano Course Music Book
- Key Stickers for learning
- Ilana itọnisọna

Figure 3.1: Included accessories with the STRICH piano.
4. Eto
4.1 Powering the Piano
The piano can be powered by either the included DC 6V power adapter or 4 AA batteries (not included).
4.1.1 Fifi sori batiri
- Locate the battery compartment on the underside of the piano.
- Lo screwdriver lati ṣii ideri iyẹwu batiri naa.
- Fi awọn batiri AA 4 sii, ni idaniloju polarity ti o pe (+/-).
- Rọpo ideri ki o ni aabo pẹlu dabaru.
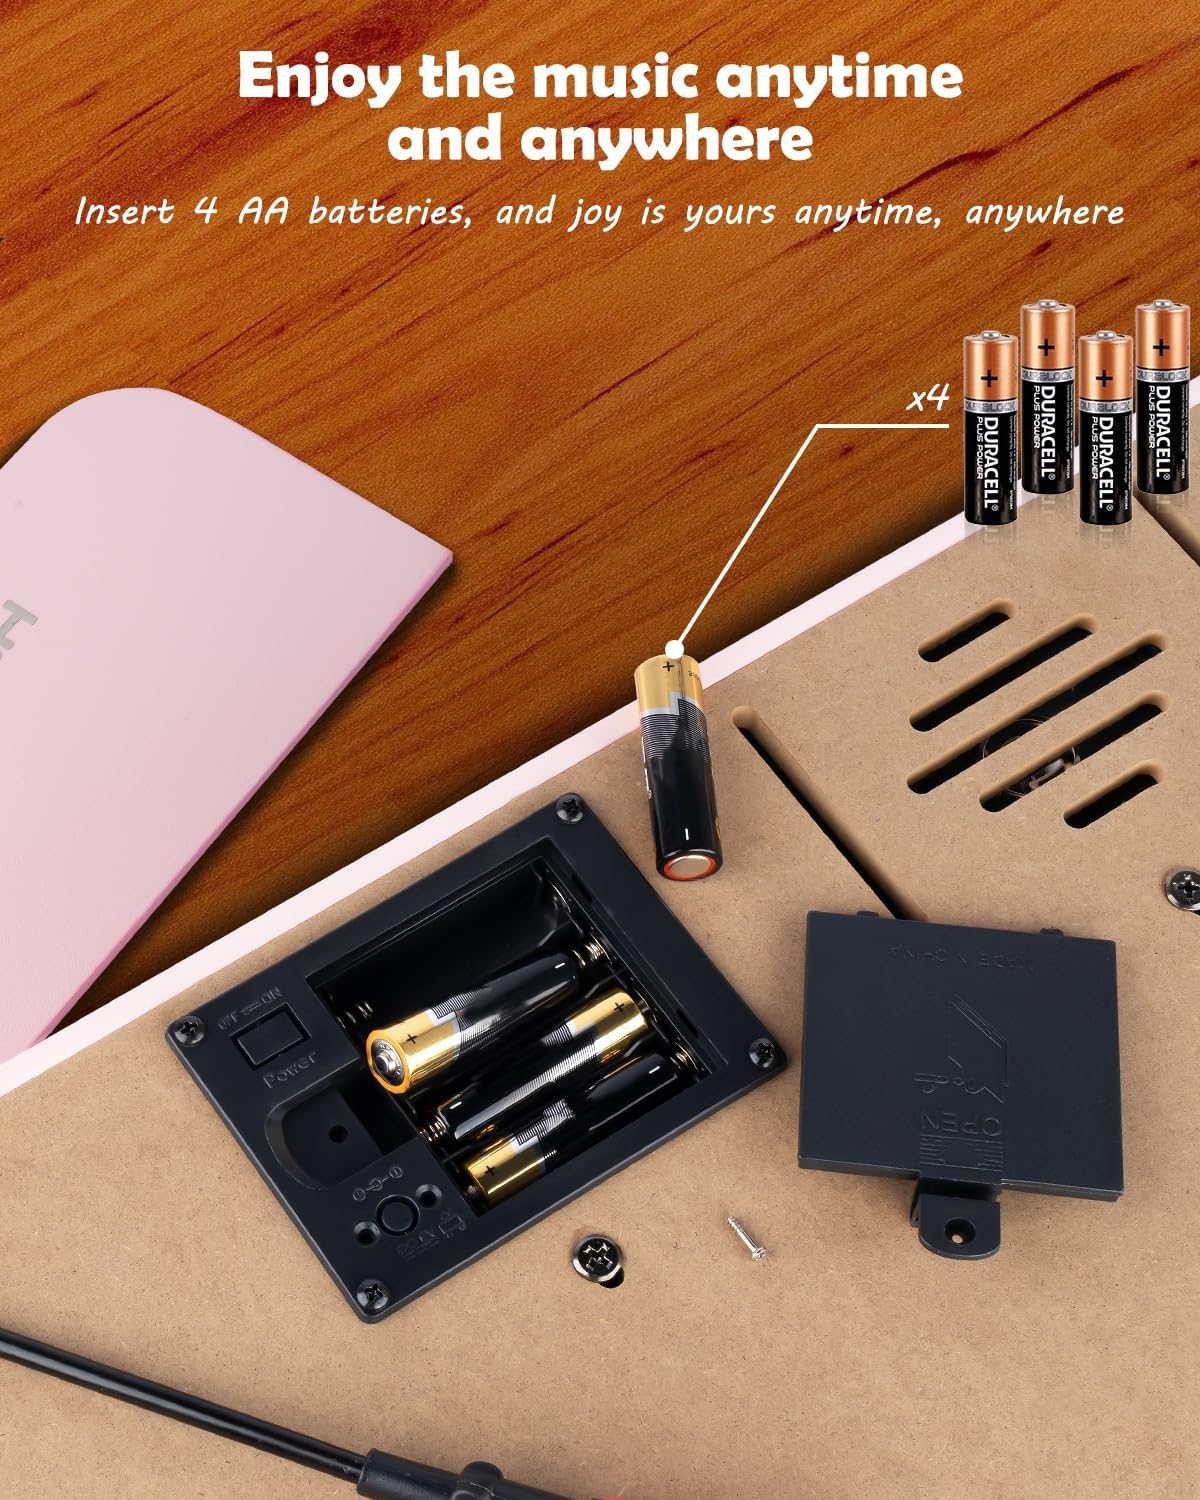
Figure 4.1: Battery compartment for 4 AA batteries.
4.1.2 Power Adapter Connection
Insert the DC 6V power adapter into the 'DC: 6V' port on the rear panel of the piano, then plug the adapter into a standard wall outlet.
4.2 Applying Key Stickers
The included key stickers are designed to assist with learning. Refer to the 'Kid's Piano Course' music book for guidance on proper placement.

Figure 4.2: Key stickers applied to the piano keys.
4.3 Music Stand Placement
The detachable music stand can be inserted into the slot on the top panel of the piano to hold your music book or tablet.
5. Awọn ilana Iṣiṣẹ
5.1 Agbara Tan / Pa ati Iṣakoso iwọn didun
Locate the 'VOL' knob on the rear panel. Turn the knob clockwise to power on the piano and increase the volume. Turn it counter-clockwise to decrease the volume and power off the piano.

Figure 5.1: Volume and power control knob.
5.2 Nsopọ Awọn ẹrọ ita
The rear panel features various ports for enhanced functionality:
- MIDI Port: Connect to MIDI-compatible devices for advanced musical applications.
- Ibudo USB: Connect to a computer or other USB devices.
- PHONE Port: Pulọọgi agbekọri fun adaṣe ikọkọ.
- INPUT Port: Connect external audio sources (e.g., MP3 player) to play along.
- SUSTAIN PEDAL Port: Connect an optional sustain pedal for extended note duration.

olusin 5.2: Ru nronu awọn isopọ.
5.3 Asopọmọra Alailowaya
The piano supports wireless connection, allowing playback of songs and music from compatible mobile phones and tablets. Refer to your device's instructions for pairing with a Bluetooth audio device.
5.4 Learning with the Music Book and Stickers
The included 'Kid's Piano Course' music book provides simple tutorials and songs that correspond to the key stickers. Follow the color and shape codes to play basic melodies.
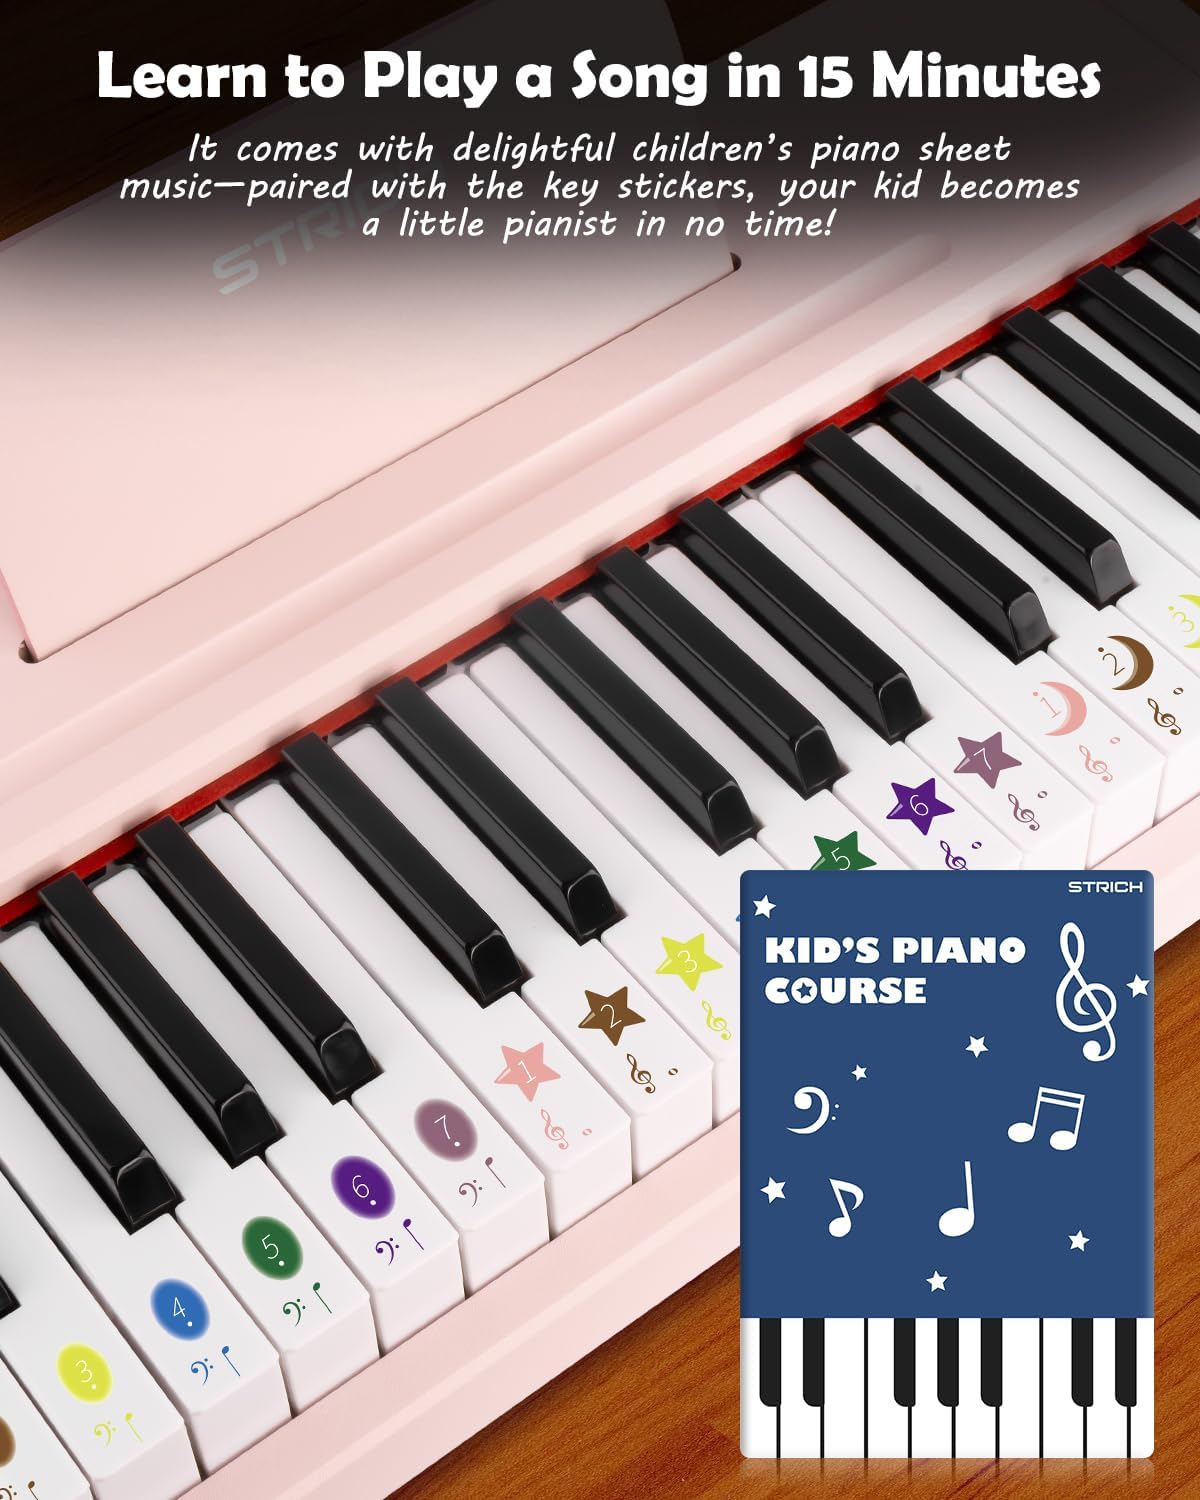
Figure 5.3: Learning to play using the music book and key stickers.
6. Itọju
- Clean the piano surface with a soft, dry cloth. Avoid abrasive cleaners or solvents.
- If not in use for an extended period, remove the batteries to prevent leakage.
- Store the piano in a cool, dry place, away from direct sunlight and extreme temperatures.
7. Laasigbotitusita
- Ko si Ohun: Ensure the piano is powered on and the volume is turned up. Check battery installation or power adapter connection. Verify external devices (headphones, speakers) are correctly connected and powered.
- Awọn bọtini Ko Dahun: Ensure the piano is powered on. If using batteries, check battery level.
- Awọn oran Isopọ Alailowaya: Ensure the piano's wireless function is active and your external device's Bluetooth is enabled. Try re-pairing the devices.
8. Awọn pato
| Ẹya ara ẹrọ | Sipesifikesonu |
|---|---|
| Nọmba awoṣe | SEK-37 |
| Ọja Mefa | 21.65 x 11.02 x 3.54 inches |
| Iwọn Nkan | 9.9 iwon |
| Awọn bọtini | 37 |
| Orisun agbara | DC 6V Adapter or 4 AA Batteries |
| Niyanju Ọjọ ori | 36 osu - 8 ọdun |
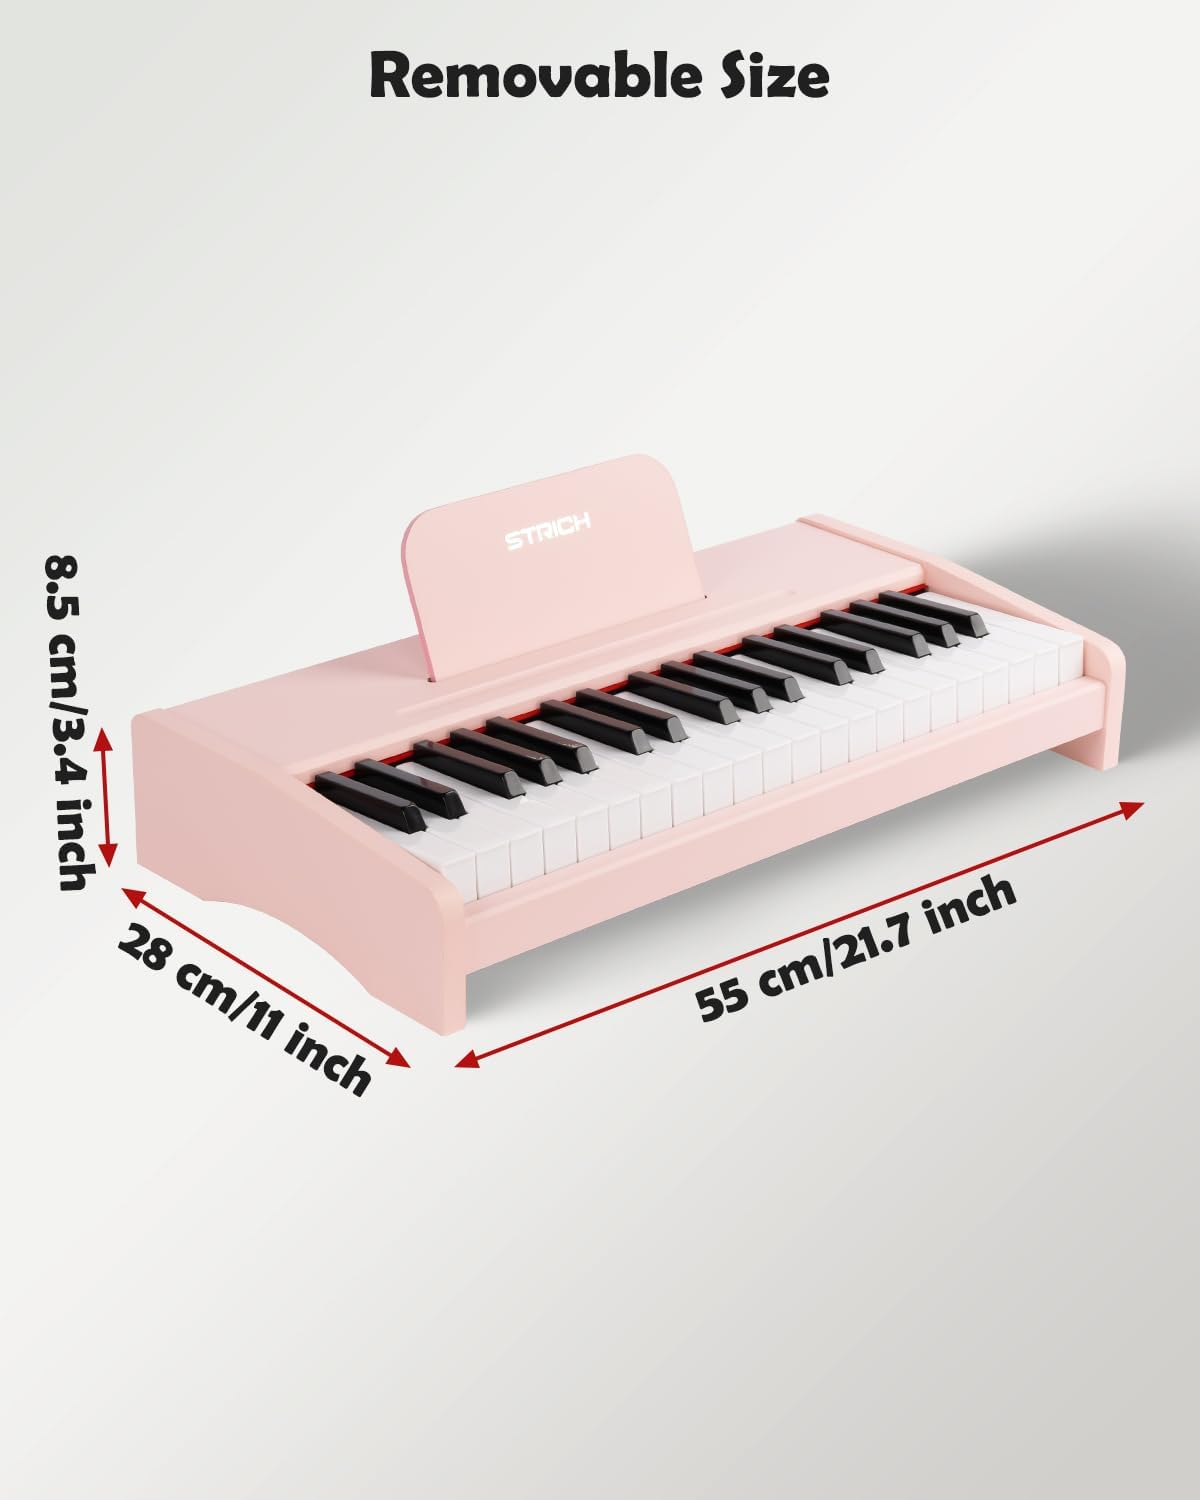
olusin 8.1: Awọn iwọn ọja.
9. Atilẹyin ọja ati Support
For warranty information or technical support, please refer to the contact details provided with your purchase or visit the official STRICH webojula. Jeki ẹri rira rẹ fun awọn iṣeduro atilẹyin ọja.