1. Ifihan
This manual provides essential information for the proper setup, operation, and maintenance of your Veout 15.6-inch Portable Monitor. Please read these instructions thoroughly before using the product to ensure optimal performance and longevity.
2. Package Awọn akoonu
Daju pe gbogbo awọn ohun ti a ṣe akojọ si isalẹ wa ninu apoti ọja rẹ:
- 1 x Atẹle to ṣee gbe
- 1 x USB-A si okun USB-C
- 1 x USB-C si okun USB-C
- 1 x Mini HDMI si okun HDMI
- 1 x Itọsọna olumulo

Figure 2.1: Included accessories with the portable monitor.
3. Ọja Ipariview
The Veout portable monitor features a 15.6-inch IPS display with a slim profile and integrated kickstand for versatile use.
3.1. Awọn ẹya ara ẹrọ ti ara

olusin 3.1: Iwaju view of the Veout 15.6-inch Portable Monitor.

olusin 3.2: Ẹyìn view highlighting connectivity ports.

olusin 3.3: Ẹgbẹ profile demonstrating the monitor's thin design.
3.2. Àwọn Èbúté àti Àwọn Ìṣàkóso
- Full-Function USB-C Ports: For video, audio, data, and power delivery with a single cable.
- Ibudo Mini-HDMI: For video and audio input. Requires external power via USB-C when used.
- Jack Audio 3.5mm: Fún sísopọ̀ àwọn agbekọri tàbí àwọn agbohunsoke ìta.
- Control Wheel/Buttons: Used for adjusting volume, brightness, and navigating the On-Screen Display (OSD) menu.
3.3. Integrated Kickstand
The monitor features a foldable kickstand for stable positioning at various viewing awọn igun.
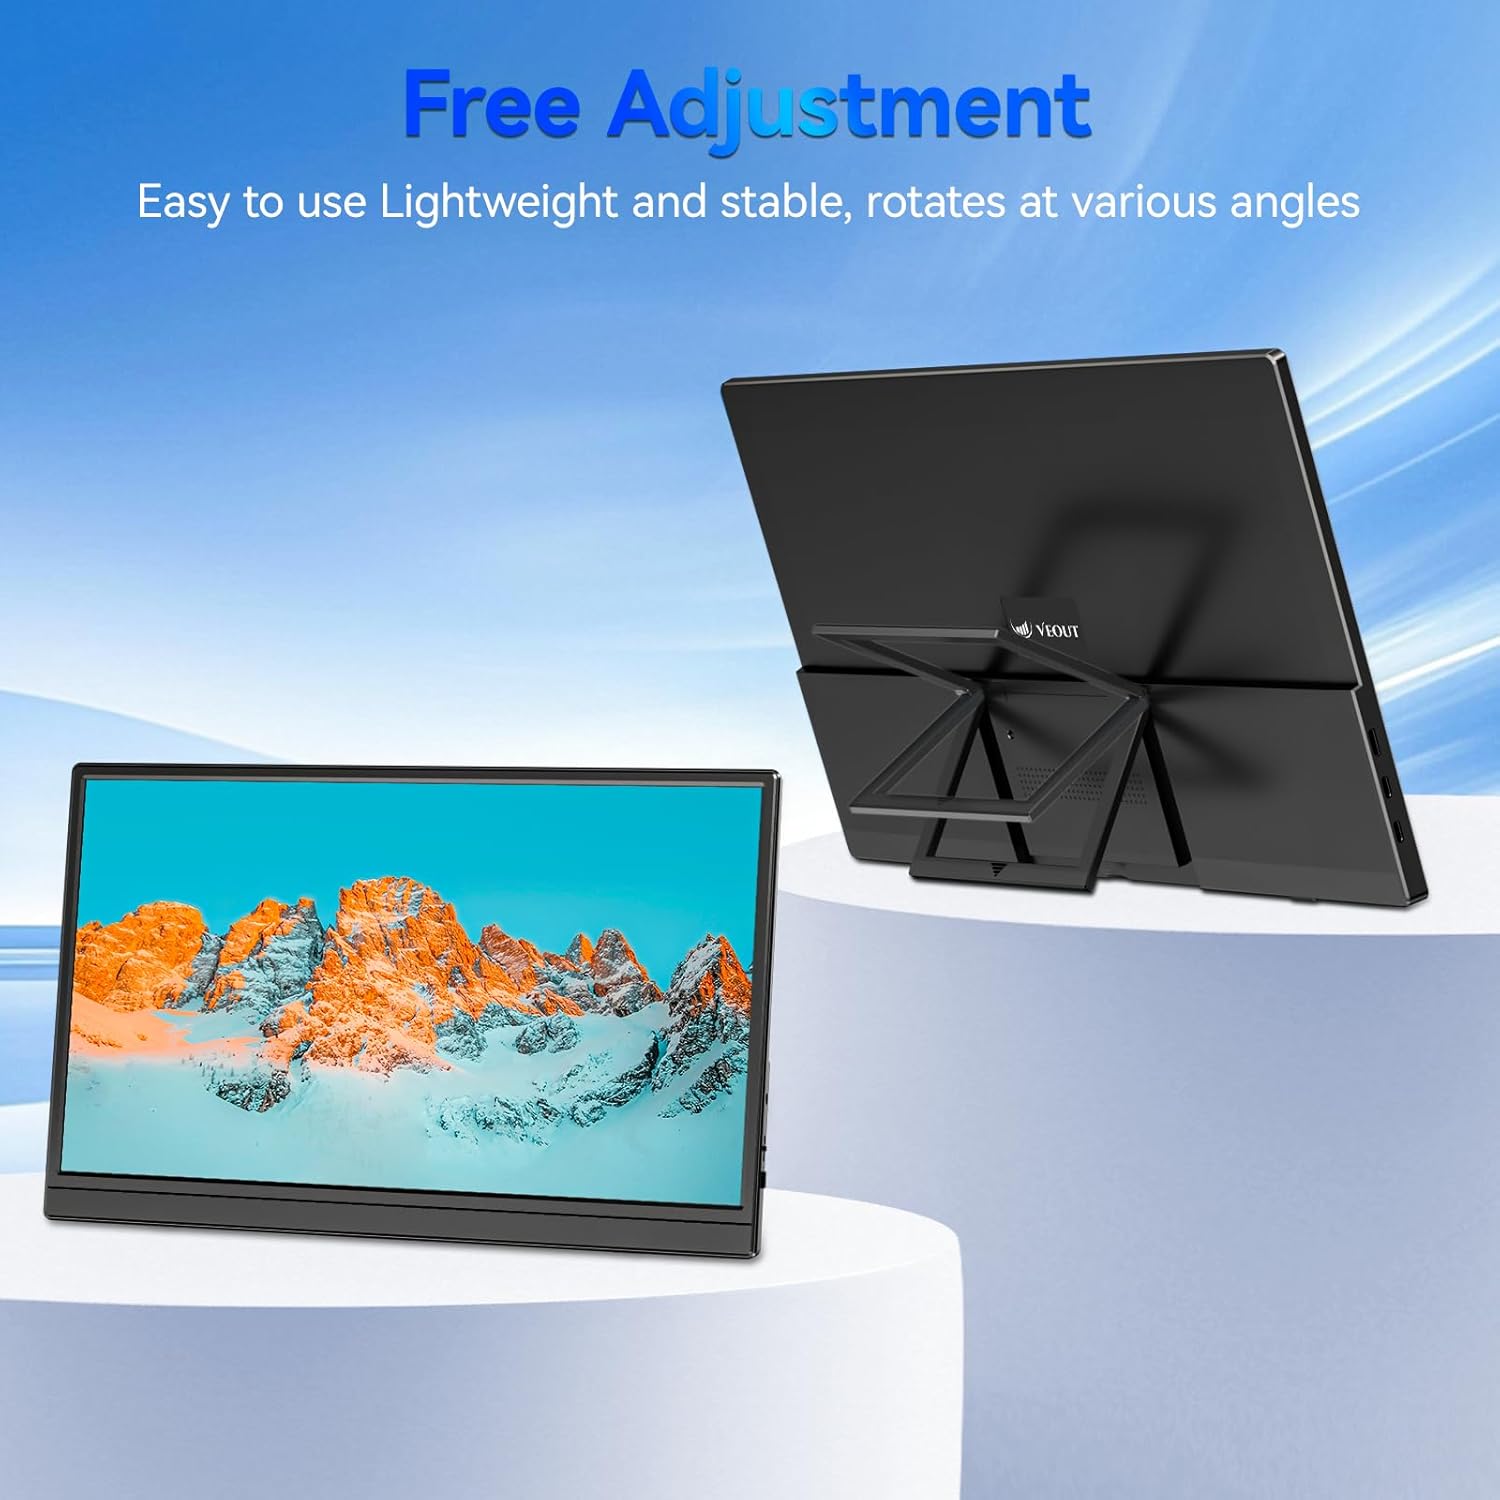
Figure 3.4: Monitor with kickstand for adjustable viewing.
4. Eto
The Veout portable monitor supports plug-and-play functionality, requiring no driver installation for most devices.
4.1. Sísopọ̀ mọ́ ẹ̀rọ kan
- USB-C Connection (Single Cable):
- Connect one end of the USB-C to USB-C cable to a full-function USB-C port on your laptop, smartphone, or other compatible device.
- Connect the other end of the USB-C to USB-C cable to one of the full-function USB-C ports on the portable monitor.
- This connection provides video, audio, and power to the monitor.
- HDMI Connection (Requires Additional Power):
- Connect one end of the Mini-HDMI to HDMI cable to the Mini-HDMI port on the monitor.
- Connect the other end of the Mini-HDMI to HDMI cable to the HDMI port on your device.
- For power, connect the USB-A to USB-C cable or a USB-C to USB-C cable from your device's USB port or a power adapter (not included) to one of the monitor's USB-C ports.
4.2. Positioning the Monitor
Deploy the integrated kickstand to position the monitor on a flat surface. Adjust the angle for optimal viewing. The monitor can be used in both landscape and portrait orientations.

Figure 4.1: Monitor used in portrait mode for document viewing.
5. Awọn ilana Iṣiṣẹ
5.1. Awọn ọna ifihan
When connected to a computer, you can configure the display mode through your operating system's display settings:
- Copy Mode (Mirror Display): Duplicates your primary screen's content onto the portable monitor. Useful for presentations or sharing content.
- Ipo ti o gbooro sii: Extends your desktop across both screens, providing additional workspace for multitasking.
- Second Screen Only Mode: Displays content only on the portable monitor, with the primary device's screen turned off.
5.2. Siṣàtúnṣe Eto
The monitor features an intuitive control mechanism for quick adjustments:
- Atunse Imọlẹ: Scroll the control wheel up or down to instantly adjust screen brightness.
- Atunse iwọn didun: Scroll the control wheel up or down to instantly adjust speaker volume.
- Akojọ OSD: Press the control wheel or designated button to access the On-Screen Display menu for advanced settings like color, contrast, and input source selection.
5.3. Eye Care Technology
The monitor incorporates advanced eye-care technology designed to reduce blue light emission and screen flicker, promoting comfortable viewlakoko lilo igba pipẹ.
6. Itọju
To maintain your monitor's performance and appearance, follow these guidelines:
- Ninu iboju: Rọra nu iboju naa pẹlu asọ ti ko ni lint. Fun awọn ami alagidi, fẹẹrẹ dampen awọn asọ pẹlu omi tabi a iboju-ninu ojutu. Yago fun awọn kẹmika lile tabi awọn ohun elo abrasive.
- Ninu ile Casing: Lo asọ ti o rọ, ti o gbẹ lati nu atẹle's casing.
- Ibi ipamọ: When not in use, store the monitor in a cool, dry place, preferably in its original packaging or a protective sleeve.
- Yago fun Olomi: Do not expose the monitor to excessive moisture or spill liquids directly onto it.
7. Laasigbotitusita
Ti o ba pade awọn ọran pẹlu atẹle rẹ, tọka si awọn iṣoro ti o wọpọ ati awọn ojutu wọnyi:
| Isoro | Owun to le Fa | Ojutu |
|---|---|---|
| Ko si ifihan/"Ko si ifihan agbara" ifiranṣẹ | Incorrect cable connection, insufficient power, incorrect input source. | Ensure cables are securely connected. If using HDMI, ensure a separate power source is connected to the monitor's USB-C port. Check your device's display settings to ensure the monitor is detected and enabled. Select the correct input source via the OSD menu. |
| Iboju ti n tan imọlẹ | Loose cable connection, incompatible resolution/refresh rate, power fluctuations. | Reconnect cables. Adjust display resolution or refresh rate on your connected device. Ensure stable power supply. |
| Ko si ohun lati atẹle agbohunsoke | Monitor volume too low, incorrect audio output selected on device. | Increase monitor volume using the control wheel. On your connected device, ensure the portable monitor is selected as the audio output device. |
| Atẹle ko ni agbara lori | No power supply, faulty cable. | Ensure the monitor is receiving power via a USB-C connection from a compatible device or power adapter. Try a different USB-C cable. |
8. Awọn pato
| Ẹya ara ẹrọ | Ẹ̀kúnrẹ́rẹ́ |
|---|---|
| Nọmba awoṣe Ọja | Veout-15.6 |
| Iwon iboju | 15.6 inches |
| Ipinnu | Awọn piksẹli 1920 x 1080 (FHD 1080p) |
| Apakan Ipin | 16:9 |
| Panel Iru | IPS |
| Iboju Iboju | Matte |
| Ọja Mefa | 1.97 x 13.78 x 11.02 inches |
| Iwọn Nkan | 3.08 iwon |
| Iṣagbewọle Voltage | 5V |
| Ti won won Lọwọlọwọ | 3A |
| Agbara Ijade | 5.5W |
| Olupese | Guangdong Zhanwei electronic Technology Co., LTD |

Figure 8.1: Product information and certification details.
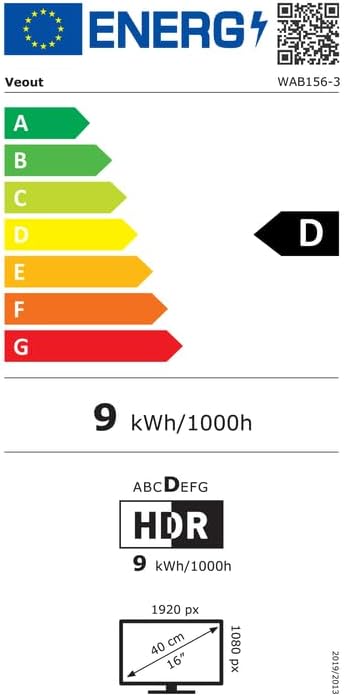
Figure 8.2: EU Energy Label for model WAB156-3. For more details, visit eprel.ec.europa.eu/qr/2209122.
9. Atilẹyin ọja ati Support
Your Veout Portable Monitor is backed by a 12-month warranty from the date of purchase. We are committed to providing customer service and support.
- Akoko atilẹyin ọja: 12 osu
- Ilana Pada: 30-ọjọ owo-pada lopolopo
- Iṣẹ onibara: Wa 24 wakati

Figure 9.1: Warranty and support information.
For technical assistance or warranty claims, please contact Veout customer support at support@veout.com.