
Ọrọ Iṣaaju
This manual provides detailed instructions for the installation, operation, and maintenance of your SHINYSNAKE G600 MATX MFF Gaming Case. The G600 is designed for high-performance computing in a compact form factor, featuring a solid wood front panel, tempered glass side panel, and an optional 11.3-inch auxiliary screen for real-time hardware monitoring. Please read this manual thoroughly before beginning assembly to ensure proper setup and optimal performance.
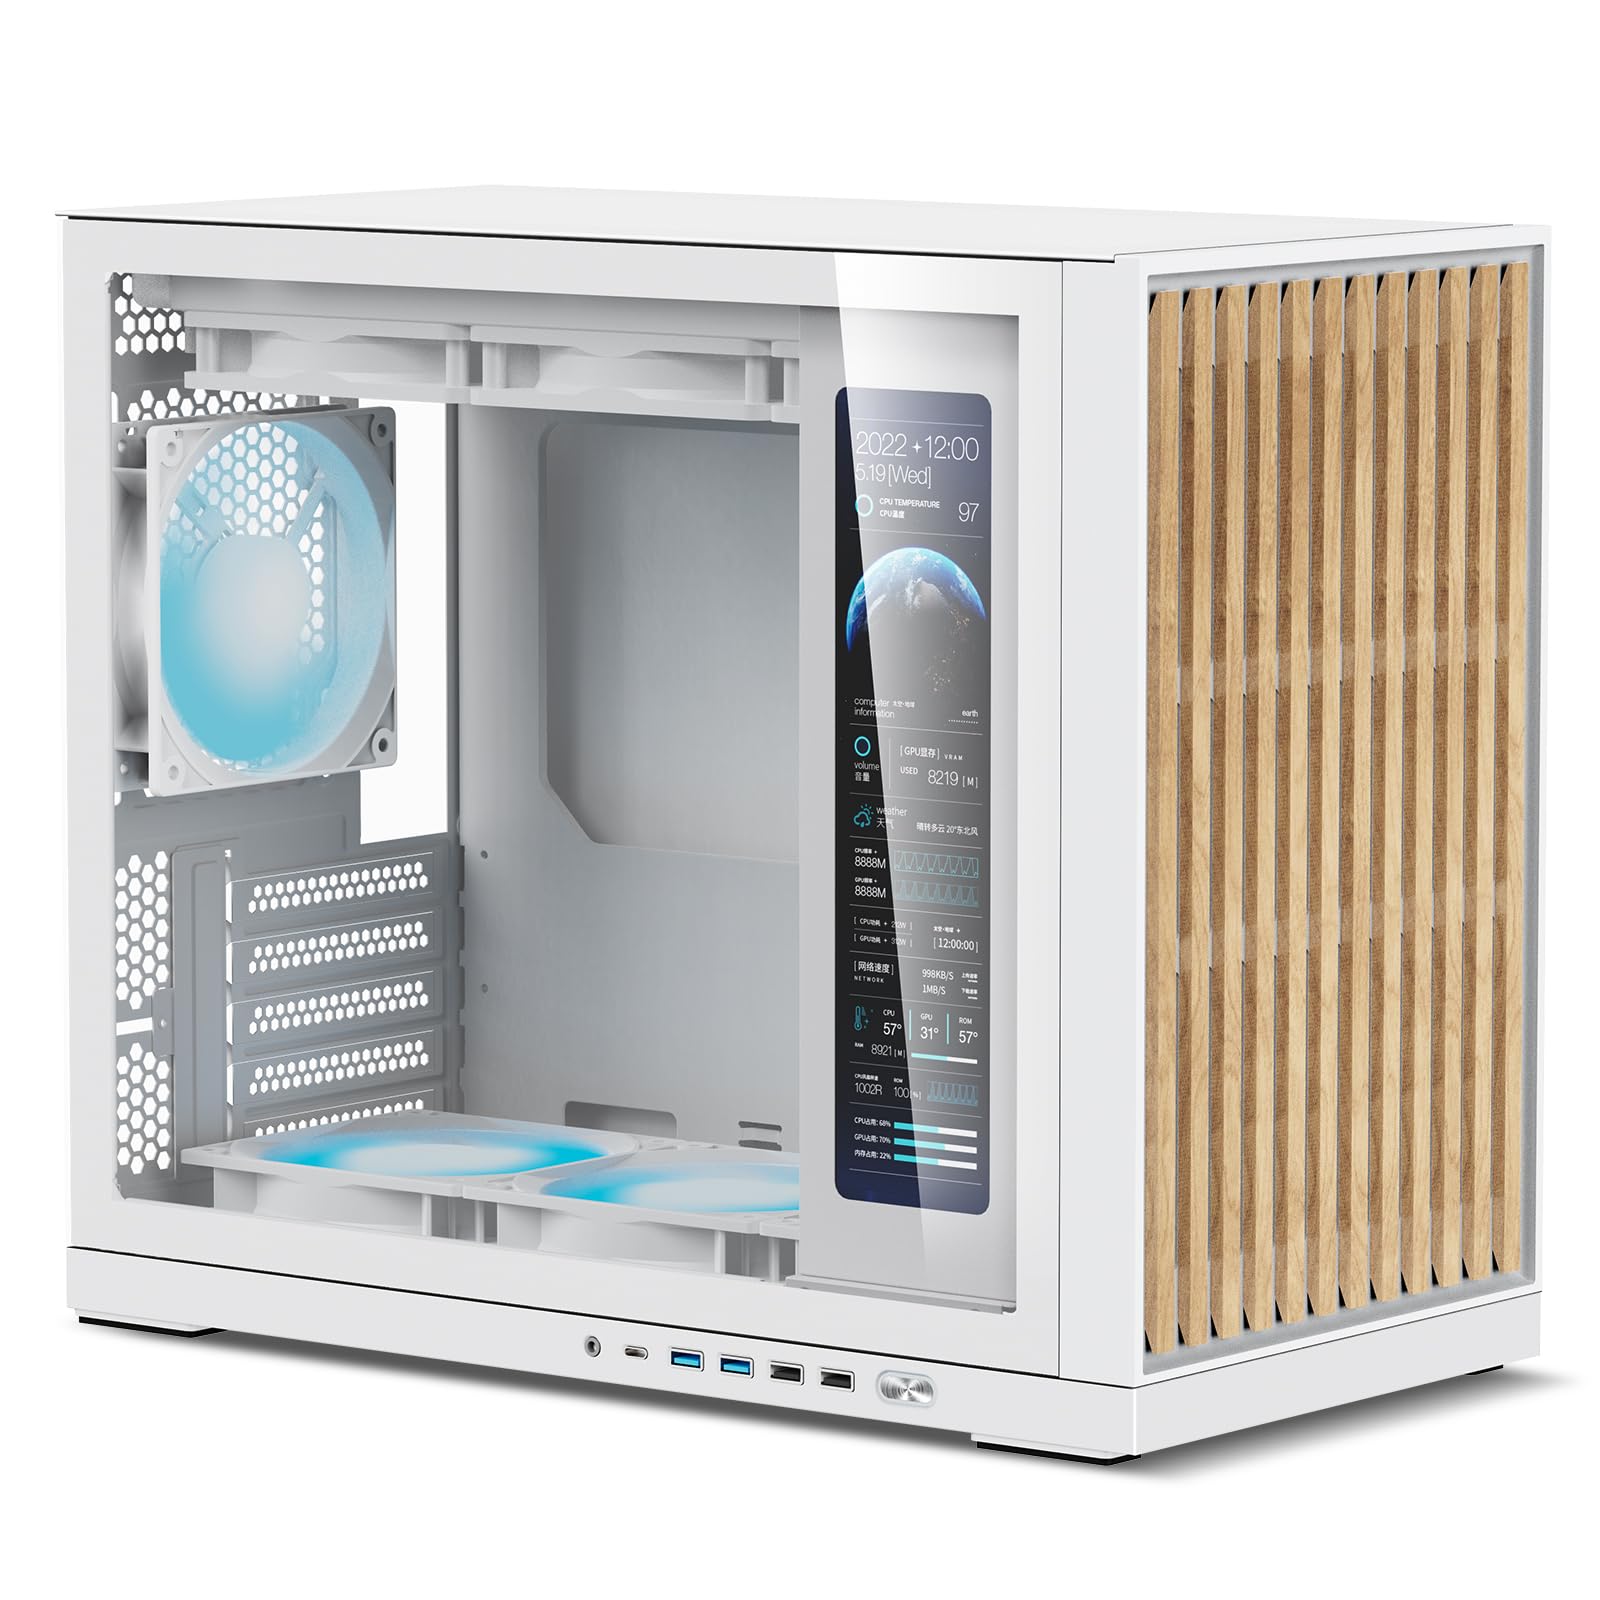
Image: The SHINYSNAKE G600 MATX MFF Gaming Case in white with its auxiliary screen displaying system information.
Alaye Aabo
- Nigbagbogbo ge asopọ ipese agbara lati inu iṣan ogiri ṣaaju fifi sori ẹrọ tabi yiyọ awọn paati eyikeyi kuro.
- Wọ okun ọwọ-atako-aimi lati ṣe idiwọ isọjade elekitirotatiki (ESD) ibajẹ si awọn paati ifura.
- Mu awọn paati farabalẹ lati yago fun ibajẹ ti ara.
- Pa awọn ẹya kekere ati awọn irinṣẹ kuro lọdọ awọn ọmọde.
- Rí i dájú pé afẹ́fẹ́ tó yẹ wà ní àyíká àpótí náà kí ó má baà gbóná jù.
- Do not operate the system with the side panels removed unless performing maintenance or troubleshooting.
Package Awọn akoonu
Verify that all items are present before beginning assembly:
- SHINYSNAKE G600 MATX MFF Gaming Case (Auxiliary Screen Version)
- Àpótí Ẹ̀rọ (àwọn skru, àwọn okùn okùn, àwọn ìdádúró, àti bẹ́ẹ̀ bẹ́ẹ̀ lọ)
- Afowoyi Olumulo (iwe-ipamọ yii)
- Auxiliary Screen USB Cable
- Auxiliary Screen Power Cable
Eto ati fifi sori
Follow these steps for proper assembly of your PC components within the G600 case.
1. Múra Ẹjọ́ náà sílẹ̀
- Carefully remove the tempered glass side panel and the solid wood front panel. These are typically secured with thumbscrews or a snap-on mechanism.
- Unpack the accessory box and identify the various screws and mounting hardware.

Image: The SHINYSNAKE G600 case with its side panel removed, showing the internal layout.
2. Modaboudu fifi sori
- Install the CPU, CPU cooler (if air cooler), and RAM onto your Micro-ATX or Mini-ITX motherboard outside the case.
- Align the motherboard with the standoffs inside the case. Ensure the I/O shield is correctly positioned.
- Ṣe aabo modaboudu nipa lilo awọn skru ti a pese.
3. Agbara Ipese Unit (PSU) fifi sori
The G600 supports ATX PSUs up to 160mm in length and features a 3-level adjustable PSU chamber to optimize clearance for GPUs and cooling.
- Determine the optimal PSU chamber level based on your GPU length and AIO radiator thickness. Refer to the diagrams below for guidance.
- Mount the PSU to the adjustable bracket and secure it in the desired position.
- Route the necessary PSU cables through the cable management cutouts.

Image: Diagram illustrating the adjustable ATX PSU chamber for optimized clearance.

Image: Configuration for PSU Chamber Level 1, showing GPU and PSU length compatibility.

Image: Configuration for PSU Chamber Level 2, showing GPU and PSU length compatibility.

Image: Configuration for PSU Chamber Level 3, showing GPU and PSU length compatibility.
4. Kaadi eya aworan (GPU) fifi sori
The G600 supports GPUs up to 400mm in length (5-slot).
- Yọ awọn ideri iho PCIe pataki kuro.
- Insert your GPU into the primary PCIe slot on the motherboard.
- Fi awọn skru so GPU mọ.
- Connect the appropriate PCIe power cables from the PSU to the GPU.
5. Itutu eto sori
The G600 offers flexible cooling options:
- Itutu afẹfẹ: Supports CPU air coolers up to 170mm tall. Up to 7 x 120mm fans can be installed (3x top, 1x rear, 3x bottom).
- Itutu Omi: Supports 360mm AIO radiators at the top or bottom, or a 120mm AIO at the rear. Note: A 360mm AIO at the top or bottom may affect other component clearances.
- Install your chosen fans or AIO radiator in the designated mounting points.
- So awọn okun agbara afẹfẹ pọ mọ modaboudu tabi oluṣakoso afẹfẹ kan.

Image: Diagram showing air cooling fan configurations and CPU cooler height support.

Image: Diagram showing liquid cooling AIO radiator support for top, bottom, and rear mounts.
6. Fifi sori ẹrọ ẹrọ ipamọ
The G600 supports various storage configurations:
- Rear: 1 x 2.5” SSD mount
- Bottom: 1 x 3.5” HDD mount (optional)
- Auxiliary Screen Bracket: 2 x 2.5” SSD mounts (if not using the screen)
- Mount your SSDs and HDDs in the appropriate locations using the provided screws.
- Connect SATA data and power cables.

Image: Visual representation of SSD and HDD mounting points within the case.
7. Iwaju I/O Panel Awọn isopọ
Connect the front panel cables to your motherboard:
- 1 x USB 3.2 Iru-C (10Gbps)
- 2 x USB 3.0 (5Gbps)
- 2 x USB 2.0
- 1 x Agbekọri / Gbohungbo Konbo Jack
- Power Button / Reset Button / LED indicators

Image: Close-up of the front I/O panel showing USB ports and audio jack.
8. Auxiliary Screen Setup
The 11.3-inch auxiliary screen (1920x480 resolution) displays real-time hardware data.
- Connect the auxiliary screen's USB cable to an available USB 2.0 header on your motherboard.
- Connect the auxiliary screen's power cable to a SATA power connector from your PSU.
- Download and install the necessary monitoring software from the official SHINYSNAKE webojula.
- Configure the display settings and choose from over 20 customizable themes to show CPU/GPU temperatures, clock speeds, fan RPM, and more.

Image: Features of the 11.3-inch auxiliary screen, including resolution, USB connection, and monitoring themes.
9. Apejọ ipari
- Perform cable management to ensure optimal airflow and a clean aesthetic.
- Reattach the tempered glass side panel and the solid wood front panel.
Installation Video (SHINY SNAKE G350 - General Guidance)
While this video is for the SHINY SNAKE G350 model, it may provide general visual guidance for PC component installation within a compact SHINY SNAKE chassis. Please note that specific steps and component layouts may differ for the G600.
Video: Installation instructions for the SHINY SNAKE G350 PC case. Provides general steps for component installation.
Operating the Auxiliary Screen
Once your system is fully assembled and powered on, the auxiliary screen will activate. Ensure the monitoring software is installed and running in your operating system.
- Iṣeto ni Sọfitiwia: Use the SHINYSNAKE monitoring software to customize the information displayed on the screen. You can select from various metrics such as CPU temperature, GPU temperature, CPU/GPU load, fan speeds, and more.
- Theme Selection: The software offers over 20 customizable themes. Experiment with different themes to find one that suits your aesthetic and informational needs.
- Troubleshooting Display: If the screen does not power on or display information, verify the USB and power connections, and ensure the monitoring software is correctly installed and configured.
Ọja Pariview Video (SHINY SNAKE G600)
Yi fidio pese ohun loriview of the SHINY SNAKE G600 MATX Chassis, highlighting its features including the auxiliary screen.
Fidio: Pariview of the SHINY SNAKE G600 MATX Chassis with Auxiliary Screen, demonstrating its design and features.
Itoju
- Awọn Ajọ Eruku: Regularly clean the dust filters (if present) to maintain optimal airflow and prevent dust buildup inside the case.
- Ode Ninu: Lo asọ, damp cloth to clean the exterior surfaces. Avoid abrasive cleaners or solvents that could damage the finish or wood panel.
- Ninu inu: Periodically open the case and use compressed air to remove dust from components and internal surfaces. Ensure the system is powered off and unplugged before cleaning.
- Gilasi ibinu: Clean the tempered glass panel with a microfiber cloth and a glass cleaner designed for electronics to avoid streaks or damage.
Laasigbotitusita
System Does Not Power On
- Check all power connections: PSU to wall, PSU to motherboard (24-pin and CPU 8-pin), and front panel power switch cable to motherboard.
- Rii daju pe iyipada PSU wa ni ipo "ON".
- Rí i dájú pé okùn bọ́tìnì agbára náà so mọ́ orí iwájú pánẹ́lì modaboudu náà dáadáa.
Auxiliary Screen Not Displaying
- Confirm the USB and SATA power cables for the auxiliary screen are securely connected.
- Ensure the monitoring software is installed and running in your operating system.
- Check your motherboard's BIOS/UEFI settings to ensure USB 2.0 headers are enabled.
Ko dara Airflow / Overheating
- Verify all case fans are spinning and oriented correctly for optimal airflow (front/bottom intake, rear/top exhaust).
- Clean any dust filters or internal components that may be obstructing airflow.
- Ensure proper cable management to avoid blocking airflow paths.
Awọn pato
| Ẹya ara ẹrọ | Ẹ̀kúnrẹ́rẹ́ |
|---|---|
| Iwọn Ọja (LxWxH) | 427 x 220 x 362 mm / 16.81" x 8.66" x 14.25" |
| Modaboudu Ibamu | Micro-ATX, Mini-ITX |
| Àtìlẹ́yìn Gígùn GPU | Up to 400mm (5-slot) |
| Atilẹyin Giga Itutu Sipiyu | Ti o de 170mm |
| Iru PSU ati Gigun | ATX PSU, up to 160mm (adjustable chamber) |
| Fan gbeko | Top: 3 x 120mm or 2 x 140mm; Rear: 1 x 120mm; Bottom: 3 x 120mm |
| AIO Radiator Support | Top/Bottom: 120/240/280/360mm; Rear: 120mm |
| Ibi ipamọ Bays | 1 x 2.5" SSD (rear), 1 x 3.5" HDD (bottom, optional), 2 x 2.5" SSD (auxiliary screen bracket, if no screen) |
| Iwaju Awọn Ibudo I / O | 1 x USB 3.2 Type-C (10Gbps), 2 x USB 3.0 (5Gbps), 2 x USB 2.0, 1 x Headphone/Mic Combo Jack |
| Iboju Iranlọwọ | 11.3-inch, 1920x480 resolution, real-time hardware monitoring |
| Awọn ohun elo | SPCC Steel, Tempered Glass, Wood |
| Iwọn Nkan | 6.5 kilo |

Image: Detailed specifications table for the SHINYSNAKE G600 case.
Atilẹyin ọja ati Support
Alaye atilẹyin ọja
The SHINYSNAKE G600 MATX MFF Gaming Case comes with a 2-odun atilẹyin ọja Láti ọjọ́ tí a rà á. Àtìlẹ́yìn yìí bo àwọn àbùkù iṣẹ́-ọnà àti àbùkù ohun èlò lábẹ́ lílò déédéé. Kò bo ìbàjẹ́ tí ó wáyé nípasẹ̀ ìlòkulò, ìjàǹbá, àtúnṣe tí a kò fún ní àṣẹ, tàbí fífi sori ẹrọ tí kò tọ́.
Jọwọ ṣe idaduro ẹri rira rẹ fun awọn iṣeduro atilẹyin ọja.
Onibara Support
For technical assistance, troubleshooting, or warranty inquiries, please contact SHINYSNAKE customer support through their official website or the retailer where the product was purchased. You may need to provide your product model number (G600-AS-WT) and proof of purchase.
Official SHINYSNAKE Webojula: Visit the SHINYSNAKE Store on Amazon


