
1. Ifihan
O ṣeun fun riraasing the Surge Wireless Pro Controller. This controller is designed for multi-platform compatibility, offering an enhanced gaming experience across various devices. Please read this manual carefully before use to ensure proper operation and to maximize your gaming enjoyment.
Awọn ẹya pataki:
- Multi-Platform Compatibility: Nintendo Switch/Switch 2 (Note: No C Button/Audio Port support for Switch 2), Windows PC, Steam Deck, Android, and iOS devices.
- Hall Effect Thumb Sticks & Triggers: Provides precise control and reduces the likelihood of stick drift.
- Turbo Functionality: Offers three adjustable turbo levels for rapid-fire control.
- Vibration Feedback: Four adjustable vibration levels for customizable haptic feedback.
- Motion Controls: Supports motion sensing in compatible games.
- Console Wake Up: Ability to wake the Nintendo Switch console from sleep mode (Nintendo Switch only).
- Rechargeable Battery: Built-in 600mAh Li-polymer battery provides up to 10 hours of play.
- USB-C Charging: Includes a 1-meter USB-C charging cable.
2. Package Awọn akoonu
- 1 x Surge Wireless Pro Controller
- Okun gbigba agbara 1 x USB-C (mita 1)
- 1 x Ilana itọnisọna
3. Adarí Layout
Familiarize yourself with the buttons and features of your Surge Wireless Pro Controller.
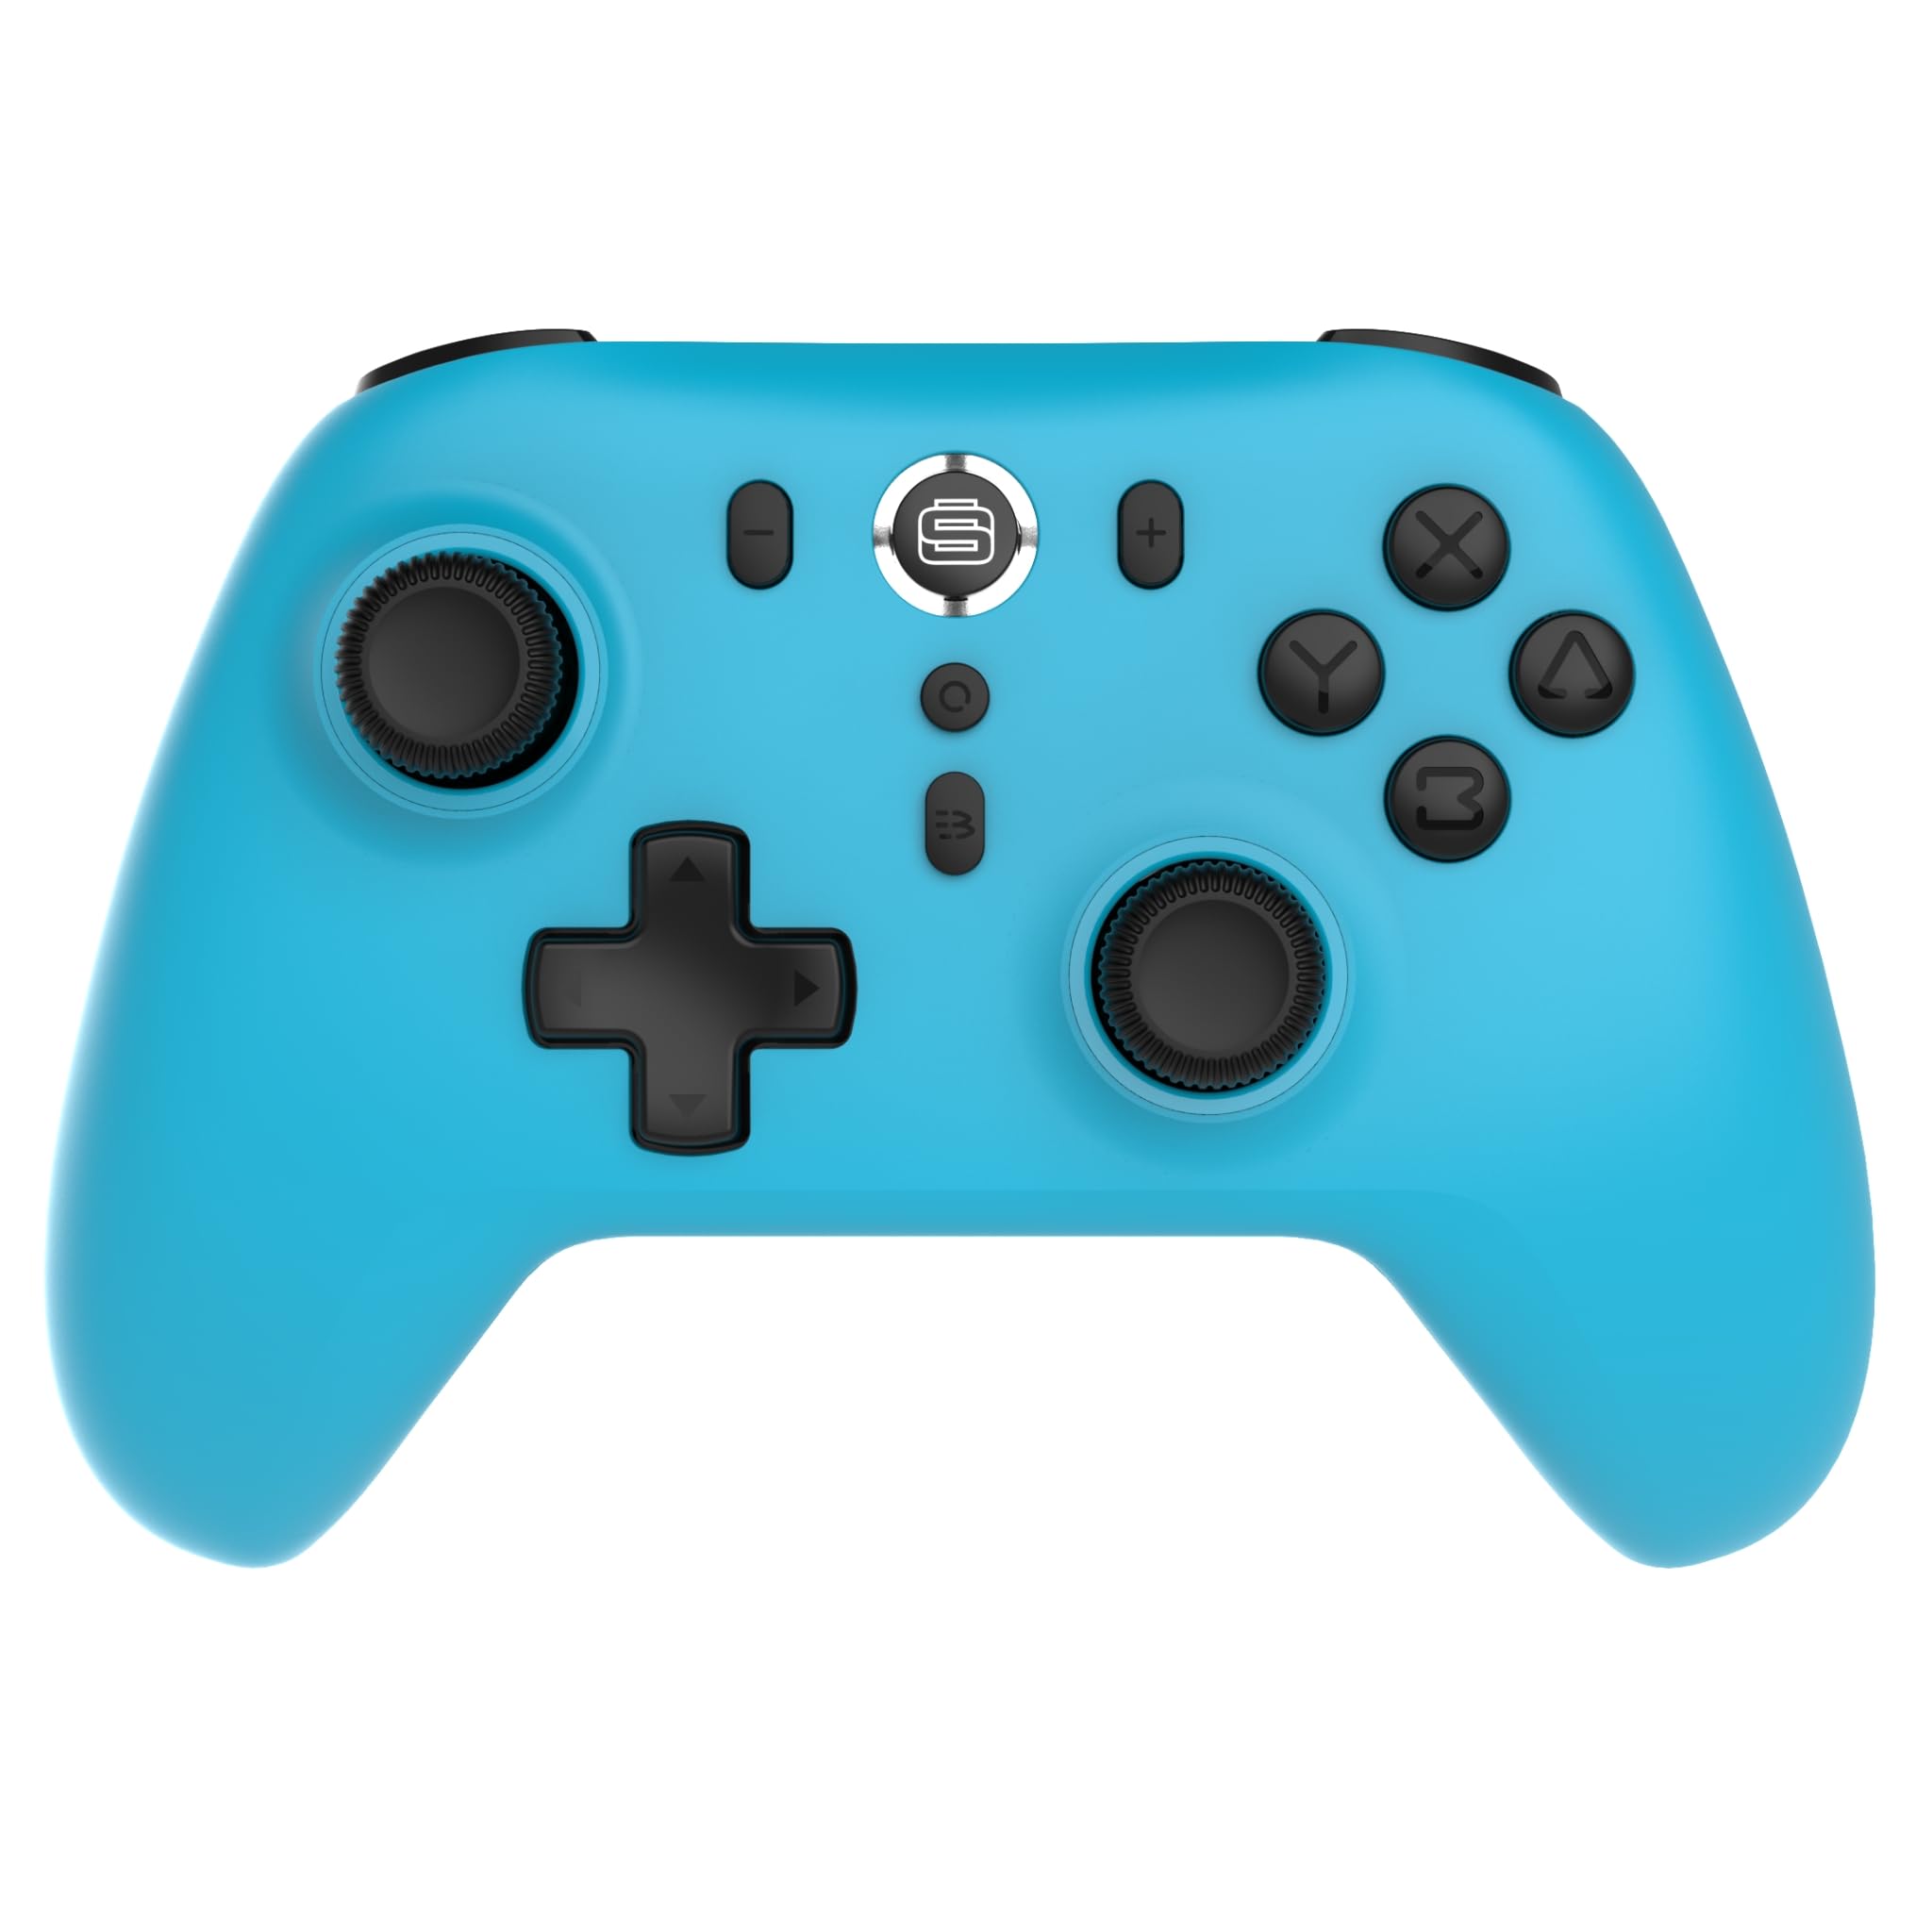
Iwaju view of the Surge Wireless Pro Controller, showing the D-pad, left and right analog sticks, A/B/X/Y buttons, Home button, Capture button, Plus and Minus buttons, and the Surge logo button.

Pada view of the Surge Wireless Pro Controller, showing the textured grips and the charging port.
4. Eto ati Sisopọ
The Surge Wireless Pro Controller supports multiple connection methods depending on your device.

This image displays the various platforms compatible with the Surge Wireless Pro Controller, including Nintendo Switch, Nintendo Switch 2, Windows PC, Android, and iOS.
4.1. Pairing with Nintendo Switch / Switch 2
- Lati Akojọ aṣyn Ile, yan Awọn oludari > Yi Dimu / Bere fun.
- Lori oluṣakoso, tẹ mọlẹ Bọtini ile for 3-5 seconds until the indicator lights begin to flash rapidly.
- Once paired, the indicator light(s) on the controller will remain solid.
- To wake the console from sleep mode, press the Bọtini ile lori oludari.
4.2. Pairing with Windows PC
- Rii daju pe kọmputa rẹ ni Bluetooth ti ṣiṣẹ.
- Lọ si Bluetooth & other devices settings lori PC rẹ.
- Yan Fi Bluetooth tabi ẹrọ miiran kun > Bluetooth.
- Lori oluṣakoso, tẹ mọlẹ Bọtini ile for 3-5 seconds until the indicator lights begin to flash rapidly.
- Select the controller from the list of available devices on your PC.
- Once paired, the indicator light(s) on the controller will remain solid.
4.3. Pairing with Android / iOS Devices
- Mu Bluetooth ṣiṣẹ lori Android tabi ẹrọ iOS rẹ.
- Lọ sí àkójọ ètò Bluetooth lórí ẹ̀rọ rẹ.
- Lori oluṣakoso, tẹ mọlẹ Bọtini ile for 3-5 seconds until the indicator lights begin to flash rapidly.
- Select the controller from the list of available devices.
- Once paired, the indicator light(s) on the controller will remain solid.
5. Awọn ẹya ara ẹrọ ti nṣiṣẹ
5.1. Hall Effect Thumb Sticks & Triggers
The controller is equipped with Hall Effect technology for its thumb sticks and triggers. This technology uses magnets and electrical conductors to detect position, providing enhanced precision and significantly reducing the risk of stick drift over time compared to traditional potentiometers.

This image highlights the Hall Effect thumbsticks and triggers, emphasizing their role in providing precise inputs and preventing stick drift.
5.2. Iṣẹ́ Turbo
The Turbo function allows for rapid, repeated input of a button press. This controller features 3 adjustable turbo levels.
- Lati mu Turbo ṣiṣẹ: Tẹ mọlẹ Bọtini Turbo, then press the desired action button (A/B/X/Y, L1/R1, L2/R2, D-pad directions). The button will now rapidly repeat its input when held.
- Lati ṣatunṣe iyara Turbo: With Turbo active on a button, press and hold the Bọtini Turbo ati ki o gbe awọn Ọtun Analog Stick soke tabi isalẹ to cycle through the 3 speed levels.
- Láti mú kí Turbo má ṣiṣẹ́: Tẹ mọlẹ Bọtini Turbo, then press the same action button again.
5.3. Ìròyìn nípa gbígbìjìn
The controller provides haptic feedback through vibration. You can choose from 4 vibration levels.
- To adjust Vibration level: Tẹ mọlẹ Bọtini gbigbọn (if present, or a designated button combination, refer to specific button mapping if available) and move the Left Analog Stick Up or Down to cycle through the 4 levels (Off, Low, Medium, High).
5.4. Motion Controls
The controller supports motion controls for compatible games, particularly on Nintendo Switch/Switch 2. This allows for intuitive gameplay where physical movement of the controller translates into in-game actions.

This image visually represents the controller's advanced features, including Turbo Function, Motion Controls, and Rumble Vibration, enhancing the gaming experience.
6. Gbigba agbara
The controller is equipped with a built-in 600mAh Li-polymer battery, providing up to 10 hours of gameplay on a single charge.

This image shows the controller being held, emphasizing its internal rechargeable battery for extended play sessions.
- Connect the included USB-C charging cable to the controller's USB-C port.
- So opin keji okun naa pọ mọ orisun agbara USB (fun apẹẹrẹ, console, PC, adapter ogiri USB).
- The indicator lights on the controller will show charging status (e.g., blinking while charging, solid when fully charged).
- Gbigba agbara ni kikun maa n gba to awọn wakati 2-3.
7. Itọju
To ensure the longevity and optimal performance of your controller, follow these maintenance guidelines:
- Ninu: Lo asọ ti o tutu, ti o gbẹ lati nu oludari naa. Fun idoti alagidi, die-die dampen awọn asọ pẹlu omi. Yẹra fun lilo awọn kẹmika lile tabi awọn afọmọ abrasive.
- Ibi ipamọ: Tọju olutọju naa ni itura, aye gbigbẹ kuro lati orun taara ati awọn iwọn otutu to gaju.
- Yago fun awọn isọ silẹ: Dáàbò bo olùdarí náà kúrò lọ́wọ́ àwọn ìṣàn àti àwọn ìkọlù, èyí tí ó lè ba àwọn ẹ̀yà ara inú jẹ́.
- Ifihan Olomi: Do not expose the controller to water or other liquids.
8. Laasigbotitusita
If you encounter issues with your Surge Wireless Pro Controller, please refer to the following common solutions:
| Isoro | Ojutu |
|---|---|
| Adarí ko ni tan. | Ensure the controller is charged. Connect it to a power source using the USB-C cable. |
| Controller does not pair. | Ensure the controller is in pairing mode (indicator lights flashing rapidly). Check that Bluetooth is enabled on your device. Try restarting both the controller and the device. |
| Aisun titẹ sii tabi ge asopọ. | Ensure the controller is within range of the device. Reduce interference from other wireless devices. Ensure the controller is fully charged. |
| Awọn bọtini tabi awọn ọpá ko ni idahun. | Try resetting the controller (if a reset button is available, typically a small pinhole on the back). Ensure no debris is obstructing the buttons. |
| Gbigbọn kò ṣiṣẹ́. | Check the vibration settings on the controller and in the game. Ensure the vibration level is not set to 'Off'. |
9. Awọn pato
| Ẹya ara ẹrọ | Ẹ̀kúnrẹ́rẹ́ |
|---|---|
| Nọmba awoṣe | SG60095 |
| Batiri Iru | 1 Nonstandard Battery (Li-polymer, 600mAh) |
| Igbesi aye batiri | Titi di wakati 10 (isunmọ.) |
| Gbigba agbara Port | USB-C |
| Awọn iwọn | 20.5 x 14 x 6.6 cm |
| Iwọn | 320 g |
| Ilu isenbale | China |
10. Atilẹyin ọja ati Support
For warranty information and customer support, please refer to the documentation included with your purchase or visit the official Surge webojula. Jeki ẹri rira rẹ fun awọn iṣeduro atilẹyin ọja.