1. Alaye Aabo pataki
Read and understand all instructions before operating the lawn mower. Failure to follow all instructions listed below may result in electric shock, fire, and/or serious personal injury.
Awọn ikilọ Aabo Gbogbogbo:
- Always wear appropriate personal protective equipment, including eye protection and sturdy footwear.
- Pa awọn ọmọde ati awọn ohun ọsin kuro ni agbegbe mowing.
- Má ṣe lo ẹ̀rọ ìgé igi ní àsìkò òjò tàbí ní àsìkò òjò.
- Inspect the area for objects that could be thrown by the blade before mowing.
- Nigbagbogbo ge asopọ agbara ṣaaju ṣiṣe eyikeyi itọju tabi mimọ.
- Ensure all guards and safety devices are in place and functioning correctly.
2. Eto ati Apejọ
2.1 Ṣiṣii silẹ
Carefully remove all components from the packaging. Ensure all parts listed in the packing list are present. Retain packaging for future storage or transport.
2.2 mu Apejọ
The mower features a fold-over handle for convenient storage. To assemble for use, unfold the handle and secure it in the upright position using the provided knobs or levers. Ensure the handle is firmly locked to prevent movement during operation.

Olusin 1: Pariview of the PowerSmart DB8015 Electric Lawn Mower, highlighting the fold-over handle, 12.5 AMP motor, 2-in-1 function (bagging & mulching), 10-gallon grass collection bag, and adjustable height setting with 6 options.
2.3 Grass Collection Bag Attachment
Attach the grass collection bag to the rear discharge opening of the mower. Ensure it is securely fastened to prevent grass clippings from escaping during operation.

Figure 2: A person emptying the 40L grass collection bag, demonstrating its capacity for less frequent emptying.
2.4 Asopọ agbara
Connect the mower to a standard 120V, 60Hz electrical outlet using an appropriate outdoor-rated extension cord. Ensure the extension cord is in good condition and rated for the mower's 12.5 AMP power requirement.
3. Isẹ
3.1 Bíbẹ̀rẹ̀ ẹ̀rọ ìgéko
To start the mower, first press the safety lock button, then pull the switch handle towards you. Release the safety lock button once the mower starts. To stop, release the switch handle.
3.2 Siṣàtúnṣe iwọn Ige
The mower offers 6 height adjustments, ranging from 1.0 inches to 3.0 inches. To adjust, locate the height adjustment lever on the mower deck and move it to the desired position. Ensure all wheels are set to the same height for an even cut.

Figure 3: Visual representation of the 6 cutting height adjustments available on the mower, ranging from 1.0 to 3.0 inches.
3.3 Àwọn Ọ̀nà Ìgé Gígé
Operate the mower in a push-style manner. For best results, mow in straight, overlapping lines. Avoid overloading the motor by cutting excessively long or wet grass. The mower's 7-inch rear wheels and 5.5-inch front wheels contribute to easy maneuverability.

Figure 4: The mower in use, demonstrating its easy maneuverability due to its wheel design.
3.4 2-in-1 Function: Bagging and Mulching
This mower offers both bagging and mulching capabilities. When the grass collection bag is attached, clippings are collected. For mulching, remove the grass bag and ensure the mulching plug (if included) is properly inserted to circulate clippings back into the lawn.
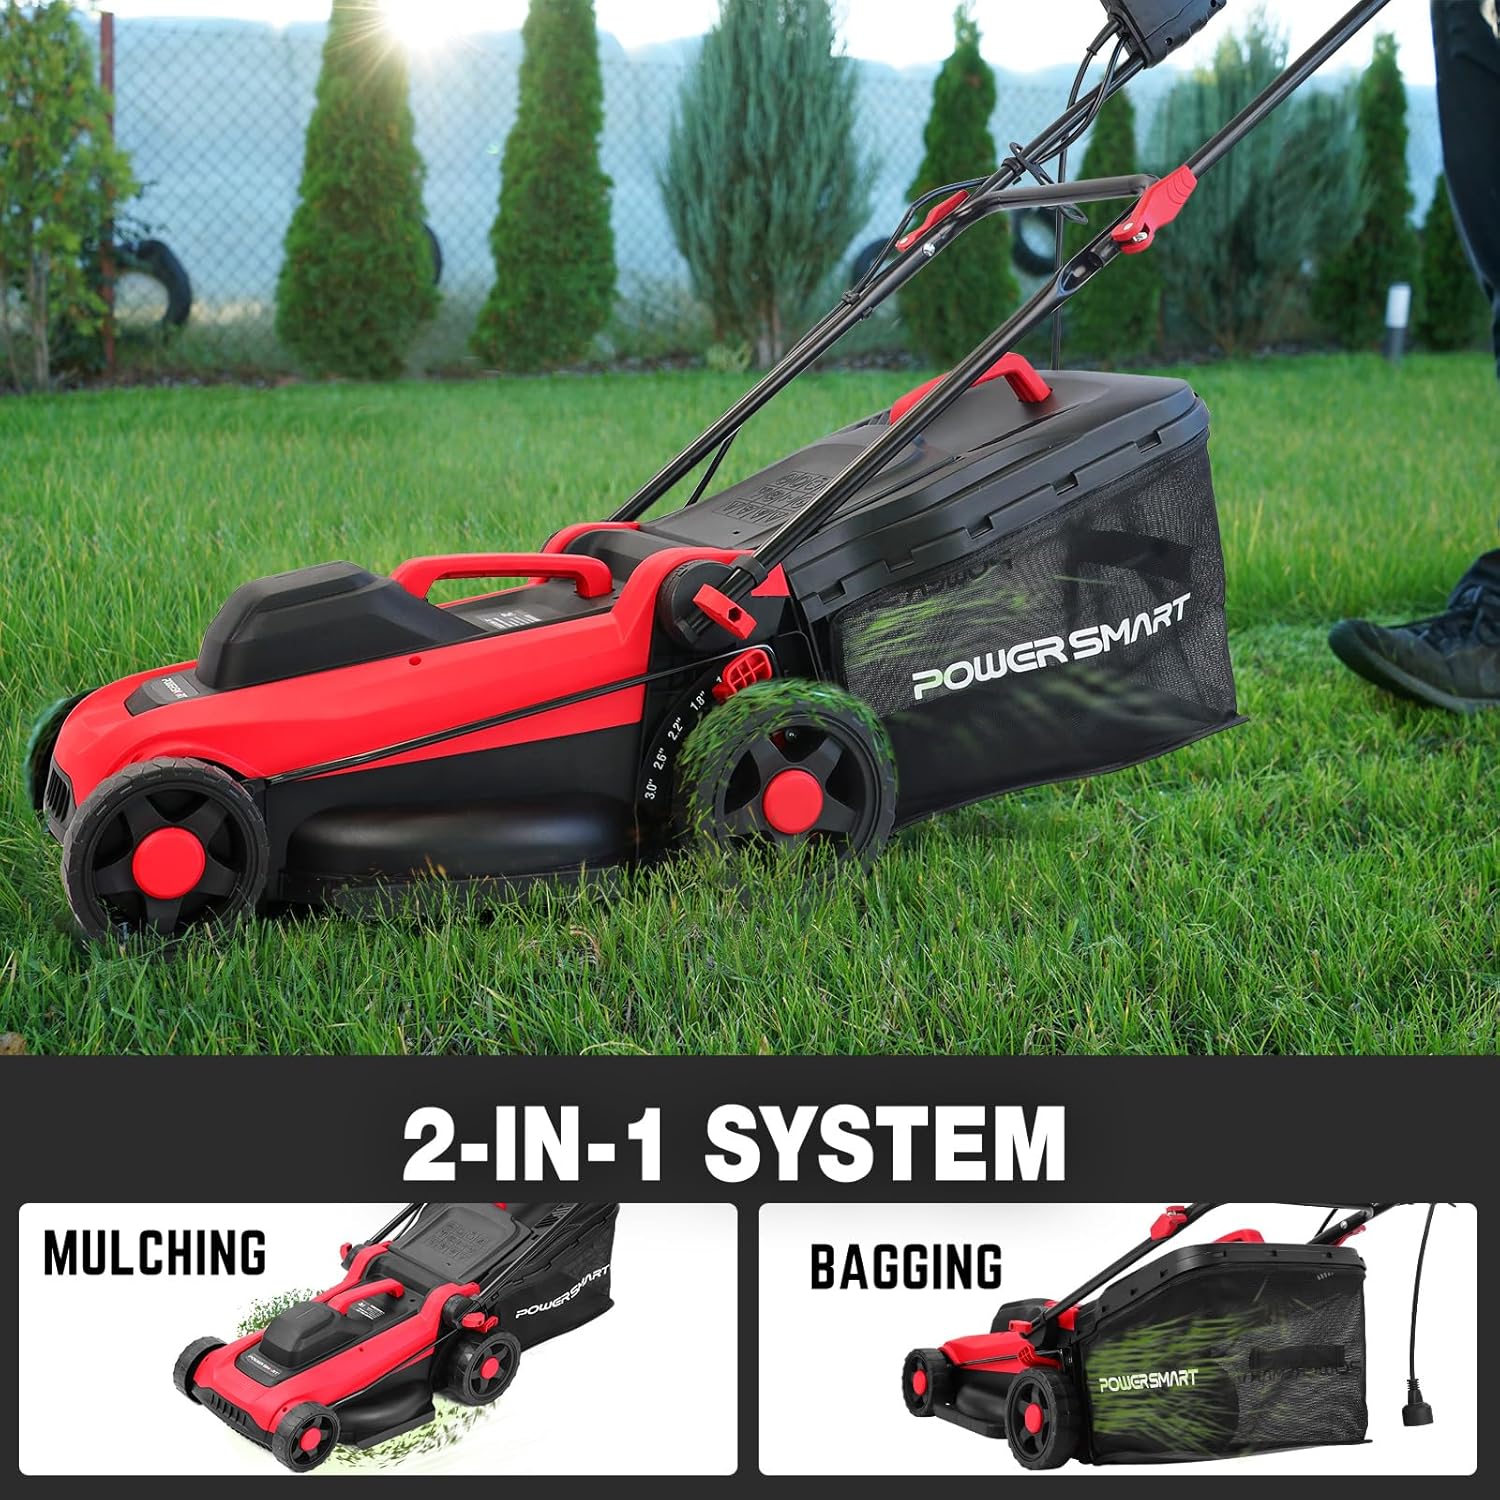
Figure 5: The 2-in-1 system, illustrating the mower's mulching and bagging configurations.
3.5 Fídíò Ìṣiṣẹ́
Video 1: Demonstration of the PowerSmart Electric Mower in operation, showcasing its low noise and lightweight design suitable for residential yards.
4. Itọju
Regular maintenance ensures optimal performance and extends the life of your lawn mower. Always disconnect the power supply before performing any maintenance.
4.1 Ninu
Lẹ́yìn lílo kọ̀ọ̀kan, fọ pákó ìgbálẹ̀ àti ìta pẹ̀lú ìpolówóamp cloth. Remove any accumulated grass clippings from the underside of the deck and around the blade. Do not use a pressure washer or hose directly on the motor or electrical components.
4.2 Blade Ayewo ati Rirọpo
Regularly inspect the cutting blade for sharpness and damage. A dull or damaged blade can lead to poor cutting performance and strain the motor. Replace the blade with a genuine PowerSmart replacement blade if it is dull, bent, or cracked. Refer to the specifications for the correct blade type.
4.3 Grass Bag Cleaning
Empty and clean the grass collection bag periodically to maintain proper airflow and collection efficiency. Wash with water and mild soap, then allow it to dry completely before reattaching.
4.4 Ibi ipamọ
Store the mower in a dry, protected area. The foldable handle design allows for vertical storage, saving up to 70% of storage space. Ensure the mower is clean and dry before storing for extended periods.

Figure 6: The mower in its folded, vertical storage position, illustrating how it saves space in a garage or shed.
5. Laasigbotitusita
Ṣaaju ki o to kan si atilẹyin alabara, tunview Awọn iṣoro ti o wọpọ ati awọn solusan wọnyi:
| Isoro | Owun to le Fa | Ojutu |
|---|---|---|
| Mower ko bẹrẹ | No power supply; Safety switch not engaged; Overload protection activated | Check power cord and outlet; Ensure safety lock button and switch handle are fully engaged; Allow motor to cool down, then restart. |
| Ige iṣẹ ti ko dara | Dull or damaged blade; Cutting height too low; Wet or excessively long grass | Sharpen or replace blade; Adjust cutting height; Mow when grass is dry and not excessively long. |
| Gbigbọn ti o pọju | Bent or unbalanced blade; Loose components | Inspect and replace blade if bent; Tighten all fasteners. |
| Grass bag not filling | Grass chute clogged; Grass bag full or improperly attached | Clear any blockages; Empty and reattach grass bag securely. |
6. Awọn pato
The following are the technical specifications for the PowerSmart DB8015 Electric Lawn Mower:
| Ẹya ara ẹrọ | Sipesifikesonu |
|---|---|
| Nọmba awoṣe | DB8015 |
| Orisun agbara | Itanna |
| Mọto | 12.5 AMP, 120V, 60HZ |
| Gige Iwọn | 14 inches |
| Ige Giga tolesese | 6 positions (1.0" - 3.0") |
| Koriko Gbigba Bag Agbara | 10 galonu (iwọn 40 liters) |
| Ipo Isẹ | Ti |
| Iwọn Nkan | 32 iwon |
| Awọn iwọn Ọja (D x W x H) | 26" x 13.2" x 16.6" |

Figure 7: The mower's motor, highlighting its 3400 RPM speed for efficient cutting.
7. Atilẹyin ọja ati Support
7.1 atilẹyin ọja Alaye
This PowerSmart product is covered by a manufacturer's warranty. Please refer to the warranty card included with your purchase for specific terms, conditions, and duration. Keep your proof of purchase for warranty claims.
7.2 Onibara Support
For technical assistance, replacement parts, or warranty inquiries, please contact PowerSmart customer support. Contact details can typically be found on the product packaging, the official PowerSmart webaaye, tabi iwe rira rẹ.