
Ọrọ Iṣaaju
This manual provides detailed instructions for the installation, operation, and maintenance of your GAMDIAS Aura GC11 ARGB Mid-Tower PC Case. Please read this manual thoroughly before beginning installation to ensure proper setup and safe use of the product. The GAMDIAS Aura GC11 ARGB is designed to accommodate Mini-ITX, Micro-ATX, and ATX motherboards, featuring a bar-patterned mesh front panel for optimal airflow and four pre-installed 120mm ARGB fans.
Alaye Aabo
- Always disconnect the power supply from the wall outlet before installing or removing any components to prevent electrical shock.
- Mu gbogbo awọn paati pẹlu iṣọra lati yago fun ibajẹ.
- Wear an anti-static wrist strap or frequently touch a grounded metal object to discharge static electricity before handling internal components.
- Pa awọn ẹya kekere ati awọn ohun elo apoti kuro lọdọ awọn ọmọde.
- Rii daju pe fentilesonu to dara ni ayika ọran PC lati ṣe idiwọ igbona.
Package Awọn akoonu
Verify that all the following items are present in your package:
- GAMDIAS Aura GC11 ARGB Mid-Tower PC Case
- 4 x Pre-installed 120mm ARGB Fans
- Ohun èlò ìbáṣepọ̀ (àwọn skru, ìdènà, àwọn okùn waya)
- Afowoyi Olumulo (iwe-ipamọ yii)
Eto ati fifi sori
1. Unpacking awọn nla
Carefully remove the PC case from its packaging. Inspect the case for any signs of damage during transit. Remove any protective films from the tempered glass panel.

Aworan: Angled view of the GAMDIAS Aura GC11 ARGB PC case, showcasing the tempered glass side panel and the distinctive bar-patterned mesh front panel.
2. Wíwọlé sí inú ilé
To access the interior of the case, locate and remove the thumbscrews securing the tempered glass side panel. Carefully lift and remove the panel. The opposite solid side panel can also be removed for cable management access.

Aworan: inu view of the GAMDIAS Aura GC11 ARGB PC case, with the side panel removed, revealing the motherboard mounting area, fan cutouts, and cable management space.
3. Modaboudu fifi sori
- Install the necessary motherboard standoffs into the motherboard tray according to your motherboard's form factor (Mini-ITX, Micro-ATX, or ATX).
- Fi ààbò I/O ti motherboard rẹ sinu ẹnu-ọna ẹhin apoti naa.
- Fi pẹ̀lẹ́pẹ̀lẹ́ gbé mótábódì rẹ sí orí àwọn ibi tí wọ́n ti ń dì í, kí o sì ṣe àtúnṣe àwọn ihò skru náà.
- Ṣe aabo modaboudu pẹlu awọn skru ti a pese.
4. Agbara Ipese Unit (PSU) fifi sori
- Mount your PSU into the dedicated compartment at the bottom rear of the case.
- Ṣe aabo PSU pẹlu awọn skru lati ẹhin ọran naa.
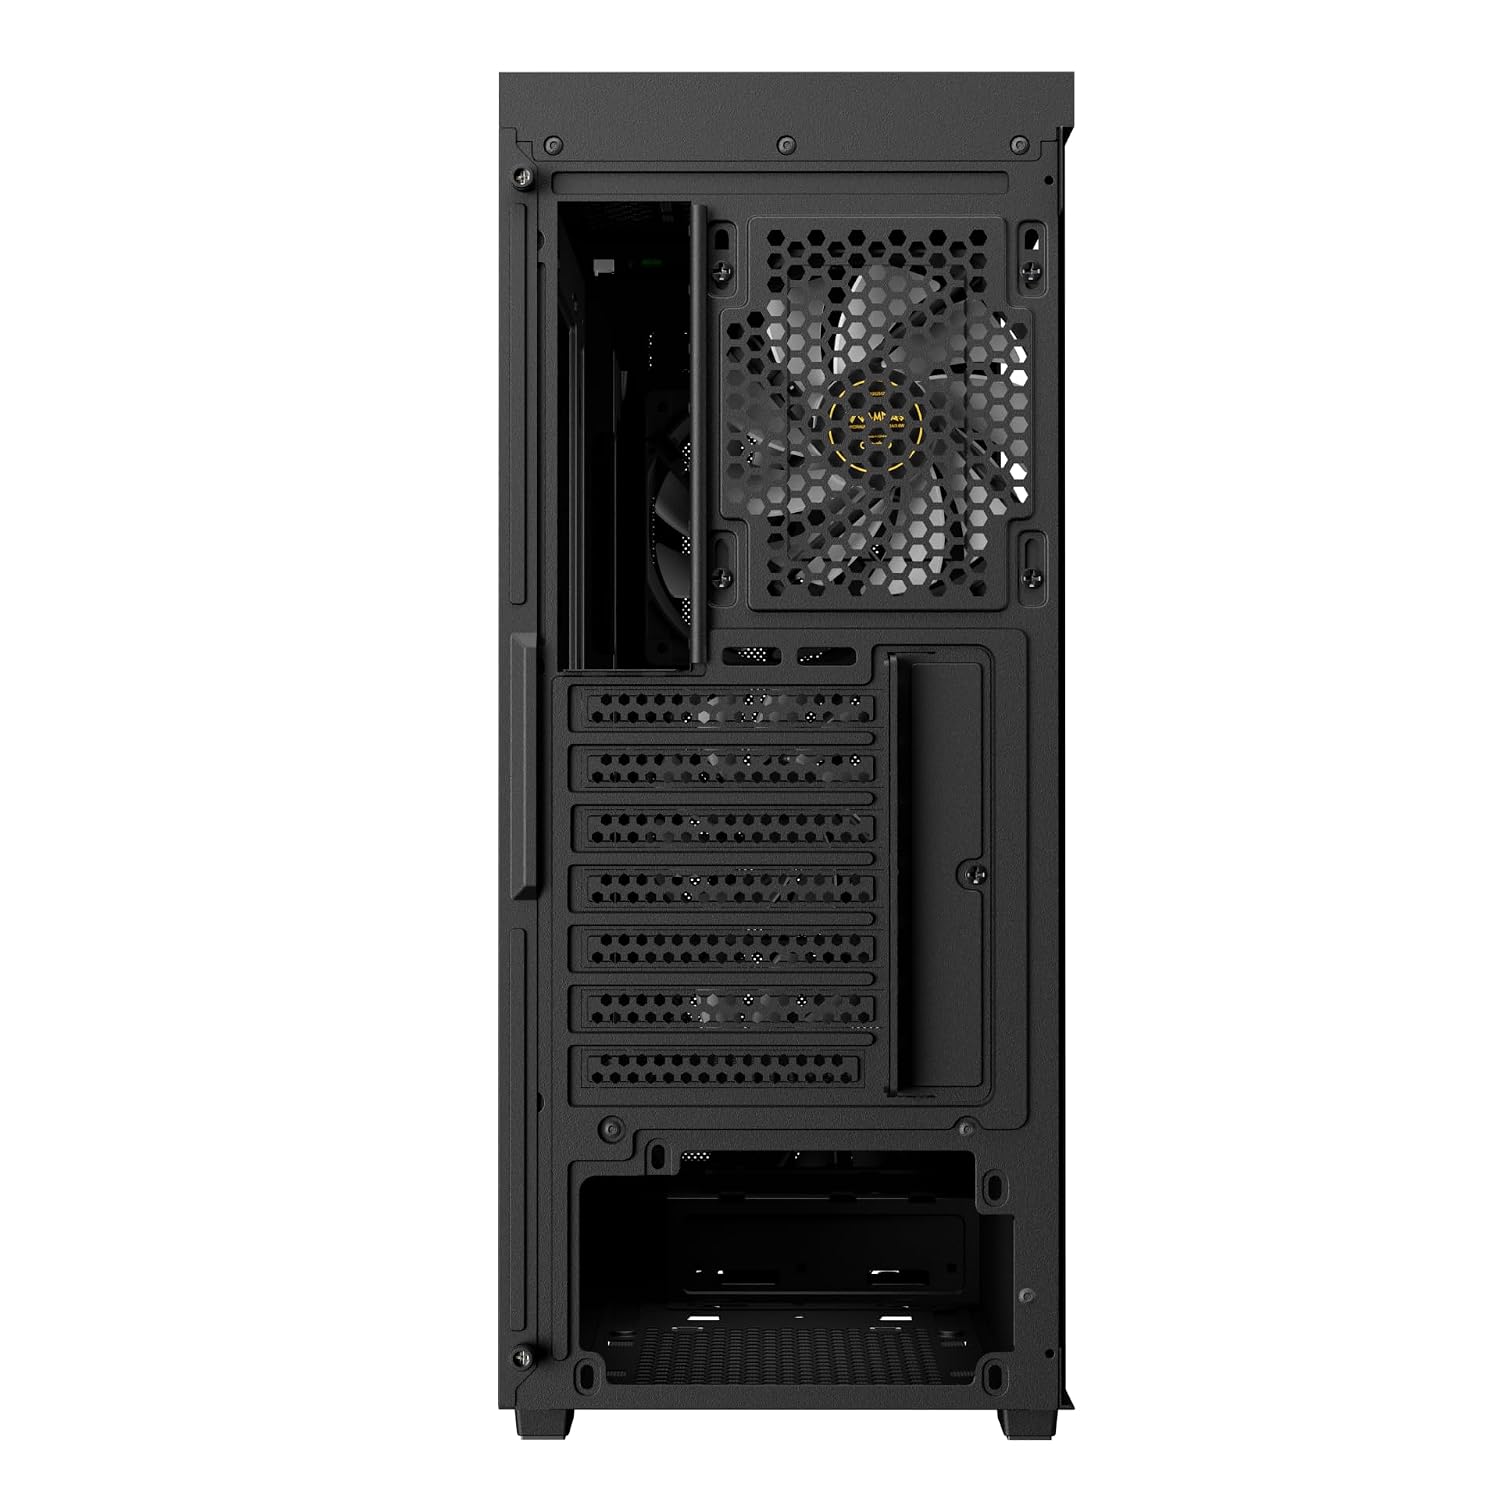
Aworan: Ẹyin view of the GAMDIAS Aura GC11 ARGB PC case, highlighting the power supply unit mounting bracket at the bottom and the expansion slots for graphics cards and other components.
5. Fifi sori ẹrọ Awakọ Ibi ipamọ
The case supports multiple storage drives. Refer to the accessory kit for specific mounting hardware.
- 2.5" SSDs: Mount SSDs to the designated trays or mounting points behind the motherboard tray.
- Awọn HDD 3.5": Install HDDs into the drive cage located beneath the PSU shroud.
6. Graphics Card (VGA) and Expansion Card Installation
- Yọ awọn ideri aaye imugboroosi pataki kuro ni ẹhin apoti naa.
- Insert your graphics card or other expansion cards into the appropriate PCIe slots on your motherboard.
- So awọn kaadi naa mọ pẹlu awọn skru.
7. Cable Management and Front Panel Connections
Route all power and data cables through the cutouts in the motherboard tray for a clean build. Connect the front panel I/O cables (USB, HD Audio, Power, Reset, LED) to their corresponding headers on your motherboard. The case features a Type-C port, two USB 2.0 ports, HD Audio, and Reset button on the top panel.

Image: Top-front view of the GAMDIAS Aura GC11 ARGB PC case, displaying the front I/O panel with Type-C, USB 2.0 ports, and audio jacks, along with the top magnetic dust filter.
8. Tilekun Ọran naa
Once all components are installed and cables are managed, reattach the side panels, starting with the solid panel, then the tempered glass panel. Secure them with the thumbscrews.
Awọn ilana Iṣiṣẹ
1. First Power-On
After ensuring all connections are secure, connect your PC to a power outlet and press the power button on the top panel of the case. The pre-installed ARGB fans will illuminate, and your system should begin to boot.

Aworan: Iwaju view of the GAMDIAS Aura GC11 ARGB PC case, with the four pre-installed ARGB fans visible and illuminated behind the bar-patterned mesh front panel.
2. ARGB Fan Control
The pre-installed ARGB fans are typically connected to a controller or directly to an ARGB header on your motherboard. Refer to your motherboard's manual or the fan controller's instructions for details on how to customize the lighting effects.
Itoju
1. Ìmọ́tótó Àlẹ̀mọ́ Eruku
The GAMDIAS Aura GC11 ARGB case includes a magnetic dust filter on the top panel and a removable filter for the PSU intake. Regularly clean these filters to maintain optimal airflow and prevent dust buildup inside your system.
- Gently remove the magnetic dust filter from the top of the case.
- Slide out the PSU dust filter from the bottom rear of the case.
- Fọ àwọn àlẹ̀mọ́ náà nípa lílo afẹ́fẹ́ tí a ti fún pọ̀ tàbí nípa fífi omi fọ̀ wọ́n. Rí i dájú pé wọ́n gbẹ pátápátá kí o tó tún so wọ́n pọ̀.
2. Gbogbogbo Cleaning
Lo asọ, damp cloth to wipe down the exterior surfaces of the case. Avoid using harsh chemicals or abrasive materials that could damage the finish or tempered glass.
Laasigbotitusita
No Power After Assembly
- Rí i dájú pé PSU ti tan-an àti pé a so mọ́ ibi tí a ti ń ta ohun èlò náà dáadáa.
- Rí i dájú pé àwọn okùn agbára ATX 24-pin àti 8-pin CPU so pọ̀ mọ́ motherboard láìléwu.
- Check that the front panel power switch cable is correctly connected to the motherboard's front panel header.
Fans Not Spinning or ARGB Not Working
- Confirm that the fan power cables are connected to the motherboard or fan controller.
- Ensure ARGB cables are properly connected to the motherboard's ARGB header or the fan controller.
- Check your motherboard's BIOS/UEFI settings or ARGB software for fan and lighting control.
Awọn ọrọ igbona pupọ
- Ensure all case fans are spinning correctly and oriented for optimal airflow (intake at front, exhaust at rear/top).
- Clean all dust filters and internal components to remove dust buildup.
- Rí i dájú pé ẹ̀rọ ìtútù CPU àti àwọn afẹ́fẹ́ GPU ń ṣiṣẹ́ dáadáa.
Awọn pato
| Ẹya ara ẹrọ | Ẹ̀kúnrẹ́rẹ́ |
|---|---|
| Brand | GAMDIAS |
| Orukọ awoṣe | Aura GC11 ARGB |
| Iru Irú | Ile-iṣọ Mid |
| Modaboudu Ibamu | Mini-ITX, Micro-ATX, ATX |
| Awọn onijakidijagan ti a ti fi sii tẹlẹ | 4 x 120mm ARGB egeb |
| Ọna Itutu | Afẹfẹ |
| Ohun elo apade | Irin, Gilasi Onígboná |
| I/O Ports | 1 x Type-C, 2 x USB 2.0, 1 x HD Audio, 1 x Reset |
| Sipiyu kula iga Aropin | 160mm |
| VGA Length Limitation | 300mm |
| PSU Gigun Idiwọn | 150mm |
| Internal Bays Quantity | 3 (for 2.5"/3.5" drives) |
| Pataki Awọn ẹya ara ẹrọ | Bar Patterned Mesh Front Panel, Magnetic Dust Filter |
| Iwọn Nkan | 4000 giramu |
| Awọn iwọn Nkan (D x W x H) | 46D x 20W x 40H |
| Ilu isenbale | China |
Alaye atilẹyin ọja
Ọja yi wa pẹlu kan 1 YEAR MANUFACTURER warranty. Please retain your proof of purchase for warranty claims. For detailed terms and conditions, refer to the official GAMDIAS webojula tabi kan si atilẹyin alabara.
Atilẹyin
If you encounter any issues or have questions regarding your GAMDIAS Aura GC11 ARGB PC Case that are not covered in this manual, please contact GAMDIAS customer support. You can find contact information on the official GAMDIAS webojula tabi nipasẹ rẹ alagbata.
Manufacturer Contact Information: GAMDIAS TAIWAN, No. 113, Jian 2nd Rd., Zhonghe, Dist., New Taipei City 235, Taiwan
Importer Contact Information: Allway Distributions Pvt Ltd, No-49, H.B. Samajha Road, Baswangudi, Bengaluru- 560004, Contact -8904307700