Ọrọ Iṣaaju
This manual provides detailed instructions for the proper setup, operation, and maintenance of your Singer 8500Q sewing machine. Please read this manual thoroughly before using the machine to ensure safe and efficient operation.
Image: Front cover of the Singer 8500Q Instruction Manual, displaying the Singer logo, a line drawing of the sewing machine, "8500Q", and "INSTRUCTION MANUAL".
Awọn Itọsọna Aabo pataki
When using an electrical appliance, basic safety precautions should always be followed to reduce the risk of fire, electric shock, or injury to persons. Read all instructions before using this sewing machine.
- Always unplug the machine from the electrical outlet immediately after using and before cleaning, removing covers, lubricating, or when making any other user servicing adjustments mentioned in the instruction manual.
- Do not operate the machine if it has a damaged cord or plug, if it is not working properly, or if it has been dropped or damaged. Return the appliance to the nearest authorized dealer for examination, repair, electrical or mechanical adjustment.
- Maṣe ṣiṣẹ ẹrọ naa pẹlu awọn ṣiṣii afẹfẹ eyikeyi ti dina. Jeki awọn šiši fentilesonu ti ẹrọ masinni ati oludari ẹsẹ ni ominira lati ikojọpọ ti lint, eruku, ati asọ alaimuṣinṣin.
- Maṣe ju silẹ tabi fi ohunkan sinu ṣiṣi eyikeyi.
- Maṣe lo ni ita.
- Lati ge asopọ, yi gbogbo awọn idari pada si ipo pipa, lẹhinna yọ pulọọgi kuro lati inu iṣan.
- Ohun elo yii kii ṣe ipinnu fun lilo nipasẹ awọn eniyan (pẹlu awọn ọmọde) pẹlu idinku ti ara, imọlara tabi awọn agbara ọpọlọ, tabi aini iriri ati imọ, ayafi ti wọn ba ti fun wọn ni abojuto tabi itọnisọna nipa lilo ohun elo nipasẹ eniyan ti o ni iduro fun aabo wọn.
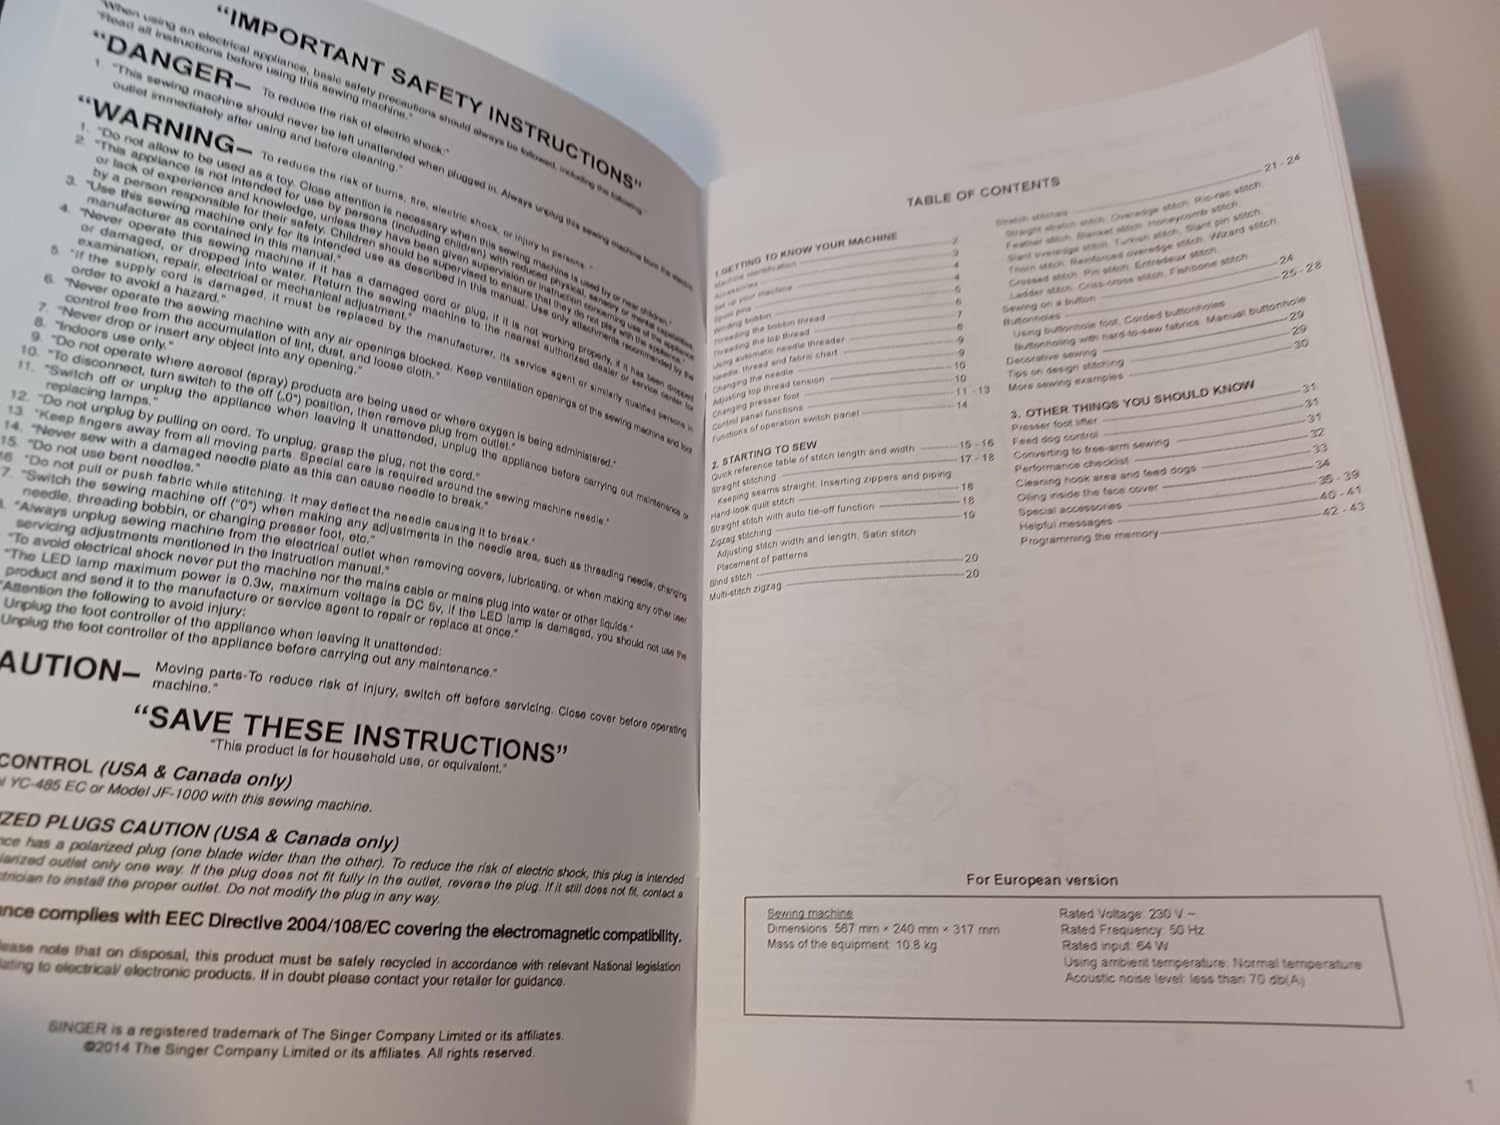
Image: An open page from the manual displaying "IMPORTANT SAFETY INSTRUCTIONS" on the left and a "TABLE OF CONTENTS" on the right, listing various sections of the manual.
Eto ati Bibẹrẹ
Getting to Know Your Machine
Familiarize yourself with the various parts of your Singer 8500Q sewing machine before beginning operation. This includes understanding the needle, bobbin, thread paths, and control panel.
Converting to Free-Arm Sewing
Your machine can be used either as a flat-bed or as a free-arm model. The extension table provides a large working surface. To convert to free-arm, hold the extension table with both hands and pull it off to the left. To replace, slide the extension table back into place until it clicks.

Image: An open page from the manual illustrating how to convert the sewing machine to free-arm sewing and detailing the presser foot lifter and feed dog control.
Tobi Itẹsiwaju Table
The large extension table provides additional workspace. To attach, align the table with the machine and push it firmly until it locks into place. Ensure the table is flush with the machine bed to prevent fabric snags.

Image: An open page from the manual showing instructions for the large extension table, even feed/walking foot, open toe foot, and quarter inch foot with guide.
Isẹ
Ipilẹ stitching
The Singer 8500Q offers a variety of stitches for different sewing needs. Refer to the machine's display for stitch selection and adjustment.
Adjusting Stitch Width and Length
For most stitches, the machine automatically sets the optimal stitch width and length. However, you can manually adjust these settings for specific projects. Use the control panel to modify stitch width and length as needed.
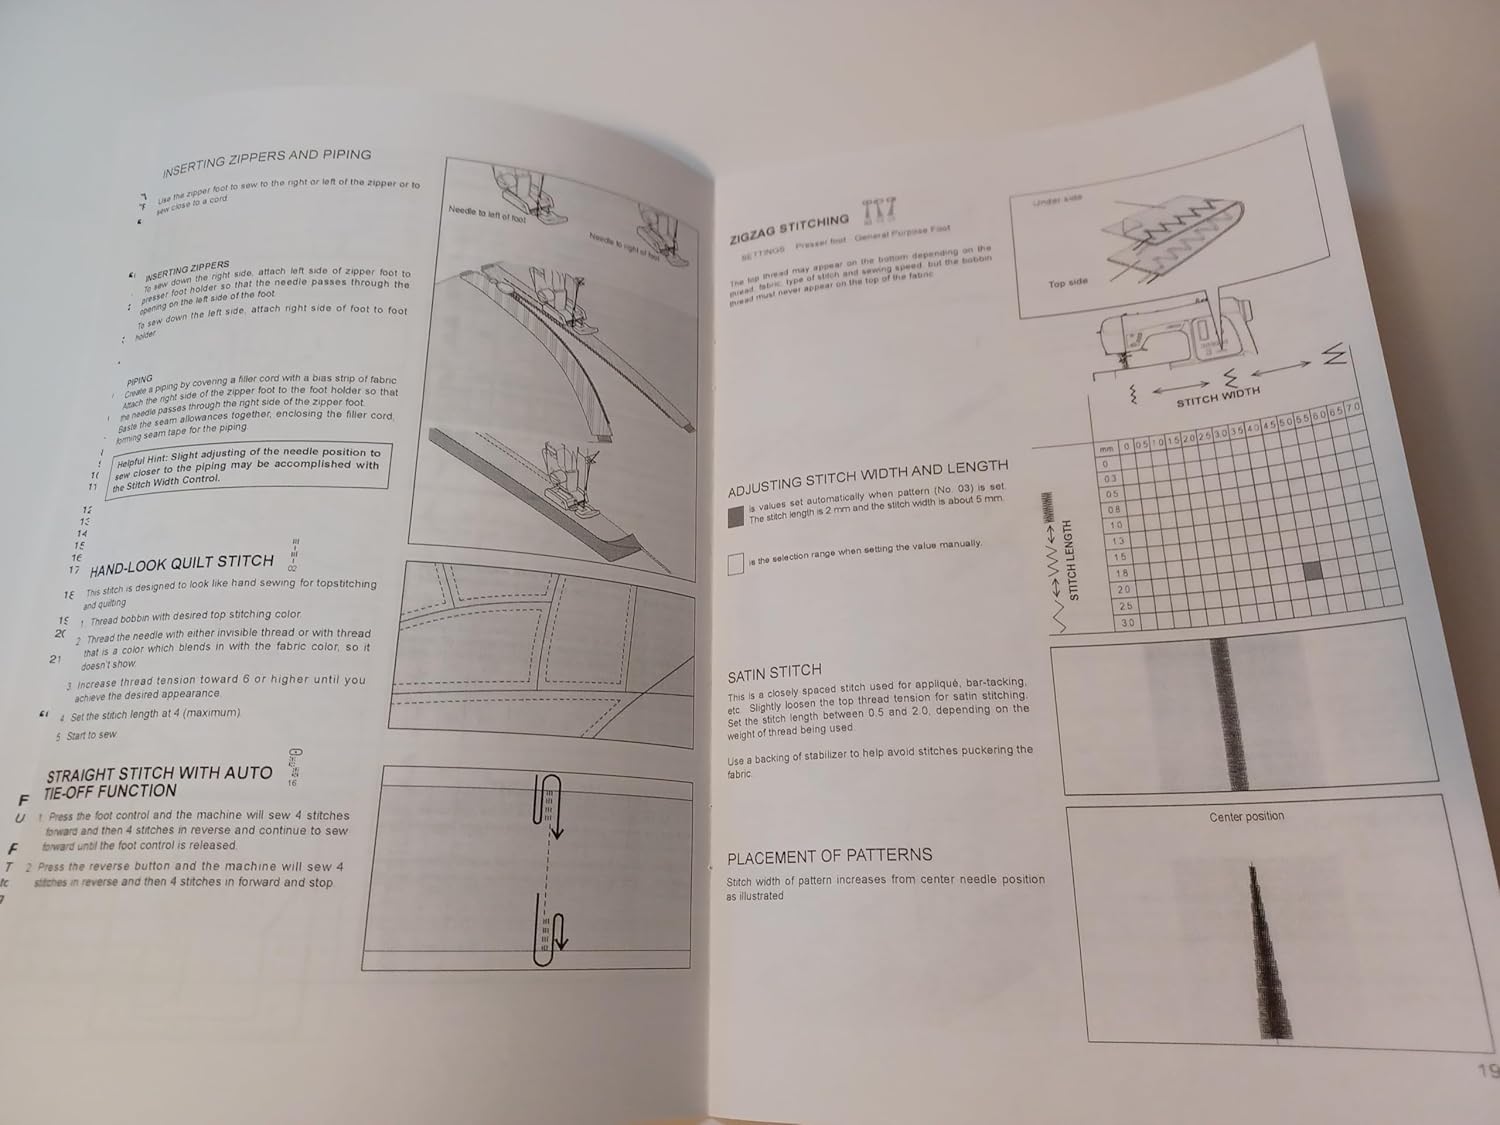
Image: An open page from the manual detailing instructions for inserting zippers and piping, zigzag stitching, adjusting stitch width and length, satin stitch, placement of patterns, hand-look quilt stitch, and straight stitch with auto tie-off function.
Specialized Stitches
- Zigzag Stitching: Used for finishing seams, appliqué, and decorative purposes.
- Satin Stitch: A dense zigzag stitch used for decorative embellishments and appliqué.
- Honeycomb Stitch: Creates a textured, decorative pattern.
- Slant Overedge Stitch: Ideal for finishing raw edges of fabric to prevent fraying.
- Turkish Stitch: Combines overcasting and decorative elements.
- Slant Pin Stitch: Excellent for hemstitching and decorative borders.
- Thorn Stitch: A decorative stitch for embellishing fabric pieces.
- Reinforced Overedge Stitch: Provides extra durability for seam finishes.
- Wizard Stitch: A decorative stitch suitable for various projects.
- Crossed Stitch: Used for decorative borders and elastic applications.
- Pin Stitch: A traditional stitch pattern for pintucks and edges.
- Entredeux Stitch: Useful for decorative stitching on borders and creating holes for ribbon insertion.
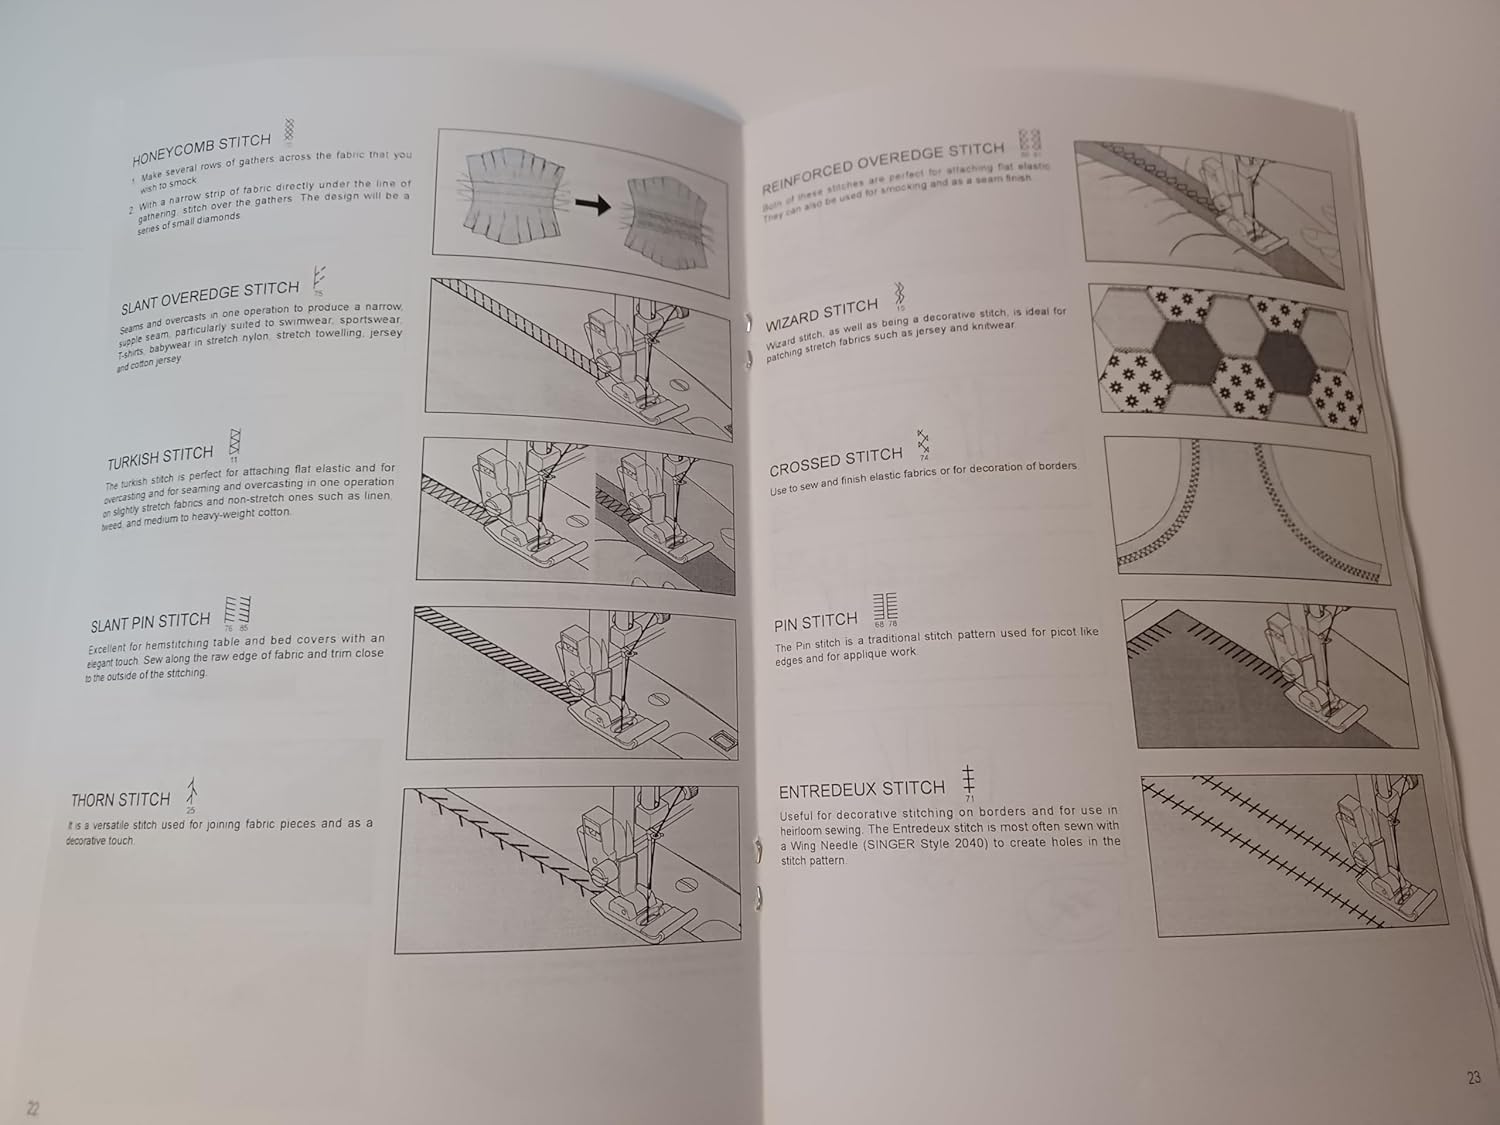
Image: An open page from the manual displaying diagrams and descriptions for various stitch types including Honeycomb, Slant Overedge, Turkish, Slant Pin, Thorn, Reinforced Overedge, Wizard, Crossed, Pin, and Entredeux stitches.
Awọn bọtini bọtini
The Singer 8500Q can create various types of buttonholes, including corded buttonholes and buttonholes on hard-to-sew fabrics. Follow the machine's instructions for precise buttonhole creation.
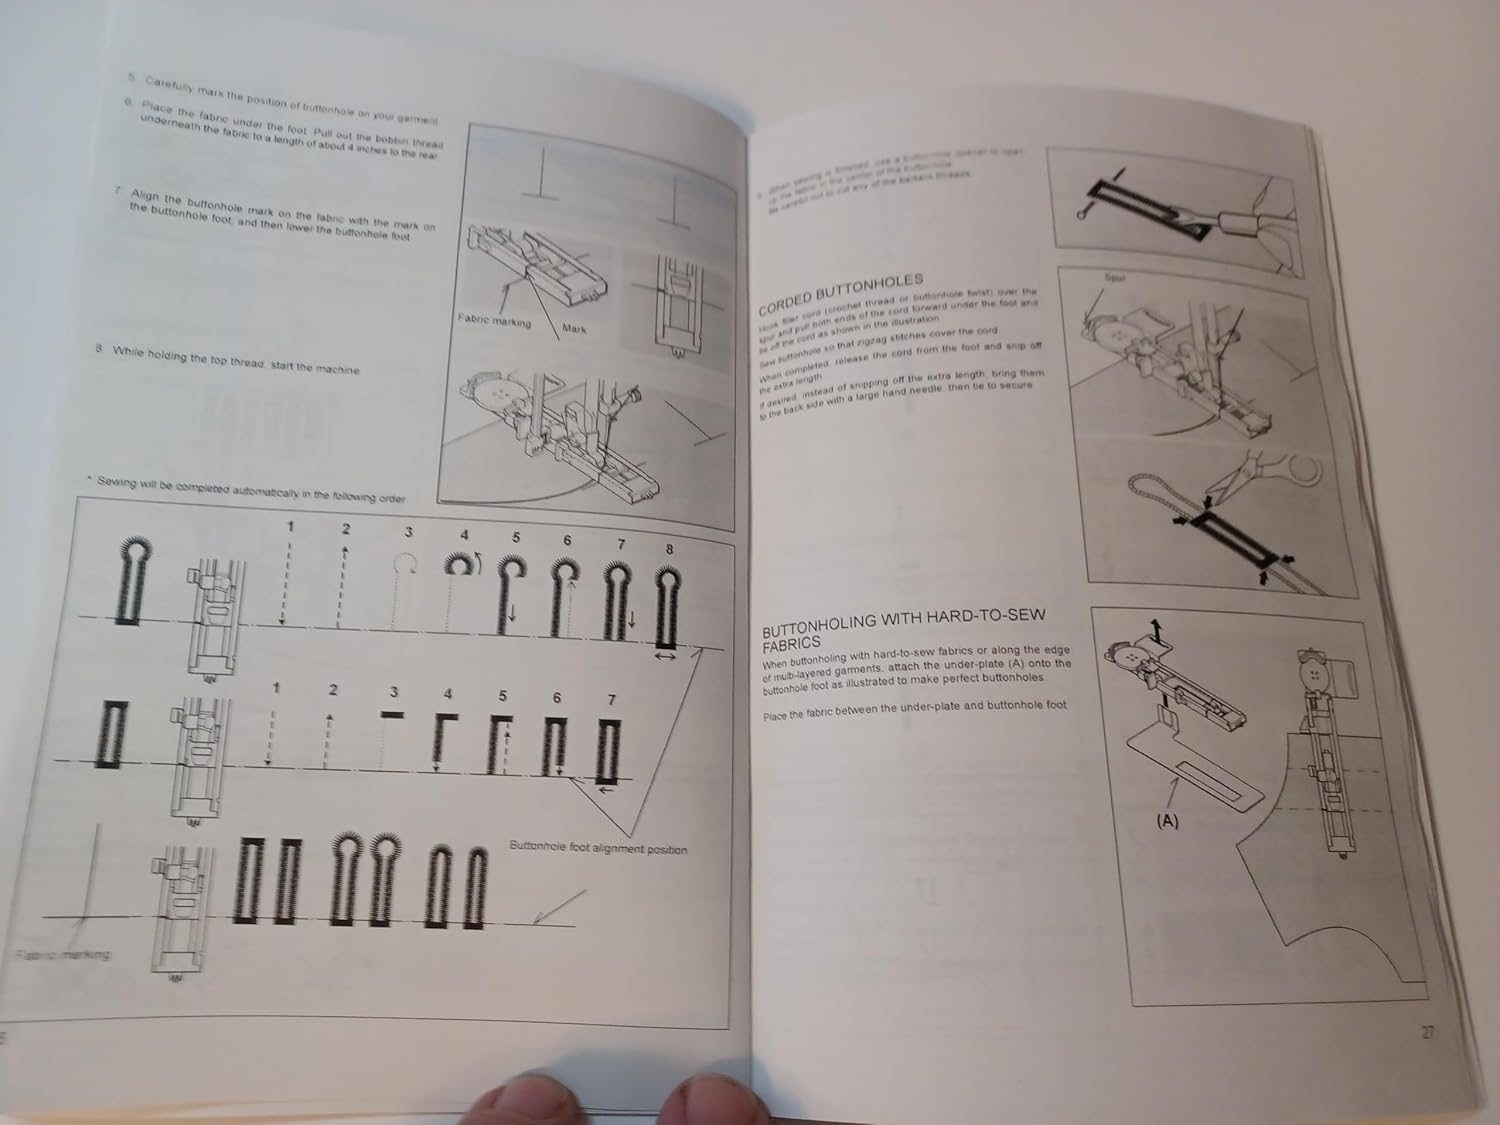
Image: An open page from the manual illustrating the process of creating buttonholes, including corded buttonholes and techniques for buttonholing with hard-to-sew fabrics.
Feed Dog Control
The feed dog control manages the movement of fabric. For general sewing, the feed dogs are engaged. For darning, free-motion quilting, or embroidery, disengage the feed dogs using the appropriate lever or button.
Itoju
Regular maintenance ensures the longevity and optimal performance of your sewing machine. Always unplug the machine before performing any maintenance.
Ninu
- Remove the needle plate and clean out any lint or dust from the bobbin area and feed dogs using a small brush.
- Fi aṣọ rírọrùn tí ó gbẹ nu òde ẹ̀rọ náà.
Lubrication
Refer to your machine's specific lubrication guidelines. Over-lubrication can cause issues. If unsure, consult a qualified service technician.
Laasigbotitusita
This section addresses common issues you might encounter with your Singer 8500Q sewing machine.
Awọn oran ti o wọpọ ati Awọn ojutu:
- Awọn aranpo ti a fo: Ensure the needle is inserted correctly and is not bent. Use the correct needle type and size for your fabric. Re-thread the machine.
- Pipin okun: Check for proper threading, correct tension settings, and ensure the needle is not dull or bent. Use quality thread.
- Bobbin Problems: Ensure the bobbin is wound evenly and inserted correctly. Check for lint in the bobbin case.
- Aṣọ Ẹ̀rọ Tí Kò Fúnni Ní Ìfúnni: Verify that the feed dogs are engaged. Adjust presser foot pressure if necessary.
- Ko si Agbara: Check if the power cord is securely plugged into both the machine and the outlet. Ensure the power switch is on.
If problems persist after following these steps, contact customer support or a qualified service technician.
Awọn pato
| Ẹya ara ẹrọ | Ẹ̀kúnrẹ́rẹ́ |
|---|---|
| Nọmba awoṣe | 8500Q |
| Orisun agbara | AC |
| Se Electric | Bẹẹni |
Note: Some product data, such as dimensions and weight, refer to this instruction manual reproduction itself. For detailed machine specifications, please refer to the documentation provided with your original Singer 8500Q sewing machine purchase or the official Singer webojula.
Alaye atilẹyin ọja
This instruction manual is a reproduction and does not include specific warranty details for the Singer 8500Q sewing machine. For warranty information regarding your Singer 8500Q sewing machine, please refer to the documentation provided with your original machine purchase or visit the official Singer webojula.
Onibara Support
For further assistance, technical support, or to purchase accessories for your Singer 8500Q sewing machine, please visit the official Singer website or contact their customer service department. This reproduction manual is provided by TabSynth Design Works LLC.
For video instructions, you may visit YouTube/SingerSewingCompany.