
1. Ifihan
This manual provides detailed instructions for the installation, operation, and maintenance of your Antec P7 S Mid-Tower ATX PC Case. Please read this manual thoroughly before beginning installation to ensure proper setup and to maximize the performance and longevity of your system components.
2. Alaye Aabo
- Nigbagbogbo ge asopọ ipese agbara lati inu iṣan ogiri ṣaaju fifi sori ẹrọ tabi yiyọ awọn paati eyikeyi kuro.
- Wọ okun ọwọ-atako-aimi lati ṣe idiwọ isọjade elekitirotatiki (ESD) ibajẹ si awọn paati ifura.
- Handle all components with care. Avoid touching pins or circuit boards directly.
- Pa awọn ẹya kekere ati awọn irinṣẹ kuro lọdọ awọn ọmọde.
- Rii daju pe fentilesonu to dara ni ayika ọran PC lati ṣe idiwọ igbona.
3. Package Awọn akoonu
Daju pe gbogbo awọn nkan wa ninu apo rẹ:
- Antec P7 S Mid-Tower ATX PC Case
- 3 x 120mm PWM Fans (pre-installed at front)
- 1 x 120mm PWM Fan (pre-installed at rear)
- Àpótí Ẹ̀rọ (àwọn skru, àwọn okùn okùn, ìwé ìtọ́nisọ́nà fún olùlò)
4. Ọja Ipariview
The Antec P7 S case features a sleek design with optimized airflow and noise reduction capabilities.
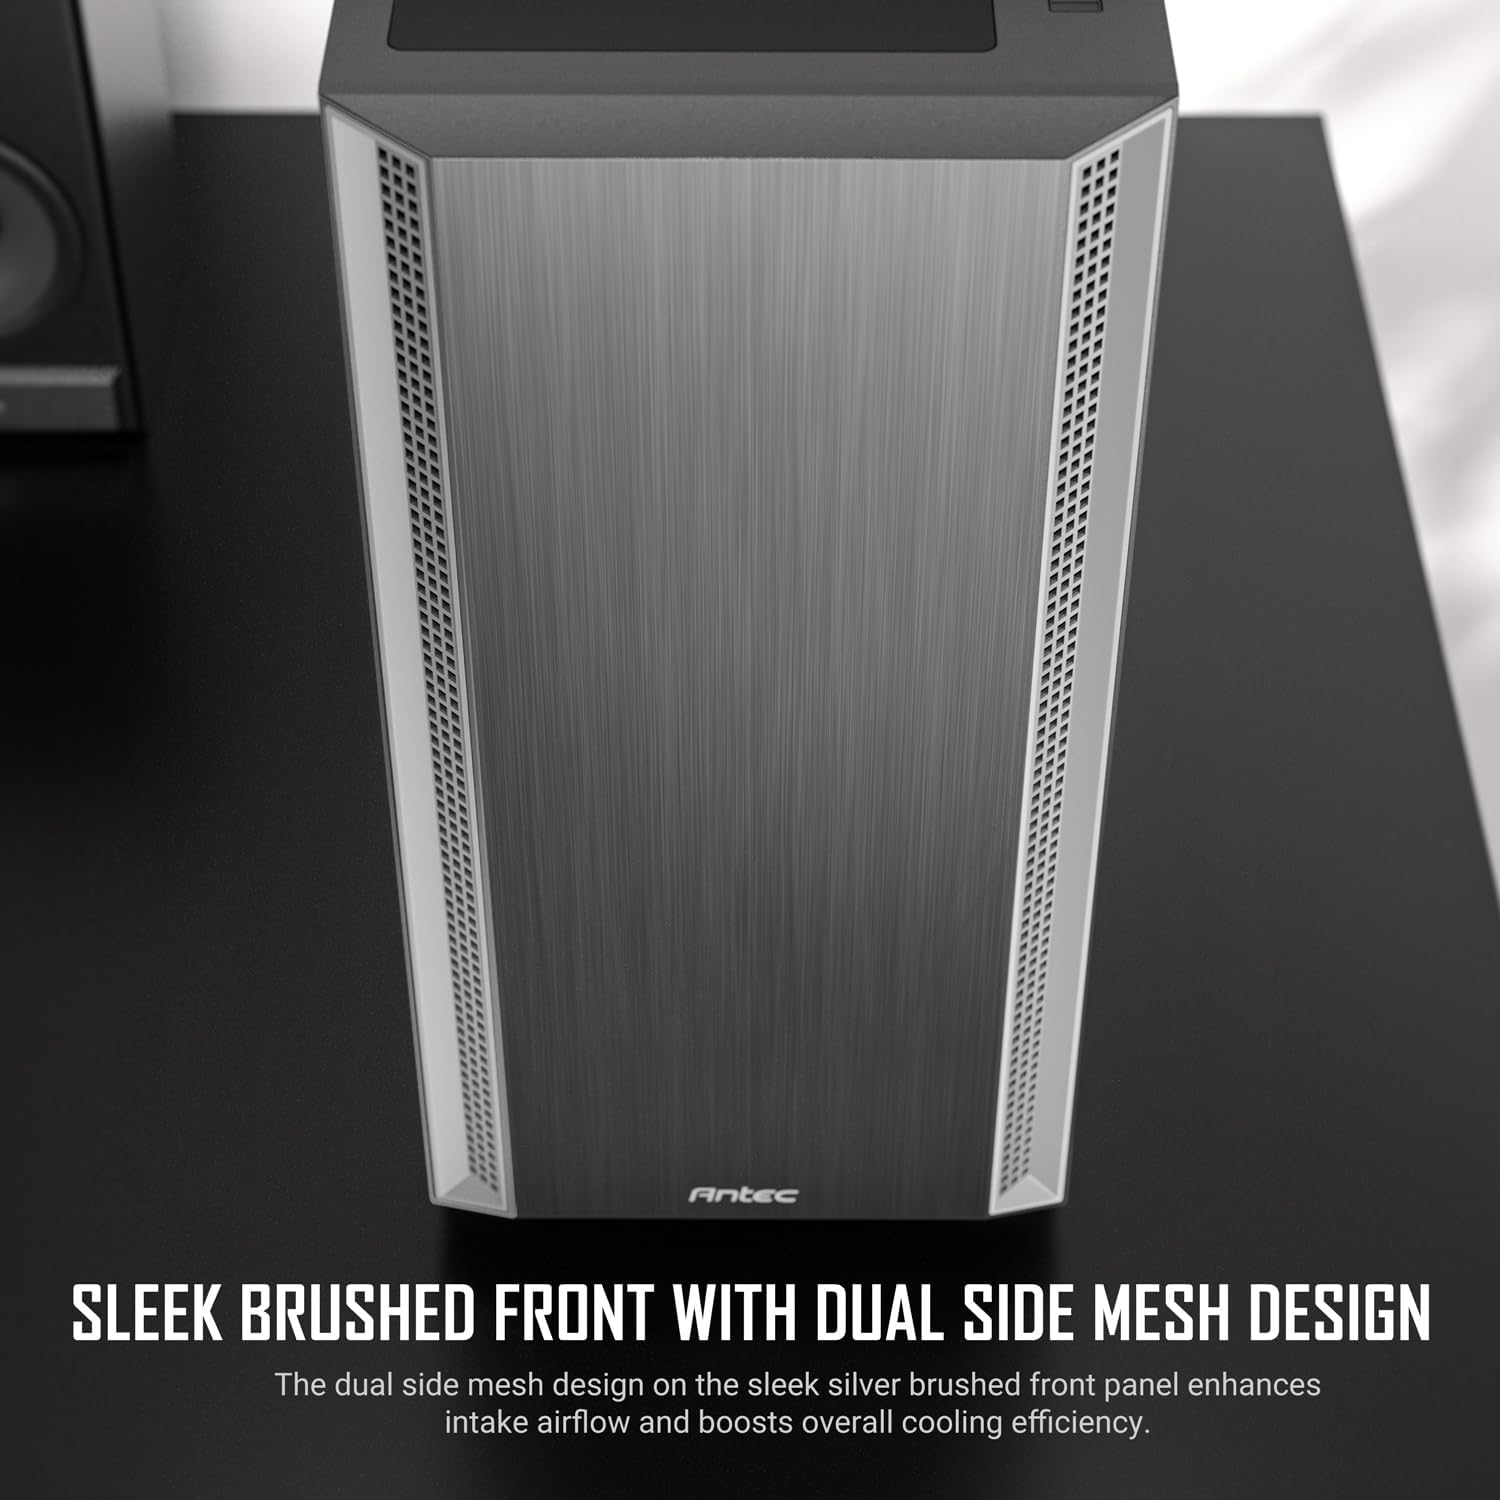
Nọmba 4.1: The front panel of the Antec P7 S case, showcasing the brushed finish and dual side mesh design for enhanced air intake.

Nọmba 4.2: Inu ilohunsoke view of the Antec P7 S, highlighting the four pre-installed 120mm PWM fans (three front, one rear) for immediate cooling performance.
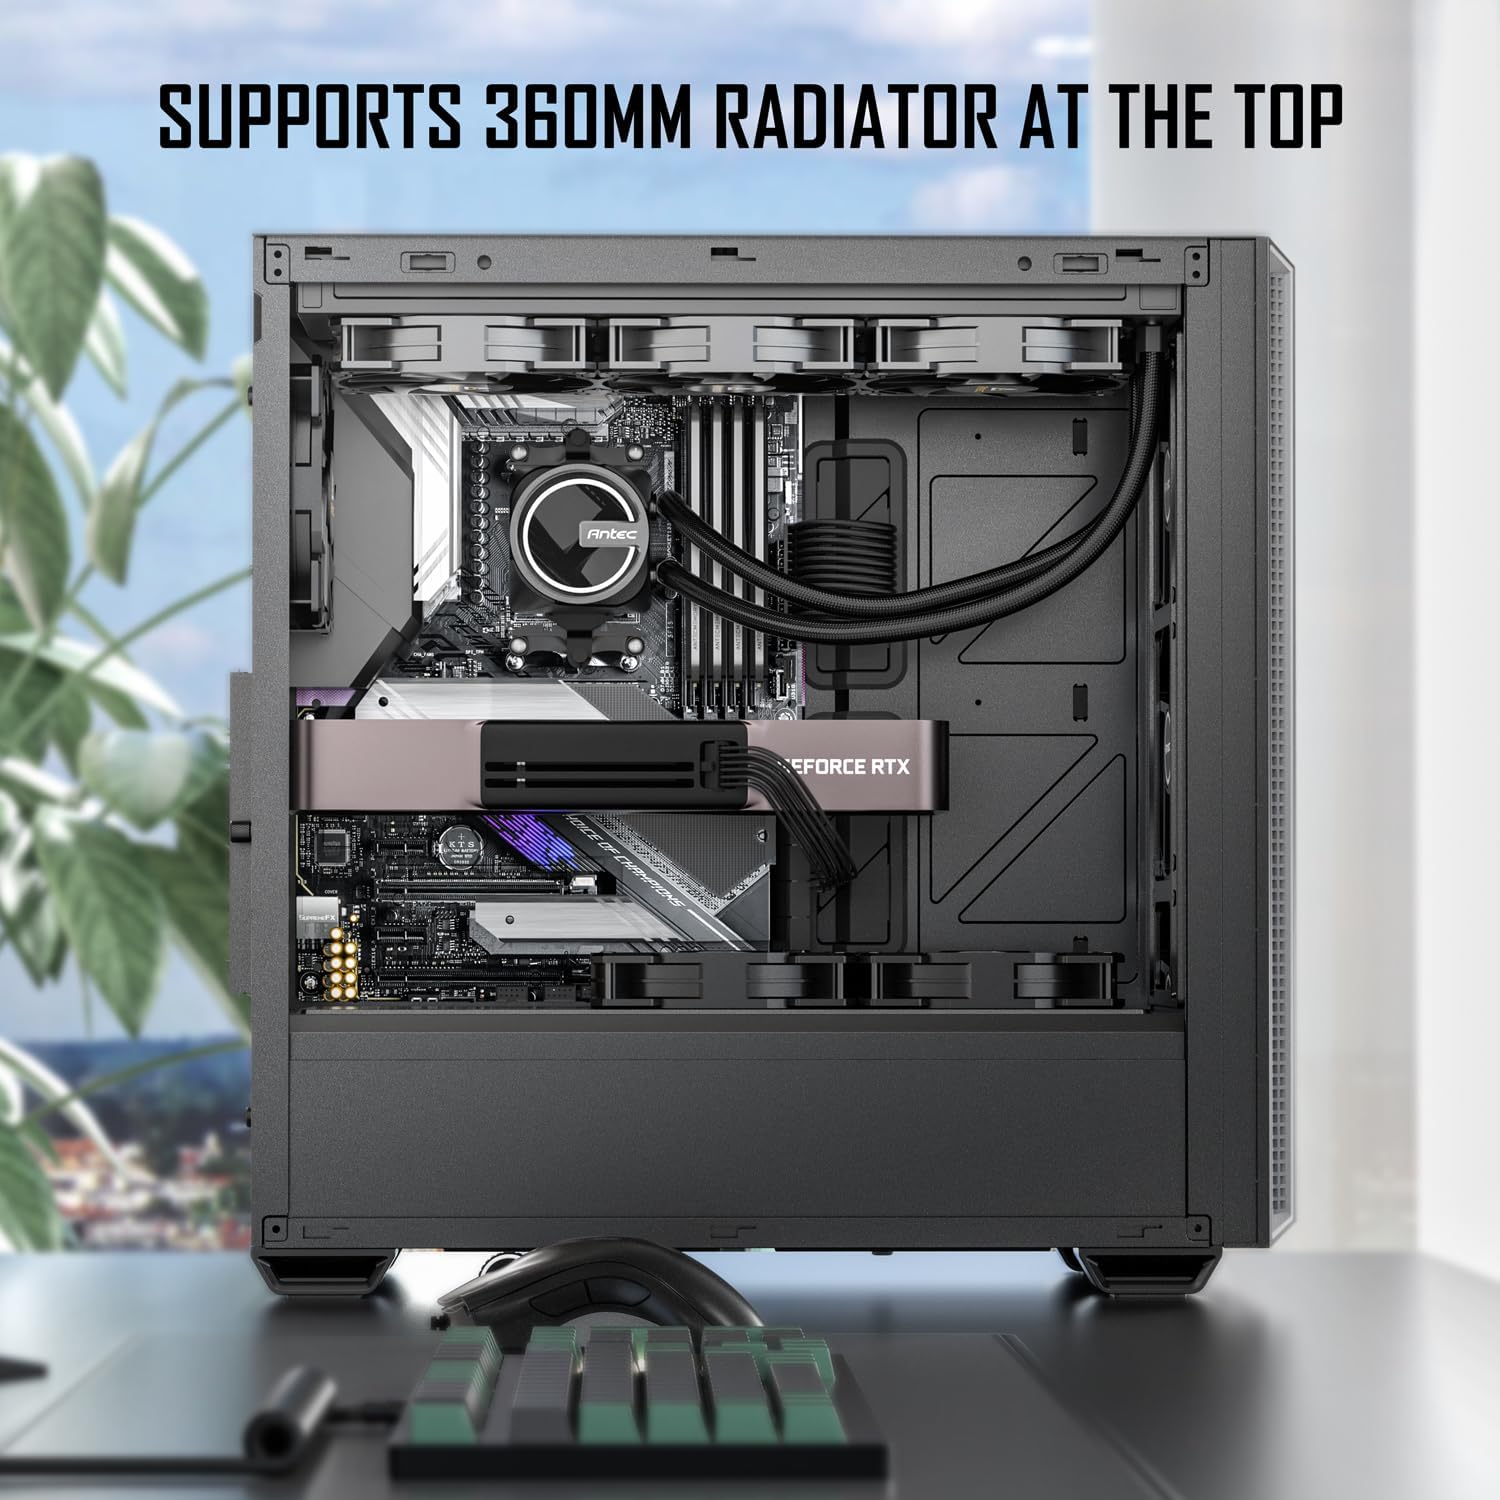
Nọmba 4.3: The top section of the Antec P7 S, demonstrating support for a 360mm liquid cooling radiator.
Nọmba 4.4: Illustration of optimized airflow for GPU cooling, showing the large bottom intake and 30mm clearance for reverse fans.
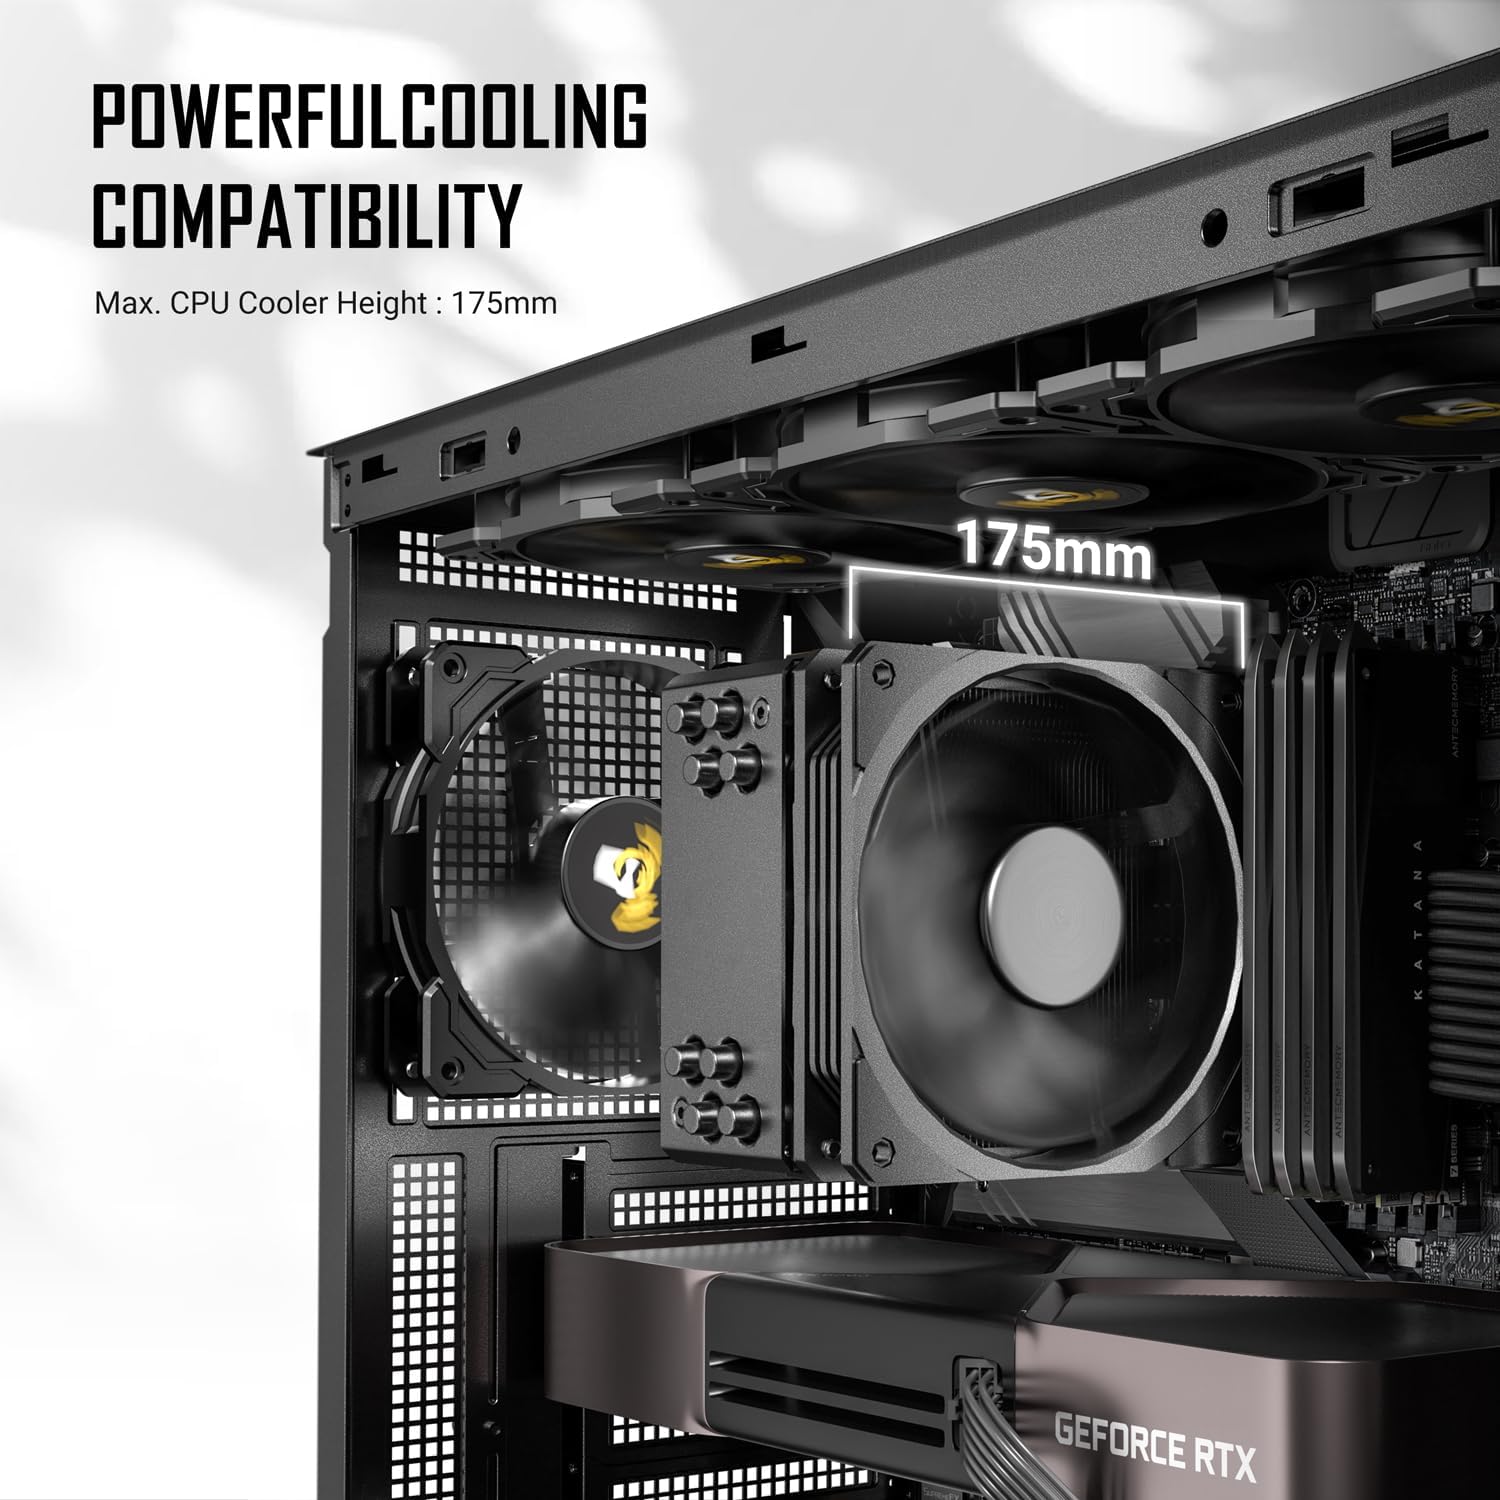
Nọmba 4.5: Ti abẹnu view indicating maximum CPU cooler height compatibility of 175mm within the Antec P7 S case.

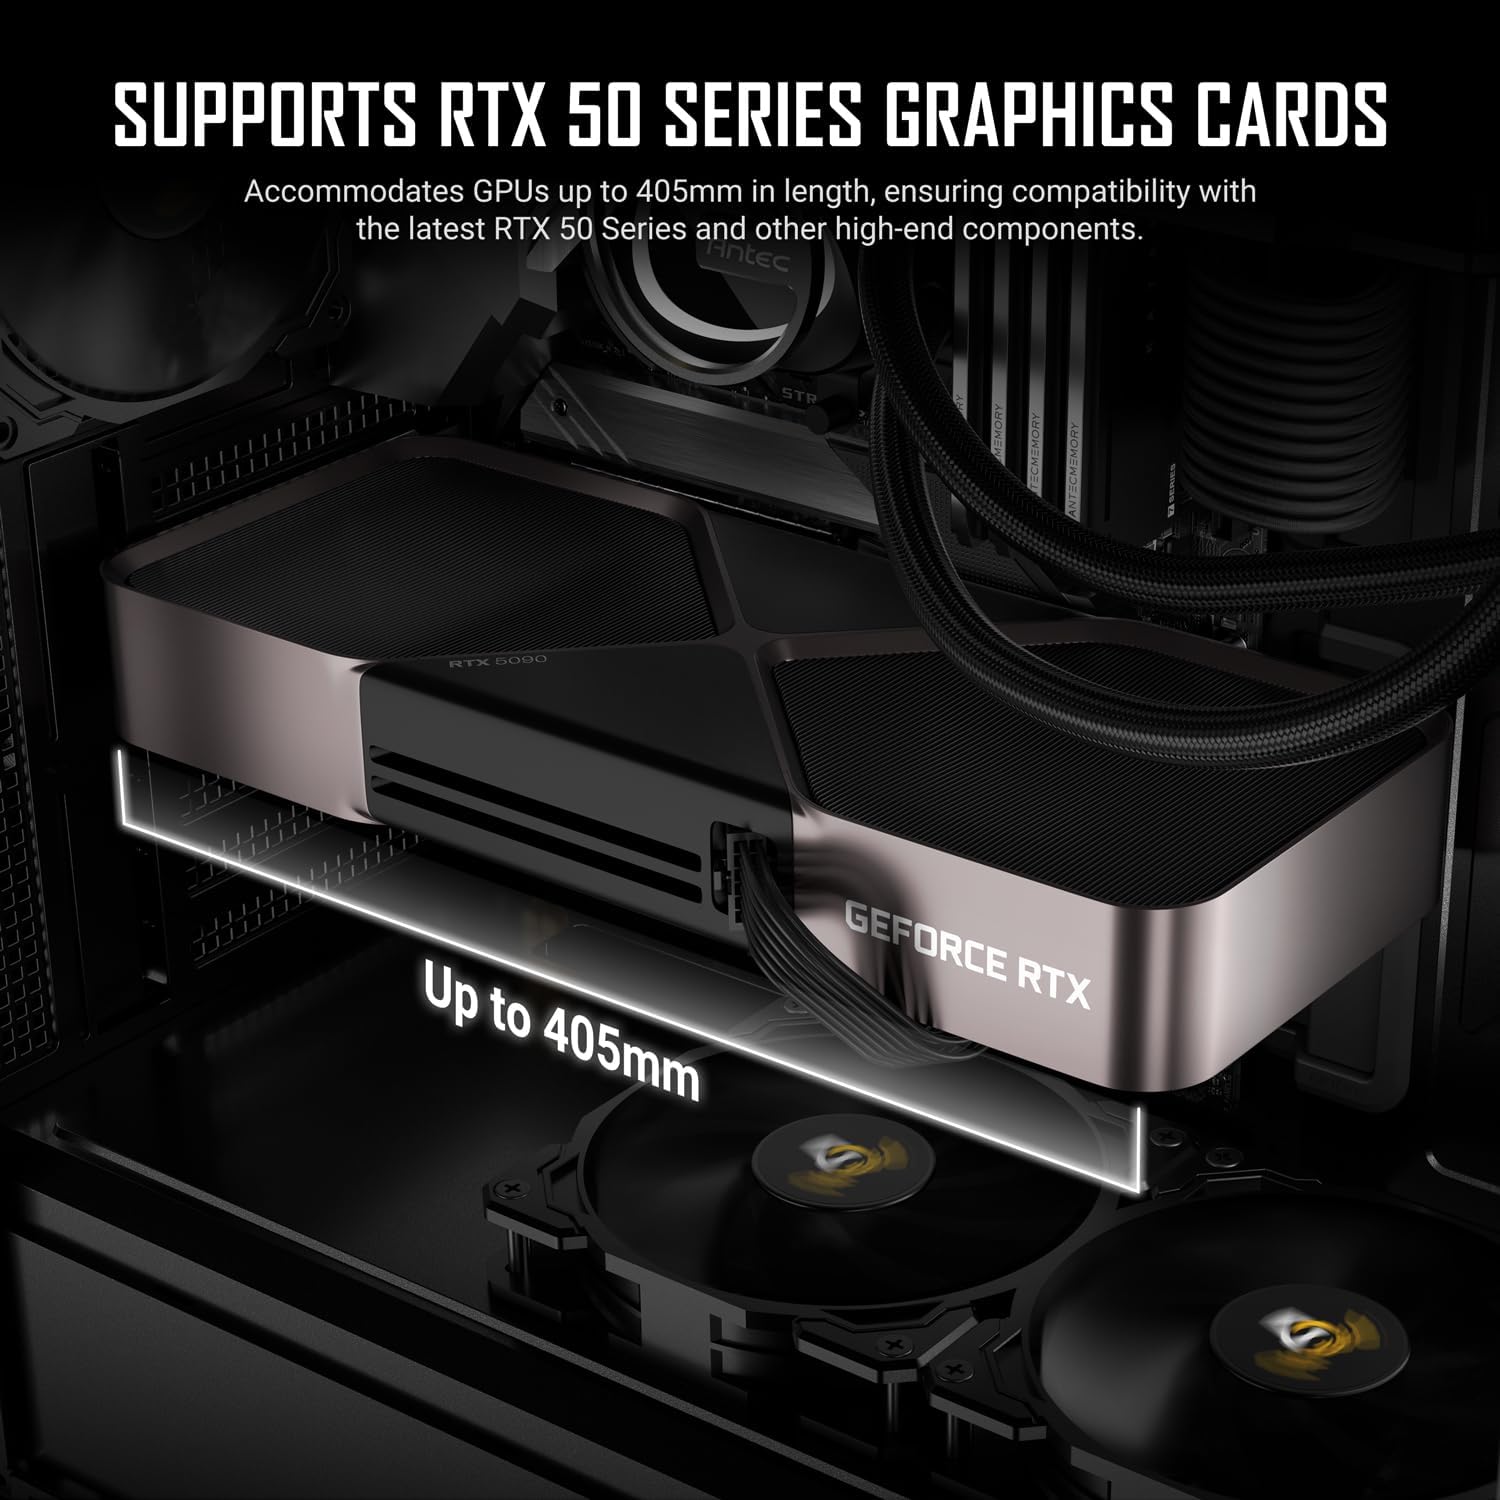
Nọmba 4.6: Internal space for graphics cards, showing support for GPUs up to 405mm in length, including RTX 50 Series cards.
Nọmba 4.7: The side panels of the Antec P7 S, featuring sound-dampening foam for effective noise reduction.

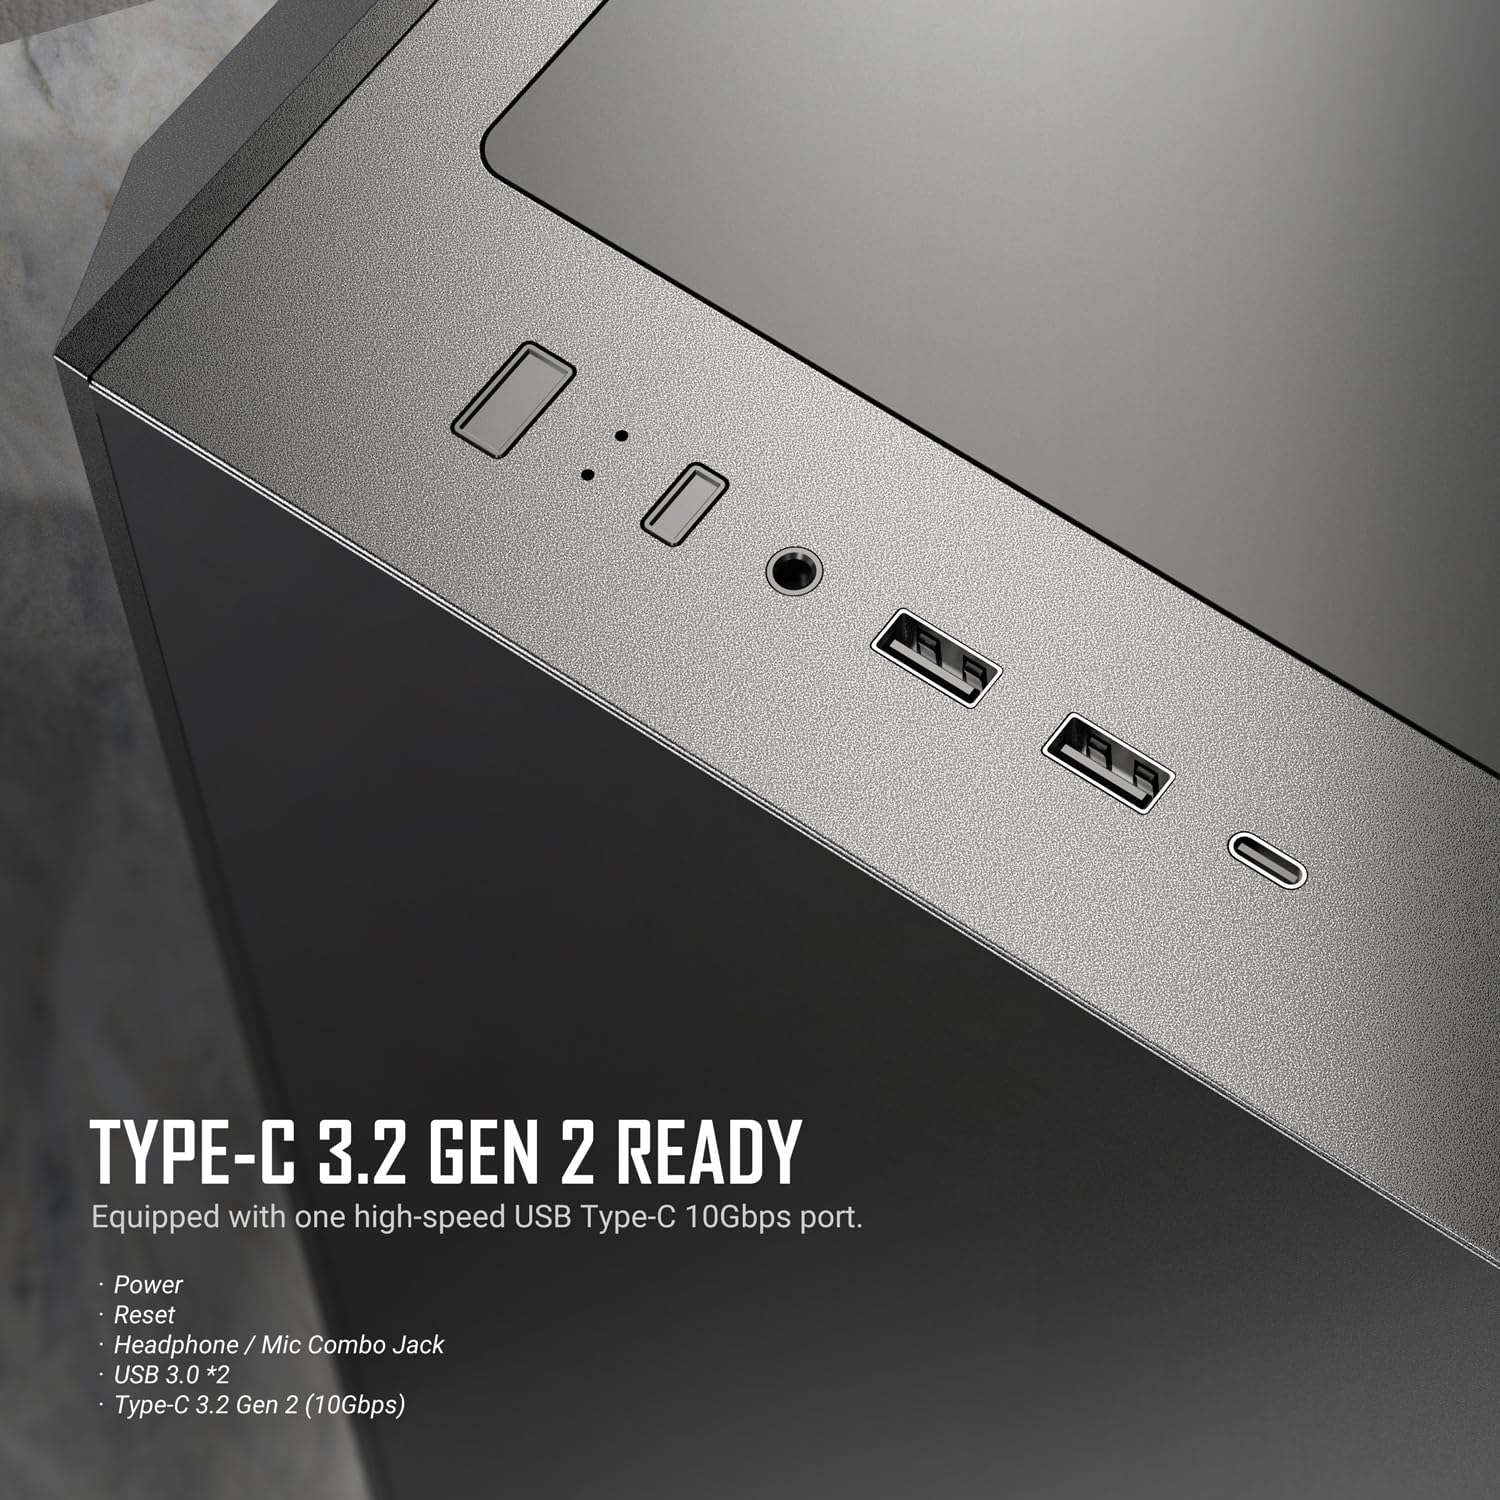
Nọmba 4.8: Close-up of the top I/O panel, featuring a USB Type-C 3.2 Gen 2 port, USB 3.0 ports, headphone/mic combo jack, power, and reset buttons.

Nọmba 4.9: The removable top filters, showing both the mesh filter for airflow mode and the solid cover for silent mode.

Nọmba 4.10: Ru inu inu view ifihanasing cable management features, including rubber grommets and Velcro straps for organized routing.

Nọmba 4.11: Ru ode view highlighting the seven reusable PCIe slots for expansion cards.
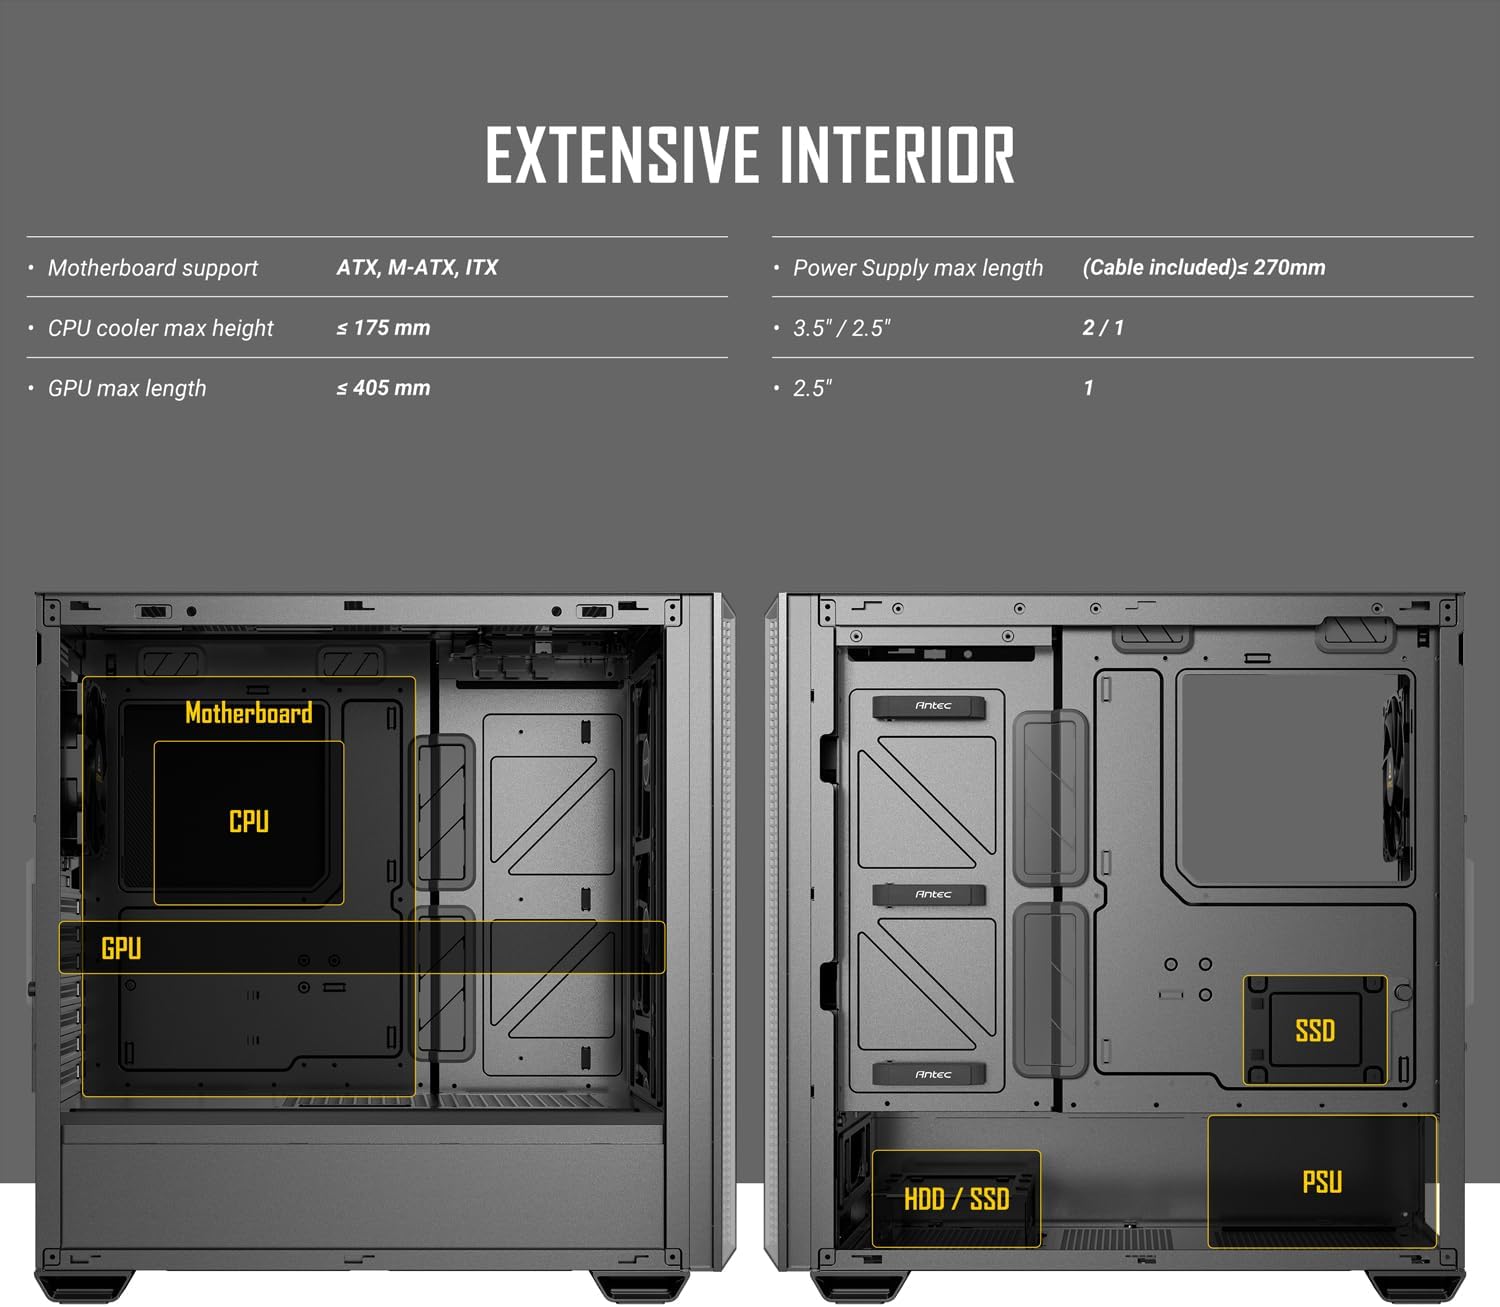
Nọmba 4.12: Diagrams illustrating the fan and radiator compatibility for various mounting locations within the case.
5. Eto ati fifi sori
5.1 Ngbaradi Ọran naa
- Gbe ọran naa sori alapin, dada iduroṣinṣin.
- Remove the side panels by unscrewing the thumbscrews at the rear and sliding them backward.
- Identify the accessory box and retrieve all necessary screws and standoffs.
5.2 Fifi sori modaboudu
- Fi I/O shield sinu ẹhin šiši ọran naa.
- Align the motherboard with the pre-installed standoffs. Ensure the standoff locations match your motherboard's form factor (ATX, Micro-ATX, Mini-ITX).
- Ṣe aabo modaboudu pẹlu awọn skru ti a pese.
5.3 Fifi sori ẹrọ Ipese Agbara
- Slide the power supply unit (PSU) into the dedicated compartment at the bottom rear of the case.
- Ṣe aabo PSU pẹlu awọn skru lati ẹhin ọran naa.
- Route the necessary power cables through the cable management cutouts to the motherboard and other components.
5.4 Ibi ipamọ wakọ sori
- Awọn HDD 3.5": Install into the drive cage located beneath the PSU shroud. Slide the drive into the tray and secure it.
- 2.5" SSDs: Mount SSDs onto the dedicated brackets behind the motherboard tray or on top of the PSU shroud. Secure with screws.
5.5 Fifi Kaadi Aworan (GPU) ati Kaadi Imugboroosi sori ẹrọ
- Remove the necessary reusable PCIe slot covers at the rear of the case.
- Fi kaadi eya aworan tabi kaadi imugboroosi miiran sinu iho PCIe ti o yẹ lori modaboudu.
- Secure the card with the thumbscrew or latch mechanism.
5.6 Iwaju Mo / Eyin Panel Awọn isopọ
Connect the front panel cables to the corresponding headers on your motherboard:
- USB 3.0: So okun USB 3.0 pọ mọ akọle USB 3.0 ti modaboudu naa.
- USB Type-C 3.2 Gen 2: Connect the Type-C cable to the motherboard's compatible header.
- Ohùn HD: Connect the audio cable to the motherboard's HD Audio header.
- Power SW, Reset SW, HDD LED, Power LED: Connect these small connectors to the front panel header pins on your motherboard according to your motherboard manual.
5.7 USB Management
Utilize the rubber grommets and Velcro straps behind the motherboard tray to route and secure cables, ensuring optimal airflow and a clean build appearance.
6. Awọn ilana Iṣiṣẹ
6.1 Lílo Ètò Rẹ
After all components are installed and cables are connected, replace the side panels. Connect your monitor, keyboard, mouse, and power cable to the PSU. Press the power button on the top I/O panel to start your system.
6.2 Using Front I/O Ports
- Awọn ibudo USB: Use the USB 3.0 and USB Type-C 3.2 Gen 2 ports for connecting peripherals and external storage devices.
- Awọn Jacks Audio: The combined headphone/microphone jack allows for easy connection of headsets.
6.3 àìpẹ Iṣakoso
The pre-installed PWM fans can be controlled via your motherboard's BIOS/UEFI settings or through compatible software provided by your motherboard manufacturer. This allows you to adjust fan speeds based on system temperature for optimal cooling and noise levels.
7. Itọju
7.1 eruku Filter Cleaning
Regular cleaning of dust filters is crucial for maintaining optimal airflow and cooling performance.
- Top Filter: The top filter is removable and can be switched between mesh (airflow) and solid (silent) modes. Remove the filter and clean it with compressed air or rinse with water (ensure it's completely dry before re-installation).
- Awọn Ajọ iwaju: The dual side mesh on the front panel acts as an intake filter. Periodically clean these areas with compressed air.
- Bottom Filter: The PSU intake filter is located at the bottom of the case. Slide it out for cleaning.
7.2 Ìmọ́tótó Àpò Gbogbogbò
Nu ita apoti naa pẹlu asọ rirọ, damp asọ. Yago fun lilo awọn kẹmika lile tabi awọn ohun elo abrasive ti o le ba ipari jẹ.
8. Laasigbotitusita
- Ètò náà kò ṣiṣẹ́: Ensure the power supply is properly connected to the wall outlet and the motherboard. Check all front panel header connections (Power SW).
- Fans are not spinning: Verify that the fan cables are correctly connected to the motherboard fan headers or a fan controller. Check BIOS settings for fan control.
- Front USB ports not working: Confirm that the USB 3.0 and USB Type-C cables are securely connected to the correct headers on your motherboard.
- Igbóná púpọ̀: Ensure all fans are functioning correctly and dust filters are clean. Verify proper component installation and thermal paste application on the CPU.
9. Awọn pato
| Ẹya ara ẹrọ | Sipesifikesonu |
|---|---|
| Brand | Antec |
| Orukọ awoṣe | P7 S |
| Iru Irú | Ile-iṣọ Mid |
| Modaboudu Ibamu | ATX, Micro ATX, Mini ITX |
| Iwọn (D x W x H) | 18.82"D x 8.74"W x 18.31"H (478mm x 222mm x 465mm) |
| Iwọn Nkan | 12.68 iwon (5.75 kg) |
| Ohun elo | Ṣiṣu, Irin |
| Awọn onijakidijagan ti a ti fi sii tẹlẹ | 3 x 120mm PWM (Front), 1 x 120mm PWM (Rear) |
| Radiator Support | Oke: Titi di 360mm |
| Max GPU Ipari | 405 mm |
| Max Sipiyu kula Iga | 175 mm |
| Agbara Ipese Iṣagbesori Iru | Isalẹ Oke |
| Wakọ Bays | 2 x 3.5" HDD, 2 x 2.5" SSD |
| Imugboroosi Iho | 7 (Reusable) |
| Iwaju Awọn Ibudo I / O | 1 x USB Type-C 3.2 Gen 2, 2 x USB 3.0, Headphone/Mic Combo Jack, Power, Reset |
| Pataki Awọn ẹya ara ẹrọ | Ohun-Dampening Side Panels, Dual Side Front Mesh Intake, Removable Top Filters |
10. atilẹyin ọja Information
The Antec P7 S Mid-Tower ATX PC Case comes with a 2-odun olupese ká atilẹyin ọja from the date of purchase. This warranty covers defects in materials and workmanship under normal use. Please retain your proof of purchase for warranty claims. The warranty does not cover damage caused by misuse, accident, modification, or unauthorized repair.
11. Atilẹyin
For further assistance, technical support, or to inquire about replacement parts, please visit the official Antec website or contact Antec customer service. You can find contact information and FAQs on their support page.
Antec Osise Webojula: www.antec.com