
1. Ifihan
This manual provides essential information for setting up, operating, maintaining, and troubleshooting your CHUWI Hi10 X2 2-in-1 Laptop Tablet. Please read it thoroughly before using your device.
Ohun ti o wa ninu Apoti
- Hi10 X2 Tablet
- Keyboard oofa
- Ọran pẹlu Iduro
- Ṣaja Ṣeto
- Afowoyi Olumulo (iwe-ipamọ yii)

Image 1.1: CHUWI Hi10 X2 Tablet with Magnetic Keyboard and Case.
2. Eto
2.1 Gbigba agbara akọkọ
Before first use, fully charge your CHUWI Hi10 X2 tablet using the provided charger set. Connect the charger to the Type-C port on the tablet and plug it into a power outlet. The charging indicator light will illuminate.
2.2 Attaching the Magnetic Keyboard and Case
Align the tablet with the magnetic connectors on the keyboard. The magnets will secure the tablet in place. The case with stand can be adjusted to your preferred viewigun igun.
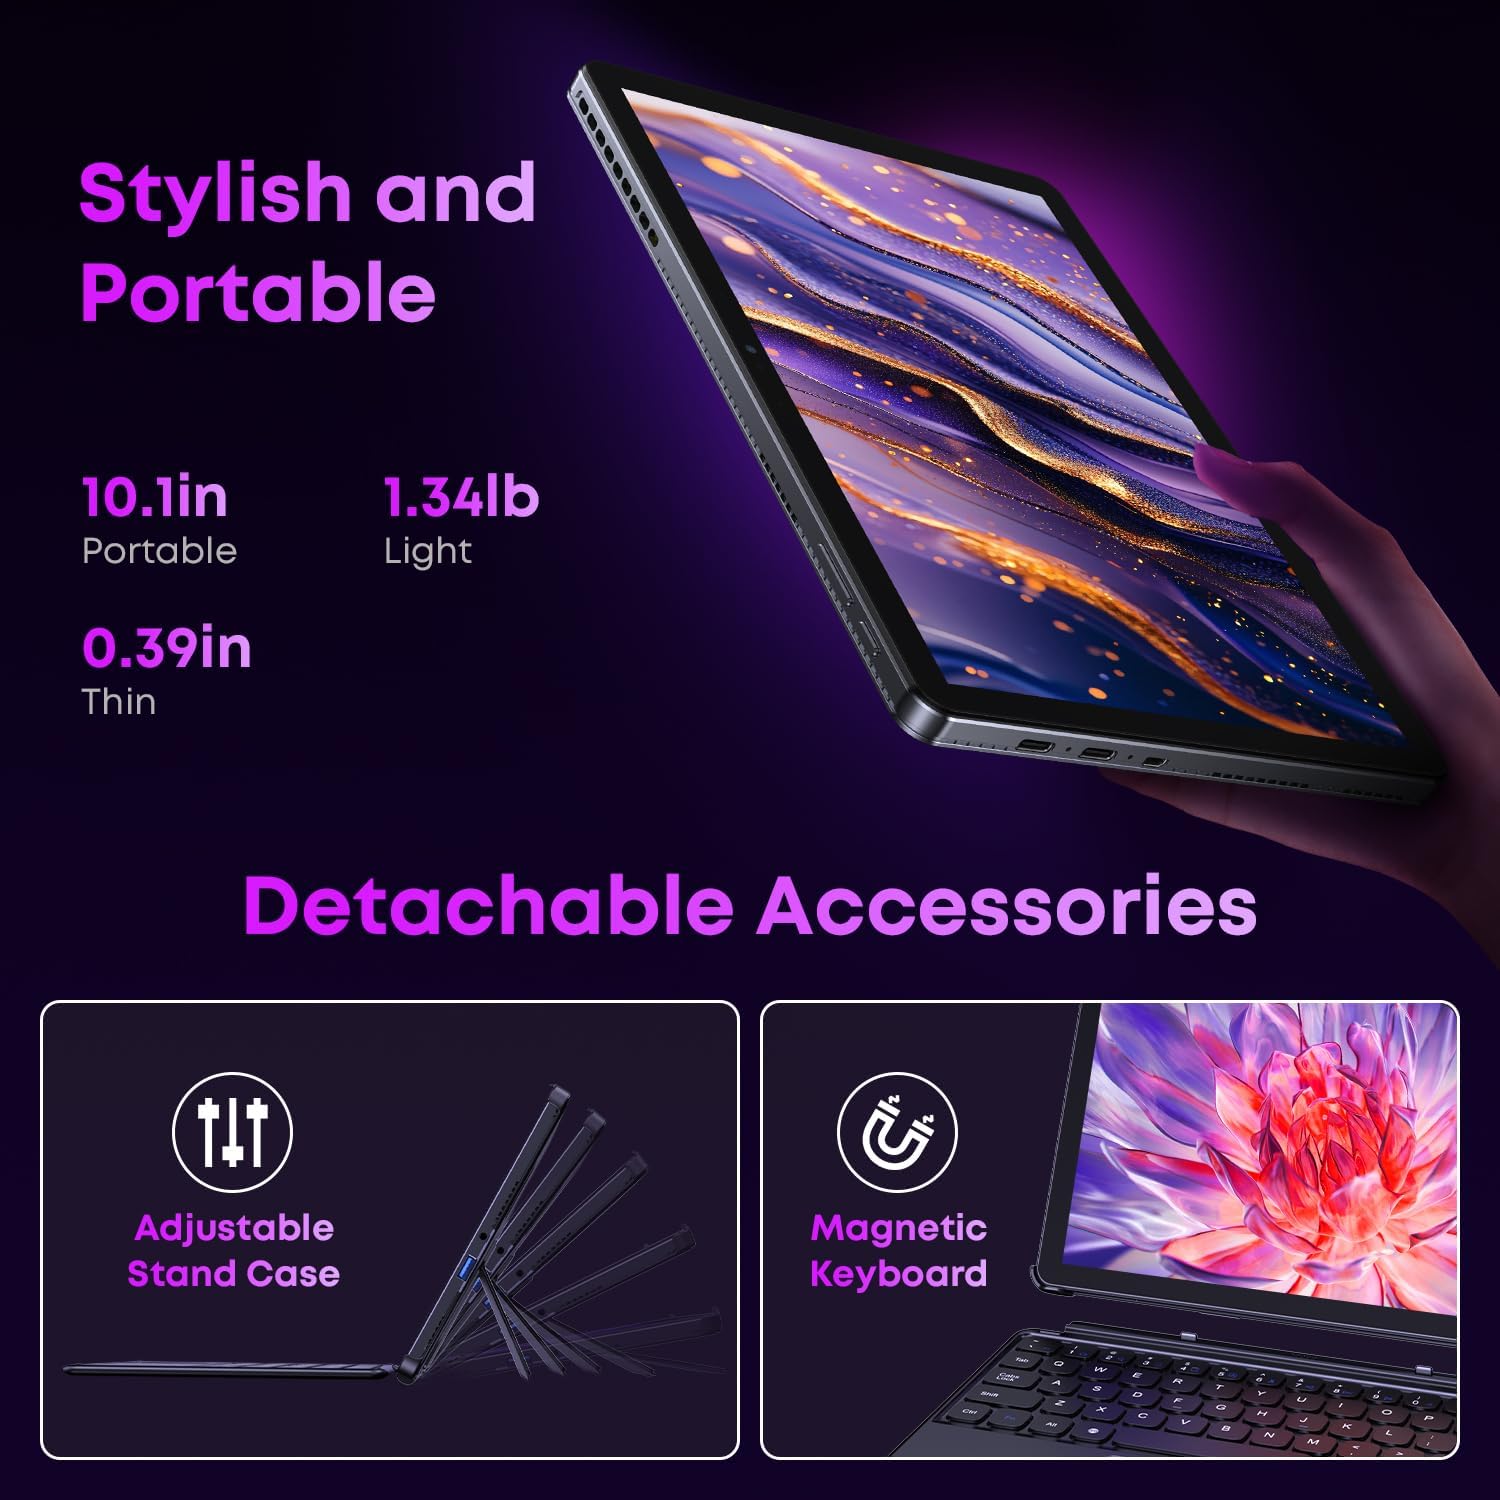
Image 2.1: Detachable accessories including the magnetic keyboard and adjustable stand case.
2.3 First Boot-Up and Windows Activation
Press and hold the power button until the screen turns on. Follow the on-screen instructions to complete the initial Windows 11 setup. If your Windows system arrives unactivated, please send the serial number (located on the back of the device) to CHUWI support via Amazon for your activation key.
2.4 Nsopọ si Wi-Fi
During setup, you will be prompted to connect to a Wi-Fi network. Select your network and enter the password. The device supports Wi-Fi 6 for fast and stable connections.
3. Awọn ilana Iṣiṣẹ
3.1 Agbara Tan / Paa ati Ipo oorun
- Agbara Tan: Tẹ mọlẹ bọtini agbara titi ti iboju yoo fi tan imọlẹ.
- Agbara Pa: From the Windows Start menu, select Power > Shut down.
- Ipo orun: Briefly press the power button to enter or exit sleep mode.
3.2 Lilo awọn Touchscreen
The 10.1-inch HD touchscreen supports 10-point multi-touch gestures. Use taps, swipes, and pinches for navigation and interaction with applications.

Image 3.1: The 10.1-inch HD touchscreen display.
3.3 Laptop and Tablet Modes
The magnetic keyboard allows for seamless switching between laptop and tablet modes. Attach the keyboard for typing and productivity, or detach it for a pure tablet experience.
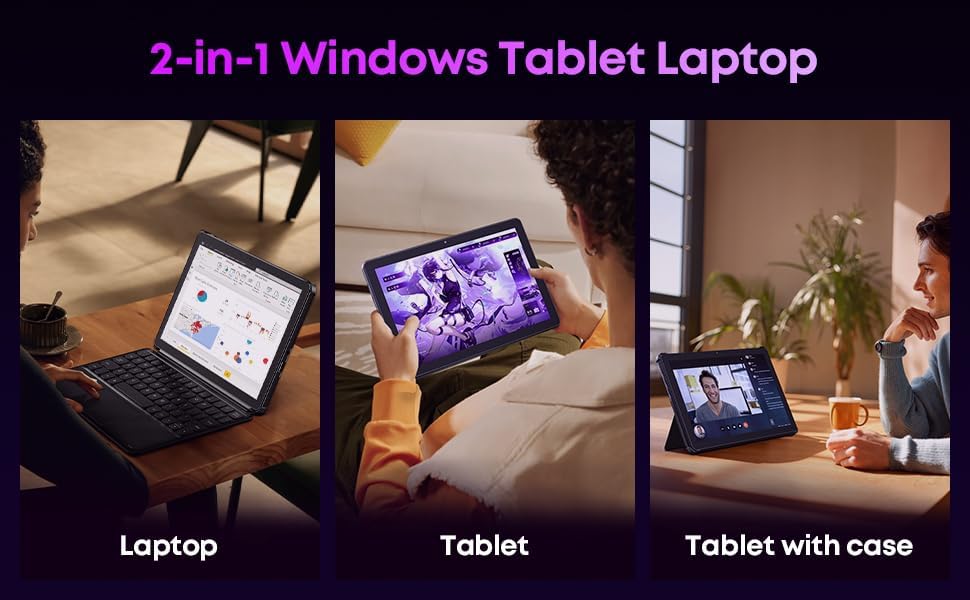
Image 3.2: Usage scenarios demonstrating laptop, tablet, and tablet with case modes.
3.4 Asopọmọra
- Awọn ibudo USB: The tablet features a full-featured Type-C port and a USB 3.2 Gen1 port for data transfer and connecting peripherals.
- Micro HDMI: Connect to external monitors or TVs using the Micro HDMI port for extended display options, supporting up to 4K video output.
- Bluetooth 5.3: Pair with wireless headphones, mice, and other Bluetooth accessories.
- Wi-Fi 6: Enjoy high-speed internet connectivity for streaming and browsing.
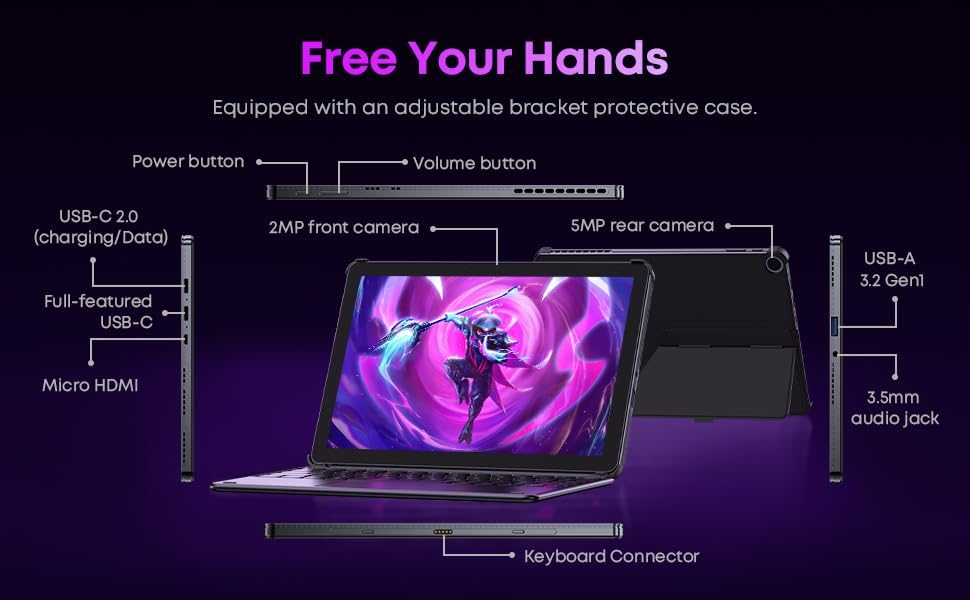
Aworan 3.3: alaye view of the tablet's ports and connectors.
3.5 kamẹra Lilo
The tablet is equipped with a 5MP autofocus rear camera for capturing photos and videos, and a 2MP front camera for video calls and selfies.

Image 3.4: Camera and wireless connectivity features.
3.6 Processor and Storage
Powered by a 10th Gen Intel Core i3 processor (up to 3.9GHz) and 8GB RAM, the tablet handles multitasking efficiently. The 256GB SSD provides ample storage and fast access to your files.

Image 3.5: Intel 10th Gen Core i3 Processor details.
3.7 Ọja Loriview Fidio
Fidio 3.6: Ipariview of the CHUWI Hi10 X2 2-in-1 Laptop Tablet, highlighting its features and functionality.
4. Itọju
4.1 Ninu ẹrọ naa
Lo asọ ti ko ni lint lati nu iboju ati ara tabulẹti naa. Fun agidi smudges, die-die dampen awọn asọ pẹlu omi tabi a iboju-ninu ojutu. Yago fun awọn kẹmika lile tabi awọn ohun elo abrasive.
4.2 batiri Itọju
To prolong battery life, avoid exposing the tablet to extreme temperatures. It is recommended to keep the battery charge between 20% and 80% for optimal longevity. Avoid fully discharging the battery frequently.
4.3 Software imudojuiwọn
Máa ṣàyẹ̀wò kí o sì fi àwọn àtúnṣe Windows sí i déédéé láti rí i dájú pé ètò rẹ ní àwọn àtúnṣe ààbò tuntun àti àwọn àtúnṣe iṣẹ́. Lọ sí Ètò > Ìmúdàgbàsókè Windows.
4.4 Ibi Management
Lorekore tunview ki o si pa kobojumu files and applications to free up storage space on the 256GB SSD. This helps maintain optimal device performance.
5. Laasigbotitusita
5.1 Ẹrọ Ko Nṣiṣẹ Tan-an
- Ensure the device is fully charged. Connect the charger and wait a few minutes before attempting to power on.
- Tẹ bọtini agbara naa ki o si dimu fun awọn aaya 10-15 lati ṣe atunto lile kan.
5.2 Wi-Fi Asopọmọra Oran
- Tun olulana Wi-Fi rẹ bẹrẹ ati tabulẹti.
- Ṣayẹwo boya awọn ẹrọ miiran le sopọ si nẹtiwọki Wi-Fi kanna.
- Gbagbe nẹtiwọọki ninu awọn eto Windows ki o tun so pọ mọ.
5.3 Screen Not Responding to Touch
- Tun tabulẹti bẹrẹ.
- Rii daju pe iboju jẹ mimọ ati laisi idoti.
5.4 Keyboard Not Working
- Ensure the tablet is correctly aligned and securely connected to the magnetic keyboard.
- Tun tabulẹti bẹrẹ.
Fun iranlọwọ siwaju sii, jọwọ wo apakan Atilẹyin.
6. Awọn pato
| Ẹya ara ẹrọ | Sipesifikesonu |
|---|---|
| Brand | CHUWI |
| Orukọ awoṣe | Hi10 X2 |
| isise | Intel Core i3 (10th Gen, up to 3.9 GHz) |
| Eto isesise | Windows 11 Ile |
| Àgbo | 8 GB |
| Ibi ipamọ | 256 GB SSD |
| Iwon iboju | 10.1 inches |
| Ipinnu Ifihan | 1280x800 awọn piksẹli |
| Asopọmọra | Wi-Fi 6, Bluetooth 5.3 |
| Awọn ibudo | Full-featured Type-C, USB 3.2 Gen 1, Micro HDMI, 3.5mm Audio Jack |
| Awọn kamẹra | 5MP Autofocus Rear, 2MP Front |
| Iwọn | 1.3 Poun (iwọn 0.59 kg) |
| Awọn iwọn (L x W x Th) | 9.6" x 6.49" x 0.39" |
| Agbara Batiri | 3400 mAh |
7. atilẹyin ọja Information
The CHUWI Hi10 X2 2-in-1 Laptop Tablet comes with a 1-odun lopin atilẹyin ọja. This warranty covers manufacturing defects and malfunctions under normal use. Please retain your proof of purchase for warranty claims.
For detailed warranty terms and conditions, please refer to the official CHUWI webojula tabi kan si atilẹyin alabara.
8. Atilẹyin
If you encounter any issues not covered in the Troubleshooting section, or require assistance with Windows activation, please contact CHUWI customer support. You can typically find support contact information on the official CHUWI website or through your purchase platform (e.g., Amazon seller messaging).
When contacting support, please have your device's serial number and proof of purchase readily available.