1. Ifihan ati Loriview
The StarTech.com 2-in-1 USB KVM Cable (SVUSB2N1_6) is designed to connect VGA and USB-equipped computers to a KVM (Keyboard, Video, Mouse) switch. This cable integrates both VGA video and USB keyboard/mouse signals into a single, convenient cable assembly, helping to reduce cable clutter and simplify connections in your workspace. It ensures crystal clear display quality and reliable performance for your KVM setup.
2. Awọn ẹya Ọja
- Connects VGA and USB-equipped computers to a KVM Switch using a single cable.
- 6-foot (1.8m) length for flexible placement.
- Combines VGA video, USB keyboard, and USB mouse signals.
- Ti o tọ ikole fun gun-pípẹ iṣẹ.
3. Package Awọn akoonu
Rii daju pe gbogbo awọn nkan wa ninu apo rẹ:
- 1x StarTech.com 2-in-1 USB KVM Cable (SVUSB2N1_6)

Figure 1: StarTech.com 2-in-1 USB KVM Cable Packaging. The packaging displays the product name, length, and model number SVUSB2N1_6, along with a UPC barcode 065030788632.
4. Awọn ilana iṣeto
Follow these steps to connect your computer to a KVM switch using the SVUSB2N1_6 cable:
- Ṣe idanimọ Awọn Asopọmọra: Locate the VGA (blue, 15-pin) and USB-A (rectangular) connectors on one end of the cable, and the VGA (blue, 15-pin) and USB-B (square) connectors on the other end.
- Sopọ si Kọmputa: Plug the VGA male connector and the USB-A male connector into the corresponding female ports on your computer. Ensure a secure connection for both.
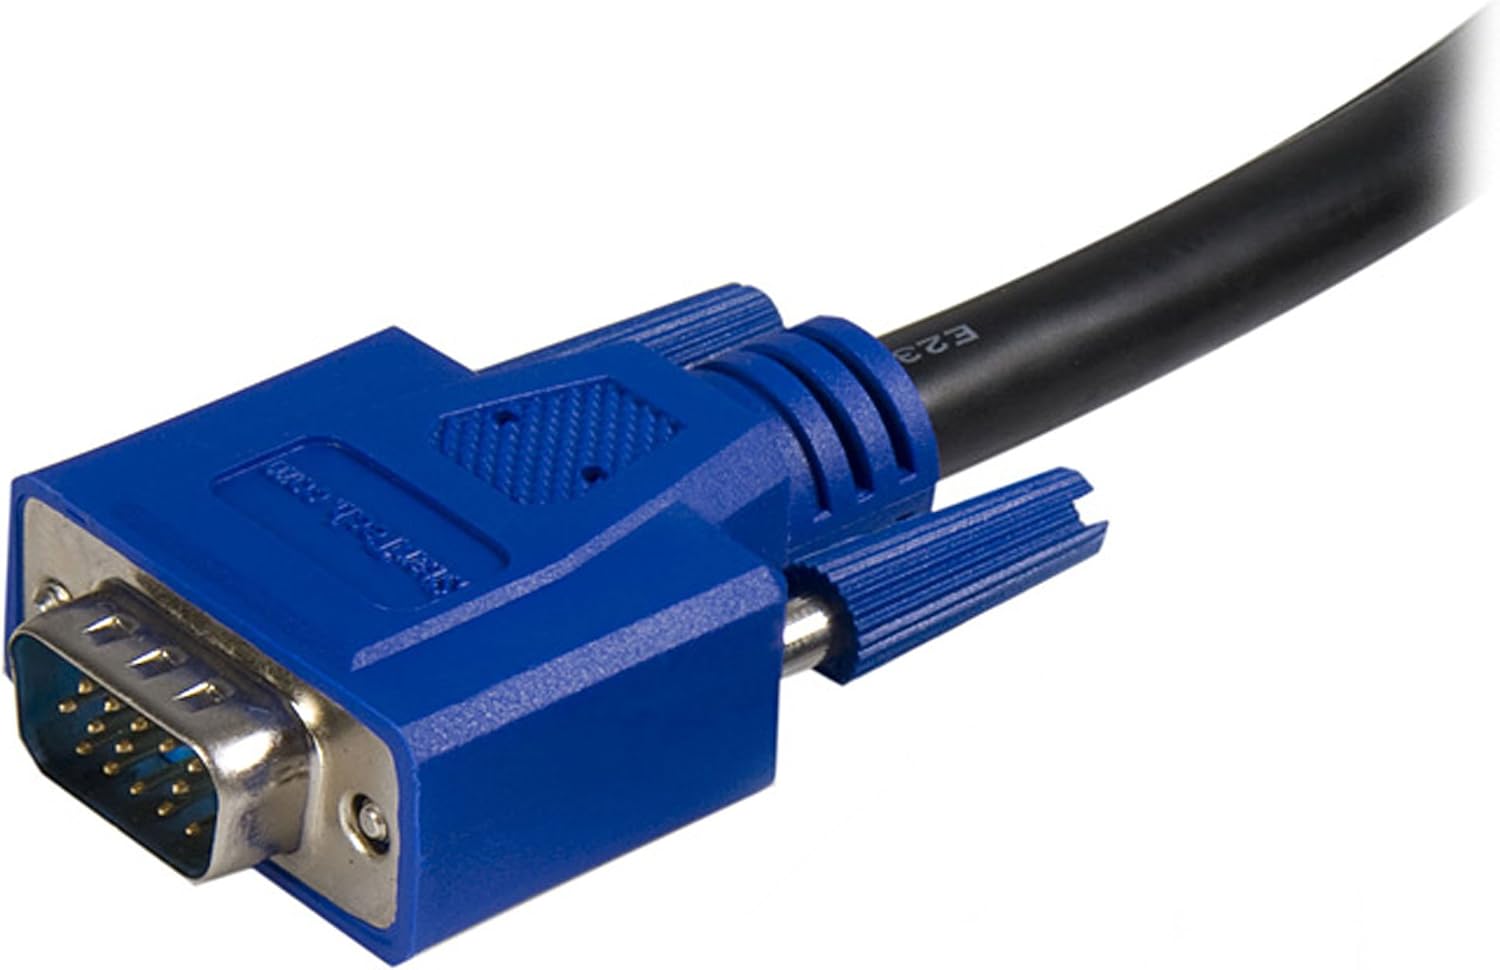
Figure 2: Close-up of the male VGA connector. This connector carries video signals.

Figure 3: Close-up of the male USB-A connector. This connector typically connects to the computer's USB port for keyboard and mouse data.
- Connect to KVM Switch: Plug the remaining VGA male connector and the USB-B male connector into the designated computer input ports on your KVM switch. The USB-B connector on the cable connects to the USB-B port on the KVM switch, which then routes keyboard and mouse signals to the connected computer.

olusin 4: Omiiran view of the male VGA connector.
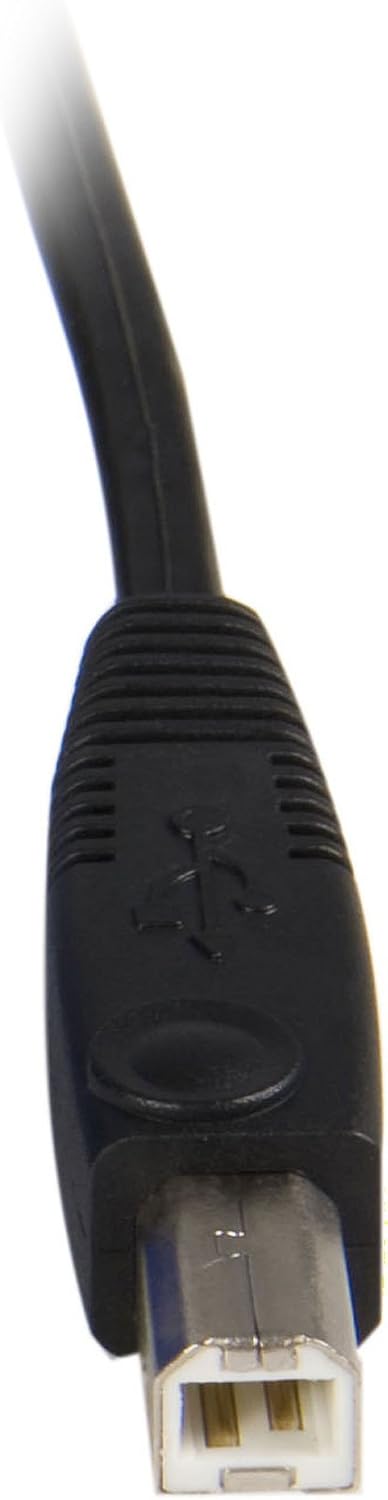
Figure 5: Close-up of the male USB-B connector. This connector typically connects to the KVM switch.
- Agbara Tan: Ensure your KVM switch and connected computers are powered on.
This cable is compatible with StarTech.com KVMs and can also work with various models from other brands such as Aten (CS102U, CS104U), Belkin (F1DN102U, F1DN104U, F1DN108U), TrippLite (B006-004-R), Cables to go (35555, 35566, 35554, 52064), and IOGear (GCS102U, GCS104U).
5. Awọn ilana Iṣiṣẹ
The StarTech.com 2-in-1 USB KVM Cable facilitates the connection between your computer and a KVM switch. The operation of switching between connected computers, or controlling peripherals, is managed directly by the KVM switch itself. Refer to your KVM switch's instruction manual for specific operating procedures, hotkey commands, or button functions.
6. Itọju
To ensure the longevity and optimal performance of your KVM cable, follow these maintenance guidelines:
- Mu pẹlu Itọju: Avoid bending the cable sharply or placing heavy objects on it, as this can damage internal wires.
- Jeki mimọ: Periodically wipe the cable and connectors with a soft, dry cloth to remove dust and debris. Do not use liquid cleaners directly on connectors.
- Ibi ipamọ to tọ: When not in use, coil the cable loosely and store it in a dry, cool place away from direct sunlight.
- Ṣayẹwo awọn isopọ: Regularly check that all connectors are securely seated in their respective ports.
7. Laasigbotitusita
If you encounter issues with your KVM cable, consider the following troubleshooting steps:
- Ko si Ifihan lori Atẹle:
- Ensure the VGA connectors are fully inserted into both the computer's video output and the KVM switch's video input.
- Verify that the monitor is powered on and correctly connected to the KVM switch's monitor output.
- Test the monitor and computer with a different VGA cable if possible to rule out other component issues.
- Kííbọọ̀dù tàbí Asin kò dáhùn:
- Check that the USB-A and USB-B connectors of the KVM cable are securely plugged into the computer and KVM switch, respectively.
- Ensure the KVM switch is powered on and functioning correctly.
- Try connecting the keyboard and mouse directly to the computer to confirm they are operational.
- Some KVM switches may require specific USB ports or drivers; consult your KVM switch manual.
- Asopọmọra igba diẹ:
- Loose connections are a common cause. Re-seat all cable connectors firmly.
- Ensure the cable is not excessively bent or kinked, which could damage internal wiring.
8. Awọn pato
| Brand | StarTech.com |
| Orukọ awoṣe | SVUSB2N1_6 |
| USB Ipari | 6 ẹsẹ (1.8 m) |
| Connector Type (Computer Side) | VGA (HD-15 Male), USB Type-A (Male) |
| Connector Type (KVM Side) | VGA (HD-15 Male), USB Type-B (Male) |
| Àwọ̀ | Dudu |
| USB Iru | Coaxial |
| Awọn ẹrọ ibaramu | Personal Computer, KVM Switches |
| Data Gbigbe Oṣuwọn | Up to 1000 Megabits Per Second (USB) |
| Nọmba ti Pinni | 15 (VGA) |
| Awọn iwọn Ọja (Ṣipo) | 5.59 x 1.02 x 10.63 inches |
| Iwọn Nkan | 10.2 iwon (0.29 kilo) |
| UPC | 065030788632 |
9. Atilẹyin ọja ati Support
This StarTech.com product is backed by a s'aiye atilẹyin ọja. For technical support or warranty inquiries, please visit the official StarTech.com website or contact their customer service department. Ensure you have your product model number (SVUSB2N1_6) and proof of purchase available when seeking support.


