Ọrọ Iṣaaju
This manual provides detailed instructions for the safe and proper installation, operation, and maintenance of your Progress Lighting Inspire Collection 9-Light Off-White Linen Shade Traditional Chandelier in Brushed Nickel. Please read all instructions carefully before beginning installation and retain this manual for future reference.
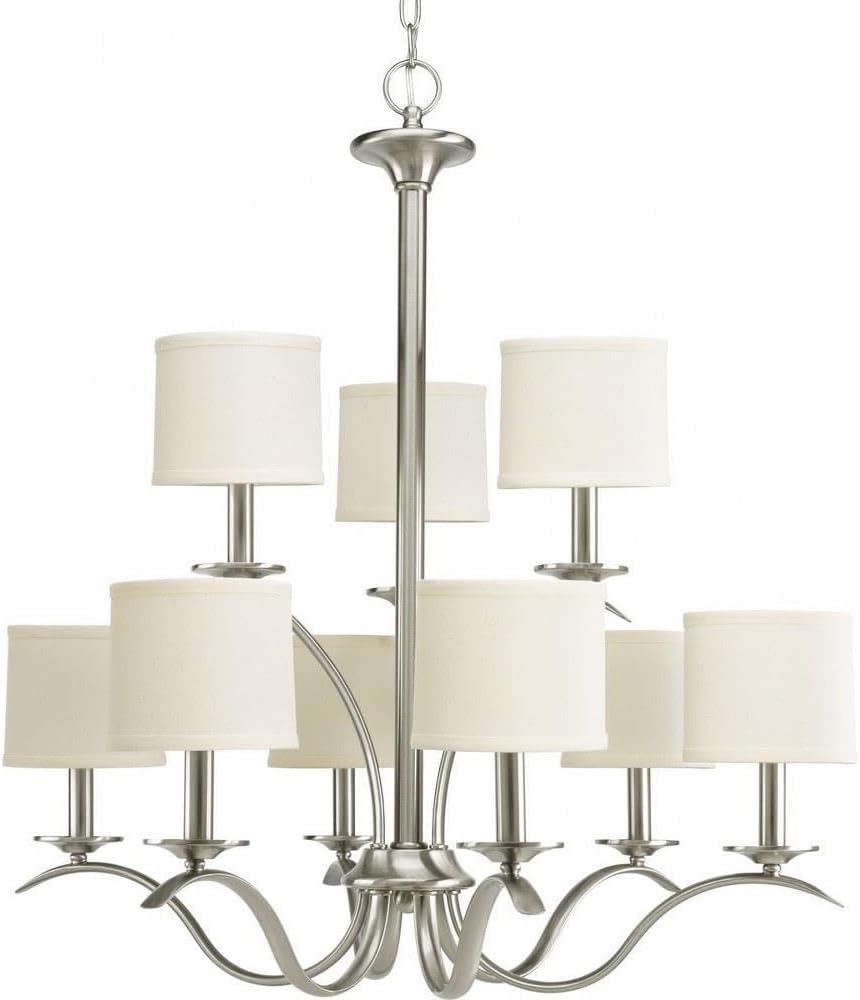
Image: The Inspire Collection 9-Light Chandelier featuring a brushed nickel finish and off-white linen shades.
Alaye Aabo
IKILO: To reduce the risk of fire, electric shock, or personal injury, always turn off the main power supply at the circuit breaker before installation, removal, or servicing. This product requires professional installation. Always consult a qualified electrician if you are unsure about the installation process.
Ilana 65 Ikilọ: Ọja yii le ni awọn kemikali ti a mọ si Ipinle California lati fa akàn ati awọn abawọn ibimọ tabi ipalara ibisi miiran. Fọ ọwọ lẹhin mimu.
- Ensure all electrical connections are in accordance with local codes and ordinances.
- Lo iru boolubu ti a ti sọ ati wat nikantage lati yago fun overheating.
- Do not hang anything from the fixture.
Package Awọn akoonu
Daju pe gbogbo awọn paati wa ṣaaju ki o to bẹrẹ fifi sori:
- Chandelier fixture assembly
- 9 Off-white linen shades
- Ceiling chain (6 feet of 9 gauge chain supplied)
- Itanna onirin
- Mounting hardware (may require additional screws not included)
- Iwe Fifi sori ẹrọ
Eto & Fifi sori
Professional installation is recommended for this chandelier. Follow these general steps, referring to the included installation sheet for specific details.
1. Mura silẹ fun Fifi sori ẹrọ
- Pa a agbara ni Circuit fifọ.
- Carefully unpack the fixture and components.
- Determine the desired hanging height. For an 8-foot ceiling, the bottom of the chandelier should be 30-36 inches above a dining table. For higher ceilings, divide the vertical space into thirds and position the chandelier two-thirds of the distance from the floor, ensuring at least 7 feet of clearance from the floor in areas where people walk underneath.
2. Mount the Fixture
- Attach the mounting bracket to the junction box in the ceiling.
- Adjust the chain length as needed. The supplied chain is 6 feet long.
- Thread the electrical wires through the chain and canopy.
3. Itanna Awọn isopọ
- Connect the fixture's ground wire to the ground wire from the junction box.
- Connect the fixture's 'white or identified' wire (often with ridges) to the white (neutral) wire from the junction box.
- Connect the fixture's 'plain or black' wire to the black (hot) wire from the junction box.
- Ṣe aabo gbogbo awọn asopọ pẹlu awọn eso waya ati teepu itanna.
4. Apejọ ipari
- Ṣe aabo ibori si aja.
- Install 9 candelabra-shaped bulbs (E26 base, maximum 60 watts each). Note: Only candelabra-shaped bulbs can be used with the shades.
- Attach the off-white linen shades to each light socket.
- Mu pada agbara ni awọn Circuit fifọ.
Visual fifi sori Itọsọna
Video: A okeerẹ loriview of chandelier installation by Progress Lighting, demonstrating key steps and considerations for proper setup.
Ọja Mefa

Image: Dimensional drawing of the chandelier, indicating a width of 29.38 inches and a height of 31 inches.
Awọn ilana Iṣiṣẹ
Once properly installed, your chandelier can be operated using a standard wall switch. If your electrical setup includes a dimmer switch, ensure it is compatible with incandescent bulbs for optimal performance.
The fixture's switch type is listed as 'Pull Chain' in some specifications, however, the primary control is typically via a wall switch for chandeliers of this design. Please refer to your specific home wiring and switch setup.
Itoju
Ninu
- Pa ina nigbagbogbo ṣaaju ki o to nu.
- Mu ese mu ese pẹlu asọ ti o gbẹ.
- Do not use abrasive cleaners or solvents as they may damage the finish.
- The linen shades can be gently dusted or spot cleaned with a damp asọ ti o ba wulo.
Rirọpo boolubu
- Ensure power is off and bulbs have cooled before replacing.
- Unscrew old bulbs and screw in new E26 candelabra-shaped bulbs.
- Maṣe kọja wat ti o pọjutage ti 60 Wattis fun boolubu.
Laasigbotitusita
If your chandelier is not functioning correctly, refer to the following common issues:
- Ko si Imọlẹ: Check the circuit breaker, ensure bulbs are securely screwed in, and verify all electrical connections are tight.
- Awọn imọlẹ didan: Ensure bulbs are fully tightened. If using a dimmer, confirm it is compatible with the bulb type and that the bulbs are dimmable.
- Loose Fixture: Re-check mounting hardware and ensure it is securely fastened to the ceiling junction box.
Ti awọn iṣoro ba tẹsiwaju, kan si onisẹ ina mọnamọna to peye.
Awọn pato
| Brand | Ilọsiwaju Imọlẹ |
| Orukọ awoṣe | Ṣe iwuri |
| Nọmba apakan | P4638-09 |
| Àwọ̀ | ti ha nickel |
| Ohun elo | Alloy Irin |
| Ohun elo iboji | Ọgbọ |
| Ara | Iyipada |
| Fọọmu Imuduro Imọlẹ | Chandelier |
| Ọja Mefa | 29.38"L x 29.38"W x 31"H |
| Iwọn Nkan | 15 iwon |
| Nọmba Awọn orisun Imọlẹ | 9 |
| Bulb Base | E26 |
| Wattage | 60 watts (per bulb) |
| Voltage | 120 Volts |
| inu ile / ita gbangba Lilo | Ninu ile |
| Pataki Ẹya | UL Akojọ |
Alaye atilẹyin ọja
This Progress Lighting product is covered by a 1-odun Atilẹyin ọja Limited. This warranty guarantees your complete satisfaction with your purchase and includes professional after-sales customer service support. Please retain your proof of purchase for warranty claims.
Onibara Support
For further assistance, technical support, or warranty inquiries, please visit the official Progress Lighting website or contact their customer service department. Refer to the packaging or the Progress Lighting webAaye fun lọwọlọwọ alaye olubasọrọ.


