Ọrọ Iṣaaju
This document provides essential information regarding the Bostitch Flooring Nailer Replacement Shoe, part number 180326. This genuine OEM replacement part is designed to maintain the optimal performance and integrity of your Bostitch flooring nailer. Please read this manual thoroughly before installation and use.
Ọja Pariview
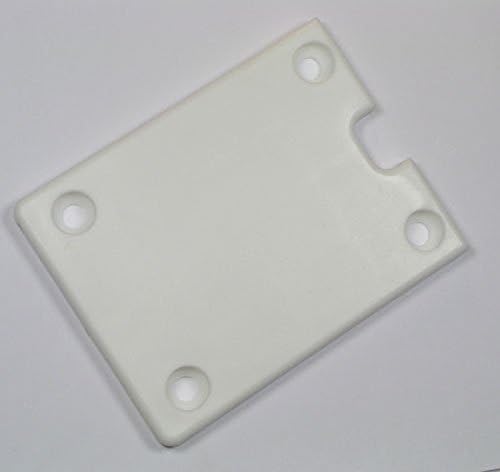
Nọmba 1: Bostitch Flooring Nailer Replacement Shoe (Part #180326). This image displays the Bostitch Flooring Nailer Replacement Shoe, a white, rectangular component with four screw holes and a notched edge, designed for specific Bostitch flooring nailer models.
The Bostitch Replacement Shoe 1/2" (Part #180326) is a critical component for maintaining the proper function and protection of your flooring nailer. It ensures smooth operation and prevents damage to flooring surfaces during nailing applications.
Ibamu
This replacement shoe is compatible with the following Bostitch flooring nailer models:
- Bostitch MFN-201 Flooring Nailer
- Bostitch MIIIFN Flooring Nailer
Always verify compatibility with your specific tool's owner's manual before purchasing or installing replacement parts.
Eto ati fifi sori
The Bostitch Flooring Nailer Replacement Shoe (Part #180326) is designed for straightforward installation. However, for precise instructions and to ensure proper fitment and safe operation, it is crucial to consult the owner's manual specific to your Bostitch flooring nailer model (MFN-201 or MIIIFN).
General Installation Guidance:
- Aabo Lakọkọ: Disconnect the air supply from the nailer before attempting any maintenance or part replacement.
- Identify Old Shoe: Locate the existing shoe on your flooring nailer.
- Yọ Awọn ohun elo kuro: Carefully remove any screws or fasteners securing the old shoe to the nailer body.
- Remove Old Shoe: Detach the worn or damaged shoe.
- Position New Shoe: Align the new Bostitch Replacement Shoe (Part #180326) with the mounting points on the nailer.
- Secure New Shoe: Reinstall the fasteners, ensuring they are tightened securely but do not overtighten.
- Iṣe idanwo: Reconnect the air supply and perform a functional test in a safe environment, away from any work surface, to ensure the shoe is properly seated and the nailer operates correctly.
Refer to your specific nailer's manual for detailed diagrams and step-by-step instructions.
Awọn ero ṣiṣe
As a replacement component, the shoe itself does not have independent operational controls. Its function is integral to the overall operation of the Bostitch flooring nailer. Ensure the shoe is clean and free of debris before each use to maintain optimal performance and prevent damage to flooring materials.
Itoju
Regular inspection and maintenance of the replacement shoe will extend its lifespan and ensure consistent performance of your flooring nailer.
- Ninu: Periodically clean the shoe to remove any accumulated dust, wood chips, or adhesive residue. A damp asọ jẹ nigbagbogbo to.
- Ayewo: Before each use, inspect the shoe for signs of wear, cracks, or damage. A worn shoe can affect nailing depth and potentially damage flooring.
- Rọpo: If the shoe shows significant wear or damage, replace it promptly with a genuine Bostitch part (Part #180326) to maintain tool performance and safety.
Laasigbotitusita
Issues related to the replacement shoe are typically straightforward. If you encounter problems, consider the following:
- Improper Nailing Depth/Angle: Ensure the shoe is correctly installed and securely fastened. A loose or improperly seated shoe can affect the nailer's performance.
- Scratches on Flooring: Inspect the shoe for any sharp edges, burrs, or embedded debris that could scratch the flooring surface. Clean or replace the shoe if necessary.
- Shoe Detaches During Use: Verify that all fasteners are properly tightened. If the shoe continues to detach, inspect the mounting points on the nailer for damage.
For more complex issues related to the nailer's overall function, refer to the main owner's manual for your Bostitch flooring nailer.
Awọn pato
| Nọmba apakan | 180326 |
| Olupese | Bostitch |
| Iwọn Nkan | 0.96 iwon |
| Ọja Mefa | 3.5 x 3.5 x 4.5 inches |
| Awọn awoṣe ibaramu | MFN-201, MIIIFN |
Atilẹyin ọja ati Support
For information regarding the warranty of this genuine Bostitch replacement part, please refer to the warranty documentation provided with your original Bostitch flooring nailer or contact Bostitch customer support directly. Genuine Bostitch parts are designed to meet the manufacturer's quality standards.
For further assistance or to locate authorized service centers, please visit the official Bostitch webojula tabi kan si wọn onibara iṣẹ Eka.
Bostitch Official Webojula: www.bostitch.com