Ọrọ Iṣaaju
This manual provides comprehensive instructions for the installation, operation, and maintenance of the Hunter 99179 Original Ceiling Fan Remote Control and Canopy Kit. This kit is specifically designed to enhance the functionality of Hunter "Original" series ceiling fans by adding remote control capabilities for fan speeds and lighting.
The kit includes a remote control unit and a canopy designed to house the receiver. It integrates with your existing two-wire fan setup, offering convenient control over three fan speeds and the fan's light fixture.
Alaye Aabo pataki
- Aabo Itanna: Always disconnect power at the circuit breaker or fuse box before attempting any installation, maintenance, or repair. Failure to do so can result in serious injury or death.
- Ibamu: This kit is designed for use NIKAN with Hunter "Original" series ceiling fans. It is not compatible with other fan models or brands.
- Downrod Requirement: Installation requires a downrod of 12 inches or longer (sold separately). The receiver unit is designed to fit within the canopy, which necessitates sufficient space provided by a longer downrod.
- Fifi sori Ọjọgbọn: If you are unfamiliar with electrical wiring or ceiling fan installation, it is recommended to consult a qualified electrician.
- Awọn koodu agbegbe: Ensure all installation procedures comply with local electrical codes and ordinances.
- Iduroṣinṣin ọja: Do not modify the product or use it for purposes other than its intended use.
Package Awọn akoonu
Daju pe gbogbo awọn paati wa ṣaaju ki o to bẹrẹ fifi sori:
- Latọna Iṣakoso Unit
- Latọna jijin olugba
- Canopy (for receiver housing)
- Mounting Hardware (screws, wire nuts, etc. - specific items may vary)
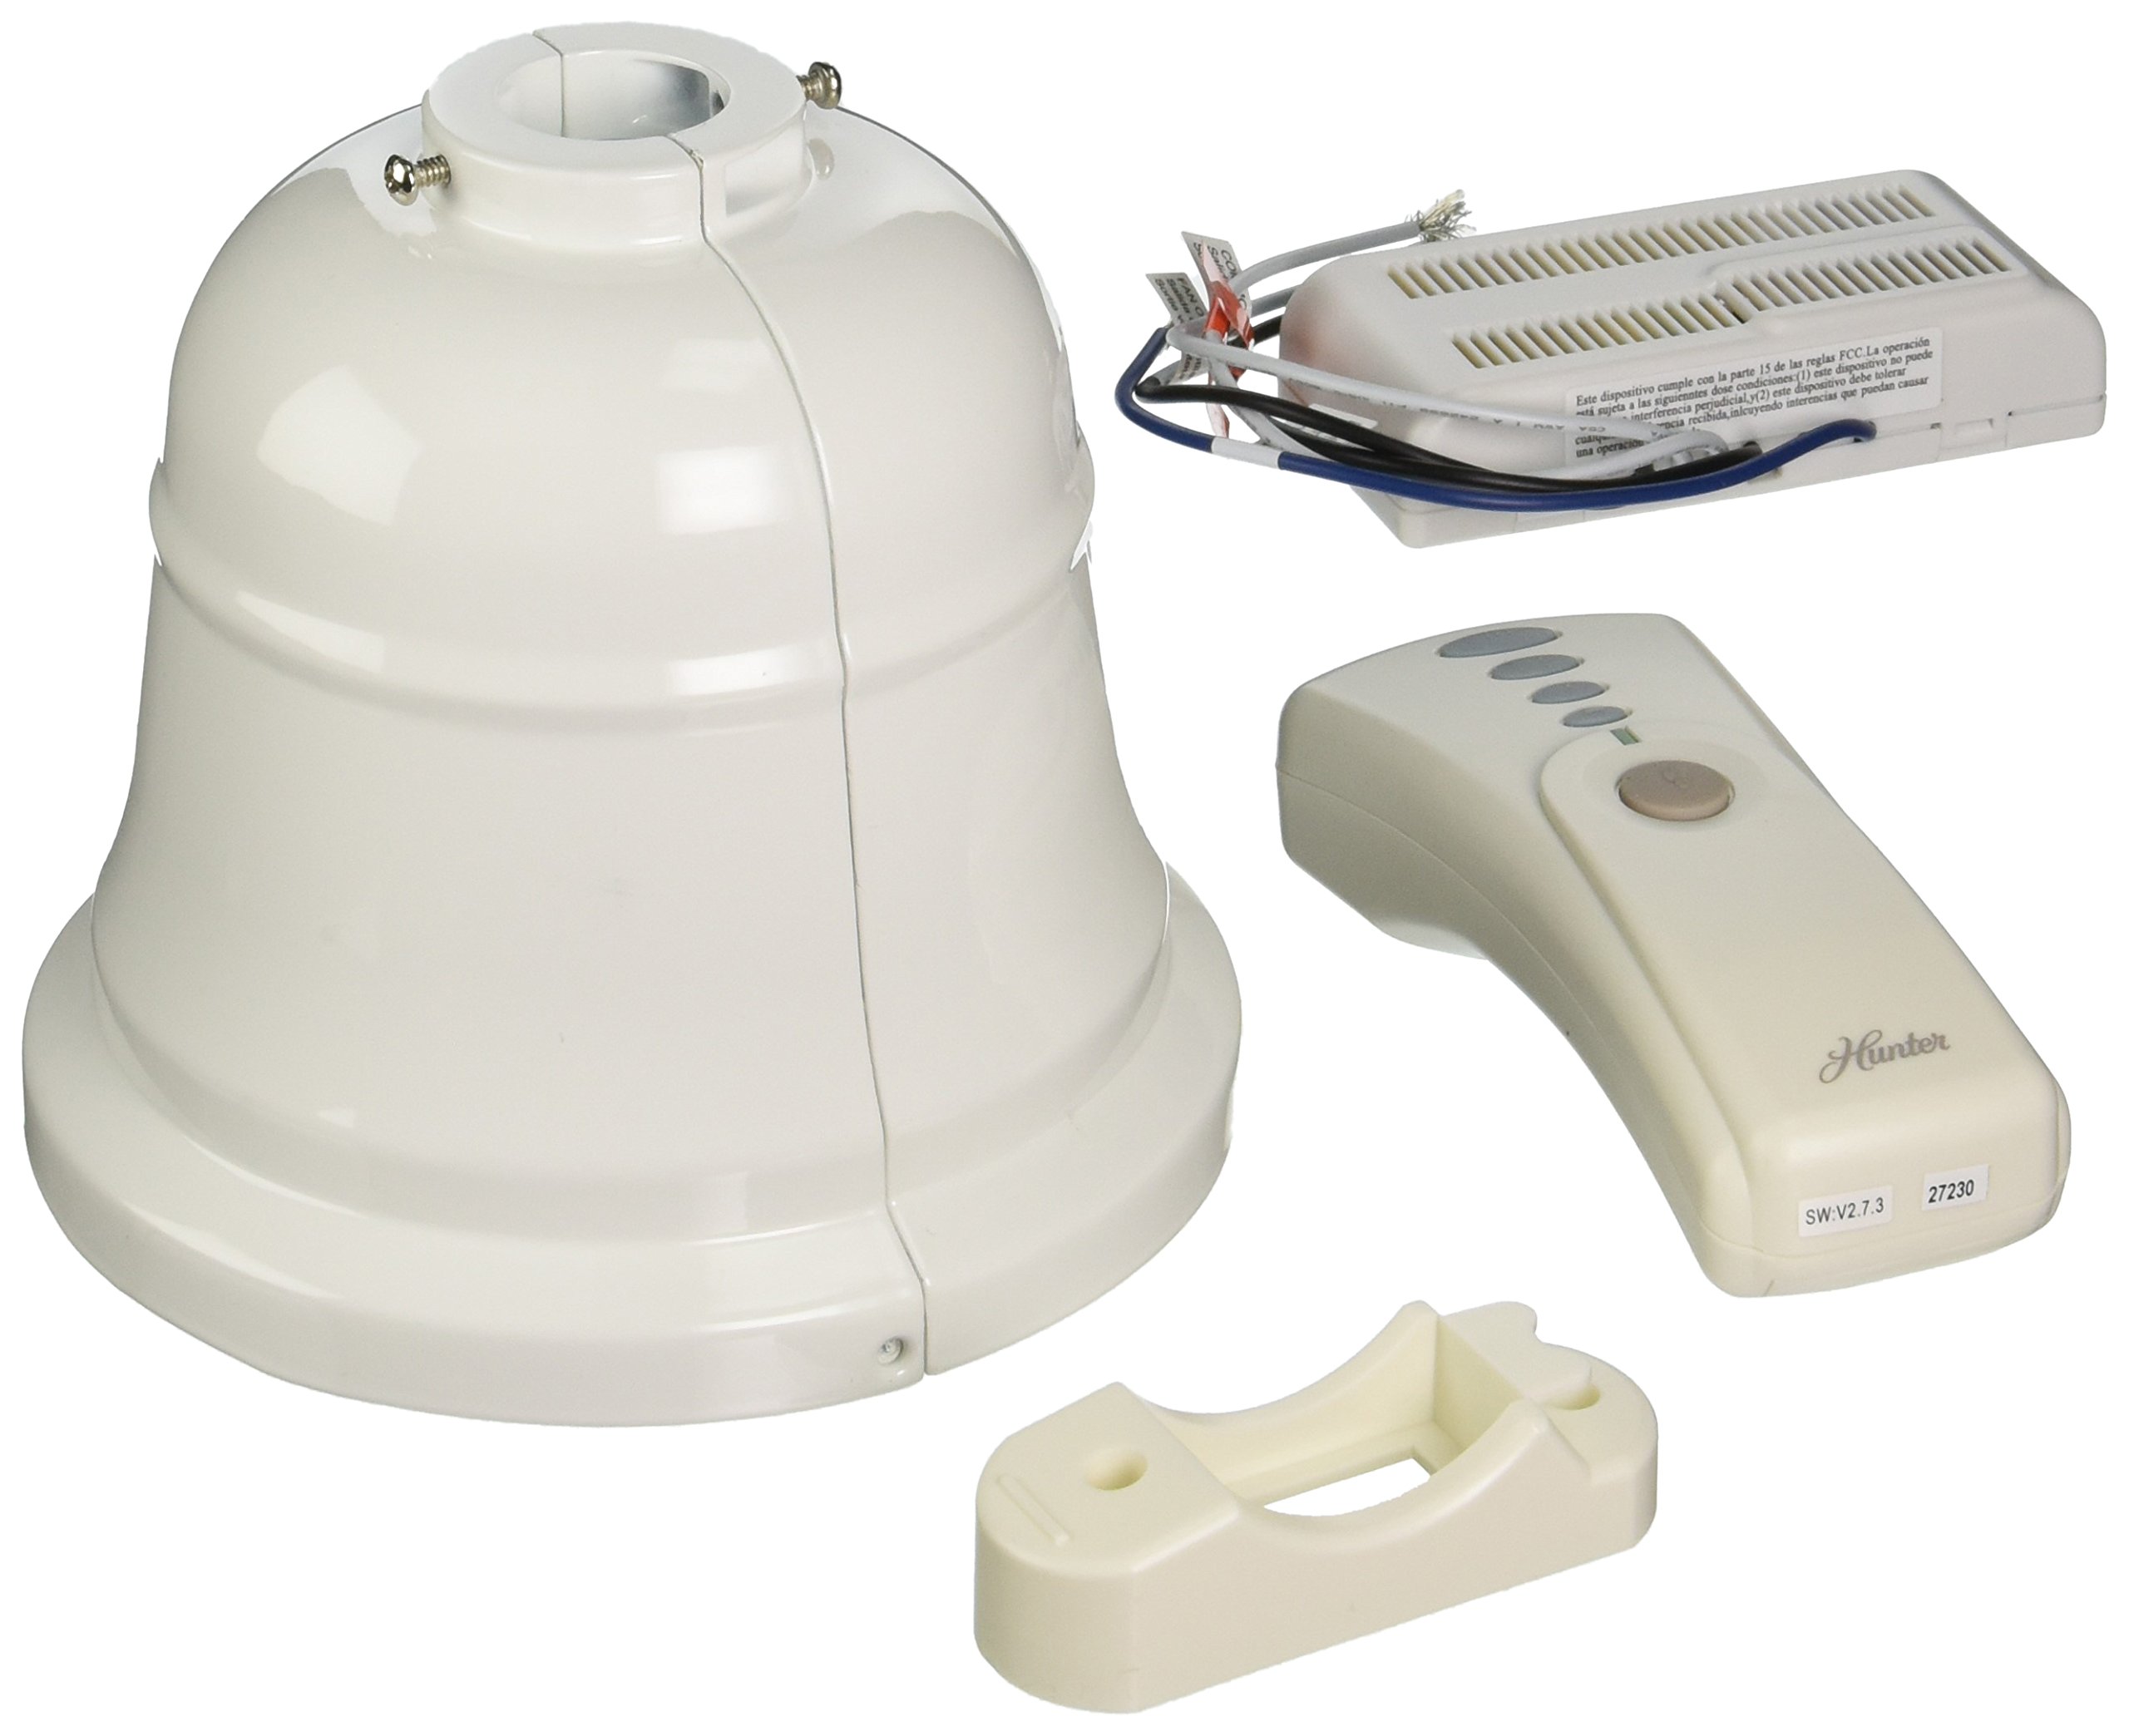
Image: A Hunter ceiling fan, representative of the type of fan compatible with the 99179 remote and canopy kit.
Eto ati fifi sori
Follow these steps carefully to install your Hunter 99179 Remote Control and Canopy Kit:
- Ge asopọ agbara: Before starting, turn off the electrical power to your ceiling fan at the main circuit breaker or fuse box.
- Wíwọlé sí Wáyà: Carefully lower the existing canopy from your Hunter Original ceiling fan to expose the wiring connections.
- Remove Old Receiver (if applicable): If an old receiver is present, disconnect its wiring and remove it.
- Fi Olùgbà Tuntun Sílẹ̀: Connect the new remote receiver's wires to the corresponding fan and household wires. Ensure all connections are secure using wire nuts. The receiver is designed to fit within the new canopy.
- Position Canopy: Carefully tuck the wired receiver into the new canopy. Ensure no wires are pinched.
- Ibori to ni aabo: Mount the new canopy securely to the fan's mounting bracket. Confirm that the downrod is at least 12 inches long to accommodate the receiver within the canopy.
- Pada Agbara pada: Once installation is complete and all connections are secure, restore power to the ceiling fan at the circuit breaker.
- Latọna meji: Follow the instructions provided with the remote control unit to pair it with the newly installed receiver. This typically involves pressing a button on the remote within a short time after restoring power.
Akiyesi: The new canopy is designed to accommodate the receiver. Some older Hunter Original fan mounting plates or downrods may not be compatible with the new canopy's dimensions. Verify fit before final installation.
Awọn ilana Iṣiṣẹ
Your Hunter 99179 remote control provides convenient operation of your ceiling fan and light:
- Iṣakoso Iyara Fan: Use the designated buttons on the remote to cycle through three fan speeds (Low, Medium, High) or to turn the fan off.
- Iṣakoso ina: Use the light button to turn the fan light on or off. Some remotes may also support dimming functions if your fan and light kit are compatible.
- Rirọpo Batiri: If the remote control stops responding, replace the batteries. Refer to the remote's specific instructions for battery type and replacement procedure.
Itoju
To ensure optimal performance and longevity of your Hunter 99179 kit:
- Ninu: Periodically wipe the remote control and canopy with a soft, dry cloth. Do not use abrasive cleaners or solvents.
- Ṣayẹwo Batiri: Replace remote control batteries as needed to maintain reliable operation.
- Ayẹwo onirin: Annually, or if issues arise, ensure all electrical connections within the canopy are secure and free from corrosion. Always disconnect power before inspection.
Laasigbotitusita
If you encounter issues with your remote control and canopy kit, refer to the following common solutions:
| Isoro | Owun to le Fa | Ojutu |
|---|---|---|
| Remote not responding / Fan or light not working |
|
|
| Canopy does not fit / Receiver cannot be housed |
|
|
| kikọlu lati awọn ẹrọ miiran |
|
|
Awọn pato
- Nọmba awoṣe: 99179
- Olupese: Hunter Fan Company
- Awọn iwọn ọja: Isunmọ 6 x 6 x 7 inches
- Ìwọ̀n Nkan: Ni isunmọ 2.35 poun
- Voltage: 120 Volts
- Orisun Agbara: Okun-itanna
- Ohun elo: Irin
- Ijẹrisi: Akojọ ETL
- Lilo: Ceiling fan remote control and canopy accessory
- Ẹya Pataki: Heavy Duty construction
- Awọn ẹrọ ibaramu: Hunter "Original" series ceiling fans
Alaye atilẹyin ọja
No specific warranty description is provided for the Hunter 99179 Remote Control and Canopy Kit in the product details. For warranty inquiries, please contact Hunter Fan Company directly or refer to the documentation included with your original Hunter "Original" ceiling fan.
Onibara Support
For further assistance, technical support, or to inquire about parts, please visit the official Hunter Fan Company webojula tabi kan si wọn onibara iṣẹ Eka.
Hunter Fan Company Webojula: Visit the Hunter Store on Amazon


