Ọrọ Iṣaaju
This manual provides essential information for setting up, operating, maintaining, and troubleshooting your Microsoft Surface Pro 3. The Surface Pro 3 is a versatile device designed to function as both a tablet and a laptop, powered by the Windows 10 operating system.
It features a 12-inch high-resolution screen, ample internal storage, dual HD cameras, and robust connectivity options, including a full-size USB 3.0 port. Its integrated kickstand allows for comfortable viewing in various positions, and the magnesium frame ensures a lightweight and durable design.
Alaye Aabo
- Ma ṣe fi ẹrọ naa han si awọn iwọn otutu to gaju, imọlẹ orun taara, tabi ọriniinitutu giga.
- Yago fun sisọ silẹ tabi tẹriba ẹrọ si ipa nla.
- Use only Microsoft-approved power adapters and accessories.
- Keep the device away from liquids. In case of liquid contact, power off immediately and seek professional assistance.
- Ma ṣe gbiyanju lati tunto tabi tun ẹrọ naa funrararẹ. Eyi le sọ atilẹyin ọja di ofo ati ki o fa ibajẹ.
- Ensure proper ventilation when using the device to prevent overheating.
Ṣeto
1. Unboxing ati Ibẹrẹ Ayẹwo
Carefully remove the Surface Pro 3 and all accessories from the packaging. Inspect the device for any visible damage. Retain the packaging for future transport or service needs.
2. Agbara Titan ati Eto Ibẹrẹ
- Connect the power supply to the Surface Pro 3 and a power outlet.
- Press the power button located on the top edge of the device.
- Tẹ̀lé àwọn ìtọ́ni tó wà lójú ìbòjú láti parí ìṣètò àkọ́kọ́ Windows 10, pẹ̀lú yíyan èdè, ìsopọ̀ mọ́tò, àti ṣíṣẹ̀dá àkọọ́lẹ̀ olùlò.
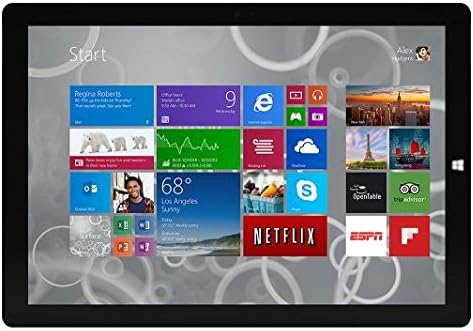
Figure 1: Windows 10 Start Screen during initial setup.
This image shows the Microsoft Surface Pro 3 screen displaying the Windows 10 Start menu, characterized by a grid of live tiles representing various applications and services. This is typically seen during the initial setup or when navigating the operating system.
3. Attaching Accessories (Sold Separately)
The Surface Pro 3 is compatible with various accessories, such as the Surface Type Cover keyboard and the Surface Pen, which are sold separately.
- Surface Type Cover: Align the magnetic connector of the Type Cover with the bottom edge of the Surface Pro 3 until it clicks into place.
- Surface Pen: The Surface Pen can be magnetically attached to the side of the Surface Pro 3 for storage. For initial pairing, follow the instructions provided with the pen.
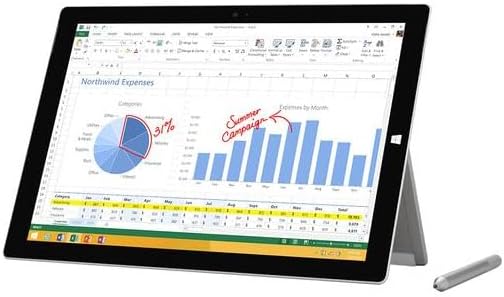
Figure 2: Surface Pro 3 with optional Surface Pen.
This image illustrates the Microsoft Surface Pro 3 in use, displaying an Excel spreadsheet on its screen. A Surface Pen is positioned next to the device, highlighting its compatibility for precise input and navigation.
4. Expanding Storage with a MicroSD Card
You can expand the internal storage of your Surface Pro 3 using a microSD card (sold separately).
- Locate the microSD card slot on the side of the Surface Pro 3, typically behind the kickstand.
- Insert the microSD card into the slot until it clicks into place.
- The device will automatically detect the card. You may need to format it if it's a new card or if prompted by the system.

Figure 3: MicroSD card slot.
This close-up image shows the microSD card slot on the side of the Microsoft Surface Pro 3, with a microSD card partially inserted, demonstrating how to expand the device's storage.
Awọn ilana Iṣiṣẹ
1. Navigating Windows 10
- Ibẹrẹ Akojọ: Tẹ aami Windows ni igun apa osi isalẹ lati wọle si awọn ohun elo, awọn eto, ati awọn aṣayan agbara.
- Afi ika te: Use gestures for navigation, zooming, and scrolling.
- Edge Browser: Utilize the pre-installed Edge browser for web browsing, which includes features for marking up web awọn oju-iwe.

Figure 4: Using the Surface Pro 3 for productivity.
This image depicts the Microsoft Surface Pro 3 in an active use scenario, showcasing a note-taking application open on its screen. The display features handwritten notes, diagrams, and sketches, illustrating the device's capability for creative and productive tasks.
2. Lilo awọn Integrated Kickstand
The multi-position kickstand allows you to adjust the viewing angle for optimal comfort, whether you are typing, watching videos, or drawing.
- Gently pull the kickstand out from the back of the device.
- Adjust it to your desired angle. The kickstand offers a wide range of positions for versatility.
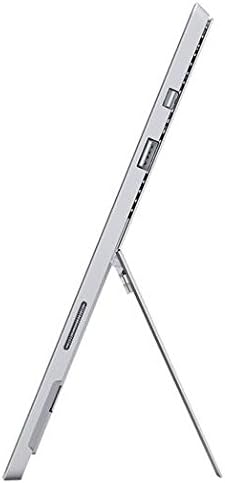
Figure 5: Adjustable kickstand.
Aworan yii pese ẹgbẹ kan view of the Microsoft Surface Pro 3, clearly showing its integrated kickstand extended to support the device at an angle, demonstrating its versatile viewing awọn agbara.
3. Iṣẹ-ṣiṣe kamẹra
The Surface Pro 3 is equipped with 5.0MP front and rear cameras.
- Open the Camera application from the Start Menu.
- Switch between front and rear cameras as needed for photos or video calls.

Figure 6: Front camera.
This close-up image focuses on the front-facing camera and associated sensors located at the top edge of the Microsoft Surface Pro 3 screen.
4. Asopọmọra
The full-size USB 3.0 port allows for connecting various peripherals and transferring data.
- Insert USB devices (e.g., flash drives, external hard drives, printers) into the USB 3.0 port.
- The device also supports Wi-Fi (802.11a/b/g/n/ac) for wireless internet connectivity.
Itoju
1. Cleaning Your Surface Pro 3
- Lo asọ rirọ, ti ko ni lint dampened pẹlu omi tabi a iboju regede pataki apẹrẹ fun Electronics.
- Yẹra fun lilo awọn kẹmika ti o lewu, awọn olutọpa abrasive, tabi awọn ohun elo aerosol.
- Fi ọwọ́ rọra nu iboju ati awọn oju ita.
2. Software imudojuiwọn
Regularly check for and install Windows updates to ensure your device has the latest security patches and performance improvements.
- Lọ si Eto > Imudojuiwọn & Aabo > Imudojuiwọn Windows.
- Click "Check for updates" and install any available updates.
3. Ibi ipamọ Management
To maintain optimal performance, manage your device's storage space.
- Paarẹ nigbagbogbo ti ko wulo files ati awọn ohun elo.
- Utilize cloud storage services or external drives for large files.
- Consider using the Disk Cleanup tool in Windows to remove temporary files.
Laasigbotitusita
This section addresses common issues you might encounter with your Surface Pro 3.
Ẹrọ Ko Nṣiṣẹ Tan-an
- Ensure the power supply is securely connected to both the device and a working power outlet.
- Gbiyanju iṣan agbara ti o yatọ.
- Press and hold the power button for 10-15 seconds to perform a forced shutdown, then press it again to restart.
Awọn ọrọ Asopọmọra Wi-Fi
- Ṣayẹwo boya Wi-Fi ti ṣiṣẹ ni awọn eto Windows.
- Tun olulana Wi-Fi rẹ bẹrẹ.
- Gbagbe nẹtiwọọki naa ki o tun sopọ, titẹ ọrọ igbaniwọle sii lẹẹkansi.
- Ṣiṣẹ Windows Network Troubleshooter.
O lọra Performance
- Pa awọn ohun elo ti ko wulo ti nṣiṣẹ ni abẹlẹ.
- Ṣayẹwo fun ati fi sori ẹrọ eyikeyi awọn imudojuiwọn Windows ni isunmọtosi.
- Rii daju pe o ni aaye ibi-itọju ọfẹ ti o to.
- Ṣiṣe ọlọjẹ ọlọjẹ kan.
For more detailed troubleshooting or issues not covered here, please refer to the official Microsoft Support webojula tabi olubasọrọ onibara iṣẹ.
Awọn pato
| Ẹya ara ẹrọ | Ẹ̀kúnrẹ́rẹ́ |
|---|---|
| Awoṣe | Microsoft Surface 1631 Pro 3 |
| Eto isesise | Windows 10 |
| Iwon iboju | 12 inches |
| Ipinnu iboju | 2160 x 1440 |
| isise | Intel mojuto i3 1.5 GHz |
| Àgbo | 4 GB |
| Ibi ipamọ inu | Ibi ipamọ Flash 128 GB |
| Olupilẹṣẹ Graphics | Intel HD Awọn aworan |
| Awọn kamẹra | 5.0MP Front and Rear |
| Alailowaya Iru | 802.11b, 802.11a, 802.11g |
| Awọn ibudo | Full-size USB 3.0 |
| Iwọn Nkan | 1.8 iwon |
| Ọja Mefa | 11.5 x 0.36 x 7.93 inches |
| Àwọ̀ | Fadaka |
Atilẹyin ọja ati Support
Your Microsoft Surface Pro 3 comes with a standard manufacturer's warranty. For detailed warranty terms and conditions, please refer to the documentation included with your purchase or visit the official Microsoft support webojula.
For technical assistance, troubleshooting guides, driver downloads, and service requests, please visit the Microsoft Surface Support oju-iwe.


