1. Ifihan
O ṣeun fun yiyan awọn KOLINK Refractor Midi-Tower computer case. This manual provides essential information for the proper installation, operation, and maintenance of your new PC chassis. Please read this manual carefully before beginning the assembly process to ensure a smooth and safe build.
1.1 Abo Alaye
- Nigbagbogbo ge asopọ ipese agbara lati inu iṣan ogiri ṣaaju fifi sori ẹrọ tabi yiyọ awọn paati eyikeyi kuro.
- Wọ okun ọwọ-atako-aimi lati ṣe idiwọ isọjade elekitirotatiki (ESD) ibajẹ si awọn paati ifura.
- Handle components with care. Avoid touching pins or circuit boards directly.
- Pa awọn ẹya kekere ati awọn irinṣẹ kuro lọdọ awọn ọmọde.
- Rí i dájú pé afẹ́fẹ́ tó yẹ wà ní àyíká àpótí náà kí ó má baà gbóná jù.
2. Package Awọn akoonu
Jọwọ rii daju pe gbogbo awọn nkan wọnyi wa ninu package rẹ:
- KOLINK Refractor Midi-Tower Chassis
- Àpótí Ẹ̀rọ (tí ó ní àwọn skru, àwọn ìdádúró, àwọn okùn okùn, àti bẹ́ẹ̀ bẹ́ẹ̀ lọ)
- Afowoyi Olumulo (iwe-ipamọ yii)
If any items are missing or damaged, please contact your retailer or KOLINK support.
3. Ọja Ipariview
Familiarize yourself with the key features and components of your KOLINK Refractor Midi-Tower.
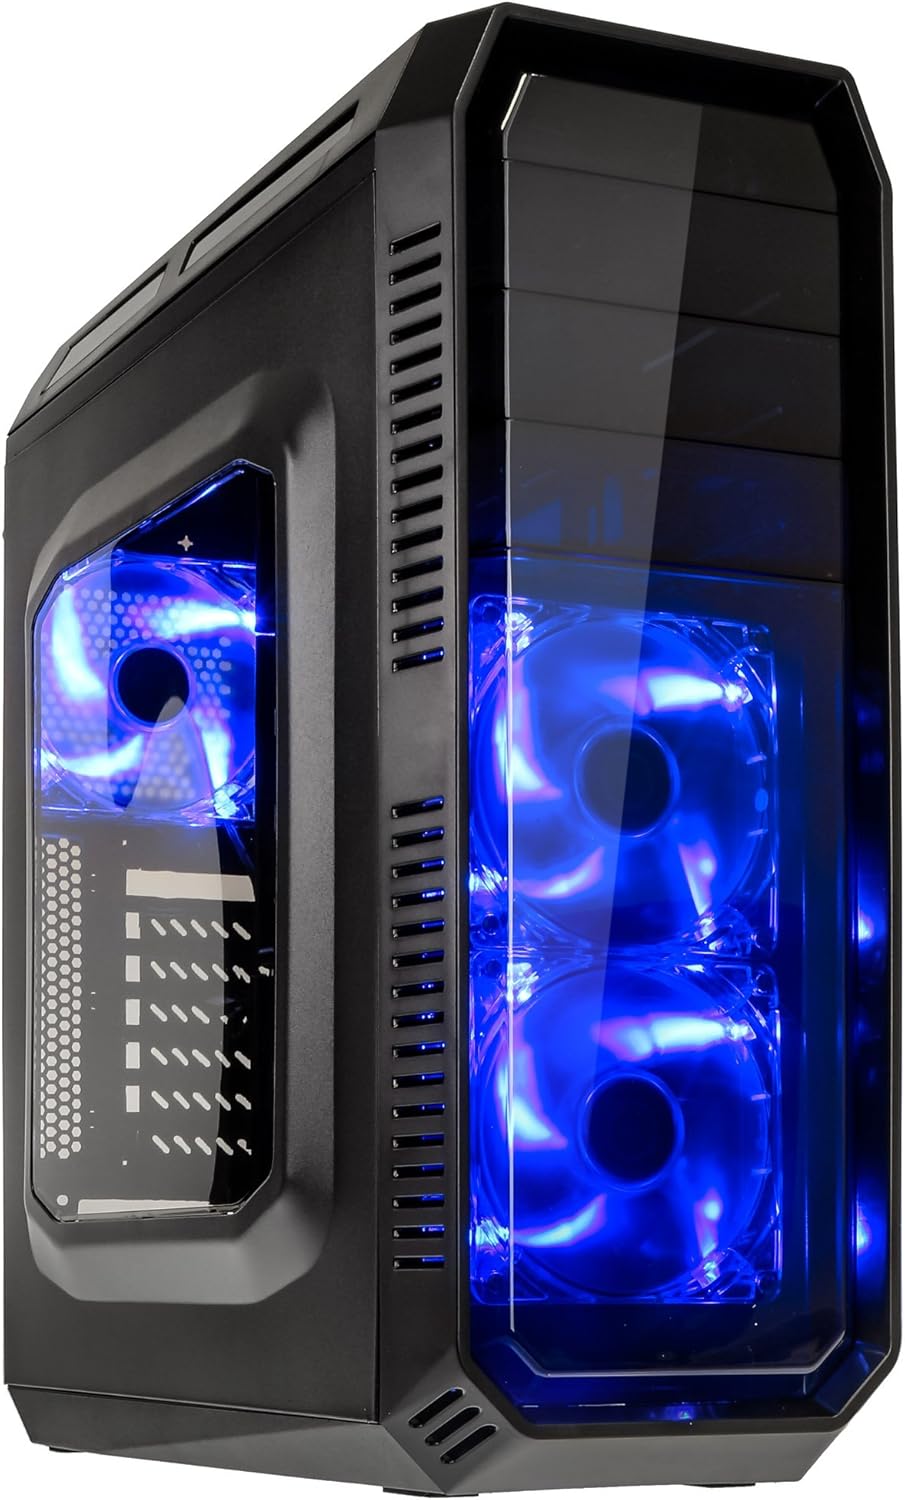
This image displays the KOLINK Refractor Midi-Tower from a front-left perspective, highlighting its sleek black design. The front panel features two pre-installed 120mm blue LED fans, visible through a transparent section, providing both cooling and aesthetic appeal. The left side panel includes a window, allowing visibility of internal components.

A top-front view of the case, illustrating the conveniently located I/O panel on the top. This panel includes two USB 3.0 ports, two USB 2.0 ports, and audio input/output jacks. The top surface also features a mesh area for additional ventilation, contributing to optimal airflow.

This image shows the right side panel of the KOLINK Refractor Midi-Tower. It is a solid black panel, designed for cable management behind the motherboard tray, ensuring a clean and organized interior.

This composite image provides three distinct views of the case. The left panel shows the front with its blue LED fans. The middle panel displays the rear of the case, featuring the motherboard I/O cutout, seven expansion slots, and a 120mm fan mount. The right panel offers a close-up of the top I/O ports, including USB 3.0, USB 2.0, and audio jacks.

A detailed close-up of the top I/O panel. It clearly shows the power and reset buttons, two USB 3.0 ports, two USB 2.0 ports, and the microphone and headphone jacks, providing easy access for peripherals.
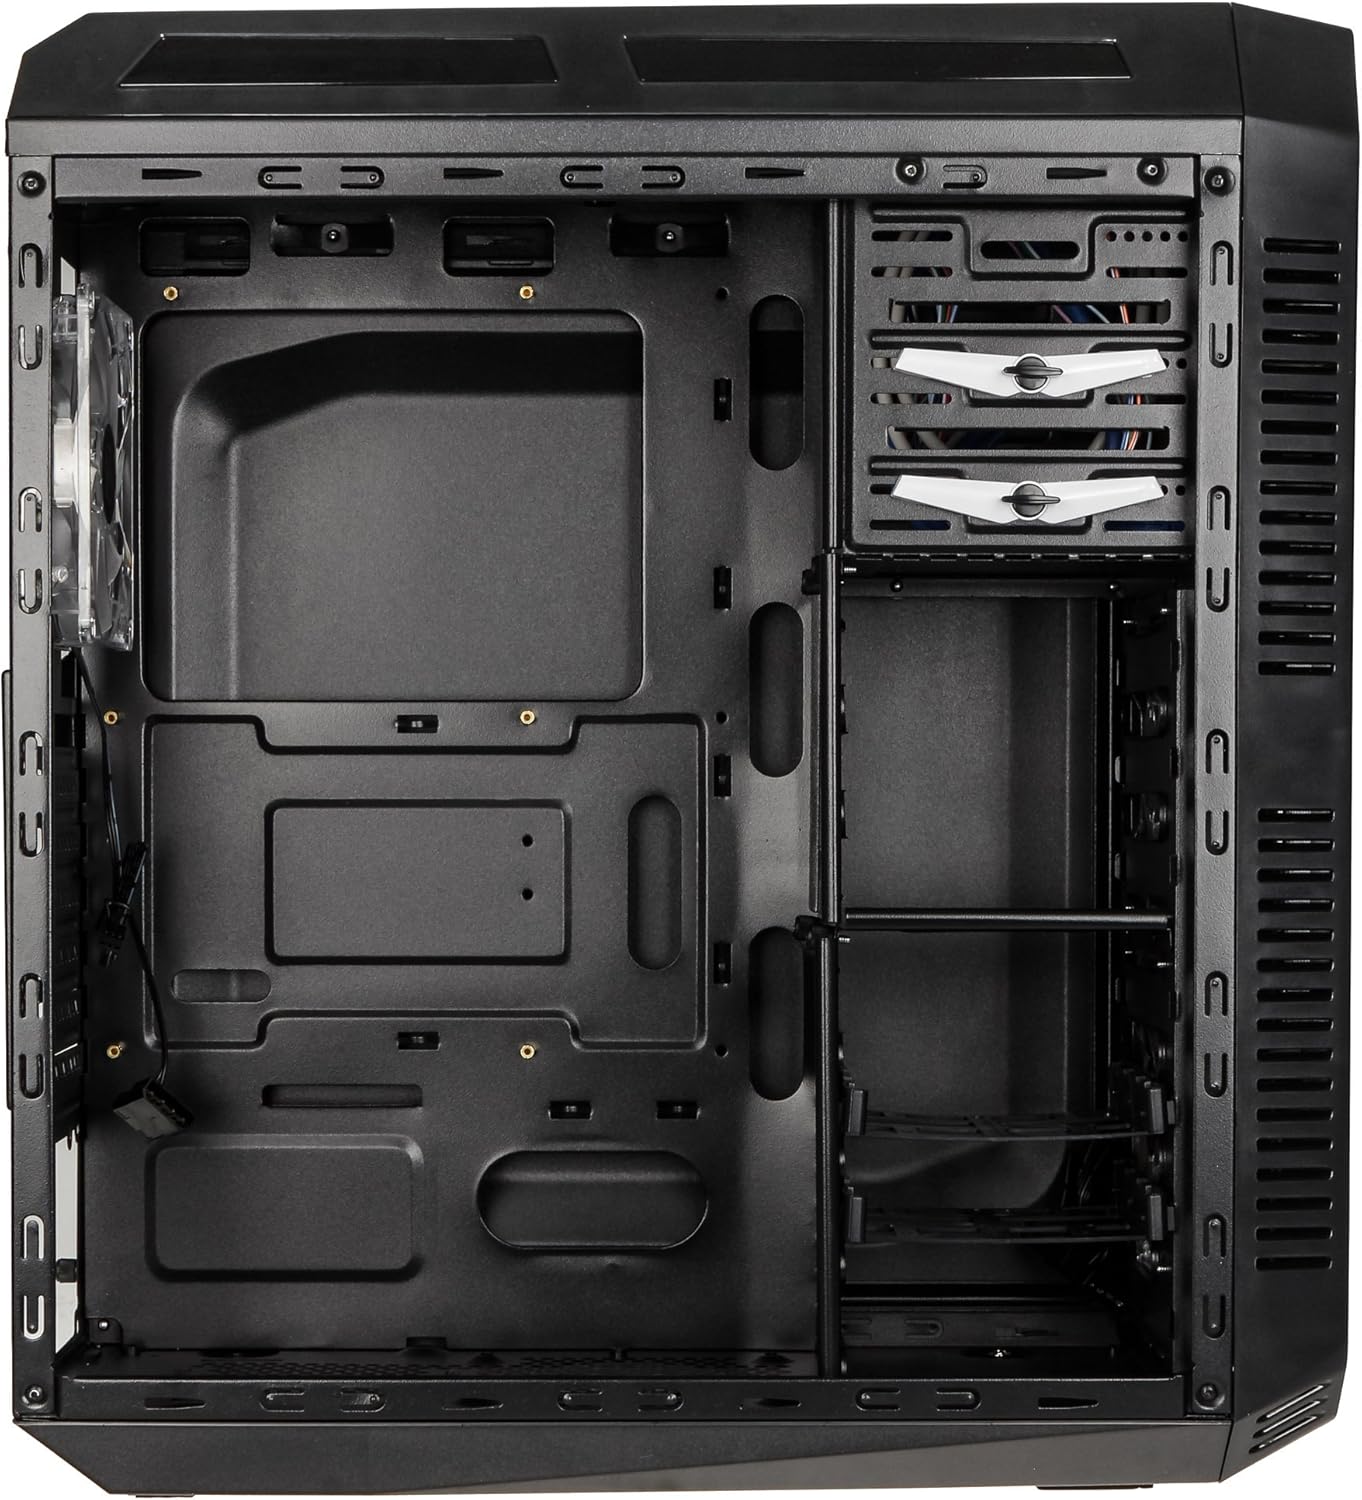
This image presents the interior of the case from the left side, revealing the spacious motherboard tray compatible with ATX motherboards. It features a large cutout behind the CPU area for easy cooler installation and multiple grommeted holes for efficient cable routing.

Ohun ti abẹnu view from the right side, focusing on the drive bay configuration. The case offers three external 5.25-inch bays and seven internal 2.5/3.5-inch drive bays, providing ample storage expansion options.

A closer look at the internal drive bays, illustrating the design for mounting 2.5-inch or 3.5-inch storage drives. These bays are designed for easy installation and removal of hard drives and SSDs.

Aworan yi pese ohun ti abẹnu view looking down from the top, showcasing the pre-installed 120mm blue LED fan at the rear for exhaust. The top panel's mesh area for additional fan mounting is also visible, contributing to overall system cooling.
4. Eto ati fifi sori
Follow these steps to install your computer components into the KOLINK Refractor Midi-Tower.
4.1 Ngbaradi Ọran naa
- Gbe ọran naa sori alapin, dada iduroṣinṣin.
- Remove the left and right side panels by unscrewing the thumbscrews at the rear of the case and sliding the panels backward.
4.2 Fifi sori modaboudu
- Install the I/O shield that came with your motherboard into the cutout at the rear of the case.
- Ensure the correct motherboard standoffs are installed for your ATX motherboard. Adjust or add standoffs as necessary using the provided accessory kit.
- Fi pẹ̀lẹ́pẹ̀lẹ́ gbé mótábódì rẹ sí orí àwọn ibi tí wọ́n ti ń dì í, kí o sì ṣe àtúnṣe àwọn ihò skru náà.
- Secure the motherboard with the appropriate screws from the accessory kit.
4.3 Fifi sori ẹrọ Ipese Agbara
- Position your ATX power supply unit (PSU) in the designated compartment at the bottom rear of the case.
- Align the PSU with the screw holes at the rear of the case.
- Secure the PSU using the screws provided with your power supply.
4.4 wakọ fifi sori
5.25-inch External Drives:
- Remove the desired 5.25-inch bay cover from the front panel.
- Slide your optical drive or other 5.25-inch device into the bay from the front.
- Secure the drive using the tool-less clips or screws.
2.5/3.5-inch Internal Drives:
- Locate the internal drive bays.
- Mount your 2.5-inch SSD or 3.5-inch HDD into the drive trays.
- Slide the populated drive trays back into the drive cage until they click into place.
4.5 Imugboroosi kaadi sori
- Remove the necessary expansion slot covers at the rear of the case.
- Insert your graphics card or other PCIe expansion card into the corresponding slot on the motherboard.
- Secure the card with the provided screws.
4.6 USB Management
Utilize the cable routing holes and tie-down points behind the motherboard tray to organize cables. This improves airflow and gives your build a cleaner appearance.
4.7 Fan Installation (Optional)
The case comes with two 120mm blue LED fans pre-installed at the front and one 120mm blue LED fan at the rear. Additional fan mounting locations include:
- Top: 1x 120/140mm fan
- Bottom: 1x 120mm fan (under the PSU)
Install additional fans as needed for optimal cooling, ensuring proper airflow direction.
5. Awọn ilana Iṣiṣẹ
5.1 Ibẹrẹ Agbara Lori
- Once all components are installed and cables are connected, replace both side panels.
- So monito rẹ, keyboard, mouse, ati awọn ohun elo miiran pọ.
- Connect the power cable to the PSU and then to a wall outlet.
- Press the power button on the top I/O panel to start your system.
5.2 Front Panel I/O Usage
The top I/O panel provides convenient access to:
- Awọn ibudo USB 3.0 (x2): Fun gbigbe data iyara-giga pẹlu awọn ẹrọ ibaramu.
- Awọn ibudo USB 2.0 (x2): Fun pọ boṣewa USB awọn ẹrọ.
- Audio Jacks (Headphone/Microphone): Fun sisopọ awọn agbekọri tabi awọn ẹrọ ohun ita gbangba.
- Bọtini agbara: Lati tan-an/pa eto naa.
- Bọtini atunto: Lati tun eto naa bẹrẹ.
5.3 Imọlẹ LED
The pre-installed front and rear fans feature blue LED lighting, which illuminates when the system is powered on, adding an aesthetic element to your build.
6. Itọju
Itọju deede ṣe iranlọwọ lati rii daju iṣẹ ṣiṣe to dara julọ ati igbesi aye gigun ti ẹrọ kọnputa rẹ.
6.1 Ninu
- Awọn Ajọ Eruku: The case includes a removable dust filter under the PSU. Regularly remove and clean this filter to prevent dust buildup and maintain airflow.
- Òde: Mu ese ita gbangba pẹlu asọ, damp asọ. Yago fun abrasive ose.
- Inu inu: Periodically use compressed air to remove dust from internal components and fan blades. Ensure the system is powered off and unplugged before cleaning the interior.
6.2 Airflow Optimization
Ensure that the case's ventilation areas (front, top, rear, bottom) are not obstructed. Proper cable management also contributes significantly to unrestricted airflow within the case.
7. Laasigbotitusita
Abala yii n ṣalaye awọn ọran ti o wọpọ ti o le ba pade.
7.1 wọpọ oran
- Eto Ko Titan:
- Ṣàyẹ̀wò bóyá okùn agbára náà so mọ́ PSU àti ibi ìjáde ògiri dáadáa.
- Rii daju pe iyipada PSU wa ni ipo 'ON'.
- Rí i dájú pé okùn bọ́tìnì agbára iwájú wà ní ìsopọ̀ dáadáa pẹ̀lú modaboudu.
- Confirm all internal power cables (24-pin ATX, CPU, GPU) are properly seated.
- Awọn onijakidijagan Ko Yiyi:
- Check if the fan power cables are correctly connected to the motherboard or fan controller.
- Ensure the system is receiving power.
- Awọn ibudo USB Ko Ṣiṣẹ:
- Verify that the front panel USB 3.0 and USB 2.0 headers are correctly connected to the motherboard.
- Ensure the device you are connecting is functioning correctly.
- Audio Ports Not Working:
- Check that the front panel audio header (HD Audio) is correctly connected to the motherboard.
- Confirm your audio drivers are installed and up to date.
For further assistance, please refer to your motherboard manual or contact KOLINK support.
8. Awọn pato
Alaye imọ ni pato fun awọn KOLINK Refractor Midi-Tower.
| Ẹya ara ẹrọ | Sipesifikesonu |
|---|---|
| Orukọ awoṣe | Refractor Midi-Tower |
| Awọn iwọn (W x H x D) | 190 x 475 x 445 mm (7.5 x 18.7 x 17.5 inches) |
| Ohun elo | Steel (body), Plastic (front) |
| Iwọn | Isunmọ. 4.8 kg (10.6 lbs) |
| Àwọ̀ | Dudu |
| Fọọmù ifosiwewe | Ile-iṣọ Midi |
| Modaboudu Ibamu | ATX |
| Ita Drive Bays | 3x 5.25-inch |
| Ti abẹnu wakọ Bays | 7x 2.5/3.5-inch |
| Imugboroosi Iho | 7 |
| Awọn onijakidijagan ti a ti fi sii tẹlẹ | 2x 120mm (front, blue LED), 1x 120mm (rear, blue LED) |
| Fan Support (Total Possible) | Front: 2x 120mm, Top: 1x 120/140mm, Bottom: 1x 120mm, Rear: 1x 120mm |
| I/O igbimo | 2x USB 3.0, 2x USB 2.0, 1x Audio In/Out |
| Iwọn Kaadi Awọn aworan ti o pọju | 360 mm |
| O pọju Sipiyu kula Giga | 174 mm |
| PSU Compatibility | Standard ATX (optional) |
| Awọn Ajọ eruku | Floor (under PSU, removable) |
9. Atilẹyin ọja ati Support
KOLINK products are manufactured to high-quality standards. This product is covered by a manufacturer's warranty against defects in materials and workmanship. The specific terms and duration of the warranty may vary by region and retailer.
Please retain your proof of purchase for warranty claims. For technical support, warranty inquiries, or to report missing/damaged parts, please contact your point of purchase or visit the official KOLINK webojula fun support oro.
KOLINK Official Webojula: www.kolink.eu (Please note: This is a general link and may not lead directly to a support page for this specific model.)


