1. Ifihan
The KitchenAid KSMPSA Pasta Roller Attachment is designed to work with your KitchenAid Stand Mixer to simplify the process of making fresh, homemade pasta sheets. This attachment allows you to roll 6-inch wide pasta sheets with adjustable thickness, providing a foundation for various pasta types.

Image: KitchenAid Stand Mixer with the KSMPSA Pasta Roller Attachment actively rolling a sheet of pasta dough.
2. Awọn Ilana Aabo pataki
- Always ensure the stand mixer is unplugged before attaching or removing the pasta roller.
- Keep fingers and utensils away from the rollers during operation to prevent injury.
- Do not immerse the pasta roller in water or other liquids for cleaning. Refer to the cleaning instructions.
- Use only with KitchenAid Stand Mixers.
- Ṣe abojuto awọn ọmọde ni pẹkipẹki nigbati ohun elo ba wa ni lilo.
3. Kini To wa
Your KitchenAid KSMPSA Pasta Roller Attachment package includes:
- (1) Pasta Roller Attachment
- (1) Fifọ Fẹlẹ
4. Eto ati Asomọ
- Rii daju pe agbara kuro: Unplug your KitchenAid Stand Mixer from the electrical outlet.
- Yọ ideri ibudo kuro: Loosen the attachment knob on the mixer's power hub by turning it counter-clockwise. Remove the hub cover.
- Fi Àfikún sí i: Insert the shaft of the pasta roller attachment into the power hub, ensuring the power shaft of the attachment fits into the square hub socket.
- Asomọ to ni aabo: Rotate the attachment back and forth if necessary until it fits securely into the power hub. Tighten the attachment knob by turning it clockwise until the attachment is completely secured to the mixer.
- Múra ẹ̀rọ àdàpọ̀: Place a bowl under the pasta roller to catch the pasta sheets.
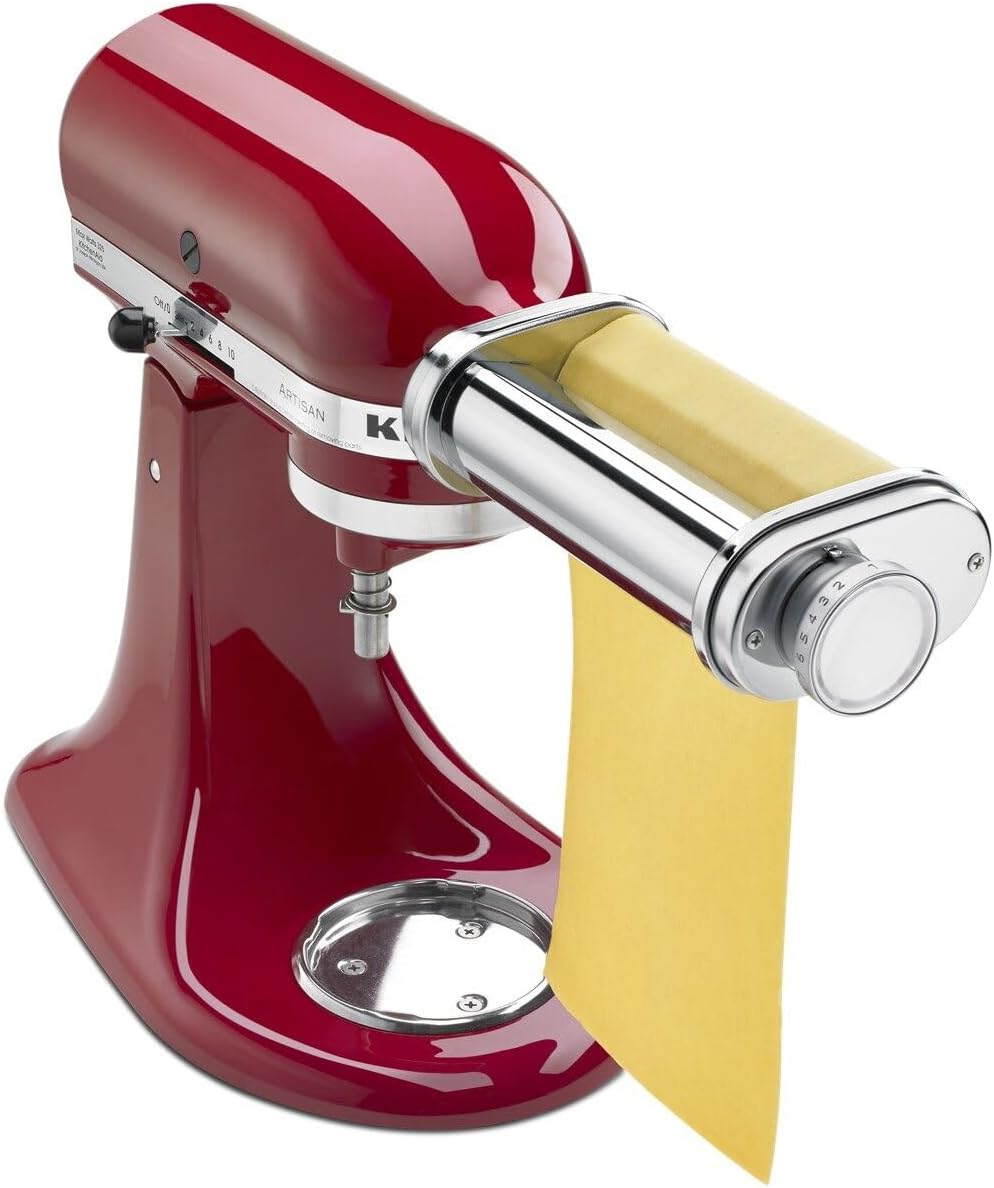
Image: The KitchenAid KSMPSA Pasta Roller Attachment correctly installed on a KitchenAid Stand Mixer.
Video: Official KitchenAid product video demonstrating the installation and basic operation of the pasta roller attachment.
5. Awọn ilana Iṣiṣẹ
The pasta roller features 8 thickness settings to achieve your desired pasta sheet consistency. Always start with the thickest setting (1) and gradually decrease the thickness.
- Múra Ìyẹ̀fun: Ensure your pasta dough is well-kneaded and rested. Flatten a portion of the dough into a rectangle that is slightly narrower than the pasta roller (approximately 5-6 inches wide).
- Set Thickness: Set the pasta roller to the thickest setting (1).
- Agbara Tan: Plug in the stand mixer and turn it to speed 2.
- Ikọja akọkọ: Feed the flattened dough into the pasta roller. Guide the dough with your hands as it passes through.
- Fold and Repeat: Fold the pasta sheet in half or thirds, then feed it through the thickest setting again. Repeat this process 2-3 times until the dough is smooth and pliable.
- Decrease Thickness: Gradually decrease the thickness setting one step at a time (e.g., from 1 to 2, then 2 to 3, and so on). Feed the pasta sheet through each setting once or twice until you reach your desired thickness. For thin pasta, settings 6-8 are typically used.
- Mu Ni pẹkipẹki: As the pasta sheets become thinner, they will also become longer. Handle them gently to prevent tearing.

Image: A user demonstrating the feeding of pasta dough into the KitchenAid Pasta Roller Attachment.

Image: Detail of the thickness adjustment dial on the pasta roller, indicating 8 available settings.
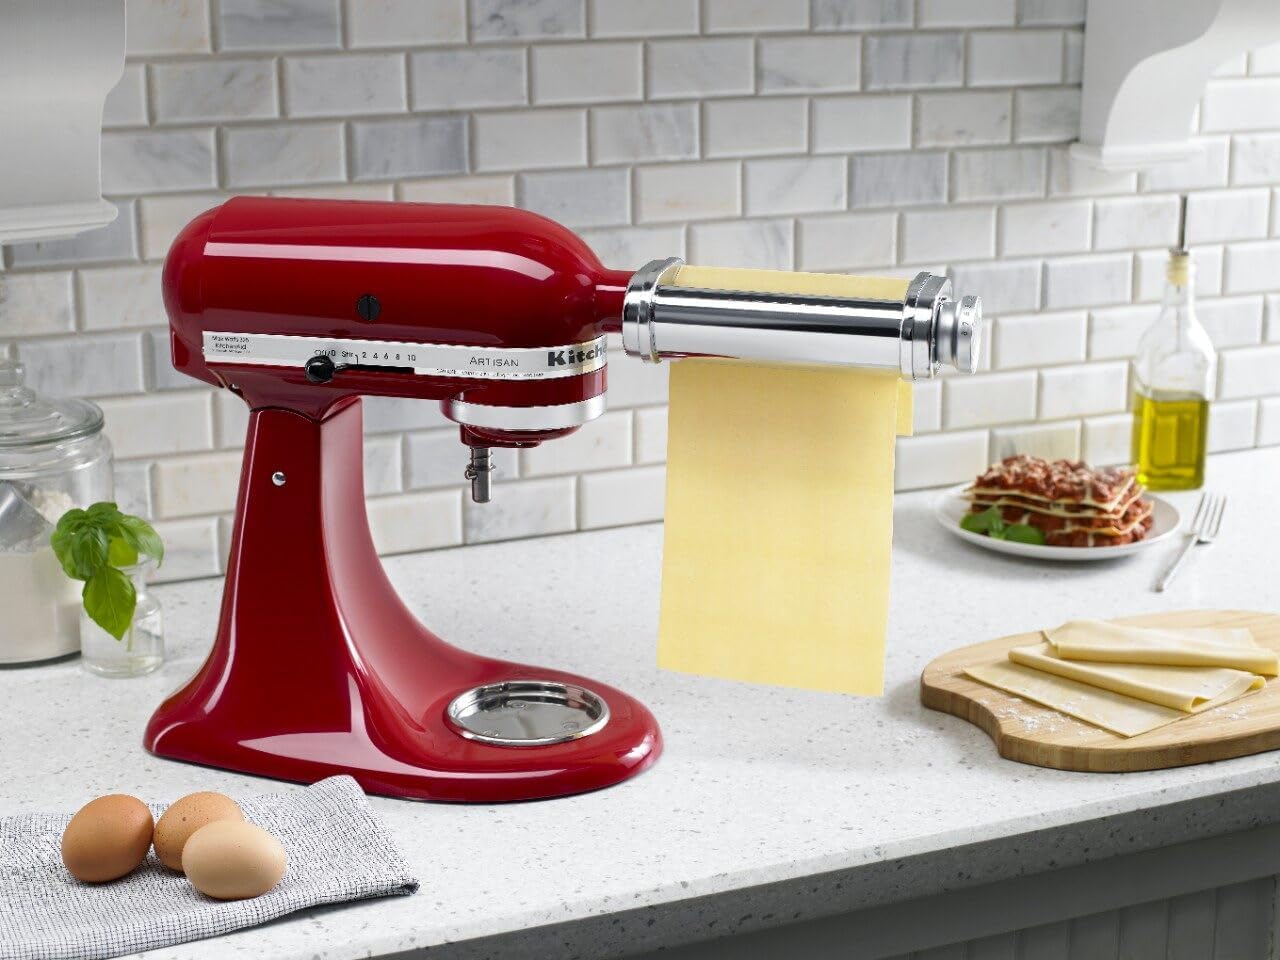
Image: Multiple sheets of fresh pasta dough, rolled to an even thickness, displayed on a countertop.
6. Itọju ati Cleaning
Proper cleaning ensures the longevity and performance of your pasta roller attachment.
- Maṣe Fọ: The pasta roller attachment is KÌ Í ṢE Ààbò fún ẹ̀rọ fifọ ẹ̀rọ and should NOT be immersed in water or other liquids. This can damage the internal mechanisms and lead to rusting.
- Gba laaye lati gbẹ: After use, allow the attachment to air dry for approximately 30 minutes to an hour. This allows any residual dough to dry and harden, making it easier to remove.
- Fẹlẹ Mọ: Use the provided cleaning brush to remove any dried dough or flour from the rollers and crevices. A toothpick or small, stiff brush can also be used for stubborn bits.
- Pa Ode nu: Wipe the exterior of the attachment with a soft, damp asọ. Rii daju pe o ti gbẹ patapata ṣaaju titoju.
- Ibi ipamọ: Store the attachment in a dry place.
7. Laasigbotitusita
| Isoro | Owun to le Fa | Ojutu |
|---|---|---|
| Dough sticks to rollers. | Dough is too sticky or not floured enough. | Add more flour to the dough or lightly dust the dough surface with flour before feeding. Ensure dough is not too wet. |
| Pasta sheets tear easily. | Dough is too dry or rolled too thin too quickly. | If dough is dry, lightly mist with water. Ensure you gradually decrease thickness settings, allowing the dough to stretch. |
| Asomọ naa ko ba ara mu daradara. | Attachment not aligned with power hub. | Ensure the mixer is unplugged. Re-insert the attachment, rotating slightly until the shaft aligns with the square hub socket. Tighten the knob firmly. |
8. Awọn pato
| Ẹya ara ẹrọ | Ẹ̀kúnrẹ́rẹ́ |
|---|---|
| Nọmba awoṣe | KSMPSA |
| Ohun elo | Irin ti ko njepata |
| Awọn iwọn Ọja (L x W x H) | 9.7" x 3.8" x 2.2" |
| Iwọn Nkan | 2.4 iwon |
| Iye Awọn Eto Sisanra | 8 |
| Ipo Isẹ | Manual (powered by stand mixer) |
| Ailewu ifoso | Rárá (A ṣeduro fifọ ọwọ) |
| Apejọ ti a beere | Bẹẹni |
9. Atilẹyin ọja ati Support
This KitchenAid KSMPSA Pasta Roller Attachment comes with a 1-Odun Atilẹyin ọja Limited lati olupese.
For technical support, warranty claims, or replacement parts, please refer to the contact information provided in your original product packaging or visit the official KitchenAid webojula.
O tun le ṣàbẹwò awọn Ile itaja KitchenAid lori Amazon fun alaye siwaju sii ati awọn ọja.


