1. Ifihan
This manual provides detailed instructions for the safe and effective operation of your Profile 191000001 Digital Multimeter. This device is designed for measuring DC/AC voltage, DC current, resistance, diode forward voltage drop, and transistor hFE. Please read this manual thoroughly before use and retain it for future reference.
2. Alaye Aabo
WARNING: Failure to follow these safety instructions can result in electric shock, fire, or personal injury.
- Rí i dájú pé multimeter náà wà ní ipò tó dára kí o tó lò ó. Ṣe àyẹ̀wò àwọn ìtọ́sọ́nà ìdánwò fún ìbàjẹ́.
- Maṣe lo diẹ sii ju iwọn voltage (600V DC/AC) between the terminals or between any terminal and ground.
- Lo iṣọra pupọ nigbati o ba n ṣiṣẹ pẹlu voltages loke 30V AC RMS, 42V tente oke, tabi 60V DC. Awọn wọnyi ni voltages duro a mọnamọna ewu.
- Máa yọ àwọn ìtọ́sọ́nà ìdánwò kúrò nínú àyíká náà kí o tó yí àwọn iṣẹ́ padà.
- Do not attempt to measure current on a circuit with voltage koja 600V.
- Rí i dájú pé a yan iṣẹ́ àti ìwọ̀n tó yẹ fún ìwọ̀n náà.
- Rọpo awọn batiri nigbati ifihan batiri kekere ba han lati rii daju pe o peye awọn kika.
- Má ṣe lo multimeter náà níbi tí àwọn nǹkan tó ń bú gbàù tàbí níbi tí àwọn gáàsì tàbí eruku tó lè jóná bá wà.
3. Package Awọn akoonu
Daju pe gbogbo awọn nkan ti a ṣe akojọ rẹ si isalẹ wa ninu package rẹ:
- Profile 191000001 Digital Multimeter
- One pair of Test Leads (Red and Black)
- Transistor hFE Test Adapter
- 2 x 1.5V AAA Batteries (may be pre-installed)
- Itọsọna olumulo

Figure 1: The Profile 191000001 Digital Multimeter, including the main unit, red and black test leads, and the hFE transistor test adapter.
4. Eto
4.1. Fifi sori batiri
The multimeter requires two 1.5V AAA batteries for operation. These are typically included and may be pre-installed. If not, or if replacement is needed:
- Rii daju pe multimeter ti wa ni pipa.
- Wa ideri iyẹwu batiri ni ẹhin ẹyọ naa.
- Lo screwdriver lati yọ skru ti o ni aabo ideri naa.
- Insert the two AAA batteries, observing the correct polarity (+ and - markings).
- Rọpo ideri kompaktimenti batiri ki o ni aabo pẹlu dabaru.
4.2. Nsopọ Awọn itọsọna Igbeyewo
The test leads are essential for making measurements. Connect them as follows:
- Fi okun idanwo dudu sinu jaketi 'COM' (Common).
- Fún ọ̀pọ̀lọpọ̀ ìpeletage, resistance, and diode measurements, insert the red test lead into the 'VΩmA' jack.
- For current measurements up to 10A, insert the red test lead into the '10A' jack.
5. Awọn ilana Iṣiṣẹ
The multimeter features a rotary switch to select the desired measurement function and range. The display will show the measurement value.
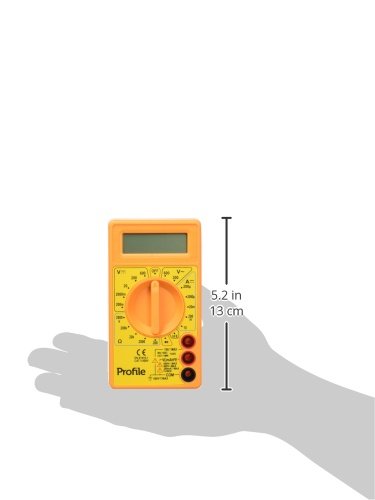
Figure 2: The Profile 191000001 Digital Multimeter with an overlay indicating its approximate dimensions (13 cm height).
5.1. Wiwọn DC Voltage (V---)
- Connect the red test lead to the 'VΩmA' jack and the black test lead to the 'COM' jack.
- Ṣeto iyipada iyipo si DC Vol ti o fẹtage range (e.g., 20V, 200V, 600V). If the voltage is unknown, start with the highest range and decrease as needed.
- So awọn okun idanwo pọ ni afiwe kọja paati tabi iyika ti a o wọn.
- Ka voltage iye lori ifihan.
5.2. Wiwọn AC Voltage (V~)
- Connect the red test lead to the 'VΩmA' jack and the black test lead to the 'COM' jack.
- Ṣeto iyipada iyipo si AC Vol ti o fẹtagibi tí a lè lo agbára iná (fún àpẹẹrẹ, 200V, 600V).
- Connect the test leads in parallel across the AC source or component.
- Ka voltage iye lori ifihan.
5.3. Measuring DC Current (A---)
CAUTION: To avoid damage to the multimeter or the circuit, never connect the multimeter in parallel when measuring current. Always connect it in series.
- For currents up to 200mA, connect the red test lead to the 'VΩmA' jack. For currents up to 10A, connect the red test lead to the '10A' jack. The black test lead always connects to 'COM'.
- Set the rotary switch to the desired DC Current range (e.g., 200µA, 2mA, 20mA, 200mA, 10A).
- Ṣí àyíká ibi tí a fẹ́ wọn ìsanwó náà kí o sì so multimeter náà pọ̀ ní ìtẹ̀léra.
- Ka iye lọwọlọwọ lori ifihan naa.
5.4. Ìwọ̀n Àìdádúró (Ω)
- Connect the red test lead to the 'VΩmA' jack and the black test lead to the 'COM' jack.
- Set the rotary switch to the desired Resistance range (e.g., 200Ω, 2kΩ, 20kΩ, 200kΩ, 2MΩ).
- Rí i dájú pé agbára ìṣiṣẹ́ tàbí ohun èlò náà ti dínkù kí o tó wọn agbára ìdènà.
- So awọn itọsọna idanwo kọja paati naa.
- Ka iye resistance lori ifihan.
5.5. Diode igbeyewo
- Connect the red test lead to the 'VΩmA' jack and the black test lead to the 'COM' jack.
- Ṣeto iyipada iyipo si aami diode (→|).
- So okun pupa mọ anode ati okun dudu mọ katode ti diode naa. Ifihan naa yoo fi okun iwaju han.tage ju.
- Reverse the leads. The display should show 'OL' (Overload) for a good diode.
5.6. Transistor hFE Idanwo
- Set the rotary switch to the 'hFE' position.
- Insert the transistor hFE test adapter into the designated sockets on the multimeter.
- Identify if the transistor is NPN or PNP and its Emitter (E), Base (B), Collector (C) terminals.
- Insert the transistor leads into the corresponding holes on the hFE adapter.
- Read the hFE (DC current gain) value on the display.
6. Itọju
6.1. Batiri Rirọpo
Tí àmì bá hàn lórí ìbòjú, yí àwọn bátìrì padà kíákíá láti rí i dájú pé wọ́n wọn dáadáa. Wo Apá 4.1 fún ìtọ́ni lórí bí a ṣe ń fi bátìrì sí.
6.2. Ninu
Lati nu multimeter, nu ọran naa pẹlu ipolowoamp asọ ati ki o kan ìwọnba detergent. Maṣe lo awọn abrasives tabi awọn nkan ti o nfo. Rii daju pe ẹrọ naa ti gbẹ patapata ṣaaju lilo.
6.3. Ibi ipamọ
If the multimeter is not used for an extended period, remove the batteries to prevent leakage and store the device in a cool, dry place away from direct sunlight.
7. Laasigbotitusita
- Ko si ifihan tabi ifihan ti ko lagbara: Check battery charge and ensure they are correctly installed. Replace batteries if necessary.
- 'OL' (Overload) on display: The measured value exceeds the selected range. Switch to a higher range.
- Awọn kika ti ko tọ: Ensure test leads are properly connected, the correct function and range are selected, and the batteries are not low. Verify the circuit is de-energized for resistance measurements.
- No reading for current: Ensure the multimeter is connected in series with the circuit and the correct current jack (VΩmA or 10A) is used for the red lead.
8. Awọn pato
| Ẹya ara ẹrọ | Sipesifikesonu |
|---|---|
| Nọmba awoṣe | 191000001 |
| Max DC/AC Voltage | 600V |
| Max DC Current | 10A |
| Idiwọn Resistance | Bẹẹni |
| Idiwọn Ẹrọ ẹlẹwọn | Bẹẹni |
| Iwọn transistor hFE | Bẹẹni |
| Orisun agbara | 2 x 1.5V AAA Awọn batiri |
| Awọn iwọn Ọja (L x W x H) | 13.5 x 3 x 18.9 cm (5.3 x 1.2 x 7.4 inches) |
| Iwọn Ọja | 0.22 kg (0.48 lbs) |
| Olupese | Eltra N.V. |
9. Atilẹyin ọja ati Support
9.1. Atilẹyin ọja
This Profile 191000001 Digital Multimeter comes with a 2-year warranty from the date of purchase, covering manufacturing defects. This warranty does not cover damage caused by misuse, unauthorized modification, accident, or normal wear and tear.
9.2. Onibara Support
For technical assistance, warranty claims, or further inquiries, please contact your retailer or the manufacturer's customer support channels. Please have your product model number and proof of purchase ready when contacting support.


