1. Ifihan
Thank you for choosing the Comfee Mobile Air Conditioner MPPH-09CRN7. This manual provides essential information for the safe and efficient operation of your appliance. Please read it thoroughly before use and retain it for future reference.
This 3-in-1 unit offers cooling, dehumidification, and fan modes, designed for rooms up to 33m² (88m³).

Aworan: Iwaju view of the Comfee Mobile Air Conditioner MPPH-09CRN7.
2. Alaye Aabo
Nigbagbogbo tẹle awọn iṣọra aabo ipilẹ nigba lilo awọn ohun elo itanna lati dinku eewu ina, mọnamọna, tabi ipalara.
- Rii daju pe ipese agbara ibaamu voltage pato lori awọn Rating aami.
- Ma ṣe ṣiṣẹ ẹyọ naa pẹlu okun ti o bajẹ tabi pulọọgi.
- Jeki ẹrọ kuro ni awọn orisun ooru ati oorun taara.
- Ma ṣe dina awọn ẹnu-ọna afẹfẹ tabi awọn ita.
- Ohun èlò yìí ń lo ìfọ́jú R290. Má ṣe gún ìyípo ìfọ́jú náà.
3. Ọja irinše ati awọn ẹya ẹrọ
The Comfee Mobile Air Conditioner MPPH-09CRN7 comes with the following components:

Image: Diagram showing all included accessories for the mobile air conditioner.
- eefi Hose
- Ohun elo Adapter
- Apo Slider Window
- Foam Seal (non-adhesive)
- Eefi Hose Adapter
- Wall Outlet Adapter
- Foam Seal (adhesive)
- Screws, Bolts, Anchors
- Isakoṣo latọna jijin
- Ifaworanhan Window
- Imugbẹ Okun
The unit also features four castor wheels for easy mobility.
Aworan: Isunmọ view of the castor wheels on the base of the air conditioner, highlighting its mobility.
4. Eto ati fifi sori
Proper installation is crucial for optimal performance. Follow these steps for setting up your mobile air conditioner:
4.1 Eefi Hose fifi sori
The exhaust hose expels hot air from the room. Ensure it is installed correctly to prevent hot air recirculation.

Image: Three options for installing the exhaust hose: through a wall air outlet, a window adapter, or a window with a "Hot Air Stop" cover.
- Option 1: Wall Air Outlet: Drill and install the hose in a dedicated air outlet.
- Option 2: Window Adapter: Assemble and install the hose in the provided window adapter.
- Option 3: Window with "Hot Air Stop" Cover: Assemble and install the hose in the window using a "Hot Air Stop" cover (not included).
4.2 Window Slider Kit Installation
For window installation, use the provided window slider kit to seal the opening and maximize cooling efficiency.

Image: Step-by-step guide for installing the window slider kit: 1. Open the window. 2. Install the window slider adapter. 3. Seal and secure the adapter. 4. Install the exhaust hose to the adapter. 5. Attach the exhaust hose to the unit. 6. Power on and activate the device.
- Ṣii window naa.
- Install the window slider adapter into the window opening.
- Seal and secure the adapter to prevent air leakage.
- Install the exhaust hose to the adapter.
- Attach the exhaust hose to the air conditioner unit.
- Plug in the unit and activate it.
5. Awọn ilana Iṣiṣẹ
5.1 Iṣakoso igbimo ati isakoṣo latọna jijin
The unit can be operated via the control panel on top of the unit or the included remote control.

Image: Layout of the remote control and the top control panel of the air conditioner, indicating various buttons and their functions.
Awọn iṣẹ iṣakoso latọna jijin:
- Titan / Paa
- Modes Control (Cooling, Fan, Dehumidification)
- Fan Speed Iṣakoso
- Iṣakoso Ipo orun
- Temperature Control (Up/Down)
- DIY Mode Control
- Timer Control (Timer On/Timer Off)
- Iṣakoso Imọlẹ LED
- "Follow Me" Function (on remote)
The "Follow Me" function on the remote control helps monitor and control the temperature around you, providing more precise cooling.

Image: A person using the remote control to operate the Comfee mobile air conditioner, demonstrating the "Smart Cooling" feature.
5.2 Awọn ọna ṣiṣe
The unit features three primary operating modes:

Image: Visual representation of the three functional modes: Cooling Mode, Fan Mode, and Dehumidification Mode. Note: For dehumidification, a hose for water drainage is required.
- Ipo itutu: Provides powerful cooling for your room.
- Ipo Ipele: Circulates air without cooling, offering ventilation.
- Ipò Ìtújáde: Removes excess moisture from the air. A drain hose must be connected for continuous drainage in this mode.
5.3 Aago Išė
The 24-hour timer function allows you to set the unit to turn on or off automatically at a desired time.

Image: A visual representation of the 24-hour timer function, showing a clock face around the air conditioner unit.
5.4 Laifọwọyi Tun
Ni ọran ti agbara kan otage, the unit will automatically restart with its previous settings once power is restored.

Image: A stylized image of a microchip with the Comfee logo, illustrating the automatic restart function.
5.5 Noise Level and Sleep Mode
The unit is designed for lower noise operation, especially in Sleep Mode, where the sound pressure level can be reduced to 46.9 dB(A).

Image: A person sleeping peacefully next to the air conditioner, with a decibel meter graphic showing noise levels, emphasizing the low noise operation.
6. Itọju
Itọju deede ṣe idaniloju igbesi aye gigun ati ṣiṣe ti afẹfẹ afẹfẹ rẹ.
6.1 Filter Cleaning
The washable filter should be cleaned regularly to maintain air quality and cooling performance.
- Paa ati yọọ kuro ṣaaju ṣiṣe mimọ.
- Yọ air àlẹmọ lati pada ti awọn kuro.
- Fi omi gbígbóná àti ọṣẹ fọ àlẹ̀mọ́ náà.
- Fi omi wẹ̀ ẹ́ dáadáa kí o sì jẹ́ kí afẹ́fẹ́ gbẹ pátápátá kí o tó tún fi sínú rẹ̀.
6.2 Omi idominugere
The unit has a self-evaporative system, but in high humidity or dehumidification mode, manual drainage may be required.
- Locate the drain port at the bottom rear of the unit.
- Place a shallow pan or connect the drain hose to the port.
- Yọ plug sisan kuro lati jẹ ki omi san jade.
- Replace the plug securely after drainage.
7. Laasigbotitusita
Ṣaaju ki o to kan si atilẹyin alabara, jọwọ tọka si awọn ọran ti o wọpọ ati awọn ojutu wọnyi:
| Isoro | Owun to le Fa | Ojutu |
|---|---|---|
| Ẹka ko ni tan-an. | No power supply; power cord unplugged; fuse blown. | Check power connection; check circuit breaker/fuse. |
| Ẹka ko ni tutu daradara. | Windows/doors open; air filter dirty; exhaust hose not properly installed; room too large. | Close windows/doors; clean air filter; ensure exhaust hose is sealed; verify room size is within specifications. |
| Omi jijo. | Drain plug loose; unit tilted; drain hose clogged. | Secure drain plug; place unit on a level surface; clear drain hose. |
| Ariwo ti ko wọpọ. | Unit not on a level surface; internal component issue. | Place unit on a flat, stable surface. If noise persists, contact support. |
8. Imọ ni pato
| Ẹya ara ẹrọ | Sipesifikesonu |
|---|---|
| Nọmba awoṣe | MPPH-09CRN7 |
| Agbara Itutu | 9000 BTU/h (2.6 kW/h) |
| Niyanju Yara Iwon | Up to 33m² (88m³) |
| Agbara agbara | 1000 Wattis |
| Voltage | 230 Volts |
| Ariwo Ipele | 47 dB |
| Firiji | R290 (Climate Neutral) |
| Awọn iwọn (L x W x H) | 34.49 x 35.51 x 70.31 cm |
| Iwọn | 25.3 kilo |
| Agbara Agbara Kilasi | A |
| Pataki Awọn ẹya ara ẹrọ | Dehumidifier, Automatic Restart, 24-hour Timer, Sleep Mode, Smart Cooling with "Follow Me" function |

Image: Diagram showing the dimensions of the Comfee Mobile Air Conditioner: 70.3cm height, 35.5cm width, 34.5cm depth.
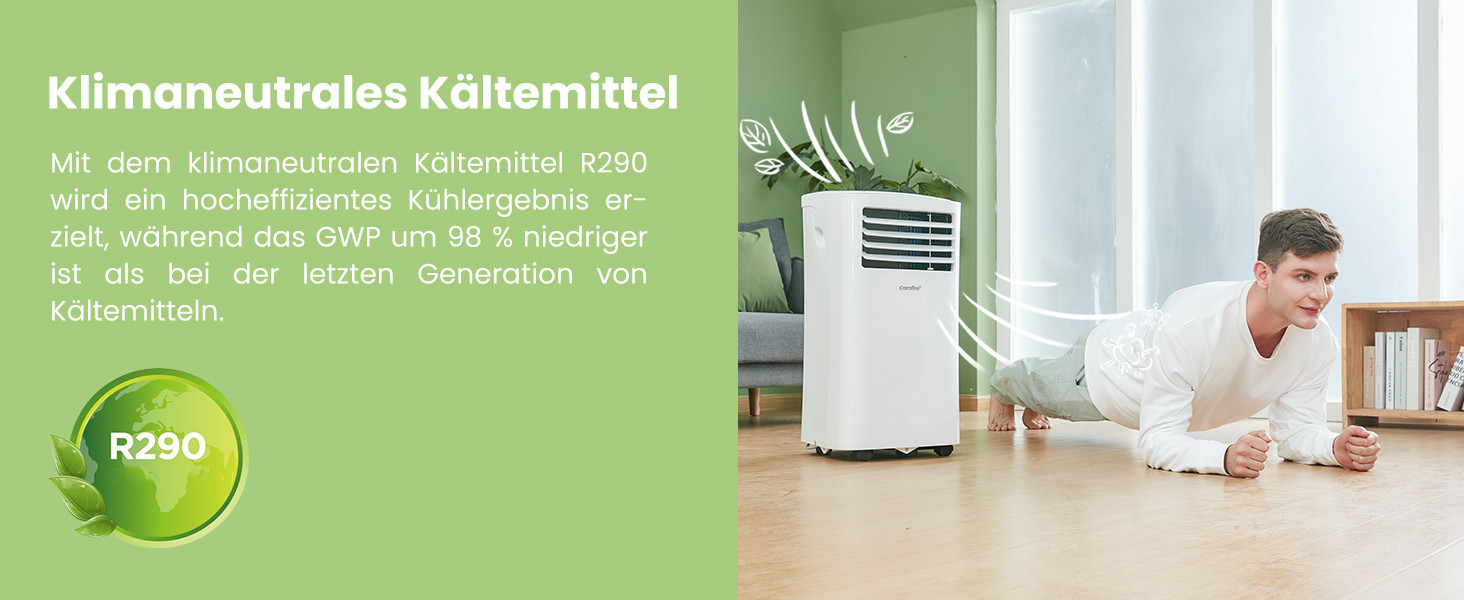
The unit uses R290, a climate-neutral refrigerant with significantly lower Global Warming Potential (GWP) compared to previous generations of refrigerants.

Image: Illustration highlighting the use of R290 climate-neutral refrigerant, with a person doing a plank exercise next to the unit.
9. atilẹyin ọja Information
This product is covered by a manufacturer's warranty. Please refer to the warranty card included in your product packaging for specific terms and conditions, including warranty period and coverage details. Retain your proof of purchase for warranty claims.
10. Onibara Support
For technical assistance, troubleshooting beyond this manual, or warranty inquiries, please contact Comfee customer support. Contact details can typically be found on the manufacturer's webaaye tabi ni apoti ọja.
You can also visit the official Comfee store on Amazon for more information and support: Comfee Store


