1. Ifihan
This instruction manual provides essential information for the proper installation and maintenance of the Panasonic Strada CN-F1XD compatible Digital TV Film Antenna and 3M Double-Sided Tape Set. This product is designed to replace or upgrade the terrestrial digital broadcast reception antenna for your car navigation system, ensuring stable and clear signal reception.
2. Ọja Ipariview ati Awọn akoonu Package
The set includes genuine Panasonic film antennas and high-strength 3M double-sided adhesive tape, specifically designed for efficient replacement and secure attachment.
- Genuine Film Antennas: Two pieces for the left side and two pieces for the right side, totaling four (4) film antennas.
- 3M Super Strong Double-Sided Tape: Four (4) pieces of acrylic foam double-sided tape, pre-cut to the dedicated shape for easy application.
- Note: Antenna connection cords are not included in this set. Please use existing cords or purchase separately if needed.
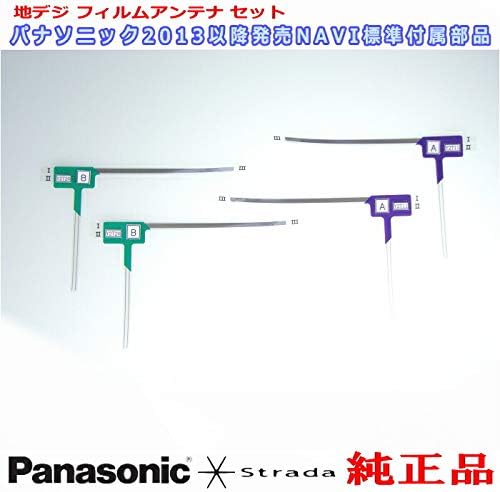
Aworan 2.1: Pariview of the Panasonic Digital TV Film Antenna and 3M Double-Sided Tape Set. This image displays the four film antennas (two for left, two for right) and the four pieces of 3M double-sided tape. The antennas are color-coded (green and purple) and labeled 'A' and 'B' for identification.
3. Itọsọna fifi sori ẹrọ
Proper installation is crucial for optimal reception. Follow these steps carefully.
- Igbaradi:
- Ensure the vehicle's ignition is off and the car navigation system is powered down.
- Clean the inner surface of the windshield where the antennas will be installed. Use an alcohol wipe or a clean cloth with glass cleaner to remove any dirt, grease, or residue. Allow the surface to dry completely.
- If replacing old antennas, carefully remove them and any remaining adhesive. Clean the area thoroughly.
- Antenna Identification:
- Identify the left (B) and right (A) antennas. They are typically marked and may have different shapes or colors for specific placement. Refer to your car navigation system's manual for exact placement guidelines.
- Applying Double-Sided Tape:
- Carefully peel off one side of the protective backing from a 3M double-sided tape piece.
- Align the tape precisely with the designated area on the back of the film antenna. Press firmly to ensure good adhesion, avoiding air bubbles.
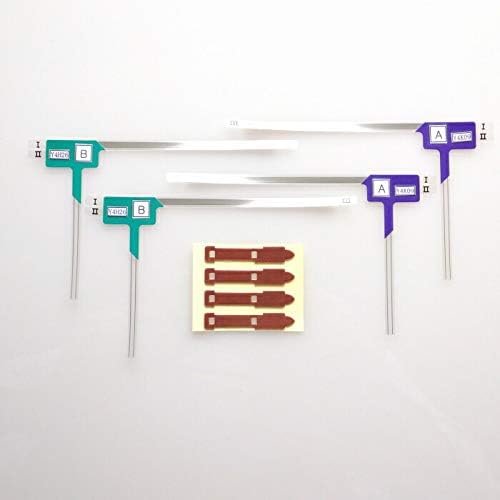
Aworan 3.1: Sun mo tipetipe view of the film antennas and the pre-cut 3M double-sided adhesive tapes. The tapes are designed to fit the antenna shape for easy and secure application.
- Attaching Antennas to Windshield:
- Peel off the remaining protective backing from the double-sided tape on the antenna.
- Carefully position the antenna on the cleaned windshield surface according to your car navigation system's installation instructions. Ensure correct orientation (e.g., vertical or horizontal, and which side is up).
- Press the antenna firmly against the glass for at least 30 seconds to ensure strong adhesion. Apply pressure evenly across the entire surface of the tape.
- Connecting Antenna Cords:
- Connect the antenna cords (not included) to the installed film antennas. Ensure a secure and proper connection.
- Route the antenna cords neatly to the car navigation unit, avoiding interference with airbags or other vehicle components. Secure cords with clips or ties if necessary.
- Ṣayẹwo Ipari:
- Once all antennas are installed and connected, power on your car navigation system and test the digital TV reception.
4. Awọn ilana Iṣiṣẹ
This product is a passive component designed to receive digital TV signals. Its operation is integrated with your car navigation system.
- Ensure the antennas are correctly connected to your Panasonic Strada CN-F1XD car navigation system.
- Refer to your car navigation system's user manual for instructions on scanning for digital TV channels and adjusting reception settings.
- Optimal reception depends on various factors including geographical location, signal strength, and vehicle movement.
5. Itọju
To ensure long-lasting performance and optimal signal reception, follow these simple maintenance guidelines:
- Ninu: Periodically clean the windshield surface around the antennas with a soft, damp cloth. Avoid using harsh chemicals or abrasive cleaners that could damage the antenna film or adhesive.
- Ṣayẹwo Asopọmọra: Occasionally check the connection points of the antenna cords to ensure they are secure and free from corrosion.
- Iduroṣinṣin Alẹmọ: Inspect the edges of the film antennas to ensure the 3M double-sided tape maintains its adhesion. If an antenna begins to peel, re-secure it promptly to prevent signal degradation or detachment.
6. Laasigbotitusita
If you experience issues with your digital TV reception, consider the following troubleshooting steps:
| Isoro | Owun to le Fa | Ojutu |
|---|---|---|
| Poor or no digital TV reception. |
|
|
| Antenna peeling off windshield. |
|
|
7. Awọn pato
| Ẹya ara ẹrọ | Ẹ̀kúnrẹ́rẹ́ |
|---|---|
| Brand | Panasonic |
| Compatible Navigation Model | Panasonic Strada CN-F1XD (and other compatible models) |
| Nọmba awoṣe Ọja | PD32TSet |
| Eriali Iru | Terrestrial Digital TV Film Antenna |
| alemora Iru | 3M Acrylic Foam Double-Sided Tape (Super Strong) |
| Quantity (Antennas) | 4 pieces (2 left, 2 right) |
| Quantity (Tape) | 4 ona |
| ASIN | B07NTGDHP2 |
8. Atilẹyin ọja ati Support
For warranty information and technical support, please refer to the documentation provided with your Panasonic Strada car navigation system or contact Panasonic customer service directly. This antenna set is a genuine accessory designed for compatibility with specified Panasonic navigation units.


