1. Awọn Ilana Aabo pataki
Before beginning any exercise program, consult with your physician. This is especially important for individuals over the age of 35 or those with pre-existing health conditions. Read all instructions carefully before using the exercise bike.
- Jeki awọn ọmọde ati awọn ohun ọsin kuro lati ẹrọ.
- Gbé kẹ̀kẹ́ ìdánrawò náà sí orí ilẹ̀ tí ó tẹ́jú, tí ó sì dúró ṣinṣin. Lo aṣọ ìdáàbòbò tí ó bá pọndandan.
- Rí i dájú pé gbogbo àwọn boluti àti èso ni a ti mú dáadáa kí a tó lo wọ́n.
- Wọ aṣọ ìdánrawò àti bàtà tó yẹ. Yẹra fún aṣọ tó ń gbọ̀n tí ó lè wọ inú àwọn ohun tó ń gbéra.
- Maṣe kọja iwuwo olumulo ti o pọju ti 120 kg.
- Tí o bá ní ìrísí lílù, ríru, ìrora àyà, tàbí àwọn àmì àrùn mìíràn tí kò báradé, dáwọ́ eré ìdárayá rẹ dúró lẹ́sẹ̀kẹsẹ̀ kí o sì bá dókítà sọ̀rọ̀.
- Perform regular maintenance as described in this manual.
2. Package Awọn akoonu
Carefully unpack all components and verify that you have received all parts listed below. If any parts are missing or damaged, contact customer support.
- Ifilelẹ akọkọ
- Iwaju ati ki o ru Stabilizers
- Awọn ẹsẹ ẹsẹ (Osi ati ọtun)
- Seat Post and Seat
- Ifiweranṣẹ ati Awọn ọpa imudani
- Monitor/Display Console
- Water Bottle Holder and Water Bottle
- Àwọn ohun èlò ìṣàkójọ (àwọn bọ́tìnì, àwọn ẹ̀rọ ìfọṣọ, àwọn èso, àwọn irinṣẹ́)
- Itọsọna olumulo
3. Apejọ Awọn ilana
Follow these steps to assemble your Physionics Indoor Exercise Bike. It is recommended to have two people for assembly.
- So awọn amuduro mọra: Secure the front and rear stabilizers to the main frame using the provided bolts and washers. Ensure they are firmly attached for stability.
- Fi awọn Pedals sori ẹrọ: Ṣe àfihàn àwọn pedal òsì (L) àti ọ̀tún (R). Àwọn pedal òsì máa ń ṣẹ́ èéfín ní ọ̀nà òdìkejì, àti pedal ọ̀tún máa ń ṣẹ́ èéfín ní ọ̀nà òdìkejì. Rí i dájú pé wọ́n ti lẹ̀ mọ́ wọn dáadáa kí wọ́n má baà bọ́.
- Mount Seat and Handlebars: Insert the seat post into the main frame and secure it at your desired height. Attach the seat to the seat post. Similarly, insert the handlebar post and attach the handlebars.
- Atẹle Sopọ: Connect the sensor wires from the main frame to the monitor console. Mount the monitor onto the handlebar post. Insert batteries (not included) into the monitor.
- So Awọn ẹya ara ẹrọ: Install the water bottle holder and any other accessories.

Figure 3.1: Fully assembled Physionics Indoor Exercise Bike. This image shows the complete structure including the frame, seat, handlebars, pedals, and display console.
4. Awọn ilana Iṣiṣẹ
4.1. Using the Display Console
The display console tracks your workout data. Insert two AAA batteries (not supplied) into the battery compartment on the back of the monitor.

Figure 4.1: Close-up of the display console showing various metrics. The display shows Time, Speed, Calories, Distance, Odometer, and Pulse.
- Bọtini MODE: Press to cycle through different display functions (Time, Speed, Distance, Calories, Odometer, Pulse). Press and hold to reset values.
- YII: Automatically cycles through all functions every few seconds.
- Àkókò: Ó ń fi àkókò ìdánrawò rẹ hàn.
- Iyara: Ṣe afihan iyara lọwọlọwọ rẹ.
- Ijinna: Displays the distance covered during your current workout.
- Awọn ọja: Ṣíṣe àkíyèsí àwọn kalori tí a jó nígbà ìdánrawò rẹ.
- ODOMETER: Ṣe afihan ijinna ikojọpọ lapapọ.
- Polusi: Shows your heart rate when holding the pulse sensors on the handlebars.
4.2. Ṣíṣe àtúnṣe sí resistance
The exercise bike features an adjustable resistance system to vary your workout intensity.

Figure 4.2: Diagram illustrating the resistance and brake system. Turning the red knob controls the resistance level, while pressing it activates the emergency brake.
- Mu Atako pọ si: Turn the resistance knob clockwise to increase the workout intensity.
- Din resistance: Turn the resistance knob counter-clockwise to decrease the workout intensity.
- Bireki pajawiri: Press down firmly on the resistance knob to engage the emergency brake and stop the flywheel immediately.
4.3. Pataki Awọn ẹya ara ẹrọ

Olusin 4.3: Pariview of additional features including the phone holder, water bottle, and foot straps. These features enhance user convenience during workouts.
- Dimu foonu: A convenient holder is integrated into the handlebars to secure your smartphone or tablet during your workout.
- Dimu Igo Omi: A dedicated holder keeps your water bottle within easy reach for hydration.
- Awọn okun Ẹsẹ: Adjustable foot straps on the pedals ensure your feet remain securely in place during intense cycling.
5. Awọn atunṣe
Ṣíṣe àtúnṣe tó yẹ fún ìjókòó àti ọ̀pá ìdábùú ṣe pàtàkì fún ìtùnú àti ìdánrawò tó gbéṣẹ́.

Figure 5.1: Illustration showing the adjustable seat and handlebars. The seat can be adjusted horizontally and vertically, and the handlebars vertically.
- Giga Ijoko: Tú kọ́kọ́rọ́ àtúnṣe tó wà lórí òpó ìjókòó náà. Gbé ìjókòó náà sókè tàbí kí o sọ̀ kalẹ̀ títí tí ẹsẹ̀ rẹ yóò fi tẹ̀ díẹ̀ ní orúnkún nígbà tí ẹsẹ̀ náà bá wà ní ibi tó rẹlẹ̀ jùlọ. Mú kọ́kọ́rọ́ náà di dáadáa.
- Seat Horizontal Position: Loosen the adjustment knob under the seat. Slide the seat forward or backward to find a comfortable position relative to the handlebars. Tighten the knob securely.
- Giga Handlebar: Loosen the adjustment knob on the handlebar post. Raise or lower the handlebars to a comfortable height that allows for a relaxed upper body posture. Tighten the knob securely.
6. Itọju
Ìtọ́jú déédéé ń mú kí kẹ̀kẹ́ ìdánrawò rẹ pẹ́ títí, kí ó sì wà ní ààbò.
- Ninu: Pa keke naa kuro pẹlu ipolowoamp asọ lẹhin lilo kọọkan lati yọ lagun ati eruku kuro. Yago fun abrasive ose.
- Ṣayẹwo Awọn isopọ: Periodically check all bolts, nuts, and screws to ensure they are tight. Tighten any loose connections.
- Lubrication: Apply a small amount of silicone-based lubricant to moving parts (e.g., pedal axles, resistance mechanism) if you notice squeaking or stiffness.
- Ibi ipamọ: Tọ́jú kẹ̀kẹ́ náà sí ibi gbígbẹ àti tútù, níbi tí oòrùn kò ti lè mú kí ó tàn tààrà tàbí kí ó má baà mú kí ó gbóná dáadáa.

Figure 6.1: Image showing the transport wheels located at the front stabilizer. These wheels allow for easy relocation of the exercise bike.
To move the bike, tilt it forward onto the transport wheels and roll it to the desired location. Ensure the area is clear before moving.
7. Laasigbotitusita
| Isoro | Owun to le Fa | Ojutu |
|---|---|---|
| Ifihan ko ṣiṣẹ | Awọn batiri ti o ku, asopọ alaimuṣinṣin | Replace batteries, check monitor cable connection. |
| Ariwo gbigbo lakoko lilo | Loose parts, lack of lubrication | Check and tighten all bolts. Apply lubricant to moving parts. |
| Resistance ko yi pada | Isoro eto iṣakoso bọtini | Ensure the resistance knob is properly engaged. Contact customer support if the issue persists. |
| Kẹ̀kẹ́ náà dà bí ohun tí kò dúró ṣinṣin | Uneven surface, loose stabilizers | Place on a flat surface. Check and tighten stabilizer bolts. |
8. Awọn pato
- Brand: Ẹkọ-ara
- Orukọ awoṣe: Vélo d'Appartement
- Awọn iwọn (L x W x H): Isunmọ 105 cm x 46 cm x 100 cm
- Ìwọ̀n Nkan: 27.65 kilo
- Iwọn olumulo ti o pọju: 120 kilo
- Ìwúwo Flywheel: 10 kg
- Ohun elo: Steel frame; Other: ABS plastic, PU leather, and foam
- Ilana Atako: Afẹfẹ
- Power Source (Display): Battery powered (batteries not included)
- Àwọ̀: Dudu, Pupa

Figure 8.1: Diagram showing the dimensions of the exercise bike (105cm length, 47cm width, 100cm height) and highlighting the steel frame construction.
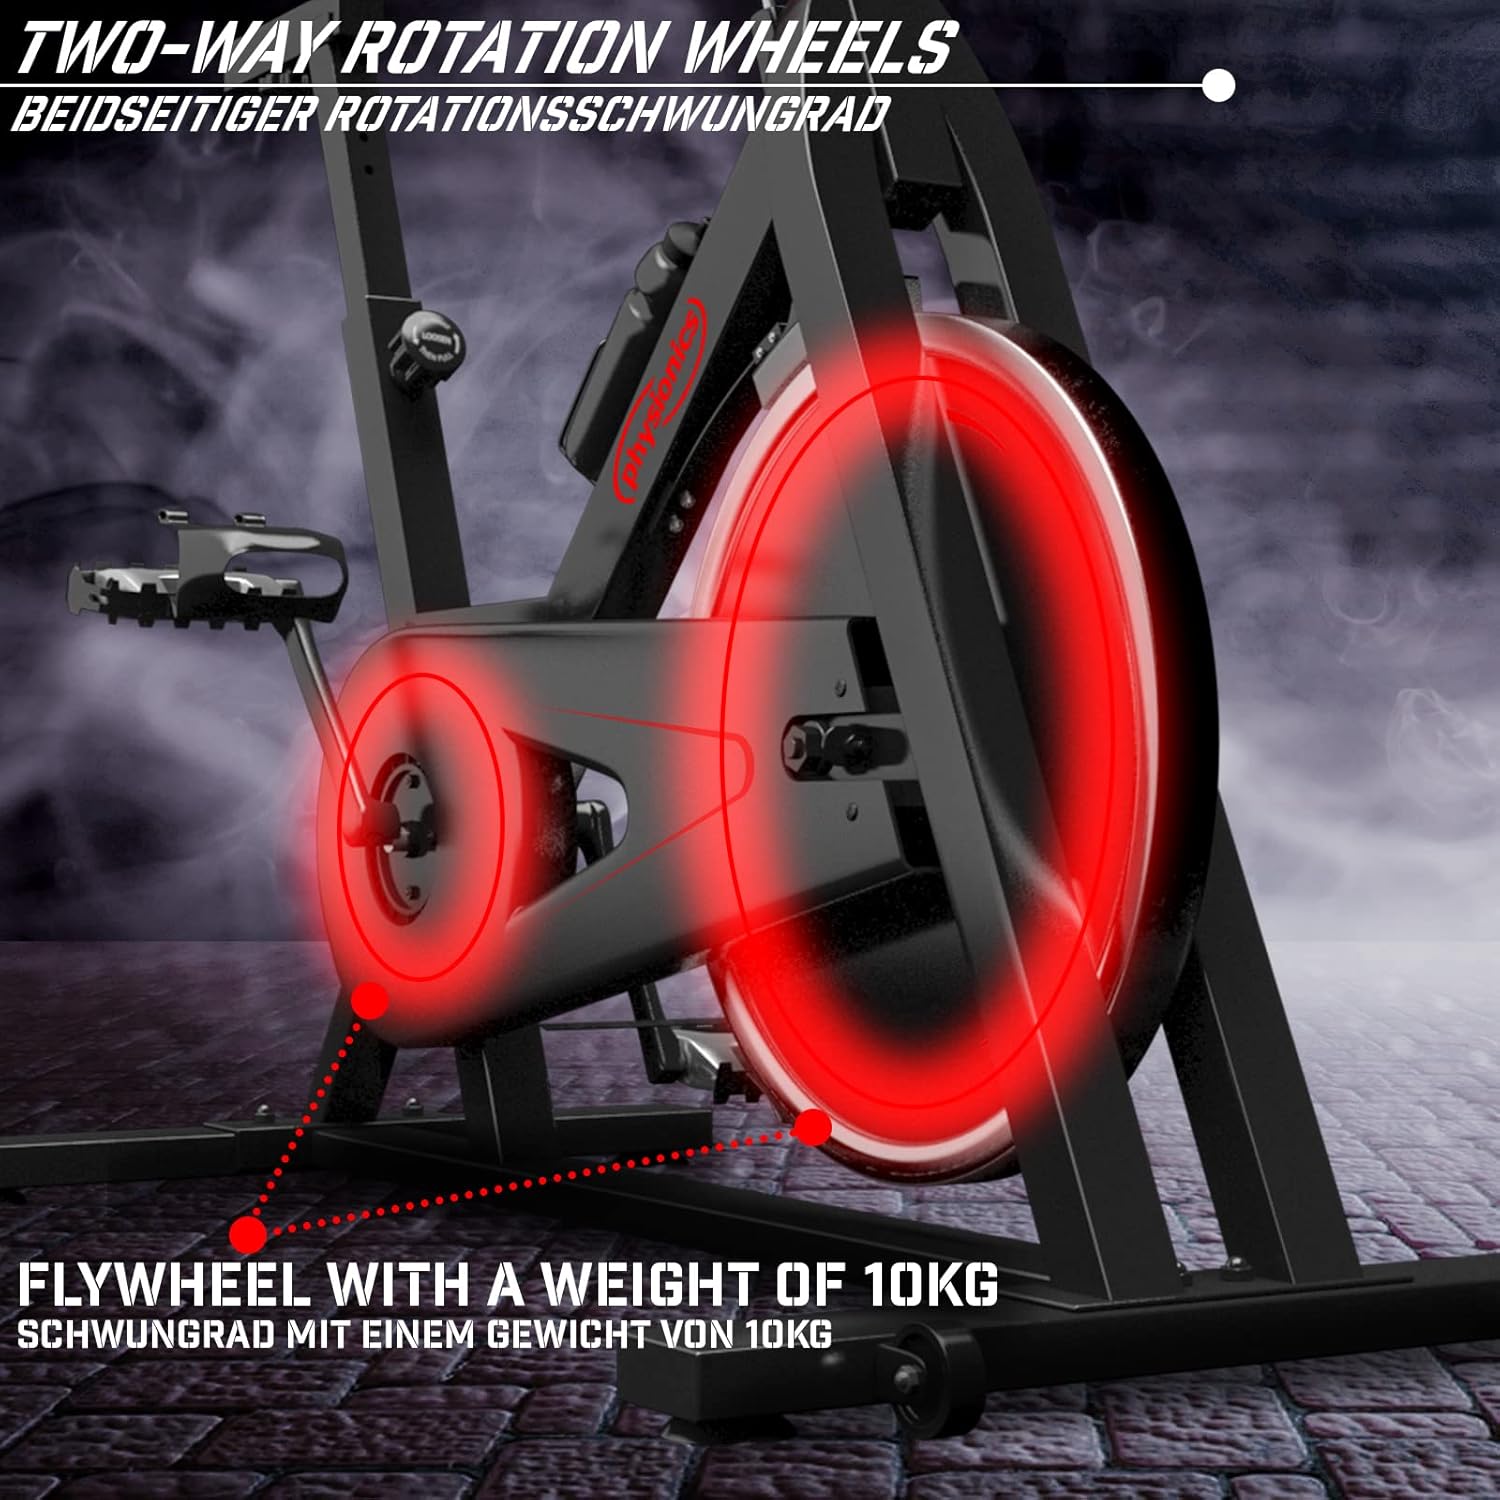
Figure 8.2: Close-up of the 10kg flywheel, indicating its two-way rotation capability.
9. Atilẹyin ọja ati Support
For warranty information or technical support, please refer to the documentation included with your purchase or contact Physionics customer service. Keep your proof of purchase for warranty claims.
For further assistance, please visit the official Physionics webaaye tabi kan si awọn ikanni atilẹyin alabara wọn.


