1. Ọja Ipariview
The ELVOX 7558/E is a pre-programmed two-wire color video entry kit designed for single-family homes. This comprehensive kit provides secure and convenient communication with visitors at your doorstep, featuring a hands-free indoor monitor and a robust outdoor call panel.
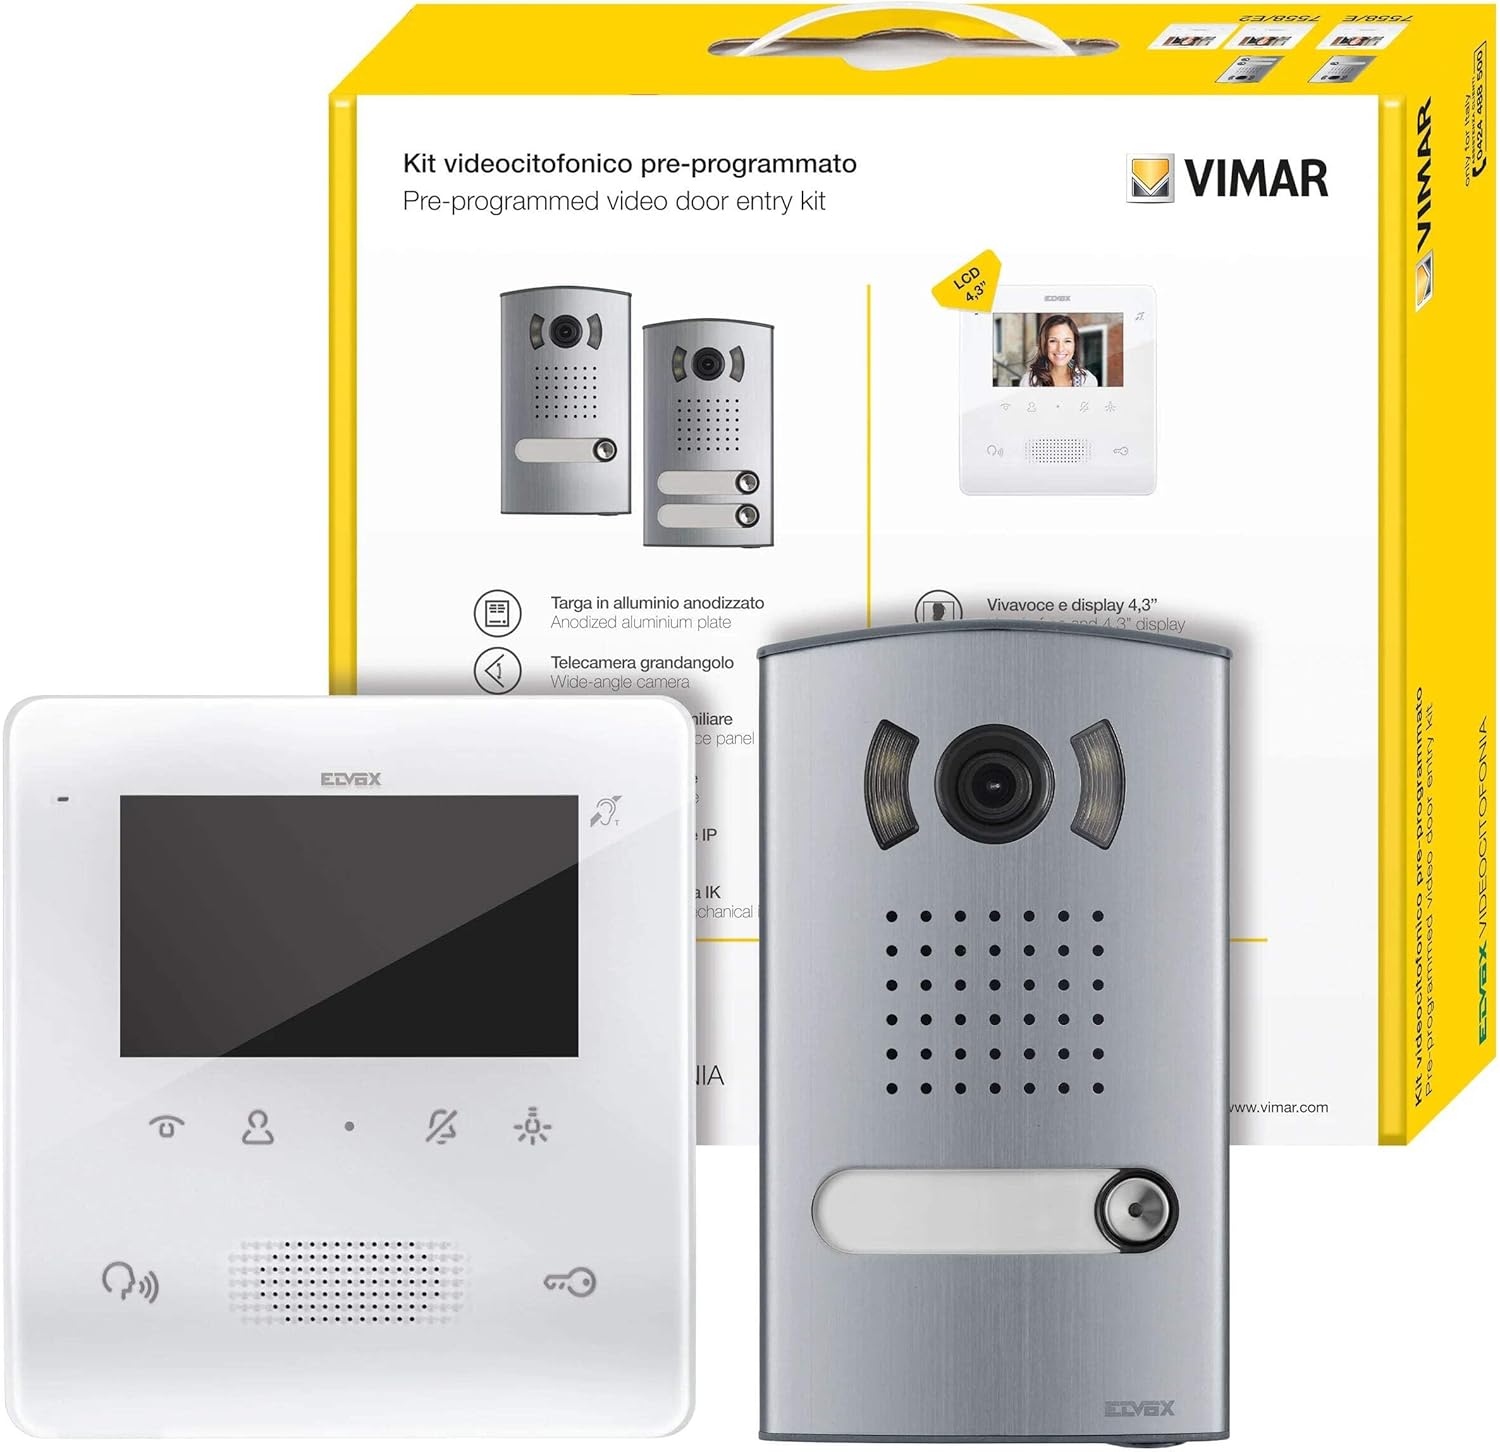
This image displays the complete ELVOX 7558/E video intercom kit. It includes the outdoor call panel, featuring a wide-angle camera and call button, and the indoor 4.3-inch color monitor. The product packaging is also visible in the background, highlighting the 'Pre-programmed video door entry kit' and 'VIMAR' branding.
2. Alaye Aabo
Jọ̀wọ́ ka gbogbo ìlànà ààbò dáadáa kí o tó fi sori ẹrọ àti ṣiṣẹ́. Àìtẹ̀lé àwọn ìlànà wọ̀nyí lè yọrí sí ìkọlù iná mànàmáná, iná, tàbí ìpalára ńlá.
- Installation should only be performed by qualified personnel in accordance with local electrical codes.
- Ge asopọ agbara ṣaaju ṣiṣe eyikeyi fifi sori ẹrọ tabi itọju.
- Do not expose the product to rain, moisture, or extreme temperatures.
- Yago fun gbigbe atẹle naa sinu imọlẹ orun taara tabi sunmọ awọn orisun ooru.
- Use only original accessories and power supply units provided with the kit.
3. Package Awọn akoonu
Daju pe gbogbo awọn paati ti a ṣe akojọ si isalẹ wa ninu package rẹ:
- 1 x Vimar 7558/E Two-Wire Color Video Entry Kit
- 1 x Anodized Aluminum Plate (Series 1300/E)
- 1 x Audio/Video Electronic Unit (401351)
- 1 x Tab Free Hands-Free Videophone with 4.3-inch Color Screen (7558 White)
- 1 x Power Supply Unit (40110)
- Awọn ẹya ẹrọ iṣagbesori (awọn skru, awọn pilogi ogiri)
- Itọsọna olumulo
4. Awọn ẹya Ọja
- Two-wire Plus technology for simplified installation.
- Hands-free operation for convenient communication.
- 4.3-inch color LCD display for clear video.
- Wide-angle camera on the outdoor panel for broader view.
- Anodized aluminum outdoor plate for durability.
- Wall-mounted design for both indoor and outdoor units.
5. Itọsọna fifi sori ẹrọ
Yi apakan pese a gbogboogbo loriview of the installation process. Refer to the detailed wiring diagrams included in your kit for specific connections.
5.1 Ita Panel fifi sori
- Choose a suitable location near your entrance, ensuring clear visibility for the camera and accessibility for visitors.
- Mount the anodized aluminum plate securely to the wall using the provided screws and wall plugs.
- Connect the two-wire bus cable and any other necessary wiring (e.g., for door lock release) to the audio/video electronic unit according to the wiring diagram.
- Secure the audio/video electronic unit and the camera module into the plate.
5.2 Indoor Monitor Installation
- Select a convenient indoor location for the monitor, typically near the main entrance or in a central living area.
- Mount the monitor's wall bracket securely.
- Connect the two-wire bus cable from the outdoor unit and the power supply unit to the indoor monitor.
- Attach the monitor to its wall bracket.
5.3 Power Ipese Asopọ
Connect the power supply unit (40110) to a suitable power outlet and to the system as indicated in the wiring diagram. Ensure all connections are secure before restoring power.
6. Isẹ
6.1 Ndahun ipe kan
When a visitor presses the call button on the outdoor panel, the indoor monitor will ring and display the visitor's image. To answer the call, simply press the Idahun button (typically represented by a telephone icon) on the monitor. You can then communicate hands-free with the visitor.
6.2 Nsii ilekun
During a conversation, or while viewing the outdoor camera, you can open the door by pressing the Ilekun Tu button (typically represented by a key icon) on the monitor. Ensure the door lock is properly connected to the system.
6.3 Monitoring the Entrance
Si view the outdoor area without a call, press the Atẹle button (typically represented by an eye icon) on the indoor unit. The monitor will display the live feed from the outdoor camera. Press the button again to turn off monitoring.
6.4 Siṣàtúnṣe Eto
The monitor may have buttons or a menu for adjusting settings such as ringtone volume, display brightness, and contrast. Refer to the specific icons on your monitor for these functions.
7. Itọju
- Clean the outdoor panel and indoor monitor surfaces with a soft, dry cloth. Do not use abrasive cleaners or solvents.
- Ensure the camera lens on the outdoor unit is clean and free from obstructions for optimal video quality.
- Regularly check all wiring connections for security, especially after any physical disturbance.
8. Laasigbotitusita
| Isoro | Owun to le Fa | Ojutu |
|---|---|---|
| Ko si aworan lori atẹle inu ile. | No power to the system; loose wiring; faulty camera. | Check power supply connection; verify all wiring connections; contact support if problem persists. |
| No audio during conversation. | Microphone or speaker issue; loose audio wiring. | Check audio connections; ensure volume is not muted or too low. |
| Door lock does not open. | Incorrect wiring to door lock; faulty lock mechanism; insufficient power. | Verify door lock wiring; check power supply; test door lock independently. |
| Monitor not ringing. | Ringtone volume too low; faulty outdoor call button. | Increase ringtone volume; check outdoor call button functionality. |
9. Awọn pato
| Ẹya ara ẹrọ | Ẹ̀kúnrẹ́rẹ́ |
|---|---|
| Brand | VIMAR (Manufacturer: ELVOX) |
| Nọmba awoṣe | 7558E |
| Iwon iboju | 4.3 inches |
| Ifihan Iru | LCD |
| Ipinnu | 800 x 480 awọn piksẹli |
| Apakan Ipin | 1.66:1 |
| Pataki Awọn ẹya ara ẹrọ | Hands-free kit, Color screen, Wall mount |
| Asopọmọra Technology | Two-wire system (internal), HDMI (listed in specs, but likely for monitor input, not system connectivity) |
| Àwọ̀ | Funfun |
10. Atilẹyin ọja ati Support
This product comes with a standard manufacturer's warranty. For detailed warranty terms and conditions, please refer to the warranty card included in your package or visit the official VIMAR website. For technical support, troubleshooting assistance, or spare parts inquiries, please contact your local VIMAR distributor or authorized service center.
You can find more information and contact details on the official VIMAR webojula: www.vimar.com


