1. Ifihan
This manual provides detailed instructions for the installation, operation, and troubleshooting of your Aideepen 2-Port PCI-E to USB 3.0 Expansion Card. This card is designed to add two high-speed USB 3.0 ports to your computer system, enhancing connectivity and data transfer capabilities. Please read this manual thoroughly before installation and retain it for future reference.
2. Alaye Aabo
- Always disconnect your computer from the power source before opening the case or installing any internal components.
- Wear an anti-static wrist strap or frequently touch a grounded metal object (like the computer case) to discharge static electricity before handling the expansion card. Static discharge can damage electronic components.
- Handle the expansion card by its edges to avoid touching the gold connectors or components on the circuit board.
- Ensure proper ventilation inside your computer case to prevent overheating.
- Do not attempt to modify or repair the card yourself. Refer to qualified service personnel if issues arise.
3. Package Awọn akoonu
Jọwọ rii daju pe gbogbo awọn ohun kan wa ninu apo rẹ:
- Aideepen 2-Port PCI-E to USB 3.0 Expansion Card
- Low-profile bracket (for small form factor cases)

Nọmba 3.1: The Aideepen 2-Port PCI-E to USB 3.0 Expansion Card, shown with both the standard and optional low-profile iṣagbesori biraketi.
4. Eto ati fifi sori
4.1 Fifi sori ti ara
- Mura kọmputa rẹ: Pa kọmputa rẹ patapata ki o si yọ okun ina kuro ninu ibudo ogiri.
- Open the computer case: Yọ ẹgbẹ ẹgbẹ ti ọran kọnputa rẹ lati wọle si modaboudu.
- Locate an available PCI-E slot: Identify an empty PCI-E x1, x4, x8, or x16 slot on your motherboard. This card is compatible with various PCI-E slot sizes.
- Remove the slot cover: Unscrew and remove the metal slot cover corresponding to the chosen PCI-E slot on the back of your computer case.
- Insert the expansion card: Carefully align the gold connectors of the expansion card with the PCI-E slot. Press down firmly and evenly until the card is securely seated in the slot.
- Ṣe aabo kaadi naa: Fasten the expansion card to the computer case using the screw from the removed slot cover.
- Sopọ agbara: Connect a 4-pin Molex power connector from your power supply unit (PSU) to the corresponding port on the expansion card. This connection is essential for stable operation and sufficient power delivery to the USB ports.
- Close the computer case: Replace the side panel of your computer case and reconnect the power cord.
- Agbara lori: Tan kọmputa rẹ.

Nọmba 4.1: The expansion card is compatible with PCI-E x1, x4, x8, and x16 slots. Ensure you select an available slot on your motherboard.

Nọmba 4.2: The 4-pin Molex power connector (white) on the expansion card must be connected to your power supply for proper functionality. The blue connector is a 20-pin USB 3.0 header for front panel USB ports.
4.2 Driver fifi sori
For optimal performance and compatibility, especially with Windows operating systems, driver installation may be required. While some operating systems may detect the card automatically, manual driver installation ensures full functionality.
- Ṣe igbasilẹ Awọn Awakọ: Access the latest drivers from the following link: Google Drive Driver Folder.
- Jade Files: Ti o ba ti gba lati ayelujara file is compressed (e.g., .zip), extract its contents to a temporary folder on your computer.
- Fi sori ẹrọ Awakọ: Follow the instructions provided within the driver package. This typically involves running a setup executable or manually updating the driver through Device Manager.
- Tun Kọmputa bẹrẹ: After successful driver installation, restart your computer to apply the changes.
Akiyesi lori Ibamu: This card is compatible with Windows XP, Vista, 7, 8, 8.1, Server 2003, and Server 2008. For Windows 10 and newer versions, drivers may be automatically detected, but manual installation using the provided link is recommended if issues occur.
5. Operating the Expansion Card
Once the Aideepen 2-Port PCI-E to USB 3.0 Expansion Card is installed and its drivers are configured, the two external USB 3.0 ports and the internal 20-pin header will be ready for use.
- Awọn ẹrọ Asopọmọra: Plug your USB 3.0 compatible devices (e.g., external hard drives, flash drives, cameras, printers) into the available USB 3.0 ports on the back of the card.
- Gbigbe Data Iyara Giga: The USB 3.0 ports support a maximum data transfer speed of 5Gbps, significantly faster than USB 2.0, ideal for large file transfers and high-bandwidth devices.
- Internal Header: The 20-pin internal USB 3.0 header allows you to connect front panel USB 3.0 ports from your computer case, providing convenient access.
- Atilẹyin Paarọ Gbona: The card supports hot-swapping, meaning you can connect and disconnect USB devices while the computer is running without needing to restart.
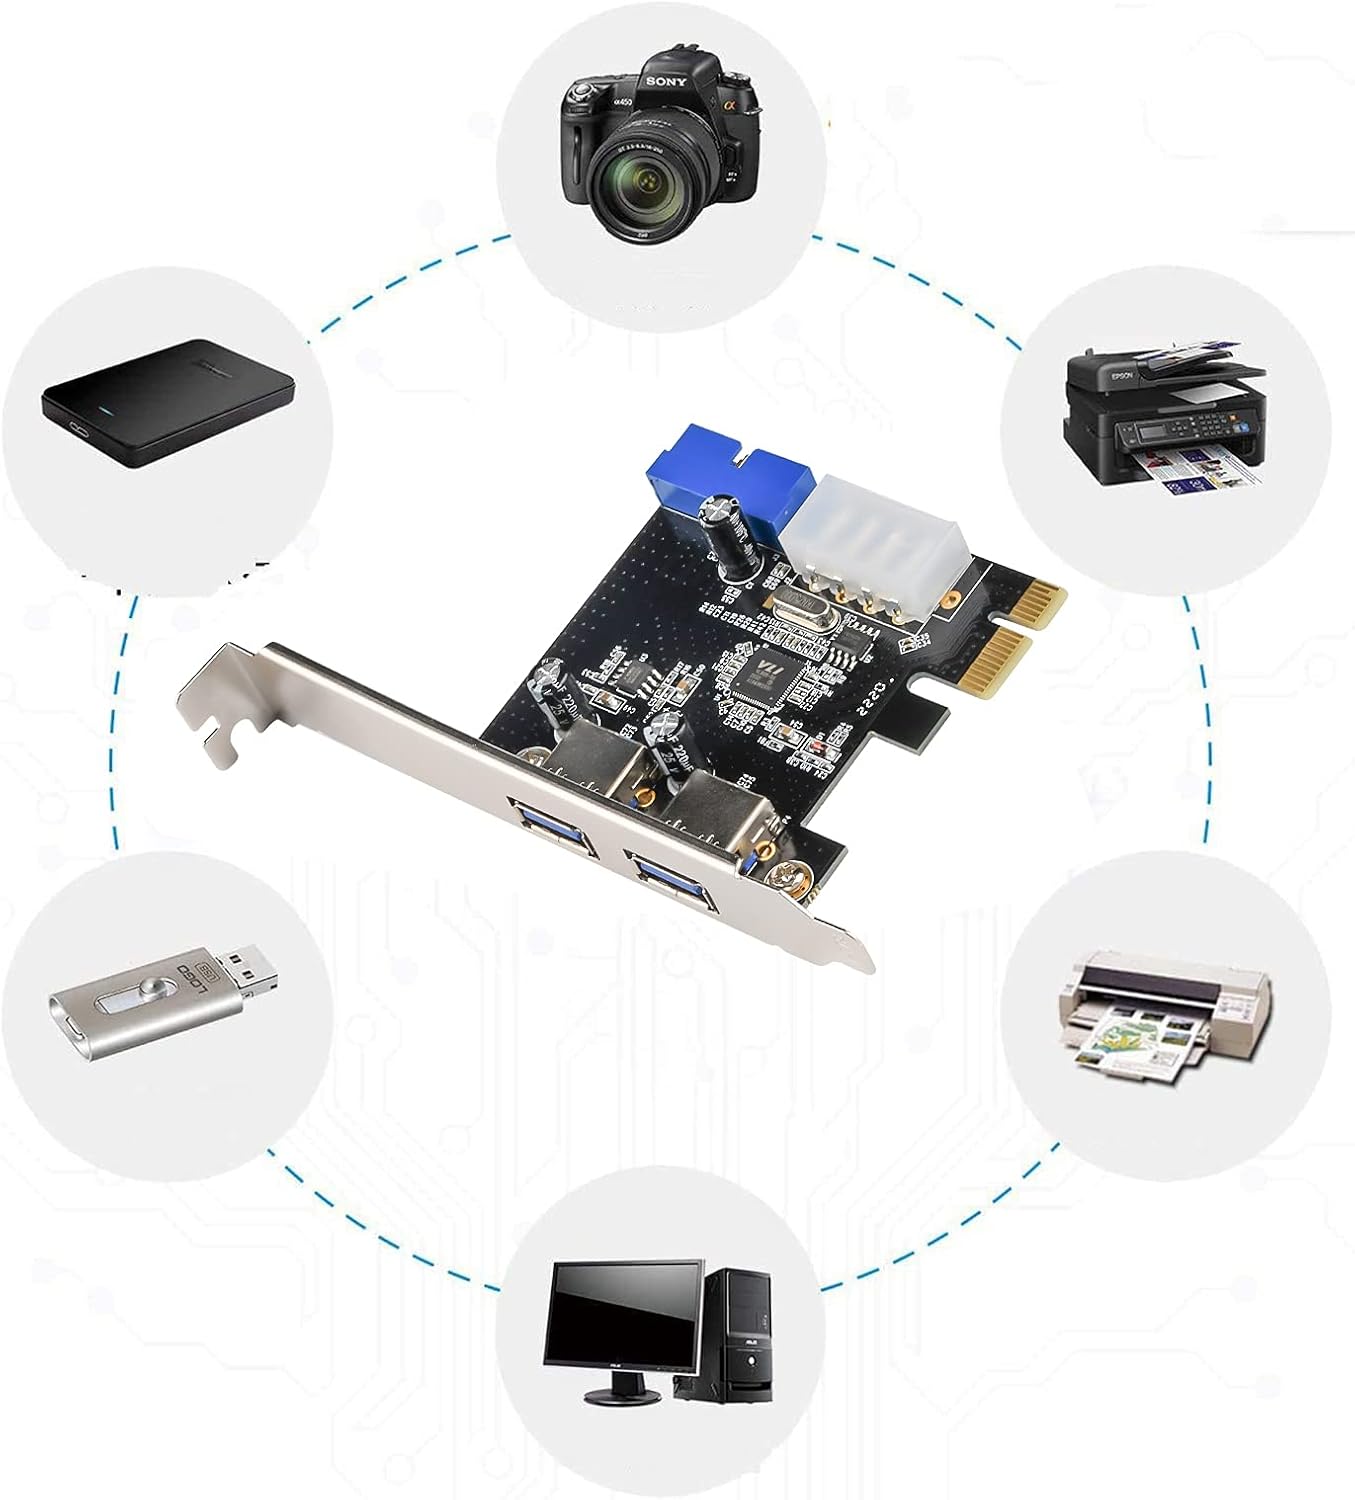
Nọmba 5.1: Examples of devices that can be connected to the USB 3.0 expansion card, including external hard drives, cameras, printers, and USB flash drives.
6. Itọju
The Aideepen 2-Port PCI-E to USB 3.0 Expansion Card requires minimal maintenance. Follow these guidelines to ensure its longevity:
- Jeki o mọtoto: Periodically open your computer case (after disconnecting power) and use compressed air to gently remove dust accumulation from the expansion card and surrounding components. Dust can impede airflow and lead to overheating.
- Avoid physical stress: Ensure that no cables or other components are putting undue stress on the card or its connectors.
- Awọn ipo ayika: Operate your computer in a clean, dry environment with stable temperatures to prevent damage to electronic components.
7. Laasigbotitusita
If you encounter issues with your expansion card, refer to the following troubleshooting steps:
- Card not detected / No power:
- Ensure the 4-pin Molex power connector is securely attached to the card and your PSU. This is a common cause of non-detection or unstable operation.
- Verify the card is fully seated in the PCI-E slot.
- Try installing the card in a different PCI-E slot if available.
- USB devices not working:
- Confirm that the necessary drivers have been installed (refer to Section 4.2). Check Device Manager for any yellow exclamation marks next to USB controllers.
- Test the USB device on another port or computer to ensure the device itself is functional.
- Ensure the 4-pin Molex power connector is providing power to the card.
- Awọn iyara gbigbe lọra:
- Ensure you are using USB 3.0 compatible devices and cables. USB 2.0 devices will operate at USB 2.0 speeds.
- Verify that the drivers are correctly installed and up to date.
- "Device Not Migrated" error (Windows):
- This error often indicates a driver issue. Reinstall the drivers from the provided Google Drive link (Section 4.2).
- Ensure Windows is fully updated.
8. Awọn pato
| Brand | Aideepen |
| Nọmba awoṣe | 2_051040US |
| Ni wiwo Hardware | PCI Express (PCI-E), USB 3.0 |
| Nọmba ti Ports | 2 x External USB 3.0 Type-A, 1 x Internal 20-Pin USB 3.0 Header |
| Data Gbigbe Oṣuwọn | Titi di 5 Gbps (USB 3.0 SuperSpeed) |
| Asopọ agbara | 1 x 4-Pin Molex |
| Ibamu System isẹ | Windows XP / Vista / 7 / 8 / 8.1 / Server 2003 / Server 2008 (and newer Windows versions with appropriate drivers) |
| Iwọn Nkan | 1.76 iwon (0.05 kilo) |
| Package Mefa | 6.34 x 3.9 x 1.34 inches |

Nọmba 8.1: Physical dimensions of the expansion card for reference.
9. Atilẹyin ọja ati Support
For warranty information or technical support, please refer to the retailer where you purchased the Aideepen 2-Port PCI-E to USB 3.0 Expansion Card. You may also visit the official Aideepen store on Amazon for product updates and additional resources: Aideepen Amazon Store.


