1. Ọja Ipariview
The MIDIPLUS STUDIO-M PRO is an advanced USB audio interface designed for high-quality audio recording and playback. It features a 24-bit/192KHz high-precision converter and pure amplifier inputs, ensuring pristine sound reproduction. Its robust aluminum alloy and metal construction make it durable for any personal studio environment. The intuitive panel design and new driver software provide easy control over your audio.

olusin 1: Iwaju view of the STUDIO-M PRO, showing input, gain controls, and level meters.
2. Key Awọn ẹya ara ẹrọ
- High-Precision Conversion: Supports 24-bit/192KHz audio resolution for superior clarity and detail in recordings.
- Upgraded Preamps: Equipped with high-quality preamplifier inputs and pure instrument/linear inputs, including 48V phantom power for condenser microphones.
- Intuitive Monitoring: Input gain knobs feature two-color level meter lights for real-time signal monitoring.
- Awọn iṣelọpọ ti o rọ: Two 1/4'' TRS balanced outputs for connecting to monitor speakers and an independent headphone output with its own volume control.
- Studio Mix Driver: New driver software with 8 wire connect presets, sample rate selection, and ASIO settings for various audio processing, live broadcast, gaming, or video playback scenarios.
- Ikole ti o tọ: Aluminum alloy panel and metal bottom shell for enhanced durability and stability.
3. Eto Itọsọna
3.1. Unpacking ati Ibẹrẹ Ayewo
Ni ifarabalẹ yọ gbogbo awọn paati kuro ninu apoti. Daju pe gbogbo awọn nkan ti a ṣe akojọ si isalẹ wa ati pe ko bajẹ:
- MIDIPLUS STUDIO-M PRO Audio Interface
- Okun USB
- Awọn ọna Bẹrẹ Afowoyi
- Software License (if applicable)
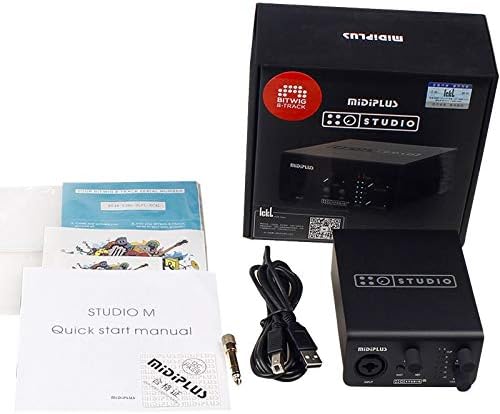
Figure 2: Contents of the STUDIO-M PRO retail package.
3.2. Hardware Awọn isopọ
Follow these steps to connect your STUDIO-M PRO to your computer and audio equipment:
- Sopọ si Kọmputa: Use the provided USB cable to connect the STUDIO-M PRO's USB port to an available USB port on your computer.
- So Microphone/Àwọn Ohun Èlò Pọ̀: Plug your microphone (XLR) or instrument (1/4" TS/TRS) into the INPUT jack on the front panel.
- Connect Monitor Speakers: Connect your active monitor speakers to the LEFT and RIGHT 1/4" TRS balanced outputs on the rear panel.
- So Agbekọri pọ: Plug your headphones into the HEADPHONE jack on the rear panel.

Figure 3: Rear panel connections of the STUDIO-M PRO, including USB, headphone, and balanced outputs.
3.3. Software fifi sori
For optimal performance, it is crucial to install the latest Studio Mix driver software. Visit the official Midiplus website to download the appropriate driver for your operating system (Windows is supported). Follow the on-screen instructions during installation.
4. Awọn ilana Iṣiṣẹ
4.1. Iṣakoso Ere Titẹwọle
The front panel features controls for managing your input signals:
- KỌRỌ NIPA: Adjust this knob to control the input level of your microphone or instrument. The two-color LED meters (CLIP, 0, -3, -6, -12, -24) indicate the signal strength. Aim for the signal to peak around -3dB to avoid clipping (red CLIP LED).
- Bọ́tìnì INST: Press this button when connecting a high-impedance instrument, such as an electric guitar or bass, directly into the input.
- Bọtini 48V: Activate this button to supply 48V phantom power to condenser microphones that require it. Ensure your microphone is connected before engaging 48V.
4.2. Monitoring and Output
Control your output and monitoring levels:
- Kọ́nì ÀTỌ́JÚ: This knob controls the overall output volume to your main monitor speakers connected to the rear TRS outputs.
- HEADPHONE Knob: This knob independently controls the volume of the headphone output. Adjust to a comfortable listening level.
4.3. Using the Studio Mix Driver Software
The Studio Mix driver software provides advanced control over your audio interface. It allows you to:
- Yan sample rates (e.g., 44.1kHz, 48kHz, 96kHz, 192kHz).
- Configure ASIO settings for low-latency performance in digital audio workstations (DAWs).
- Utilize 8 wire connect presets for quick configuration for different applications like audio processing, live streaming, gaming, or video playback.
- Monitor input and output levels digitally.
Refer to the Studio Mix software's built-in help or online documentation for detailed instructions on its features.
5. Itọju
To ensure the longevity and optimal performance of your MIDIPLUS STUDIO-M PRO, follow these maintenance guidelines:
- Ninu: Use a soft, dry cloth to wipe the exterior of the unit. Avoid using abrasive cleaners, solvents, or waxes, as they may damage the finish.
- Ibi ipamọ: Tí o kò bá lò ó fún ìgbà pípẹ́, tọ́jú ojú ibi tí ó tutù, tí ó sì gbẹ, kí oòrùn má baà fà tàbí ooru tó le gan-an.
- Mimu: Mu ẹrọ naa pẹlu iṣọra. Yago fun sisọ silẹ tabi tẹriba si awọn ipa to lagbara.
- Afẹfẹ: Rí i dájú pé afẹ́fẹ́ ń tàn káàkiri ẹ̀rọ náà kí ó má baà gbóná jù. Má ṣe dí àwọn afẹ́fẹ́ kankan.
6. Laasigbotitusita
If you encounter issues with your STUDIO-M PRO, refer to the following common problems and solutions:
- Ko si Agbara/Ko si Imọlẹ:
- Ensure the USB cable is securely connected to both the interface and your computer.
- Gbiyanju ibudo USB ti o yatọ lori kọnputa rẹ.
- Verify your computer is powered on.
- Ko si Ijade ohun:
- Check that the MONITOR and HEADPHONE volume knobs are turned up.
- Verify that your monitor speakers are powered on and connected correctly.
- Ensure the STUDIO-M PRO is selected as the default audio output device in your computer's sound settings or DAW.
- Check cable connections to speakers/headphones.
- Ko si Ifihan Inuwọle:
- Ensure your microphone or instrument is properly connected to the INPUT jack.
- Adjust the GAIN knob.
- If using a condenser microphone, ensure the 48V phantom power is engaged.
- If using an instrument, ensure the INST button is pressed.
- Verify the STUDIO-M PRO is selected as the default audio input device in your computer's sound settings or DAW.
- Ohun Yiyi:
- Reduce the input GAIN to prevent clipping (red CLIP LED).
- Ṣàyẹ̀wò fún àwọn okùn tí kò ní àbùkù.
- Rii daju pe sample rate and buffer size settings in your DAW and Studio Mix driver are appropriate for your system.
- Awọn ọran Awakọ:
- Reinstall the latest Studio Mix driver from the official Midiplus webojula.
- Má ṣe dáwọ́ sọ́fítíwọ́ọ̀kì àjẹ́sára dúró fún ìgbà díẹ̀ nígbà tí o bá ń fi àwọn awakọ̀ sílò.
If the problem persists, contact Midiplus customer support for further assistance.
7. Imọ ni pato
| Ẹya ara ẹrọ | Sipesifikesonu |
|---|---|
| Iwọn Nkan | kilo 1 (2.2 poun) |
| Asopọmọra Technology | USB |
| Brand | Midiplus |
| Ibamu System isẹ | Windows |
| Ni wiwo Hardware | USB |
| Awọn ẹrọ ibaramu | Agbekọri |
| Ọjọ Akọkọ Wa | Oṣu Keje 21, Ọdun 2020 |
| Ipinnu ohun | 24 die-die / 192 kHz |
| Awọn igbewọle | 1x Combo XLR/TRS Input (with 48V phantom power, INST switch) |
| Awọn abajade | 2x 1/4'' TRS Balanced Outputs, 1x Headphone Output |
8. Atilẹyin ọja ati Support
Information regarding the specific warranty terms and conditions for the MIDIPLUS STUDIO-M PRO is not available in the provided product data. Please refer to the official Midiplus website or contact their customer support directly for detailed warranty information and technical assistance.
Fun atilẹyin, ṣabẹwo: Ile itaja Midiplus lori Amazon


