1. Alaye Aabo pataki
Please read this entire instruction manual before installation. If you have any questions, please contact MOUNTUP customer support. Improper assembly or installation may cause damage or serious personal injury.
- Agbara iwuwo: Maṣe kọja agbara iwuwo ti o pọju ti 77 lbs (35 kg).
- Iwon TV: This mount is designed for televisions between 26 and 60 inches.
- Odi Iru: These MOUNTUP TV wall mounts are NOT FOR DRYWALL INSTALLATION. They are designed for installation into wood studs or solid concrete/brick walls. Ensure the mounting surface can safely support the combined weight of the equipment and all attached hardware.
- Hardware: Use only the hardware provided. Do not use the mount for any purpose not expressly specified by the manufacturer.
- Apejọ: Ensure all components are securely fastened before use. If any parts are missing or defective, contact MOUNTUP for replacement.
- Gbigbe: Operate the mount carefully. Avoid sudden movements or excessive force when adjusting the TV position.
2. Package Awọn akoonu
Verify that all components are present and undamaged before beginning installation. If any items are missing or damaged, please contact MOUNTUP customer support.
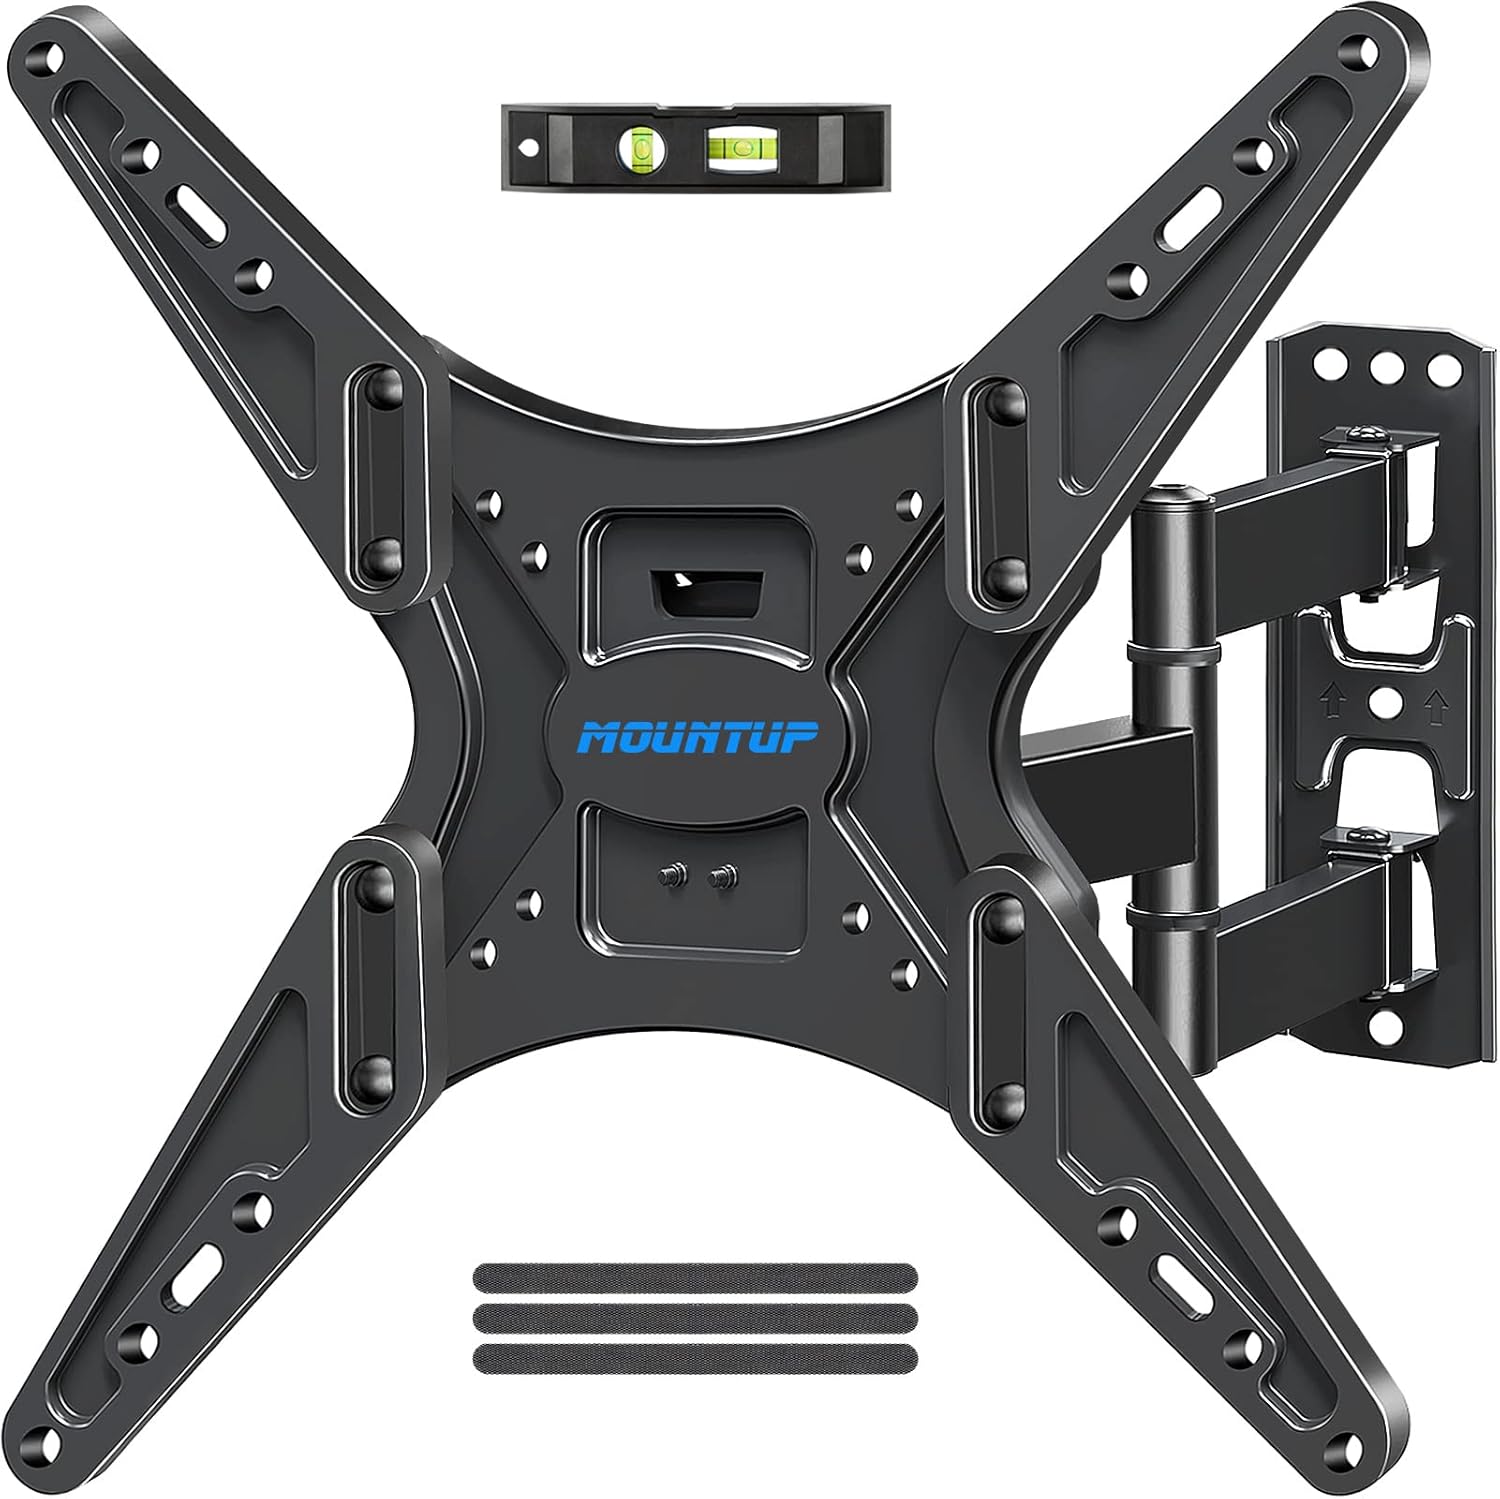
- 1 x MOUNTUP Full Motion TV Wall Mount (Model MU0014)
- 1 x MOUNTUP Full Motion TV Wall Mount (Model MU0009)
- 1 x Hardware Kit (various screws, washers, spacers, anchors)
- 1 x Ipele Bubble
- Ilana itọnisọna

Aworan 2.1: Pariview of the MOUNTUP TV Wall Mounts Bundle, including both MU0014 and MU0009 models and their respective hardware kits.
3. Awọn alaye ọja
| Ẹya ara ẹrọ | Sipesifikesonu |
|---|---|
| Awọn nọmba awoṣe | MU0014, MU0009 |
| Ibaramu Iwọn TV | 26 - 60 inches |
| Agbara iwuwo | 77 lbs (35 kg) |
| VESA ibamu | Min: 100x100mm, Max: 400x400mm |
| Iṣipopada Iru | Articulating, Swivel, Tilt |
| Tilt Angle (MU0014) | +5° / -15° |
| Tilt Angle (MU0009) | -10° |
| Swivel Angle (MU0014) | ±45° |
| Extension (MU0014) | Titi di 18.9 inches |
| Retraction (MU0014) | 2.5 inches |
| Extension (MU0009) | Titi di 15.3 inches |
| Retraction (MU0009) | 2 inches |

Image 3.1: Compatibility and specifications for the MOUNTUP MU0009 TV mount, detailing supported TV sizes, weight, and VESA patterns.
4. Eto ati fifi sori
4.1 Ṣaaju ki o to bẹrẹ
Gather the necessary tools and confirm your wall type and TV specifications.
- Awọn irinṣẹ ti a beere: Pencil, Stud Finder, Drill, 1/2 inch (13mm) Socket Wrench, Phillips Head Screwdriver, Level (included).
- Odi Iru: Identify if your wall is wood stud (minimum 2x4 inches) or solid concrete/brick. DO NOT INSTALL ON DRYWALL ALONE.
- TV VESA Pattern: Check the four mounting holes on the back of your TV. Measure the horizontal and vertical distance (in mm) to confirm it falls within the 100x100mm to 400x400mm VESA range.
- Iwọn TV: Confirm your TV's weight does not exceed 77 lbs (35 kg).
4.2 Igbesẹ-nipasẹ-Igbese fifi sori
The installation process is similar for both MU0014 and MU0009 models. Refer to the specific diagrams for each mount as needed.
- So awọn akọmọ TV mọ TV: Select the appropriate screws, washers, and spacers for your TV. Secure the vertical brackets to the back of your TV, ensuring they are centered and level.
- Mark Wall Drilling Locations: Determine the desired height for your TV. Use a stud finder to locate the center of two adjacent wood studs, or mark locations for concrete anchors. Place the wall plate against the wall and mark the drilling holes. Use the included bubble level to ensure accuracy.
- Awọn Iho Pilot Lilu: Drill pilot holes at the marked locations. For wood studs, use a 7/32 inch (5.5mm) drill bit. For concrete/brick, use a 3/8 inch (10mm) drill bit and insert concrete anchors.
- Awo Odi Oke: Secure the wall plate to the wall using the lag bolts and washers. Tighten all bolts firmly but do not overtighten.
- So TV sori Awo Odi: Carefully lift the TV with the attached brackets and hook it onto the wall plate. Ensure the TV is securely seated.
- TV ti o ni aabo lati gbe sori ẹrọ: Use the safety screws or locking mechanisms on the TV brackets to secure the TV to the wall plate, preventing accidental dislodgement.

Aworan 4.1: alaye view of the MOUNTUP MU0014 mount components, illustrating the main parts for assembly.
Aworan 4.2: alaye view of the MOUNTUP MU0009 mount components, illustrating the main parts for assembly.
5. Operating Your TV Mount
Both MOUNTUP full motion mounts offer flexible viewing options. Adjustments should be made smoothly and carefully.
5.1 Siṣàtúnṣe iwọn
The MU0014 mount allows for a tilt range of +5° to -15°, while the MU0009 offers a tilt of -10°. Loosen the tilt adjustment knobs or bolts on the TV brackets, adjust the screen to the desired angle, and then securely tighten the knobs/bolts.
5.2 Siṣàtúnṣe Swivel
The MU0014 mount can swivel up to ±45° left or right. Gently push or pull the TV screen to the desired viewing angle. The articulating arm will move smoothly.
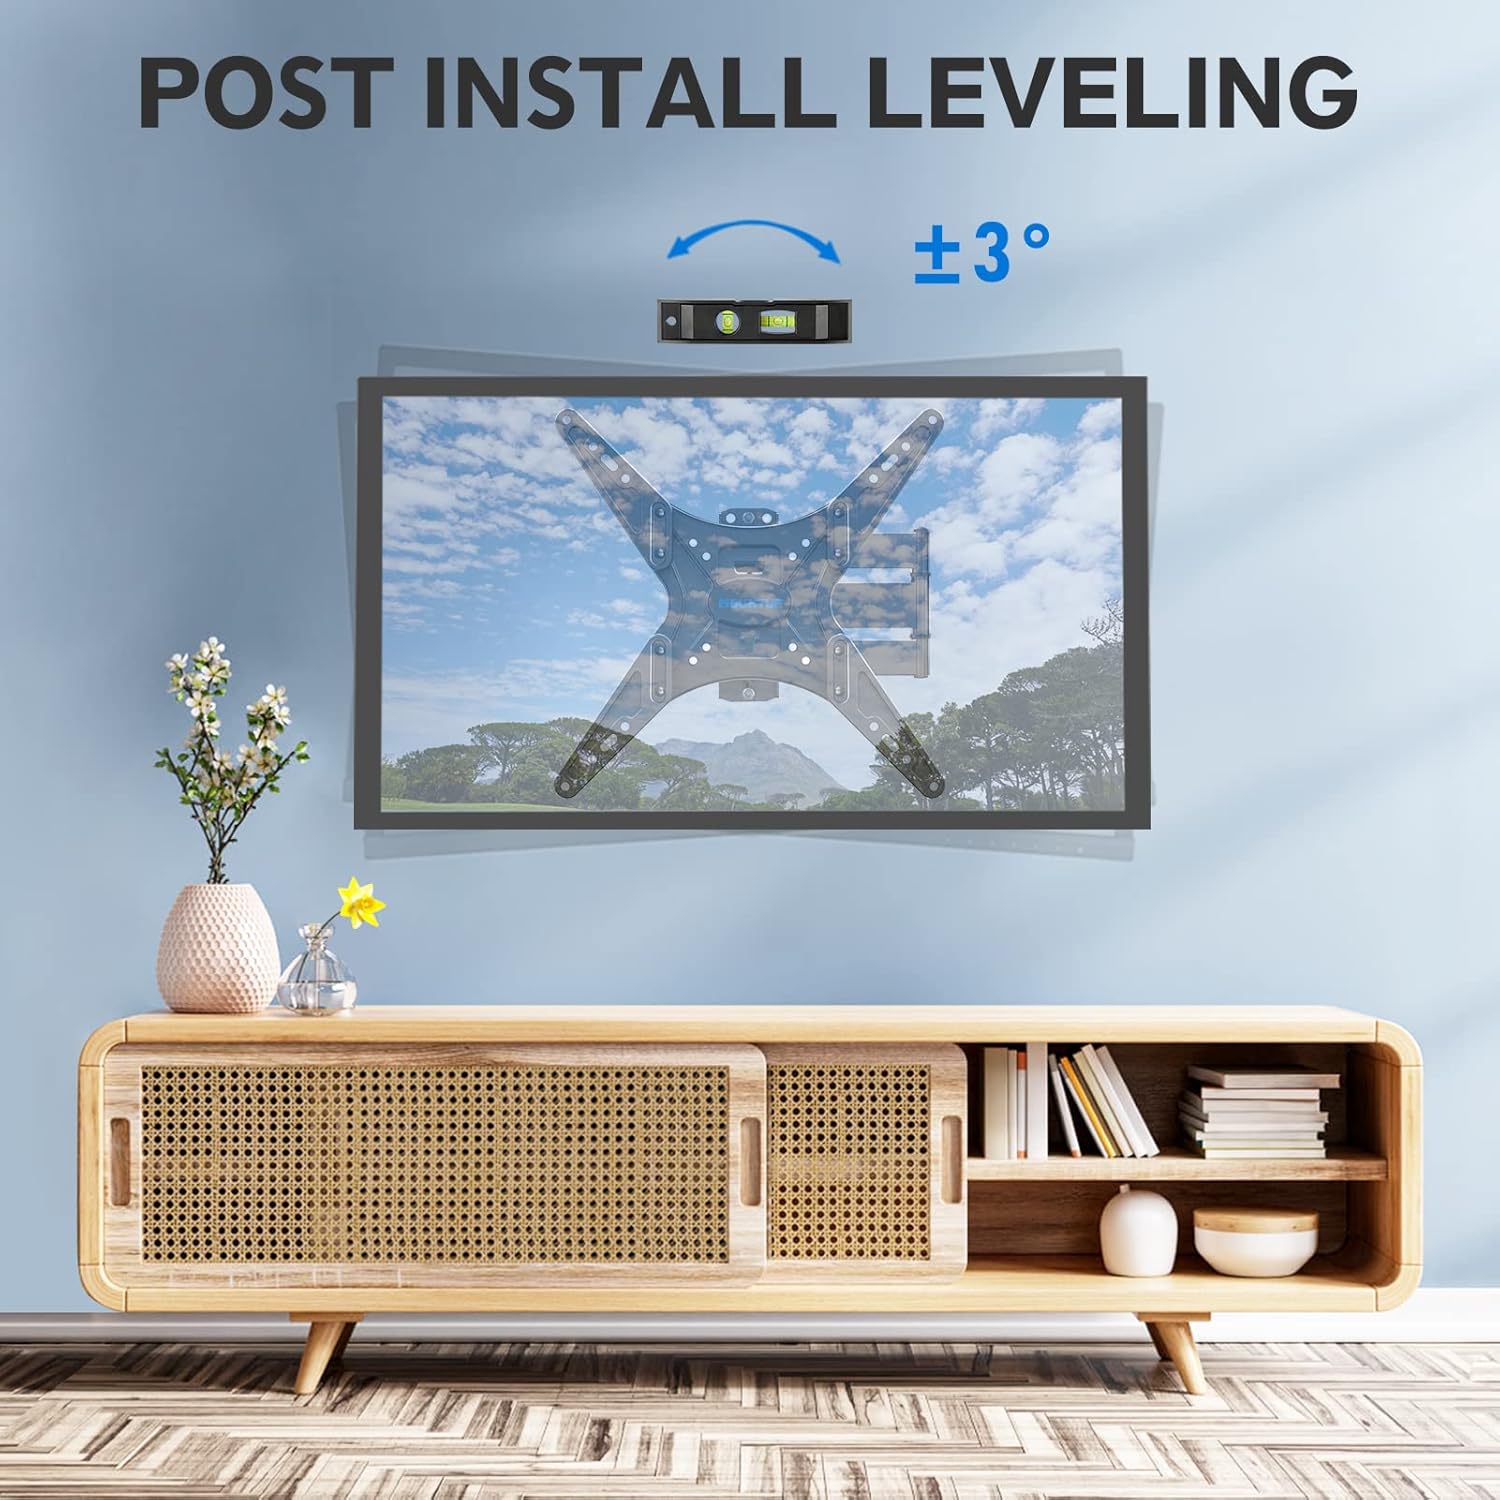
Image 5.1: Demonstrating the tilt and swivel capabilities of the MOUNTUP MU0014 mount for optimal viewing ni irọrun.
5.3 Extending ati Retracting
Extend the TV away from the wall for greater flexibility or retract it closer to the wall to save space. The MU0014 extends up to 18.9 inches and retracts to 2.5 inches. The MU0009 extends up to 15.3 inches and retracts to 2 inches.

Image 5.2: Illustrating the extension and retraction range of the MOUNTUP MU0014 mount.

Image 5.3: Illustrating the extension, retraction, and tilt capabilities of the MOUNTUP MU0009 mount.
5.4 Post-Installation Leveling
After installation, if your TV is slightly unlevel, you can make minor adjustments. The mount allows for a post-installation leveling adjustment of approximately ±3°. Consult the specific instructions for your mount model to perform this adjustment.

Image 5.4: Demonstrating the post-installation leveling feature for fine-tuning the TV's horizontal position.
6. Itọju
Itọju deede ṣe idaniloju gigun ati iṣẹ ailewu ti oke TV rẹ.
- Ṣayẹwo Awọn isopọ: Periodically (e.g., every 6 months) check all screws and bolts to ensure they remain tight. Retighten if necessary.
- Clean Mount: Mu ese kuro pẹlu asọ ti o tutu, ti o gbẹ lati yọ eruku kuro. Yago fun lilo abrasive ose tabi epo.
- Lubrication: The articulating joints are designed for smooth movement. If any stiffness occurs, a small amount of silicone-based lubricant can be applied to the moving parts, avoiding contact with electrical components.
7. Laasigbotitusita
If you encounter issues with your MOUNTUP TV mount, refer to the following common problems and solutions.
- TV ko ni ipele lẹhin fifi sori ẹrọ: Use the post-installation leveling feature (refer to Section 5.4) to make minor adjustments. Ensure the wall plate was installed level initially.
- Mount lero pe o dẹ tabi ko duro ṣinṣin: Immediately remove the TV from the mount. Recheck all wall mounting bolts and TV bracket screws for tightness. Ensure the wall type is appropriate and the anchors (if used) are secure. Contact customer support if the issue persists.
- Difficulty adjusting tilt/swivel/extension: Check for any obstructions. Ensure all adjustment knobs or bolts are sufficiently loosened before attempting to move the TV, and retighten them after adjustment.
- Awọn ẹya ti o padanu: Do not proceed with installation if parts are missing. Contact MOUNTUP customer support for replacement parts.
8. Atilẹyin ọja ati Onibara Support
MOUNTUP is committed to providing high-quality products and customer satisfaction. This product comes with a manufacturer's warranty against defects in materials and workmanship. For specific warranty details, please refer to the product packaging or contact MOUNTUP directly.
If you have any questions regarding product installation, operation, or troubleshooting, please do not hesitate to contact MOUNTUP customer support. Our team is available to assist you with pre-purchase inquiries and post-installation support.
Ibi iwifunni: Please refer to the MOUNTUP official website or your purchase documentation for the most current customer support contact details.


