1. Ifihan
This manual provides essential information for setting up, operating, and maintaining your WD Elements Desktop and Portable External Hard Drives. These drives offer high-capacity storage and fast data transfers, designed to improve your PC's performance and provide reliable backup solutions.
Ohun ti o wa ninu Apoti
- WD Elements Desktop Hard Drive (WDBWLG0100HBK-NESN)
- WD Elements Portable External Hard Drive (WDBU6Y0020BBK-WESN)
- USB 3.0 Cable (for each drive)
- AC Adapter (for Desktop drive only)
- Awọn ọna Fi Itọsọna

Image 1.1: WD Elements Desktop and Portable Hard Drives. The desktop drive is a larger, rectangular unit, while the portable drive is a smaller, sleek rectangular unit.
2. Eto
2.1 WD Elements Desktop Hard Drive Setup
- Connect the AC adapter to the desktop drive and plug it into a power outlet.
- Connect one end of the USB 3.0 cable to the desktop drive's USB port.
- Connect the other end of the USB 3.0 cable to an available USB port on your computer.
- The drive is plug-and-play ready for Windows PCs (Windows 10, 8.1, 7). It will be automatically recognized by your system.

Image 2.1: The WD Elements Desktop Hard Drive, a black, upright rectangular device with a subtle WD logo and status light.
2.2 WD Elements Portable External Hard Drive Setup
- Connect one end of the USB 3.0 cable to the portable drive's USB port.
- Connect the other end of the USB 3.0 cable to an available USB port on your computer.
- The drive is powered directly via the USB connection and is plug-and-play ready for Windows PCs.

Image 2.2: The WD Elements Portable External Hard Drive, a compact, black rectangular device with a textured finish and WD Elements branding.
Akiyesi ibamu: Both drives are formatted NTFS for Windows 10, Windows 8.1, and Windows 7. Reformatting may be required for other operating systems (e.g., macOS). Compatibility may vary depending on your hardware configuration and operating system.
3. Operating Your Drives
Once connected, your WD Elements drives will appear as an external drive in 'This PC' (Windows) or 'Finder' (macOS, after reformatting). You can now use them for data storage, backup, and transfer.
3.1 Data Gbigbe
- Fa ati Ju silẹ: Nìkan fa files and folders from your computer to the drive's icon or open folder.
- Daakọ ki o si lẹẹ mọ: Tẹ-ọtun lori files/folders, select 'Copy', then navigate to the drive, right-click, and select 'Paste'.
- Sọ́fítíwọ́ọ̀tì Àfikún: For automated backups, consider using third-party backup software compatible with your operating system.
Both drives support USB 3.0 for fast data transfers. They are also backward compatible with USB 2.0 ports, though transfer speeds will be limited to USB 2.0 speeds.

Image 3.1: A laptop connected to a portable hard drive via a USB cable, illustrating USB 3.0 and USB 2.0 compatibility.
3.2 Improving PC Performance
By offloading large files, photos, and videos from your computer's internal hard drive to your WD Elements external drive, you can free up space and potentially improve your PC's overall performance.

Image 3.2: A WD Elements Desktop Hard Drive positioned next to a computer monitor displaying a file explorer window with various media files, suggesting its use for offloading data to improve PC performance.
4. Itọju
- Yiyọ kuro lailewu: Always safely eject the drive from your operating system before disconnecting the USB cable to prevent data corruption.
- Itọju Ti ara: Keep the drives in a cool, dry place. Avoid dropping them or exposing them to extreme temperatures or moisture.
- Ninu: Use a soft, dry cloth to clean the exterior of the drives. Do not use liquid cleaners.
- Reformatting: If you need to use the drive with a different operating system or wish to change its file system, you can reformat it using your operating system's disk utility. Be aware that reformatting will erase all data on the drive.
5. Laasigbotitusita
5.1 A ko mọ awakọ naa
- Ensure all cables are securely connected (USB and power for desktop drive).
- Gbiyanju lati sopọ si ibudo USB ti o yatọ lori kọnputa rẹ.
- Tun kọmputa rẹ bẹrẹ.
- Check your computer's Disk Management (Windows) or Disk Utility (macOS) to see if the drive is detected but not assigned a drive letter or needs initialization/formatting.
5.2 Slow Data Transfers
- Ensure you are connected to a USB 3.0 port on your computer for optimal speeds. USB 2.0 ports will result in slower transfers.
- Close other applications that might be using system resources or performing background tasks.
- Ṣayẹwo ilera ti kọnputa inu kọnputa rẹ.
5.3 Drive Light Not On (Desktop Drive)
- Verify the AC adapter is firmly connected to both the drive and a working power outlet.
- Gbiyanju iṣan agbara ti o yatọ.
6. Awọn pato
| Ẹya ara ẹrọ | WD Elements Desktop (WDBWLG0100HBK-NESN) | WD Elements Portable (WDBU6Y0020BBK-WESN) |
|---|---|---|
| Digital Ibi Agbara | 10 TB (10000 GB) | 2 TB (2000 GB) |
| Lile Disk Interface | USB 3.0 (ibaramu sẹhin pẹlu USB 2.0) | USB 3.0 (ibaramu sẹhin pẹlu USB 2.0) |
| Asopọmọra Technology | USB | USB |
| Lile Disk Fọọmù ifosiwewe | 3.5 inches | 2.5 inches |
| Lile Disk Apejuwe | Darí Lile Disk | Darí Lile Disk |
| Awọn ẹrọ ibaramu | Ojú-iṣẹ | Kọǹpútà alágbèéká, Iṣẹ-iṣẹ |
| Iru fifi sori ẹrọ | Ita Lile Drive | Ita Lile Drive |
| Àwọ̀ | Dudu | Dudu |
| Orisun agbara | AC Adapter | USB akero Agbara |
6.1 Awọn iwọn
- WD Elements Desktop: Approximately 6.53 in (H) x 5.31 in (D) x 1.89 in (W)
- WD Elements Portable: Approximately 4.35 in (H) x 3.23 in (W)

Image 6.1: The WD Elements Desktop Hard Drive with dimensions labeled: 6.53 inches in height, 5.31 inches in depth, and 1.89 inches in width.
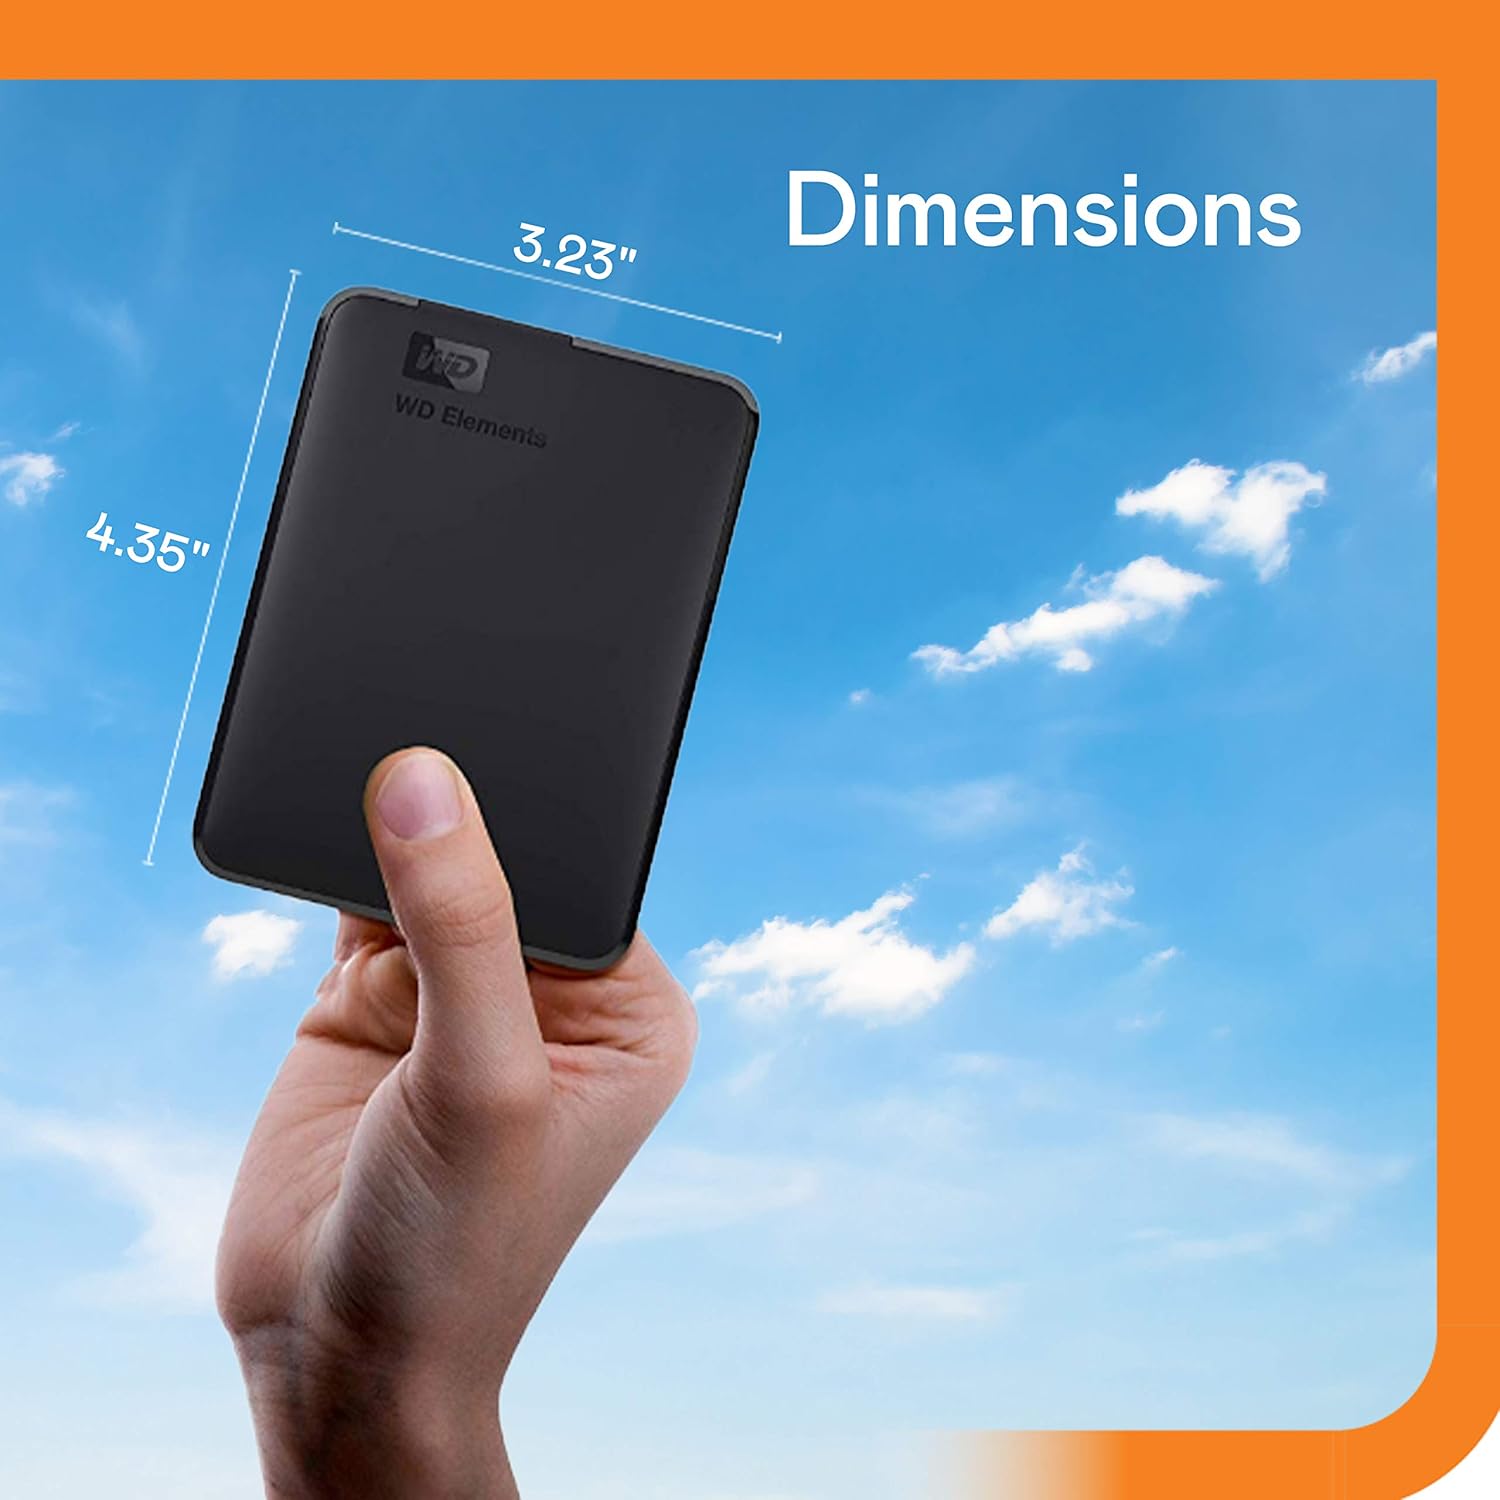
Image 6.2: A hand holding the WD Elements Portable External Hard Drive with dimensions labeled: 4.35 inches in height and 3.23 inches in width.
7. Atilẹyin ọja ati Support
Western Digital products come with a limited warranty. Please refer to the warranty information included with your product or visit the official Western Digital webAaye fun alaye ofin ati ipo.
For technical support, FAQs, and driver downloads, please visit the Western Digital support website. You can find the most up-to-date support information and contact options there.
Western Digital Support: https://support.wdc.com


